

One of the most useful features built into Apple’s operating systems is AirDrop. Part of iOS, iPadOS, and macOS, AirDrop provides a way to quickly send information between two devices. I personally use it multiple times per day to send screenshots, App Store links, and other info from my iPhone to my Mac. Here are some helpful tips on using AirDrop on the iPhone or iPad to send content to your Mac.
Enabling AirDrop on iPhone or iPad
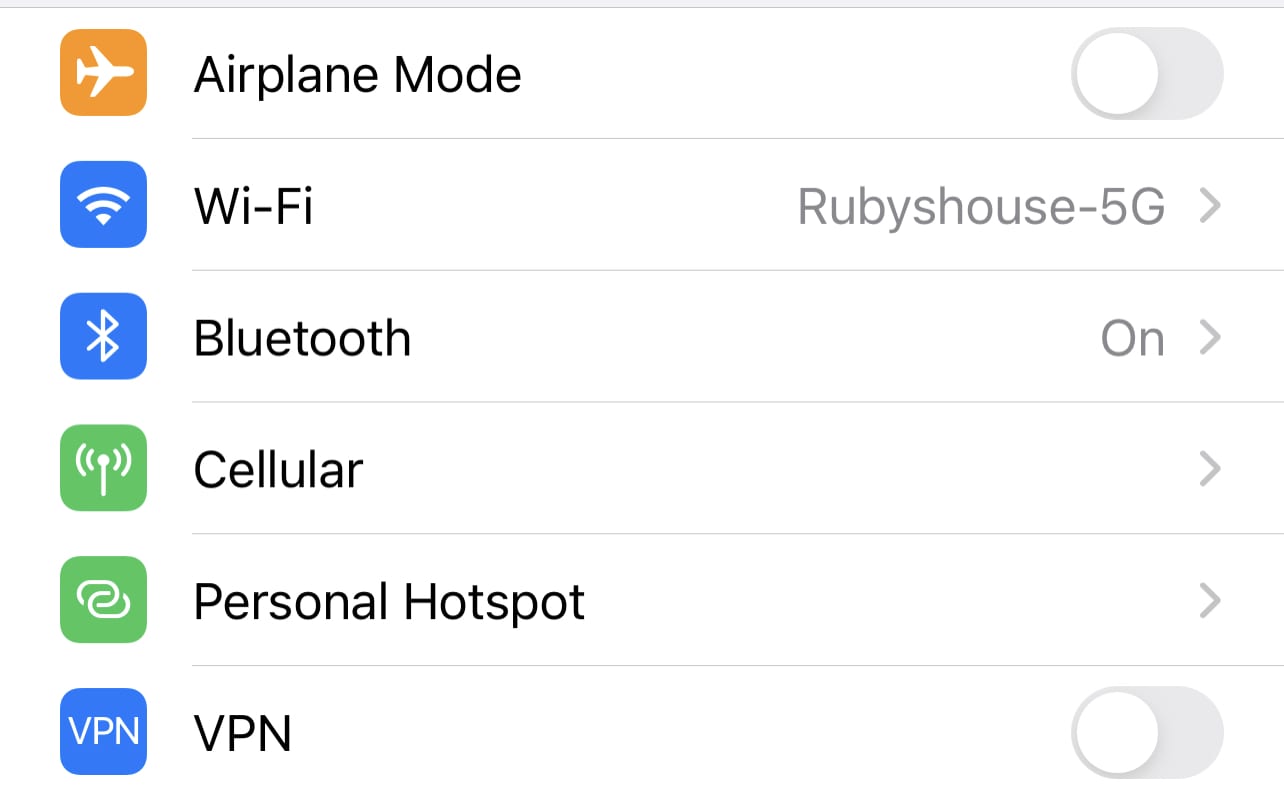
To use AirDrop, both Wi-Fi and Bluetooth must be enabled on your iPhone or iPad. You must also be signed in to your iCloud account. To ensure that both Wi-Fi and Bluetooth are on, launch the Settings app. In the first group of settings below your Apple ID/iCloud information, a Wi-Fi network is visible (here it’s called Rubyshouse-5G) and Bluetooth shows that it is “on”.
Both devices need to be within Wi-Fi or Bluetooth range (the latter is about 10 meters, or 33 feet) for AirDrop to work.
Control Center
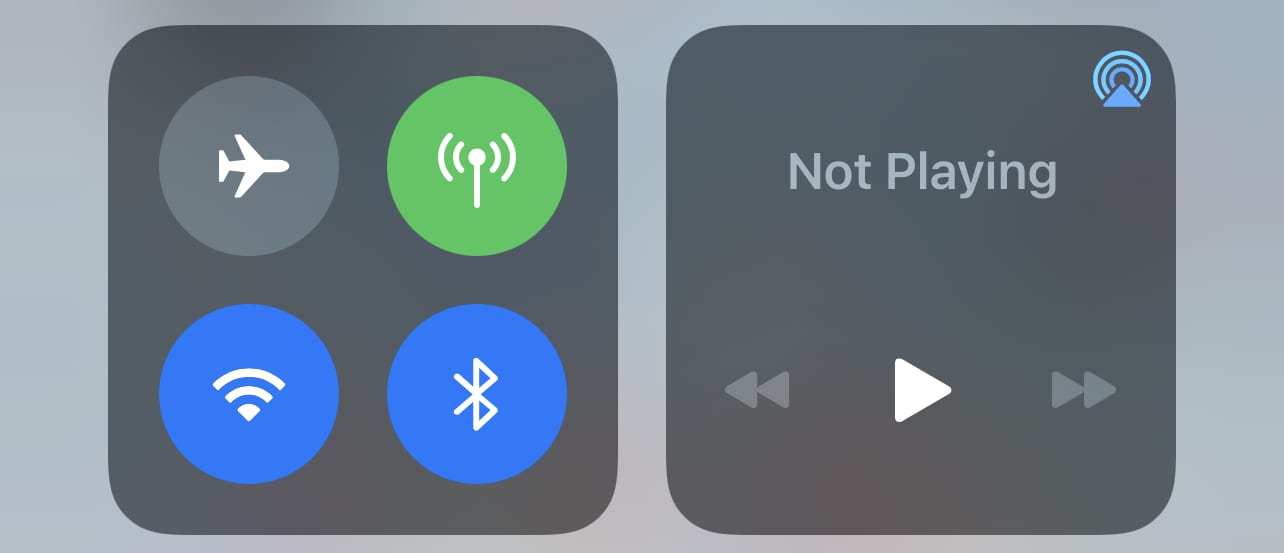
Another way to ensure Wi-Fi and Bluetooth are both enabled is to bring up Control Center by swiping down on the right side of your screen. If both the Wi-Fi and Bluetooth buttons are blue (on left, below), then these wireless technologies are turned on and you’re ready to AirDrop.
AirDrop from iPhone or iPad to Mac
Now that you’re ready, it’s time to AirDrop something from your iPhone or iPad to a Mac. Now that “something” can be just about anything — a website address, a photo, a Note, a Contact, or a document. For this example, we’ll send a Pages document to a Mac.
This document opened in Pages’ new “reading mode”, where editing tools are hidden for ease of reading. At the top right of the screen are two buttons — Edit and a “more” button. The more button looks like a circle with an ellipsis (…) inside of it and indicates that there are more things you can do when you tap the button.

AirDrop: “More” and “Share”
Tap the more button and one of the options will be to share the document. Note that in other iPhone or iPad apps, the share button is right up front — there is no “more” button in between. In Photos, it’s the traditional “box with an arrow coming out of it” (see screenshot below).

When you tap the “share” button in Pages, Photos, or any other app, one of the top choices you’ll see is AirDrop.
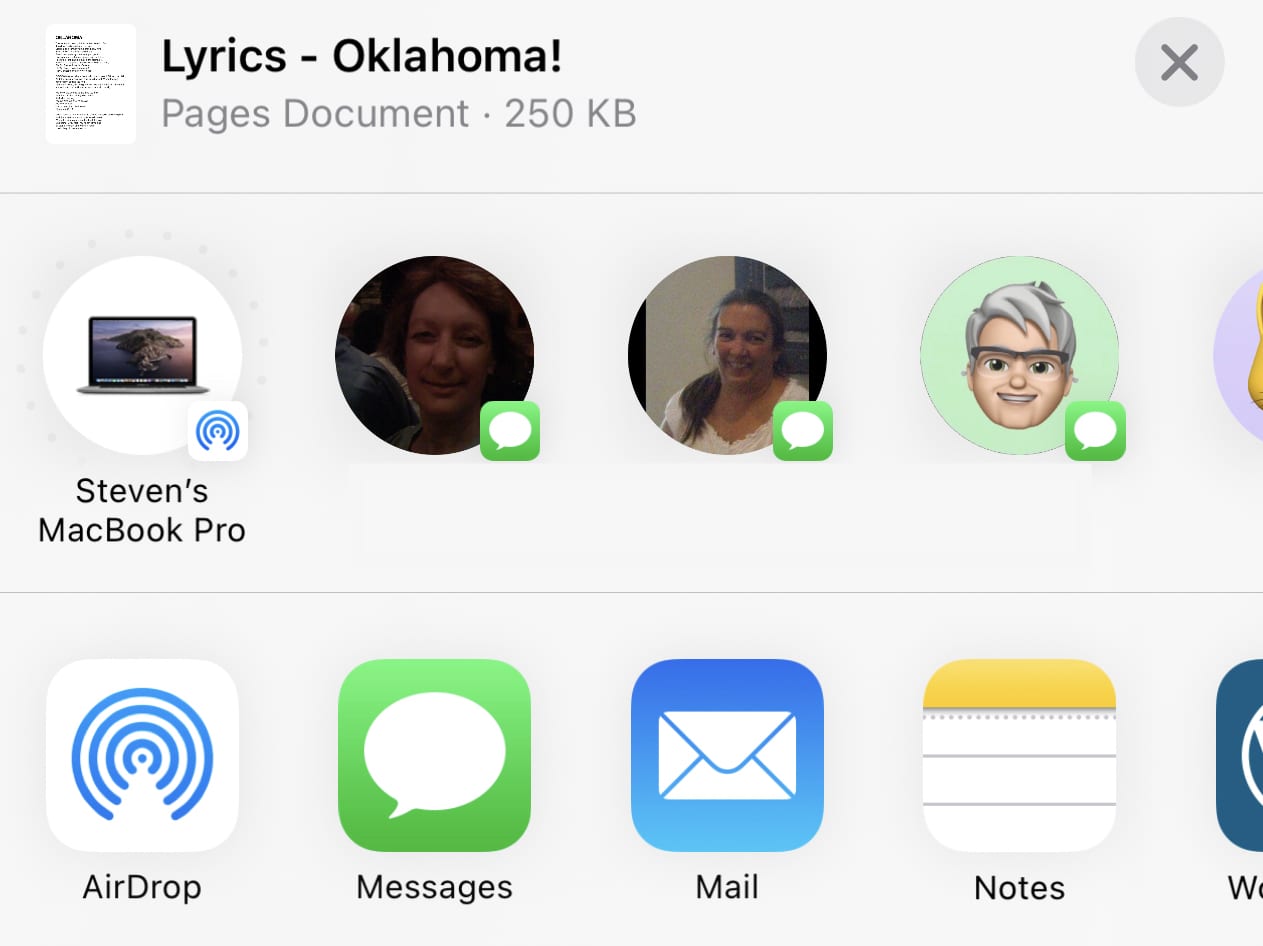
If there’s only one Mac or other Apple device around, that will probably be the only “receiver” you’ll see. In the screenshot above, you see that “Steven’s MacBook Pro” is my only choice. See those faint gray dots around the computer icon? Those show up on iPhones and iPads with Apple’s Ultra Wideband technology. That tech allows your iPhone or iPad to actually “find” the Mac in space.
More than one Mac or Apple device? The lower AirDrop button will show a red circle with the number of possible AirDrop recipients in it. Tap that button, and a more detailed AirDrop dialog appears (see screenshot below):

Just tap the receiving Mac’s AirDrop button and the file, photo, or other document travels wirelessly to the Mac.
Receiving the AirDrop Document on a Mac
On the Mac side, a notification shows receipt of the file. The default “drop box” for documents sent by AirDrop is the Downloads folder.
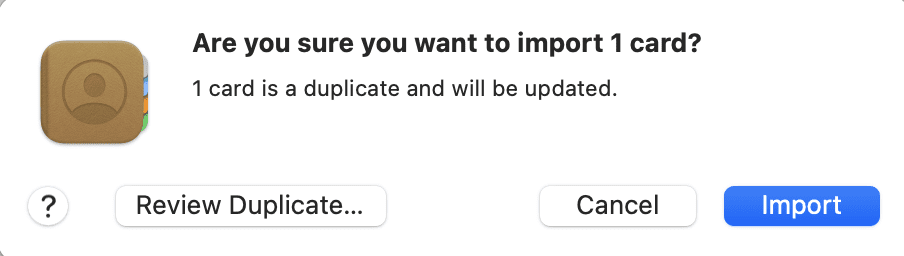
To open the document, find it in the Downloads folder and double-click it. If it is a document type recognized by your Mac, the appropriate app is launched. For example, I sent my Mac a Contact that appeared in the Downloads folder as a .vcf file.
Double-clicking that file launched Contacts, which then asked if I really wanted to import the file because it was a duplicate (see image below).
AirDrop is a useful tool for all Apple users and one that more people should learn to use. It can prevent a lot of unnecessary work when sending files of almost any type between devices. For more info on using AirDrop, this Apple knowledge base article is useful.


How does one go about making one or more vCard s for different businesses?
Critically for me it’s how to get stuff easily on an iphone from my laptop. So I haven’t tried airdrop from phone to mac laptop – but is there simple process? And no – forget itunes and all that stuff… I end up mailing myself we-send-it addresses
We just posted an article, “How To Use AirDrop to Transfer Files From One Mac to Another” that may help. As long as your iPhone is open, and AirDrop is enabled, it will appear as a device to which you can send files. You’ll even notice my iPhone appear in one of the screenshots.
Hope this helps!
I too used to use Airdrop to move pics from my iPhone to my iMac – but about a couple of weeks ago it stopped working = all your steps have been done, the iPhone and iMac are within 2 feet of each other = iMac is Mojave, but no problems before this = iPhone is updated and I honestly don’t know if it broke with the update. It’s a wonderful feature but not working for me lately.
Do both sending and receiving devices need to be signed into the same Apple ID/iCloud account?
No, they don’t! AirDrop can work with any iDevice or Mac that is nearby and enabled.