

With macOS, you can add, remove, edit, and manage your fonts using Font Book. You can even create font collections and libraries. Your Mac comes with lots of built-in fonts, but you can expand or alter the collection.
How to Add a Font
To add a font, open the Font Book app and do one of the following:
- Install fonts from your Mac or network: Click the Add button in the Font Book toolbar (under File), locate and select the font, then click Open.
- Download additional system fonts: Click All Fonts in the sidebar on the left, then select a dimmed font family or one or more styles. Click Download in the preview pane, then click Download in the dialog that appears. (Fonts that appear dimmed in Font Book are either disabled (“Off”), or are additional fonts available for download from Apple.)
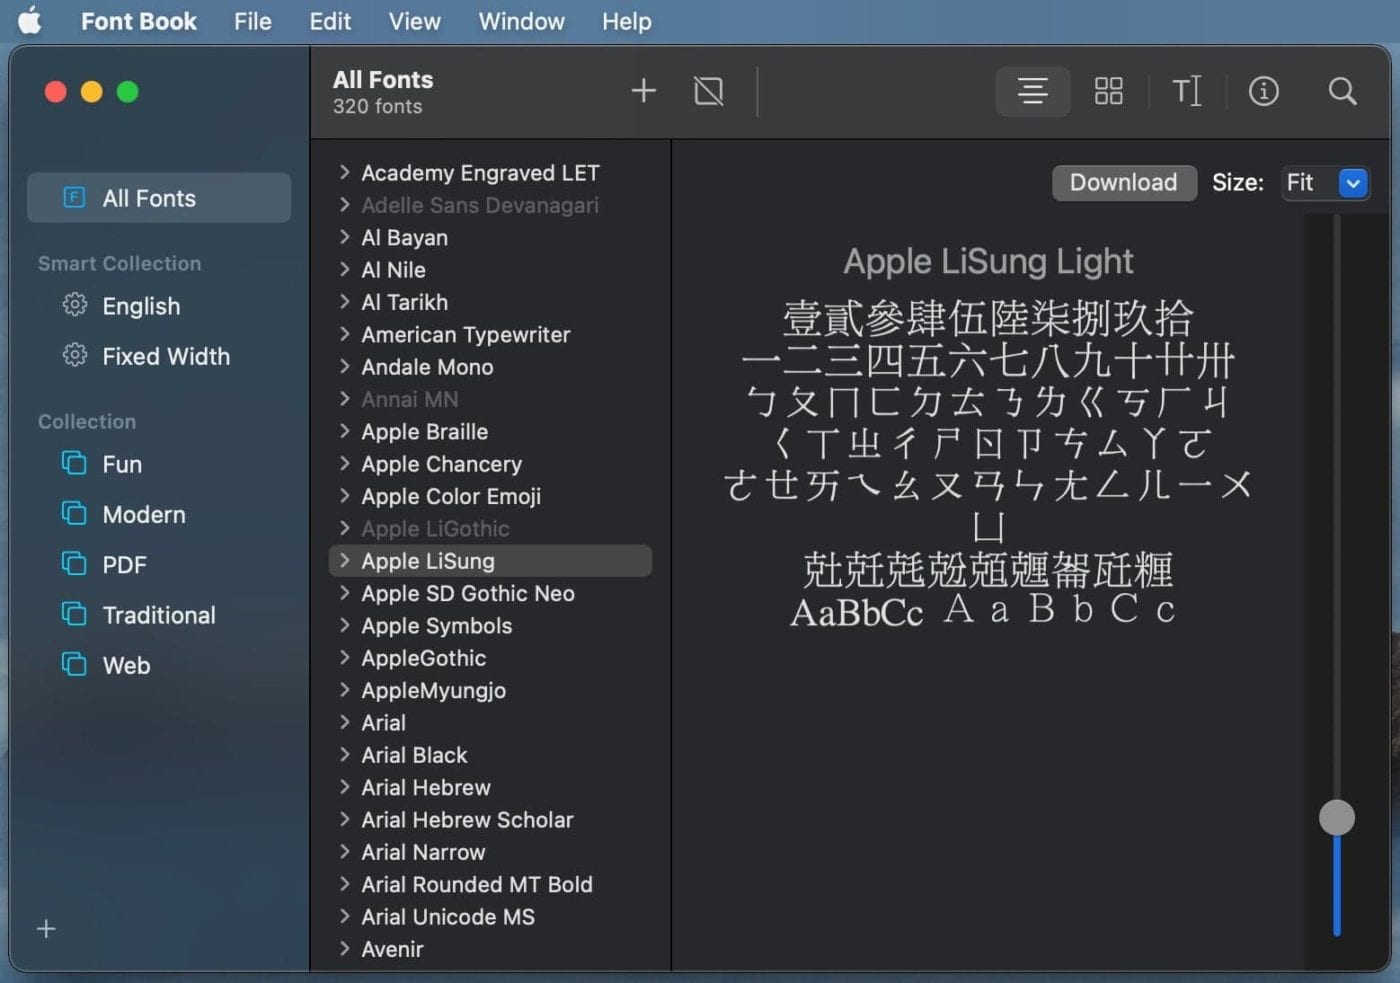
If the preview pane doesn’t appear, choose “View > Show Preview.” If you don’t see a Download button, switch to another preview type because the Download button isn’t available in the Information preview.
All fonts you install or download appear in Font Book are available to use in your apps. They’re available to you or to anyone who uses your Mac, depending on what you set as the default location for installed fonts. You can use Font Book preferences to change the options for where fonts are installed and how duplicates are handled.
How to Change Font Preferences
To change these preferences in the Font Book app on your Mac, choose “Font Book > Preferences.”
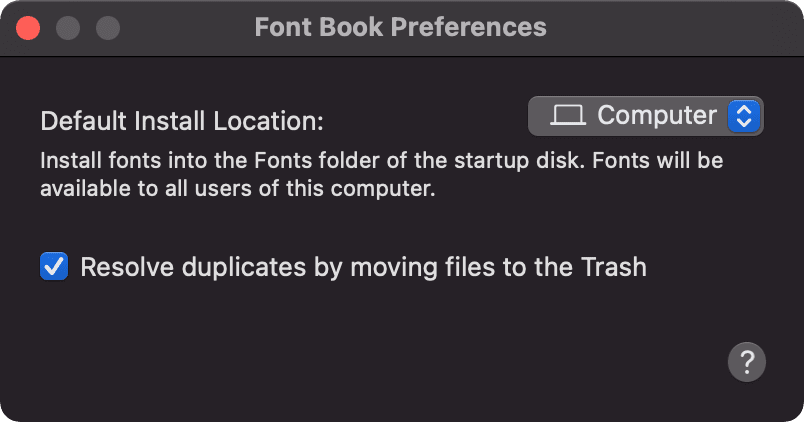
You can install fonts in:
- User: Fonts are available only to you and are located in the Fonts folder in your home Library (~/Library/Fonts/). To see your home Library folder, click the Finder icon in the Dock, press and hold the Option key, then choose “Go > Library.”
- Computer: Fonts are available to any user on this Mac and are located in the Fonts folder in the System Library (/Library/Fonts/). You have to enter your administrator’s password to install fonts here.
By the way, system fonts you download from Apple aren’t installed in these locations as they’re required by macOS. You can’t add to, or delete, any fonts in this collection. Nor should you try.
How to Remove Fonts
By default when Font Book finds duplicate fonts, it disables one of the duplicates, but doesn’t remove it. However, in the app’s prefs you can choose to “Resolve duplicates by moving files to the Trash.”
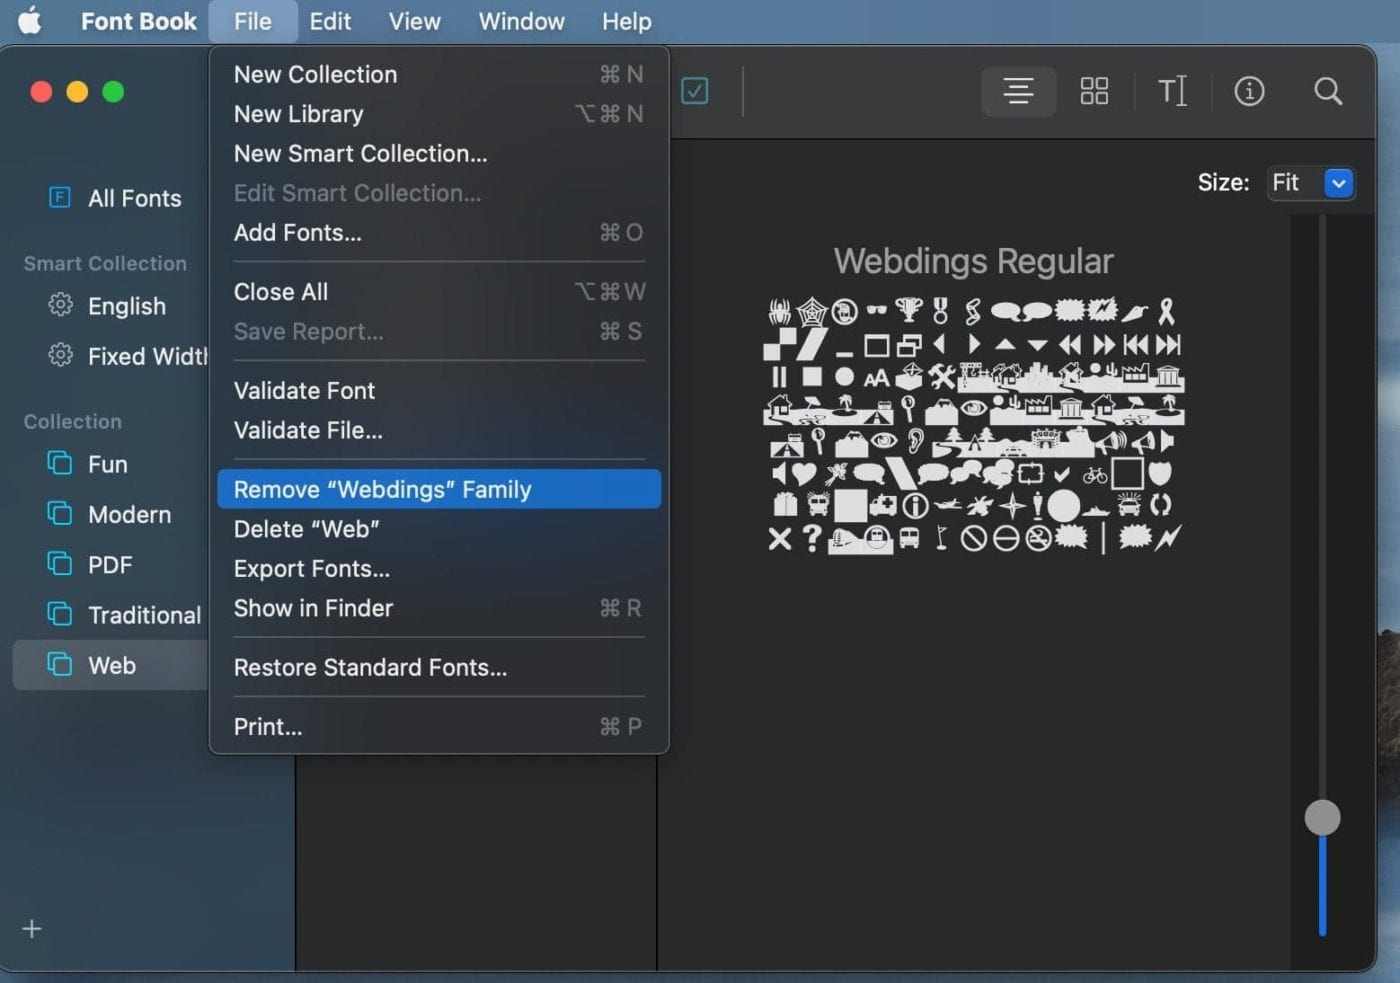
You can remove any font that isn’t required by macOS. Select the font in Font Book, then choose “File > Remove.” Font Book moves the font to the Trash.
How to Check Font Validation
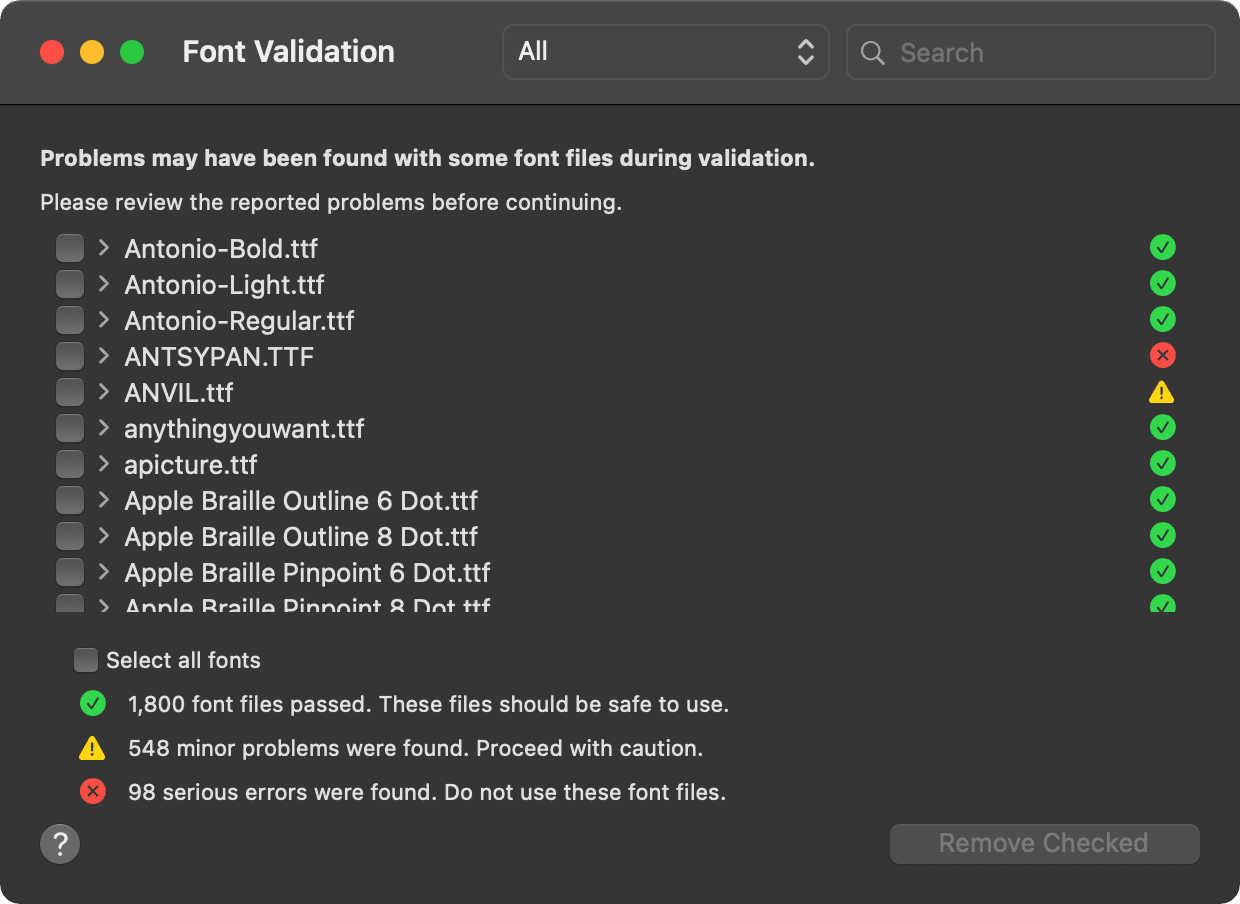
When you install a font, it’s automatically validated (checked for errors). However, if a font isn’t displayed correctly or seems to be corrupted (for example, trying to use it prevents a document from opening), you can check its validation by opening Font Book, selecting the font, and choosing “File > Validate Font.”
In the Font Validation window, click the disclosure triangle next to a font to review it. A green icon indicates the font passed, a yellow icon indicates a warning, and a red icon indicates it failed. To resolve font warnings or errors, select the checkbox next to a font, then click Install Checked or Remove Checked.
Organizing Fonts Into Collections
macOS also lets you organize your fonts into collections. For example, you may wish to establish one collection for your newsletter and another for your website.
To create a collection:
- Open the Font Book app.
- Click the Add button below the list of current collections
- Name your new collection.
Now you can simply drag fonts into it. You can even add fonts to several collections (except for the English collection or any Smart collections).

Using a Smart Collection of Fonts
To create a Smart Font Collection, choose “File > New Smart Collection…”
- Click the pop-up menu under “Collection name:”
- Choose All to find fonts that match all the criteria you enter, or Any to match any one of the criteria.
- Use the pop-up menus and text fields to define the search criteria for the collection.
- Click the Add button to add more search criteria.
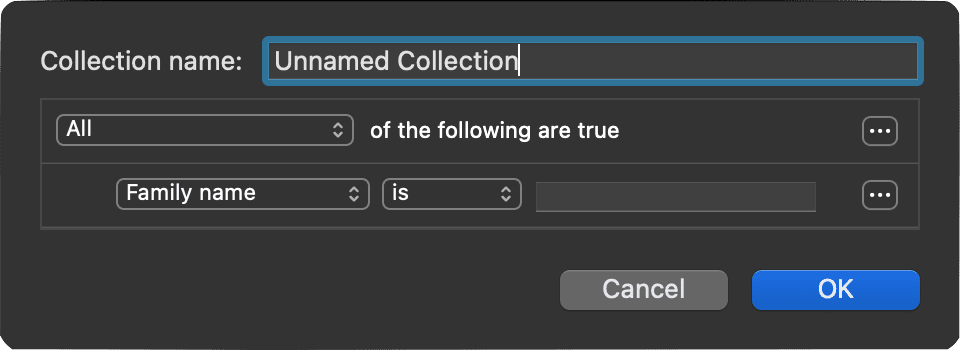
To edit a Smart collection, select it, then choose “File > Edit Smart Collection…”
Font Libraries
You can also use a library to organize your fonts. For example, if you use a group of fonts only with a document (such as I do with my church newsletter), you can create a font library to store the fonts associated with the document.
- Launch Font Book
- Choose “File > New Library”
- Enter a name for your library and it will appear in the list of collections
- Choose “File > Add Fonts,” or click the Add button in the Font Book toolbar
- Select the font, then click Open.
- In the Font Validation window, select the checkbox next to a font, then click Install Checked.
So what’s the difference between a collection and a library? Your collections appear in the Fonts window, but your libraries don’t. To delete a font library, select it in the list of collections, then choose “File > Delete [Font Library name].”
How to Create a Font Collection or Library From Text
You can also create a font collection or library from text.
- Go to the “Apple menu > System Preferences,” click Keyboard, then click Shortcuts.
- In the list on the left, select Services.
- In the list on the right, in the Text section, select “Create Collection From Text” or “Create Font Library From Text.”
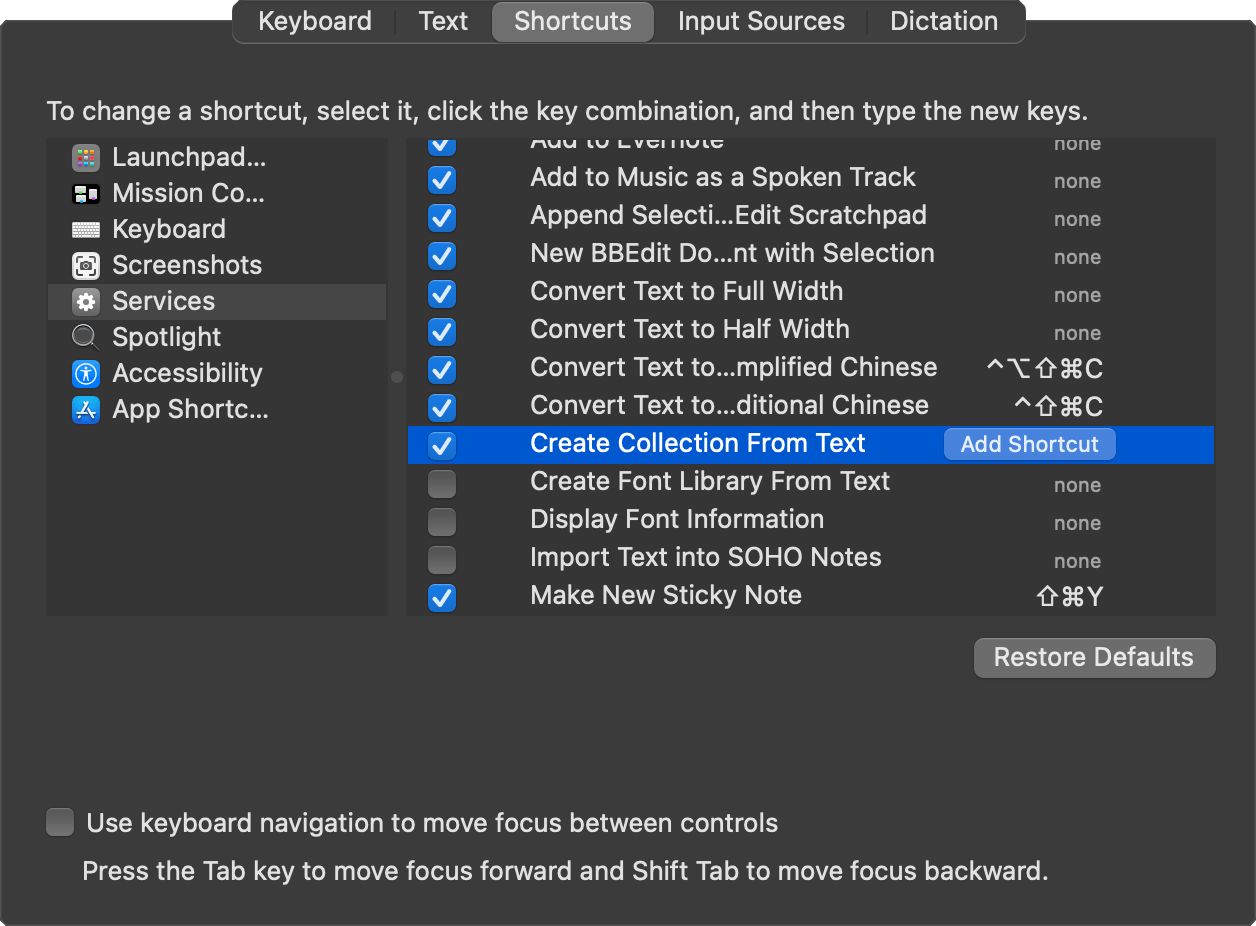
- In an app, select the text whose fonts you want to use.
- From the app’s menu, choose Services, then one of the Create commands from the Text section.


Font Book suuuuuuucks!!!!
There are many more fonts in Big Sur that are untouchable. In fact they are invisible. The only way to turn off multiple wasted foreign fonts in Photoshop is to create a favorite list. Big Sur will not allow turning them off. In previous Apple Systems we used to be able to turn off many fonts, but Apple Big Sur security has fenced them off, hiding them w the system.
John Robinson, see the link I posted below. It may have some answers.
Thanks for the interesting article. DontDoctor is also a great application to identify and troubleshoot font problems:
https://fontgear.com/products/fontdoctor-for-macintosh
This long running guide goes into great depth:
http://www.jklstudios.com/misc/osxfonts.html
From the author: This article deals with font usage in High Sierra 10.13.x through Big Sur 11.x. Its main purpose is to show you where fonts are located on your system and which can be safely removed. The idea is to keep your font list as small as possible to avoid font conflicts (font conflicts are explained in Section 13). This article will benefit prepress operators and graphic designers the most, but can clear up font issues for most general users as well.
Thanks very much for posting this link. The article answers several questions I had, including why many strange fonts were appearing in font lists in the music notation app Dorico Pro. It includes a link to an app for hiding unneeded fonts, which Apple has made absurdly difficult in Big Sur.