

In today’s topsy-turvy, busy world, the faster you can get things done, the better. Especially if you’re able to increase the speed of things you do on any kind of regular basis. That is why Automator on the macOS is one of my favorite tools for giving me boosts of productivity.
In short, Automator is a way to, in essence, write “code” on the Mac without being a computer programmer. For years it has been a way to do everything from creating shortcuts that allow you to manipulate files, rename files, perform an action on anything placed in a folder, etc.
I want to cover the most commonly used mini-programs (called “Workflows”) that you might create in Automator.
Automator Workflows
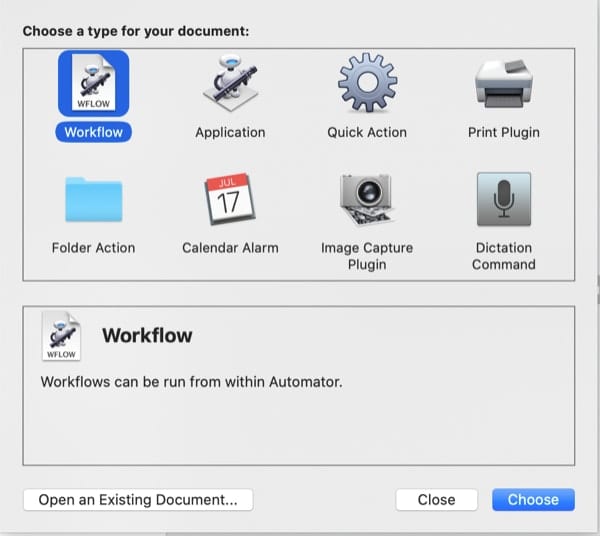
As of this writing, here are the eight types of Workflows you can create.
- Workflow: you run Workflows within Automator. I know it’s a bit confusing because a Workflow is a workflow. But, you know, that’s Apple.
- Application: since workflows are themselves mini-apps, it stands to reason to create a workflow called “Application.” Applications can run independently of Automator. Some of them can even work by dragging and dropping a file onto them.
- Quick Action: previously called “Services” in previous versions of macOS, Quick Actions can be added to Finder windows, the Touch Bar, and the Services menu. This is what you’ll use when creating workflows to launch from contextual menus (e.g. CTRL-clicking a file).
- Print Plugin: this is a workflow that’s available in the Print dialog.
- Folder Action: this workflow will run actions on any items dropped into a folder to which the workflow is connected. (See below for a great example).
- Calendar Alarm: it can be easy for your day to get ahead of you and you forget to do some little thing that needed to be done. Use this workflow and it will run when a calendar event occurs.
- Image Capture Plugin: A workflow that’s available in the Image Capture app on your Mac.
- Dictation Command: A workflow that runs when dictation is used.
Which workflows you use will greatly depend on the kind of work you do. In my roles as a content marketing manager and blog editor, I frequently need to resize and/or change the file type of images I find online. So I have a few Quick Action workflows in my contextual services menu that I frequently utilize.
Or, let’s say if you’re like me and many other people who download all kinds of crazy stuff from the internet to your desktop or Downloads folder. Use one of the Folder Action workflows to quickly and easily organize files placed into that folder.
I hazard to guess, the three types you might create most often are Applications, Quick Actions, and Folder Actions.
Some other things to know
A few other facts about Automator to keep in mind:
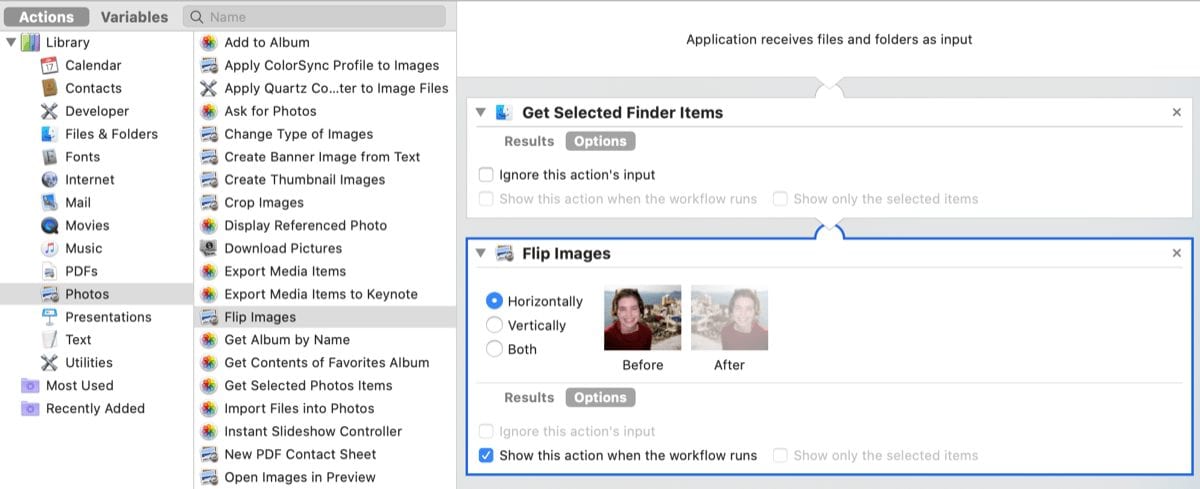
- The items on the left-hand side that you drag over into the workflow are called Actions.
- Automator can’t do everything, so it’s a good idea to get familiar with the various actions to see which ones could make your life easier or more productive.
- Test your workflows to make sure they work before saving. You can run tests from right within Automator. If a workflow is not working, something it’s a simple as you dragged over the wrong action (e.g., “Find Finder Items” instead of “Filter Finder Items”)
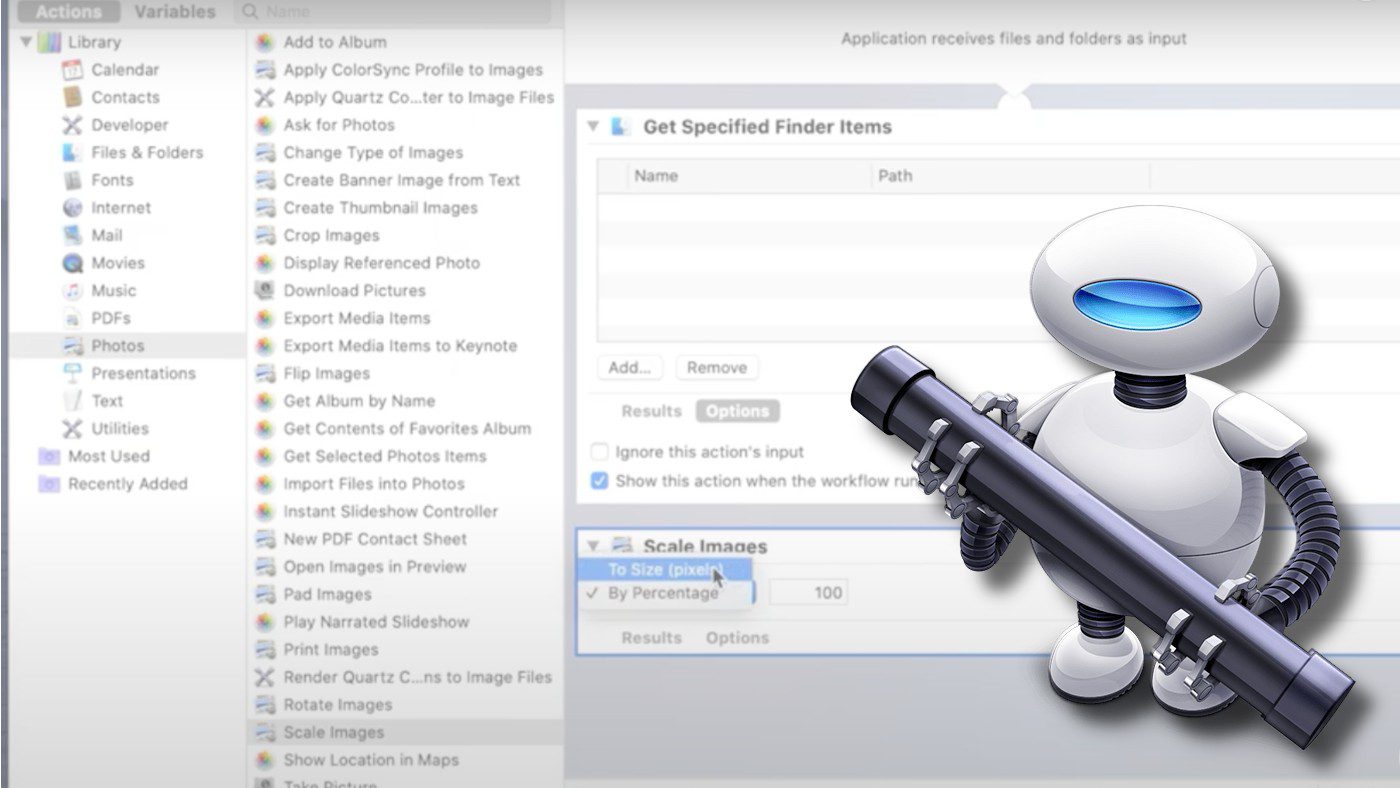
- Some workflows work best by selecting the “Show this action when the workflow runs” checkbox in the “Options” tab of an action step.
What are some of your favorite Automator workflows? Share in the comments below.
If you want to take your Automator game to the next level with coding, check out this post.


So. Any reason why you do not put a link to the apple store app in the post so users can install it?
What is the difference between applescript and automator?
Suggestion for an interesting article: a comparison between automating your Mac via three different approaches: Automator, AppleScript, or Keyboard Maestro.
(Yes I know there’s overlap — for example an Automator action can include an AppleScript — but I’d still like to see an overall comparison, what each general approach is best at, the learning curves, etc.)
Do you feel like handing out advice as to whether Automator would work for a task like the following? I’ve been doing this with bash commands in the past.
1) Scanned images/documents/etc. come in on a USB drive “SCRATCH”, formatted as MSDOS cuz that is what many scanners support.
2) Copy the files from the USB drive named “SCRATCH”, to a folder on macos named something like “INCOMING”.
3) Since MSDOS doesn’t know about unix permissions, change every file’s permissions to 444 or 644. At which point the files in INCOMING are ready to be manually transferred to their target folders.