|
Formatting OWC Mercury Hard Drives for use on Windows 2000/XP
Plug the drive into the computer and be sure the power light comes on. Please note that some drives are bus powered, and others require a power adapter.
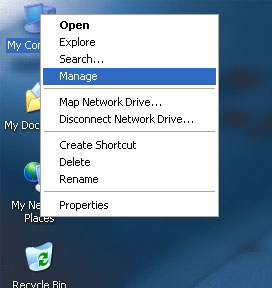
Right click on the My Computer icon and choose Manage.
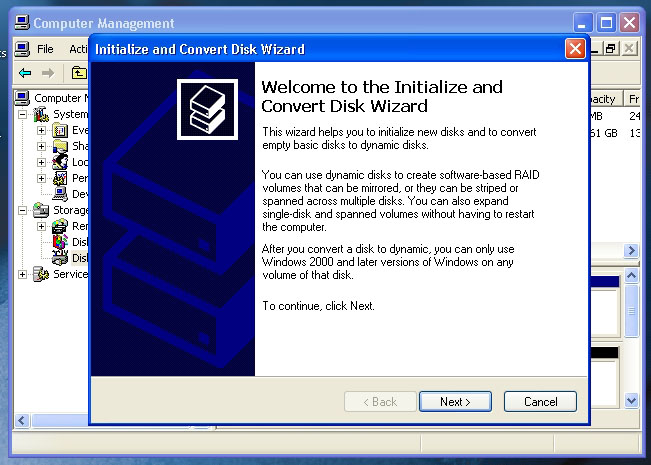
In most cases, the following window will
appear, followed by the Initialize and Convert Wizard
as displayed in the following photograph. If the Initialize
and Convert Wizard does not appear immediatly, a couple
of extra steps will be required. First, right click on the portion of
the window where it displays Disk 1 Unknown. You will have an option
to write a signature to the disk. Choosing this option will bring up
a screen like the one below. If the wizard window doesn't appear please
right click next to the disk number that you have just connected and
click Initialize to bring up the Wizard.
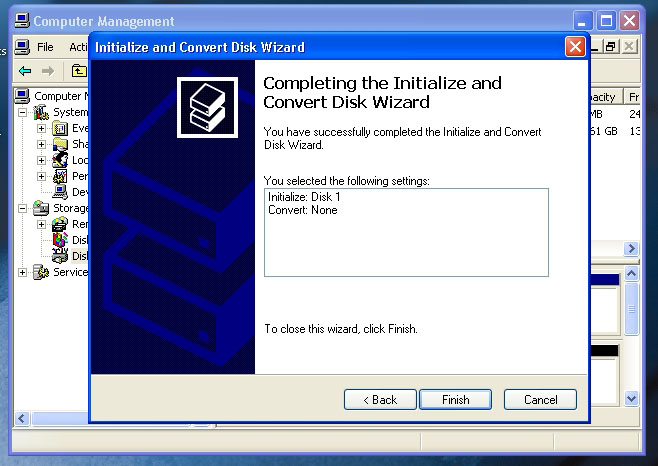
You should only have one disk displayed here. That should be the disk that you have added via FireWire or USB.

Just click finish.
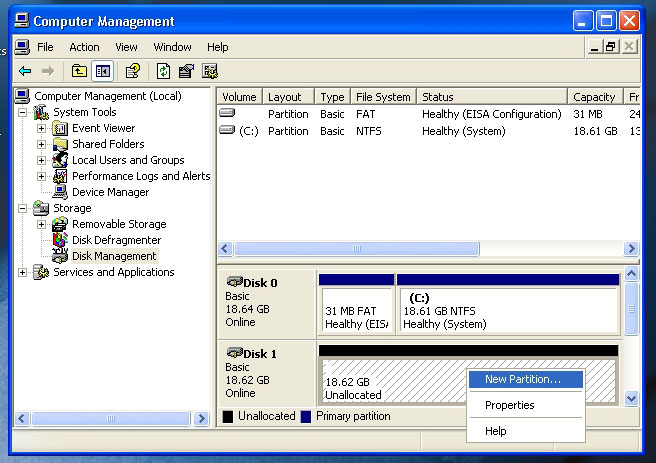
Your drive should appear similar to how Disk 1 does below. Notice that the space on the right reads as Unallocated. Right click in the Unalocated space and choose the New Partition option.
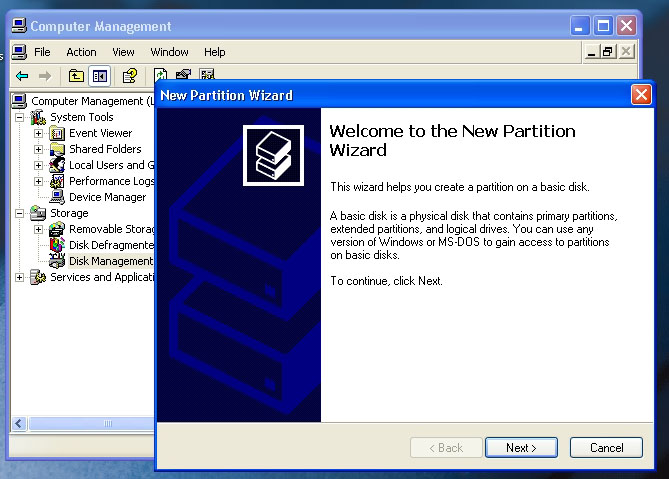
This starts the New Partition Wizard.
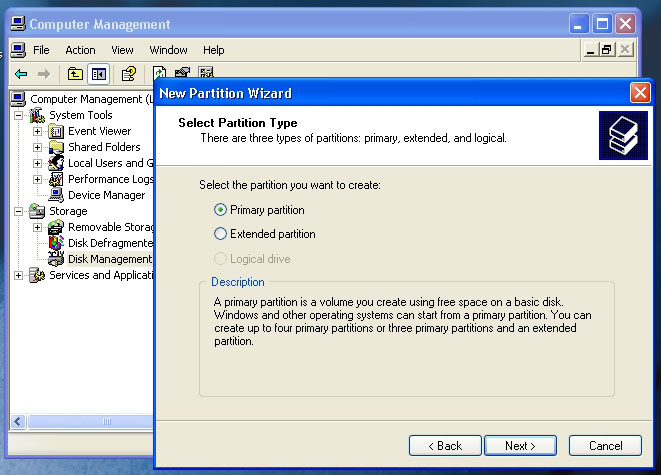
Specify your partition type as Primary.
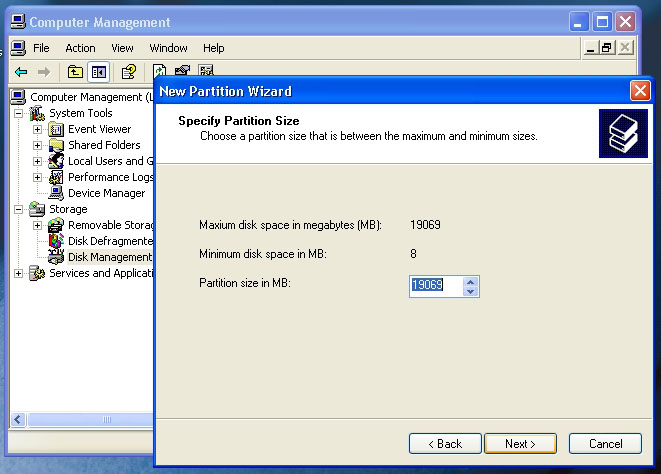
The wizard will already display the appropriate partition size for your dirve. It is strongly recommended that you DO NOT change the default value.
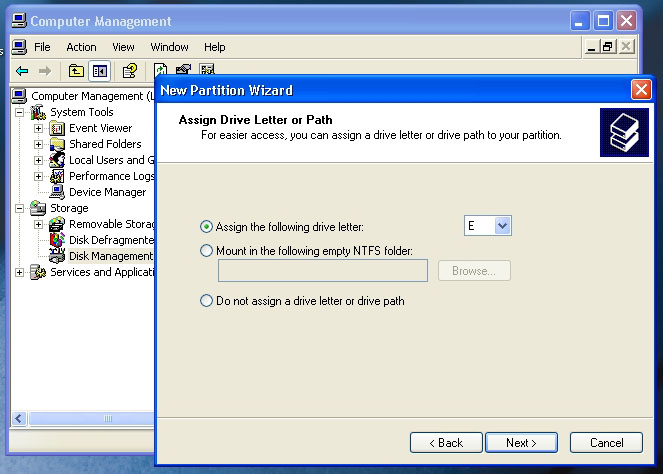
If you would prefer, you can specify the drive letter disignation for your new drive. If not, the OS will assign one for you.
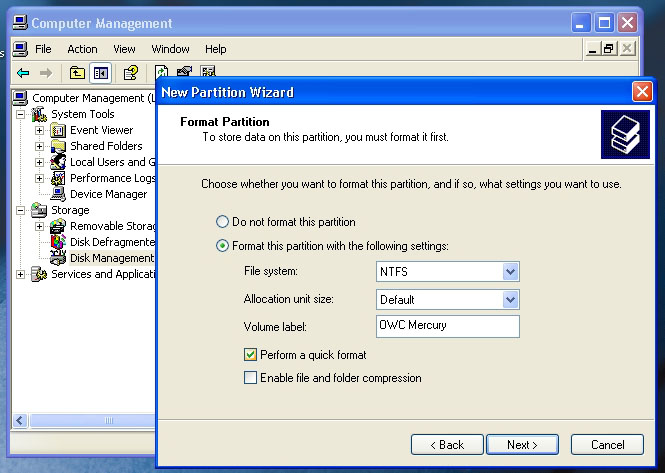
Before you can use the drive, it must be formatted. On most Windows 2000 and Windows XP systems, it is advisable to specify the filesystem as NTFS. Leave the Allocation Unit Size as Default, and feel free to give the drive whatever name you prefer.
Check the box for Quick Format. If you do not, it will likely take several hours for your drive to format.
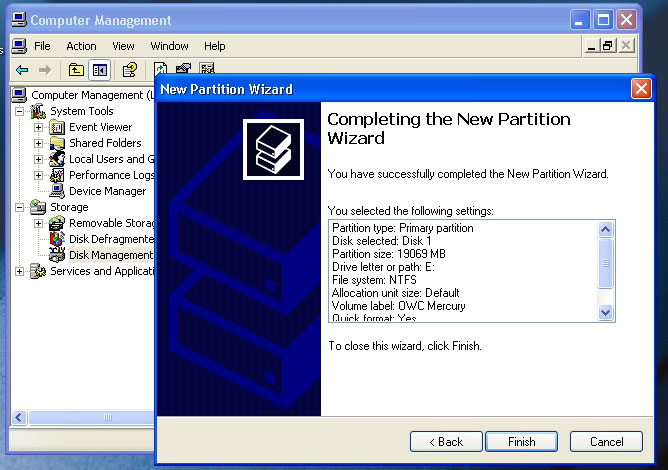
At the end of the Wizard, you will see a summary of the information you have specified throughout the steps. Simply click Finish.
Once you have finished with the formatting wizard, you will see that your new drive (represented as E in this case) will diplay a message of Formatting. This should only take a couple of minutes if you chose the Quick Format option.
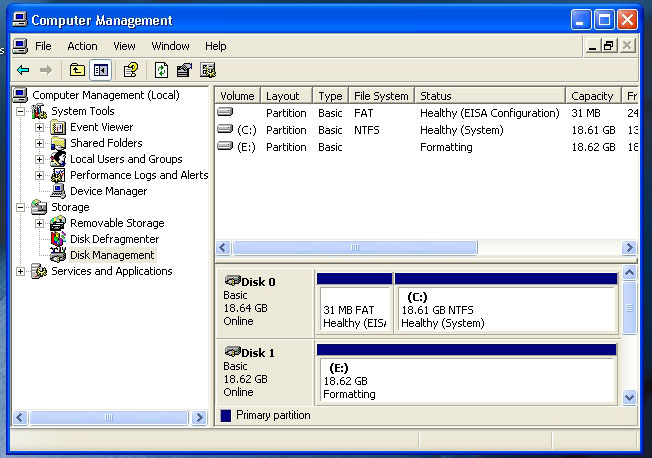
Watch closely, because the Formatting message will disappear quickly and be replaced by one that says Healthy. There is no confirmation message to tell you that your drive is now ready to use, but it is.
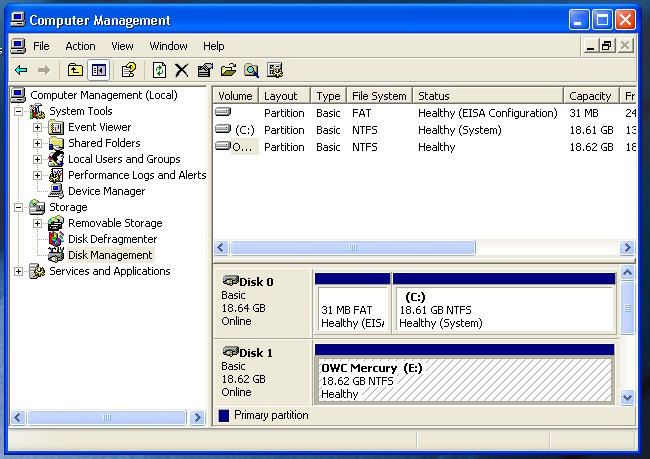
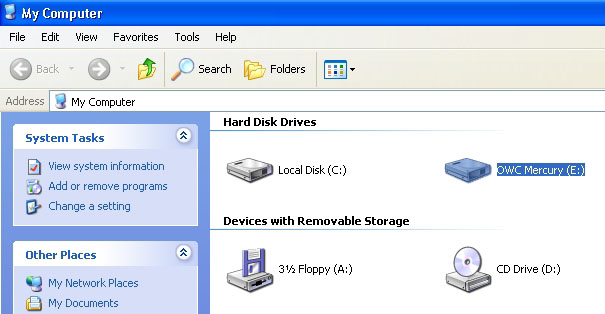
If you open the My Computer icon on your desktop, you should see your new drive mounted and ready to use.
|

