Step 1
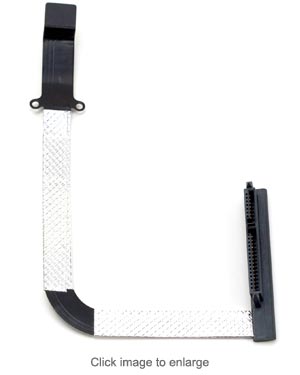
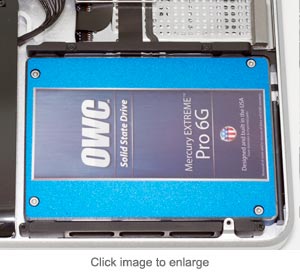
Begin by removing your hard drive from your MacBook Pro 17". Follow the SATA drive cable to the point where it disappears under a silver shield held in place by 2 very short Phillips 00 screws. Remove these two screws and the shield.
Step 2
Remove the 2 Phillips screws that are fastening the cable into the chassis of the MacBook Pro 17". These are longer than the 2 screws you removed from the silver shield.
Step 3
Remove the SATA cable from your MacBook Pro 17".
Step 4
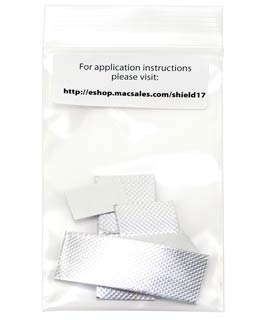
Open the ziploc bag that you received your shielding components in. There are 2 full sets of shielding tape included. Sort the lengths of shielding tape - you will need 1 long, 1 medium, and 2 small as well as the one conductive adhesive block.
Step 5
Here you see the orientation of tape lengths and how they fit onto the cable.
Step 6
Start with the long piece of shielding, and working from the end closest to the logic board connector, affix the shielding as straight as possible to the top of the cable.
Step 7
Turn the cable over and complete wrapping the shielding tape around the cable fully. Make sure to keep everything as flat as possible.
Step 8
Using the medium length of shielding tape, start at the hard drive connector end and affix the tape to one side of the cable as you did in step 6, keeping it as straight as possible.
Step 9
Finish the medium length of shielding tape by wrapping it fully around the cable.
Step 10
Place the small block of shielding material on the top of the cable, aligning the outside edges as shown in the picture. Flip the cable over so you can see the curve of the cable as shown in this picture.
Step 11
Affix the last small shielding tape on top of the one you just installed, completing the shielding procedure.
Step 12
Take the small white conductive adhesive block and remove one side of the backing tape. This is not easy to remove so be patient. Once removed, lightly affix it to the gold block on the SATA cable, it already has conductive adhesive on it but this makes sure that a good ground bond is being made. You can (optionally) use isopropyl alcohol to clean the gold ground block off before applying the new conductive adhesive.
Step 13
Place the SATA cable back into the MacBook Pro 17" hard drive bay and attach the connector to the logic board. Make sure it is fully seated on the connector. Reinstall the 2 longer Phillips screws through the eyelets of the SATA cable and firmly tighten. Using your fingertip, press down repeatedly on the ground block between the Phillips screws you just installed and the logic board connector to create a good ground bond with the conductive adhesive.
Step 14
Reinstall the silver shield using the 2 very short Phillips screws you removed from it in step #1.
Step 15
You're all set! Enjoy your SATA 6G performance!
1-800-275-4576


