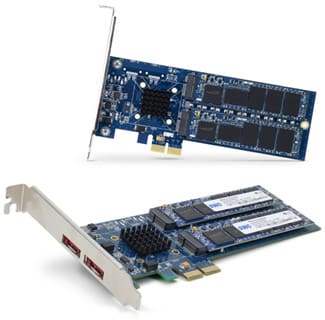
How to Transfer Data When Upgrading Accelsior Card or SSD Blades
OWC Guide
How to Transfer Data When Upgrading Accelsior Card or SSD Blades
When transferring the matched pair of Accelsior SSD blades from one Accelsior PCIe card to another, or when upgrading the existing blades to a new matched pair, it is best to have a backup of all your information. These steps will ensure that the data from your original Accelsior SSD blades is properly transferred.

STEP #1
Make a Copy of your data
Before you remove your Accelsior PCIe SSD from your computer, make sure you have copied your data onto a separate drive using a trusted utility. If you don’t have a complete copy of your data, you can make one using any of the following processes.
NOTE: These copy methods will completely erase the disk you are copying to. Make sure there is no irreplaceable data on the disk you will be using for your Accelsior backup during this process.
Apple's Disk Utility (10.3.x or Later)
Disk Utility has the ability to copy the data on your drives just as well as any other software out there.
- Select the destination volume (the indented name is the volume) and click on the "Restore" tab.
- Drag the name of the volume on your Accelsior PCIe SSD to the "Source" field
- Drag the name of the drive where you want your backup to the "Destination" field.
- Click the check box for "Erasing Destination".
- Click "Restore" at the bottom.
Note: You may have to provide username/password to start the copy process.
Prosoft Data Backup 3
- Click on "Show Backup Options" to expand the drop down menu.
- Select "Backup Type", then select "Clone".
- Click the check box "Do Complete Scan".
- Click on the "+" symbol under "Sources" and select your Accelsior PCIe SSD from the "Devices" list in the Finder window.
- Select your destination (the drive you’re backing up to) from the "Devices" list in the Finder window.
- Click "Start Now".
Carbon Copy Cloner (download)
- Select your Accelsior PCIe SSD as your "Source".
- Select your backup drive as your "Destination" or "Target".
- Under cloning options (the tab with a gear symbol), select "Backup everything".
- Click "Clone".
STEP #2
Verify that your backup is complete
Before replacing or moving your Accelsior SSD blades, you will want to verify that the backup process was successful. Double-check the files on the backup against the ones on your Accelsior. If you simply use your Accelsior PCIe SSD for a storage or scratch drive, this should be sufficient.
If you use your Accelsior PCIe SSD card as a boot drive, you should also check to make sure the backup is bootable.
To do this, restart the computer and hold the "Option" key on your keyboard to load up the boot menu. You should see both your Accelsior and your new backup as bootable drives.
If you do not see your backup drive, you will need to repeat the backup process (Step #1).
If you do see your backup drive, click on it. Your Mac will boot to your backup, which will verify that your Accelsior has been copied successfully.
Once you have confirmed that your backup is complete and bootable, you may continue.
STEP #3
Remove the Accelsior from your computer
Shut down your computer and remove the Accelsior PCIe SSD, using the proper procedures for your model computer.
STEP #4
Swap the Accelsior SSD Blades
Transfer or upgrade the pair of Accelsior SSD blades on your Accelsior PCIe card using the included instructions. An installation video is also available.
STEP #5
Reinstall the Accelsior
Reinstall the Accelsior PCIe SSD into your computer as appropriate for your model and OS, then restart. If you use your Accelsior as a boot drive, you may need to use the backup you made in Step #1 as your boot drive temporarily until you transfer your data back to your Accelsior.
STEP #6
Transfer Your Data Back
If you transferred the Accelsior SSD blades from one card to another and installed the new card in your computer, the data itself most likely will still be visible. Double-check to make sure; if it still is, then you can proceed.
If your data isn’t complete and/or you needed to format the drive to allow it to be seen, then you will need to transfer your data from your backup to your Accelsior.
Follow the same procedure you used in Step #1, except this time your backup drive will be the "Source" and the Accelsior will be the "Destination".
STEP #7
Verify Bootability (If Necessary)
If you used your Accelsior as a startup disk before the upgrade, you will want to make sure you are able to boot to it once again.
Simply hold down the "Option" key at startup to show all available boot drives. You should see your Accelsior as a bootable volume. If you do not see the Accelsior, you will need to perform Step #6 again.
If you do see the Accelsior, click on it. Your Mac will boot to the Accelsior, which will verify that your system was copied correctly.


 1-800-275-4576