 1-800-275-4576
Media Center: Adding a Mac mini to Your Home Theater Setup
Adding a Mac mini to Your Home Theater Setup
With all the high-quality music and movie options available online today, sometimes it seems like it would be much easier to enjoy that content directly through your home theater system. There are several options already out there, from DVD and Blu-ray players that can stream from Netflix, to standalone devices like the AppleTV. Unfortunately, many of these boxes are limited in the kinds of files you can play and/or where you get them from.
Home Theater PCs (HTPCs) are another option. These are usually smaller-cased computers, running some sort of media software. These offer a wider range of file types that can be played, along with the ability to stream many types of content.
The Mac mini is a perfect candidate for such a setup. Its small form factor allows it to fit nicely among the rest of your equipment, its video supports HD resolutions and it has support for digital audio output, which is necessary for surround sound.
With a little help from OWC and NewerTech, you can integrate a Mac mini into your home theater system, allowing you to access many different types of media that you couldn't before.

Attaching the mini
The first thing you'll need to do is attach the mini itself to your system. Different systems have different ports, and it is near impossible to cover all of them exactly, but it really comes down to two major connections: a video connection and an audio connection.
 |  | |
| DVI Port | HDMI Port | VGA Port |
Connecting video
In most modern home theater systems, you're going to want to hook your mini up to a digital video input. Some models have a DVI connector, which connects just like a DVI monitor. If you don't have a DVI port on your TV, nearly all modern TVs have one or more HDMI ports which you can use.
If you don't have a DVI port or an available HDMI port, many displays have a VGA port that can also be used. This, however, is an analog signal which won't be as clear as a digital one.
Depending on the model mini you have, you may require an adapter. If you have a 2009 mini, your best bet is to use a NewerTech Mini Display Port adapter for the connection you're going to hook up to on your TV. With earlier model minis, you should be able to connect the DVI port to the TV either directly (for DVI connections), through an adapter cable (for HDMI connections) or via a VGA cable and the mini's DVI-VGA adapter (for VGA connections).
Connecting Audio
Once you have the video connected, we can look at the other important connection: audio. You have two choices: digital or analog. If you have a surround sound system, you will probably want to use a digital connection, as the analog will not give you surround sound.
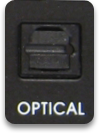
A little known feature of the Mac mini’s audio connection (and basically any Intel Mac), is that the audio out 3.5mm port can provide either analog signal and an optical signal - depending on which cable is connected to it. By using a NewerTech Toslink to Mini Toslink Optical Cable, you can connect the Mac mini to your surround sound receiver using an available optical-in connection on the receiver.
If you don't have a surround sound system, you will want to use the standard analog audio out. Use a 1/8" Stereo minijack to RCA adapter to connect the audio out from the mini to the audio in on the TV that corresponds to the input you used for the video. You may need to refer to your TV's manual to determine the correct input.
Attaching Peripherals
At this point, your mini is technically usable with your home theater system. However, there are a couple of other pieces that you may want to hook up while you're behind your TV.
TV Tuner
There are many TV tuners available, but we recommend one of these:

click image for more info | Hauppage HD PVR Note: The EyeTV software does not come with this unit, so you will need to purchase that separately from Elgato’s website. |

click image for more info | Elgato EyeTV 250 Plus, EyeTV Hybrid, EyeTV One For more information, check out our in-depth writeup of the EyeTV Hybrid and the EyeTV 250 Plus. |
Storage
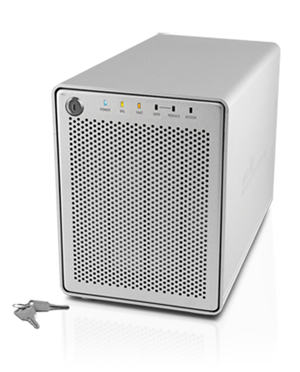
Video files take up a lot of space, so it behooves you to get the highest-capacity solution you can. The Mercury Elite-AL Pro Qx2 is a great choice for this, as it not only can support capacities up to 8TB, but it also can be configured in a RAID 5 to help protect your files in the event any one of the four hard drives within it has a problem.
There are two ways to attach your storage device: directly or over the network.
Connecting directly is more useful when recording directly to the external drive. All you need to do is connect via the fastest connection available on both the drive and the mini. In the case of the Qx2, this would be FireWire 800.
Connecting via a network is useful when you want to access those multimedia files on computers other than the one that's attached to your TV. The easiest way to do this is via an AirPort Extreme Base Station. Simply format the hard drive with your computer, then connect the drive to the base station via a USB cable. It should then show on your network as a shared volume.
Tip: If you're using a network drive to store your movies, mount the drive on your mini's desktop, then drag it to the "Login Items" tab in your "Accounts" preference pane. By doing this, the drive will always mount when you turn on your mini, saving you that extra step. |
Setting up Software
Every Mac comes with Front Row built in, but many people find its options too limiting—especially when working with network storage. Fortunately, there is another solution, which not only plays considerably more formats than Front Row and can integrate online services as well, but is also free. It's called Plex, and you can download it for free from their website.
Once you've installed and launched Plex, you can navigate using your Apple Remote or a keyboard. Later, you can set it to use a universal remote, but much of that varies with the remote itself. Check the manual for your remote and in the Plex documentation for more details.
 | Using the remote or keyboard, select "Watch your Videos." |
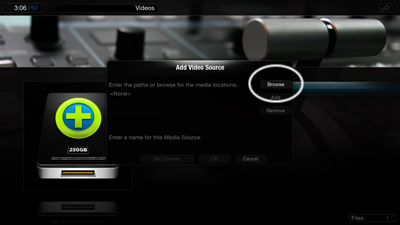 | You will be given the opportunity to Add Source. Select "Browse" from the window that pops up and navigate to your movie files just like you would in the Finder. |
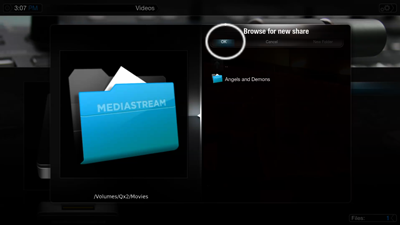 | Select the folder containing your movies, then click "OK" to set the folder's path. |
 | Select "Set Content" |
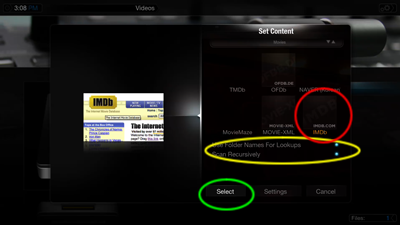 | Choose a source for movie information—The Internet Movie Database (IMDB) option is usually your best choice. (red circle) You can also check the options regarding using folder names for scanning and scanning recursively (yellow circle), as that will help get the most accurate information. Click "Select" (green circle), then "OK" and your mini will download the appropriate movie information, posters, etc. for use in the library. |
 | Once Plex has finished importing the video information, you may go to the "Movies" section and all that information will be listed. |
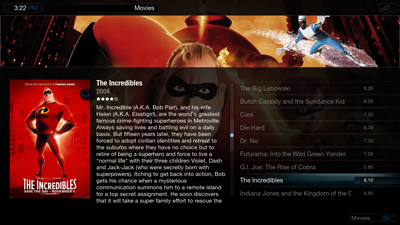 | To select a movie, simply select it in the "Movies" list, and click on it. The movie should then load and start playing. |
By the way... the process for importing and arranging your recorded TV shows is pretty much identical. :-)
Getting Media
This area is a little "gray," as there is the potential for misuse. However, in the interest of being able to have a backup copy of a movie you have legitimately purchased, we will give you some information regarding some useful hardware and software. Please do not copy movies if you have not purchased the DVD or Blu-ray Disc.

click for more info | Handbrake When it comes to converting movies, Handbrake is one of the most popular programs out there. It takes care of ripping (taking the data off the disk) and converting (arranging the data into something the computer can read) in one fell swoop. |

click for more info | MakeMKV MakeMKV is a fairly new program, and is currently in a free "beta" period. It allows you to make full-quality backups of your DVD and Blu-ray movies, only without the "extra" features. You can either watch these movies directly through Plex or use Handbrake to convert them down for use with devices like an iPhone. |
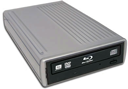
click for more info | OWC Mercury Pro Blu-Ray+SuperDrive Available in a myriad of options, the OWC Mercury Pro external Blu-ray is a great addition to your home theater. While it won't allow you to play Blu-ray movies, you can use it in conjunction with the software mentioned above to extract the movie files from discs you have purchased, as well as burn your home movies to Blu-ray by using Toast. |

click for more info | Elgato Turbo.264 HD You can check out our review of the Turbo.264 HD for more information on how it can improve conversion speeds. |
You're now ready to go!
You now have a system that's capable of playing a high-quality version of a movie or TV show from its hard drive. The advantage over a "normal" hard disk-based recorder is that when you're not using it for movies, you can hook up a wireless keyboard and mouse and use it for whatever you normally use a computer for games, email, web browsing, etc.; it's like the best of a computer and of a DVR all rolled into one.