 1-800-275-4576
Newertech iPod Replacement Battery
3rd Generation

Attention: Observe Precautions For Handling Electrostatic Sensitive Devices
Please observe all static safe precautions while working inside of your iPod. Newer Technology, Inc. takes no responsibility for damage occurring to your iPod while installing this replacement battery. If you are concerned or unable to perform this installation process, please contact a sales representative for a quote on our professional installation service.

Begin by laying your iPod on it’s back on a soft work surface.
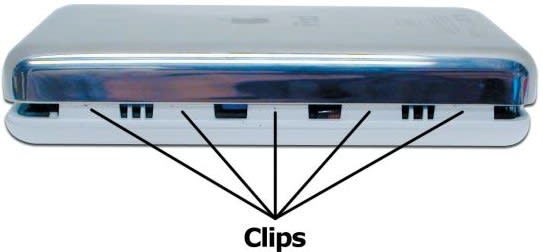
Using the included nylon screwdriver tool, gently insert the pointed end between the metal back casing and the acrylic front of the iPod, at the middle of the unit at the clip points shown. You will insert the tool from the face of the unit, pointed toward the back (metal) portion of the case. Once inserted, work the tool from the center of the unit, towards the top and bottom (left to right in this picture.
You may fi nd that if, you press inwards on the chrome back along the edge where these clips are located, you will fi nd one spot that is a little more forgiving than the rest of it - insert your tool there to begin.
NOTE: This is by far NOT an easy process. Expect to fail repeatedly. Sometimes, a thumbnail is necessary to begin the process. If the included tool becomes damaged, you can resharpen it using a razor knife - don’t cut yourself!
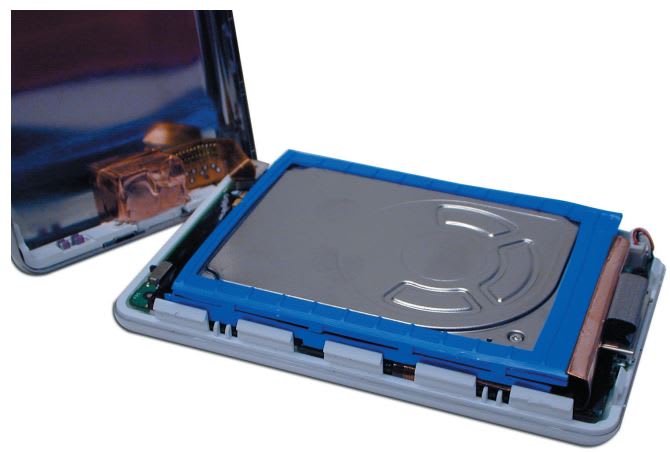
Once you have the bottom cover off, GENTLY tip it towards the top as shown. Be exceedingly careful of the ribbon connector that goes to the audio jack. It is easily damaged.
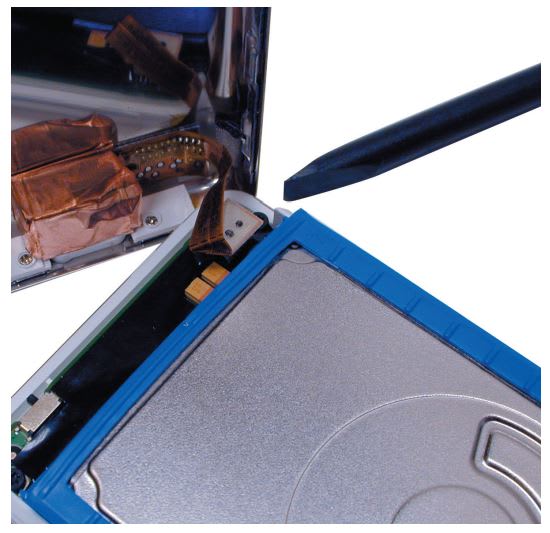
Another view of the ribbon connector, with the screwdriver tool pointing toward it. Do NOT remove the connector - it is not necessary to replace the battery.
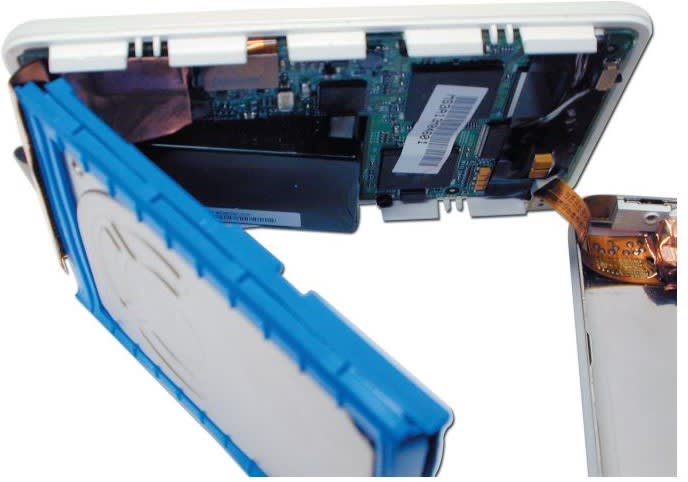
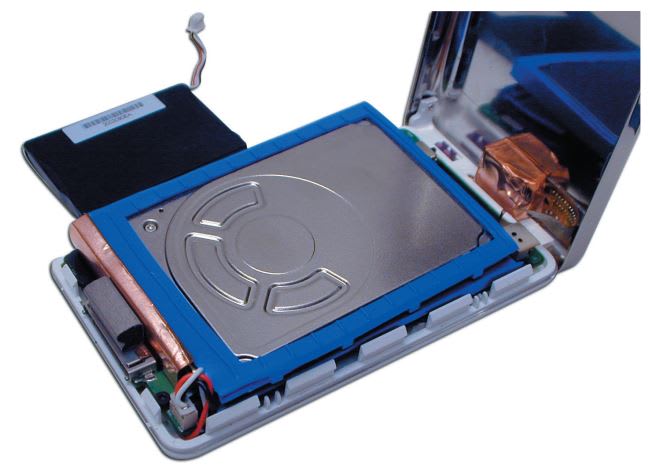
Lay the metal back cover fl at on the work surface, and stand the iPod on it’s edge as shown. You can gently lift the hard drive away from the inside of the iPod as shown, exposing it’s connector on the logic board.
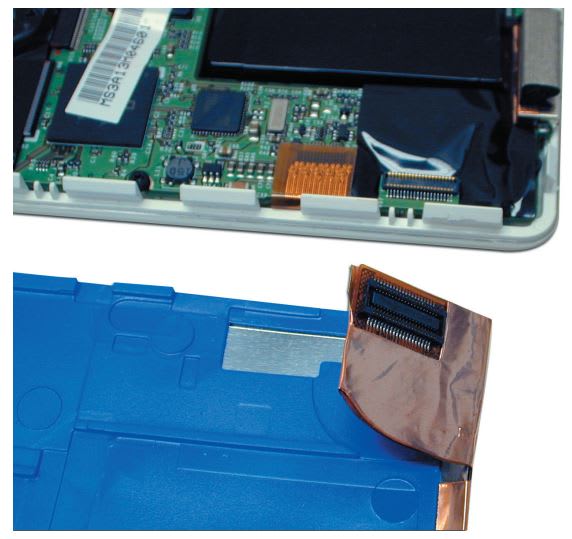
Detach the hard drive from the logic board using your fi ngernail or the nylon screwdriver tool, at the edge of the connector. Light pressure will release the connector from the board - set the hard drive aside.
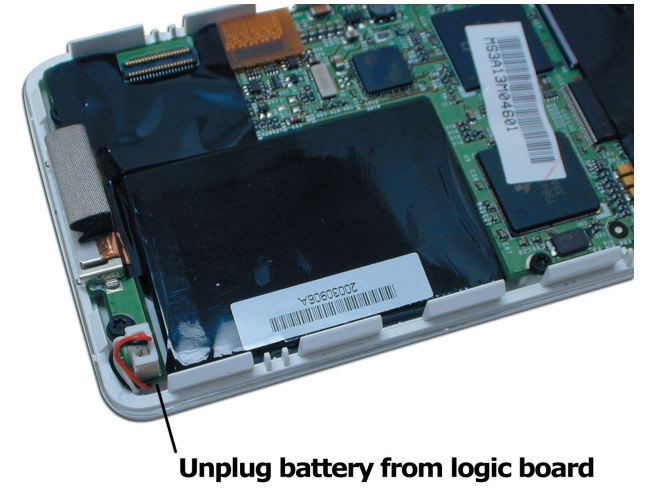
Once you have removed the hard drive, look at the logic board and you’ll see the large black battery. Gently unplug the 3 wire connector from the board and remove the battery from the unit, setting it aside for proper disposal later. You will probably find that the original battery wires are routed under the logic board and will need to be unwrapped from there to remove.
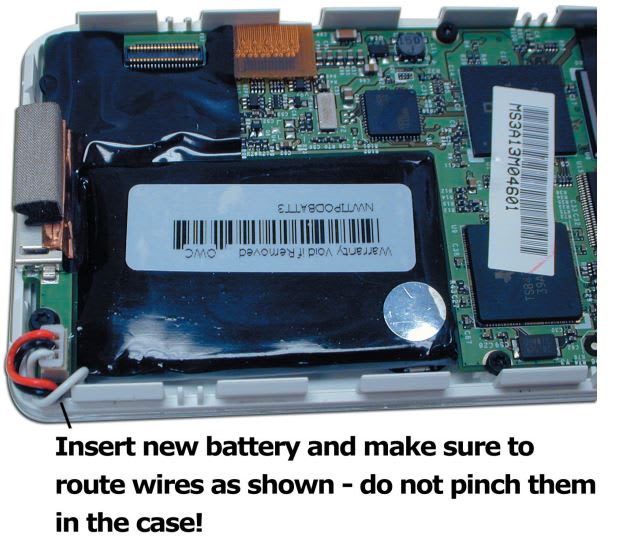
The new battery fi ts snugly into the opening of the original battery, it’s a little bit taller than the stock battery. The wires are thicker than the stock battery originally had, and will require some manipulation to fi t them inside the case. Don’t pinch the wires fi tting them back in.
Set the hard drive back into the case and reattach the cable onto the logic board fi rmly. It may make a “click” as it’s seated onto the logic board, that is normal, don’t worry. You may fi nd the attachment is performed more easily with the unit on it’s side as you had it with the drive removal. Once complete, set the back cover onto the unit, being careful to make sure that the hold switch seats back over the internal switch properly.
The back case snaps onto the front easily, just make very sure you don’t pinch the wires from the new battery. Once that is complete, your iPod is ready to be charged! Make sure that you charge the battery for a minimum of 3 hours, uninterrupted. Overnight is better - once it’s plugged into it’s power adapter or FireWire port, you can go ahead and turn the unit on, if it didn’t come on automatically by itself. You may need to perform a reset on the iPod, to do so follow these directions:
- Connect iPod to the Apple iPod Power Adapter and plug the power adapter into an electrical outlet, or connect iPod to your Mac’s built-in FireWire port. Make sure the computer is turned on and isn’t set to go to sleep.
- Toggle the Hold switch on and off. (Set it to Hold, then turn it off again.)
- Press and hold the Play/Pause and Menu buttons until the Apple/iPod logo appears, about 6 to 10 seconds. You may need to repeat this step.
Enjoy your new battery! Thanks for being a Newer Technology customer!
Free Support Chat
Our free award-winning support team is ready to answer all of your questions. Technical support is available Monday - Friday: 9AM - 6PM. Customer Support & Sales is available Monday - Friday: 9AM - 6PM. Support is unavailable on U.S. Federal holidays. Talk to a human today.