NuMount Pivot Wall Mount
Assembly Manual
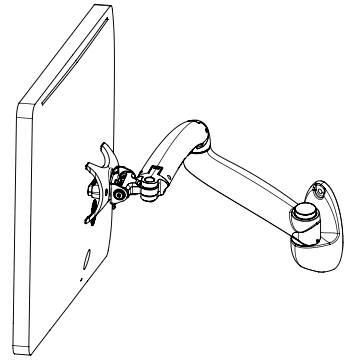
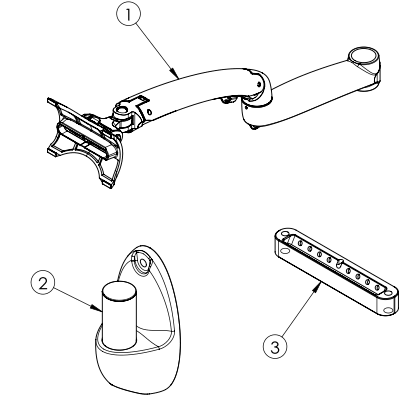
| Part No. | Sub-part No. | Sub-part Qty. | Description | Part Qty. |
|---|---|---|---|---|
| N/A | 1 | 1 | Display Arm | 1 |
| N/A | 2 | 1 | Wall Mount Set | 1 |
| N/A | 3 | 1 | Mounting Plate | 1 |
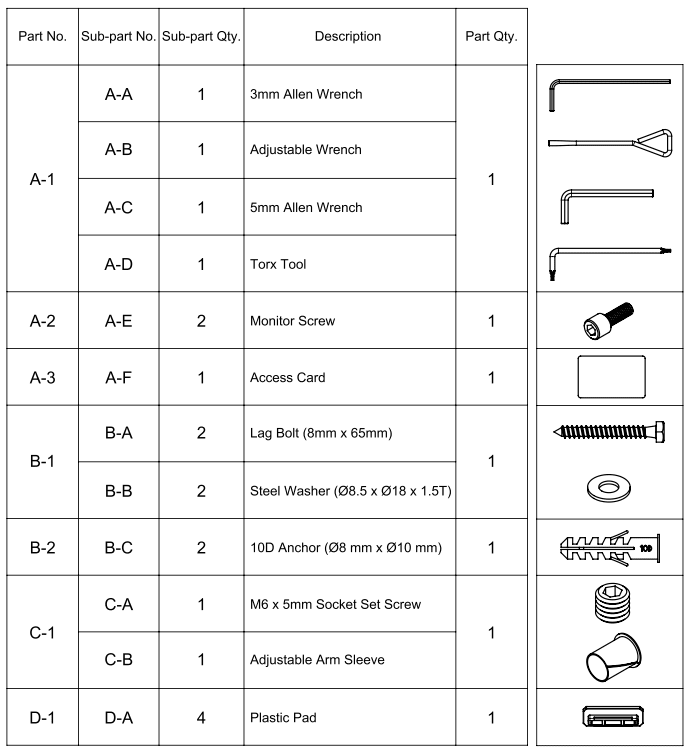
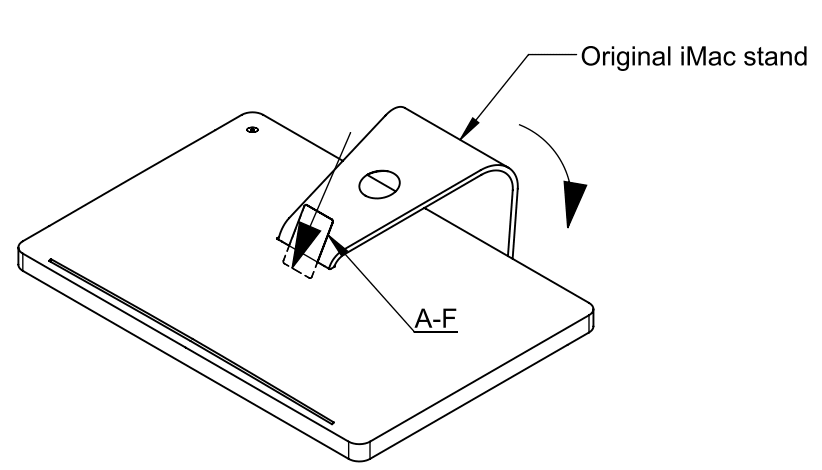
Step 1: Lift the stand up to its highest point, then insert the card (A-F) at a slight upward angle until you feel the latch.
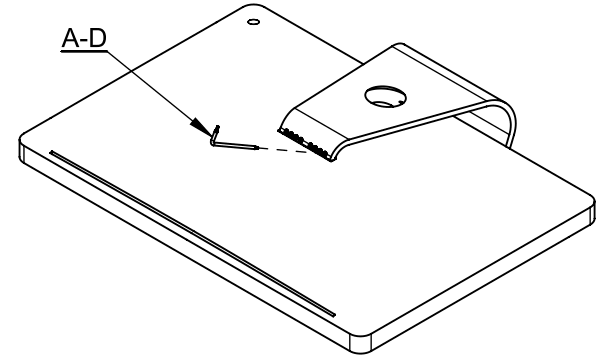
Step 2: With the card in the slot, lower the stand as far down as it can go; you will see screws where the stand connects to the iMac. Separate the stand from the iMac by using the Torx tool (A-D), as shown below. Set the original M3 screws aside — there are 8 in total.
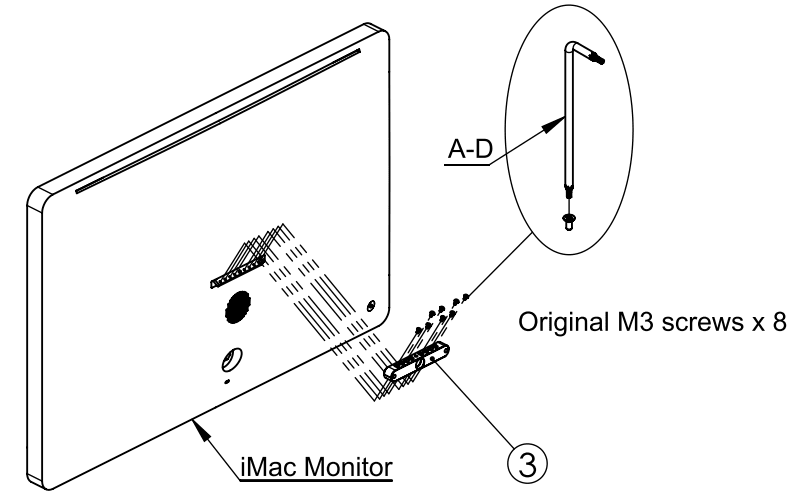
Step 3: Use the Torx tool (A-D) to fasten the Mounting Plate to the iMac as shown, using the M3 screws that were removed in the previous step.
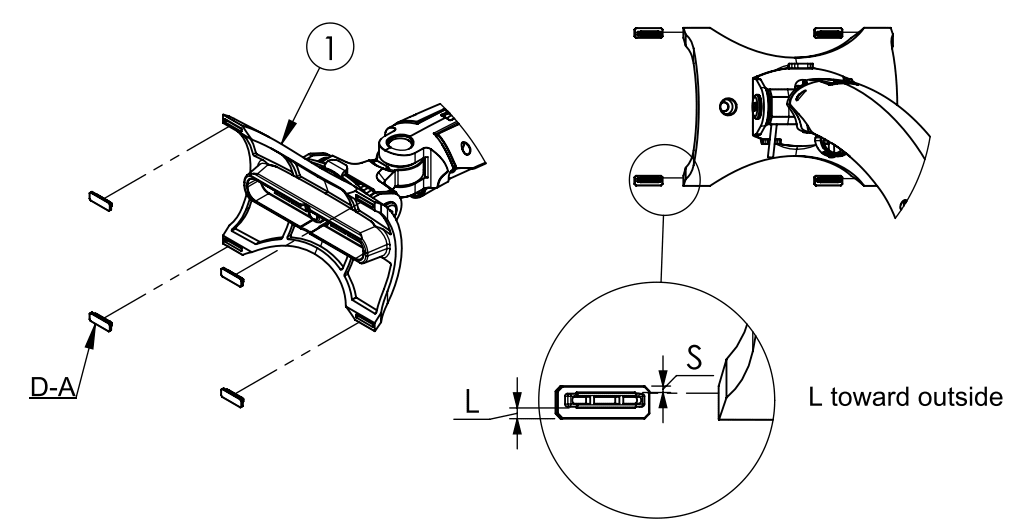
Step 4: Install the four plastic pads (D-A) into the corresponding locations on the end of the Display Arm, as shown below.
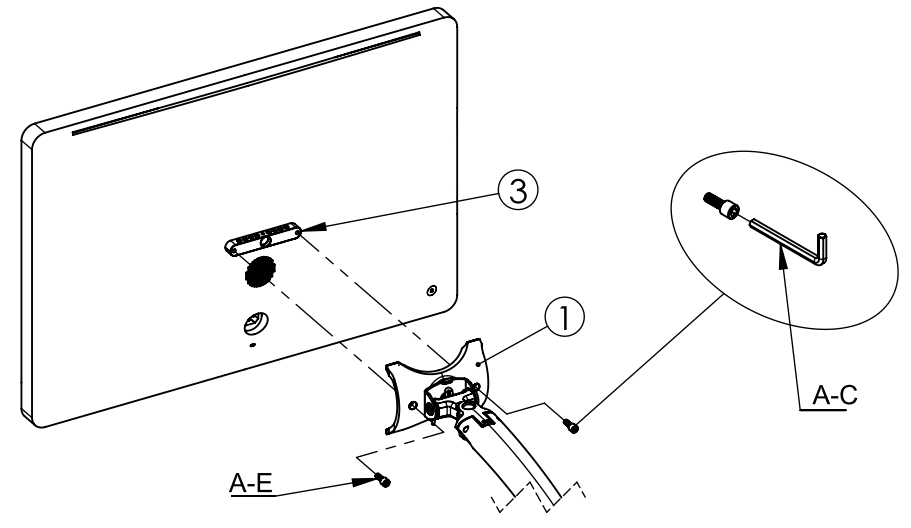
Step 5: Using the A-C wrench and the A-E screws, fasten the Display Arm onto the Mounting Plate as shown below.
The first series of steps below are recommended for installation onto a concrete wall. The differences for a wood or drywall installation are noted afterward.
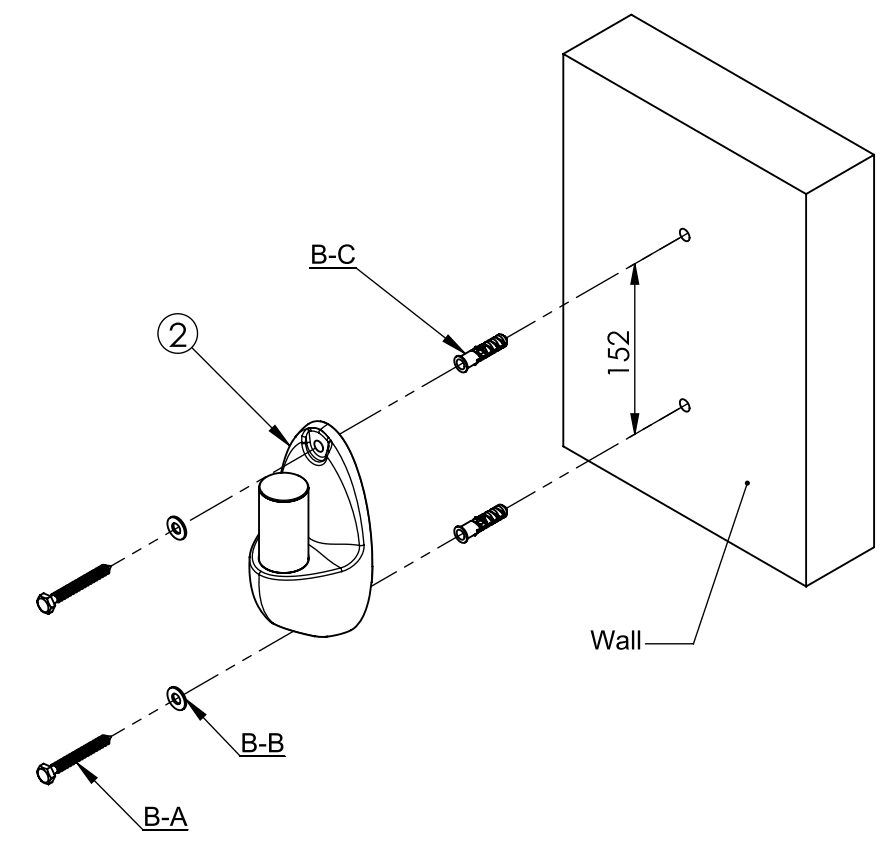
Step 6: Use the Wall Mount Set as a template to mark the hole locations on the wall, or mark them manually; the distance between the holes is 152 mm.
Step 7: Drill 3/8 inch (10 mm) holes in the wall, to a depth of approximately 60 mm.
Step 8: Insert the B-C anchors into the wall holes.
Step 9: Affix the Wall Mount Set onto the wall using the B-A bolts with the B-B washers, as shown below.
For Wood / Drywall: Start with Step 6, then, at Step 7, drill 7/32 inch (5 mm) holes to a depth of about 60 mm, then skip ahead to Step 9. Note: there is no need to use the B-C anchors in this configuration.
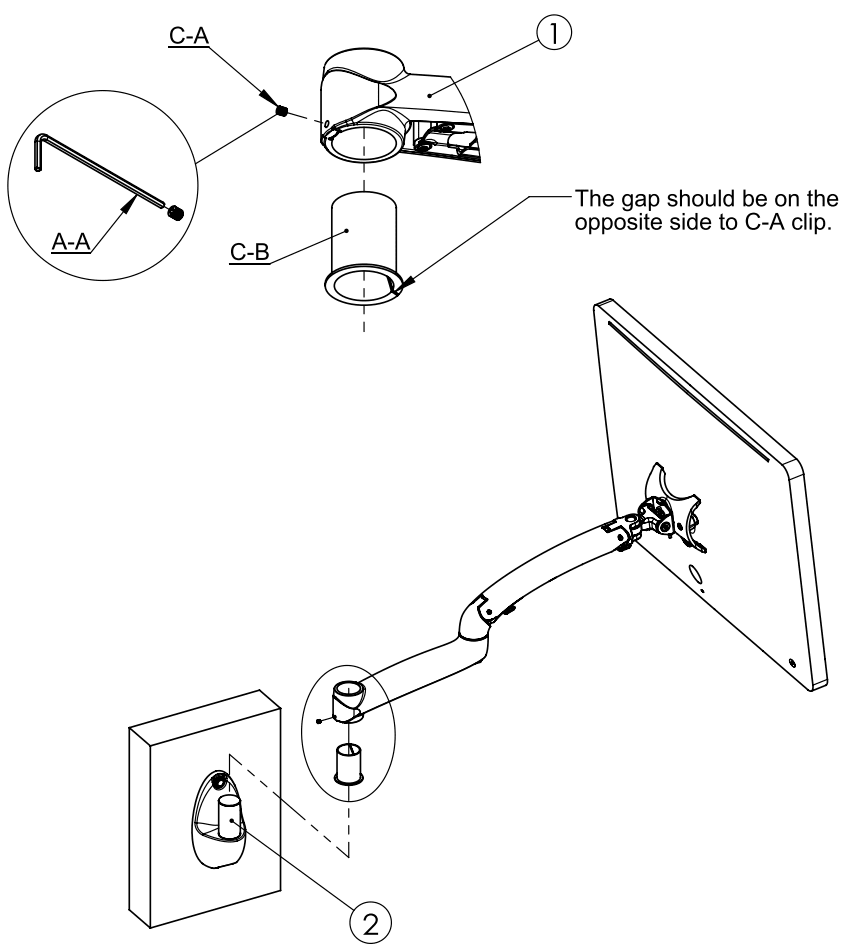
Step 10: Install the Adjustable Arm Sleeve (C-B) into the Display Arm using the 3 mm Allen Wrench (A-A) and the 5 mm Socket Screw (C-A). Do not tighten the screw all the way and note the location of the gap on the arm sleeve (see diagram below).
Step 11: Set the Display Arm into the Wall Mount Set, then tighten the C-A screw to secure the armature.
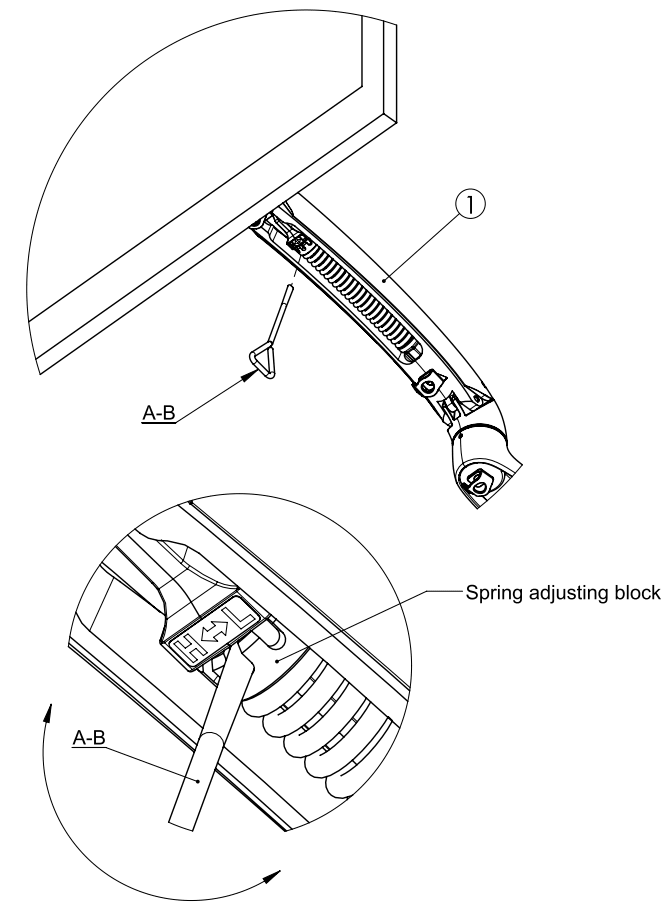
Note: after the Wall Mount Set and Display Arm have been installed, you can use the A-B wrench to adjust the tension on the spring (shown below), based on the weight of the display. Heavier displays should use the ‘H’ setting while lighter displays can use the ‘L’ setting. Note this product does not support displays over 30 pounds (~ 13.5 kg).
Note: how far the display can be extended is dependent upon the tension in the adjustable spring described on the previous page.
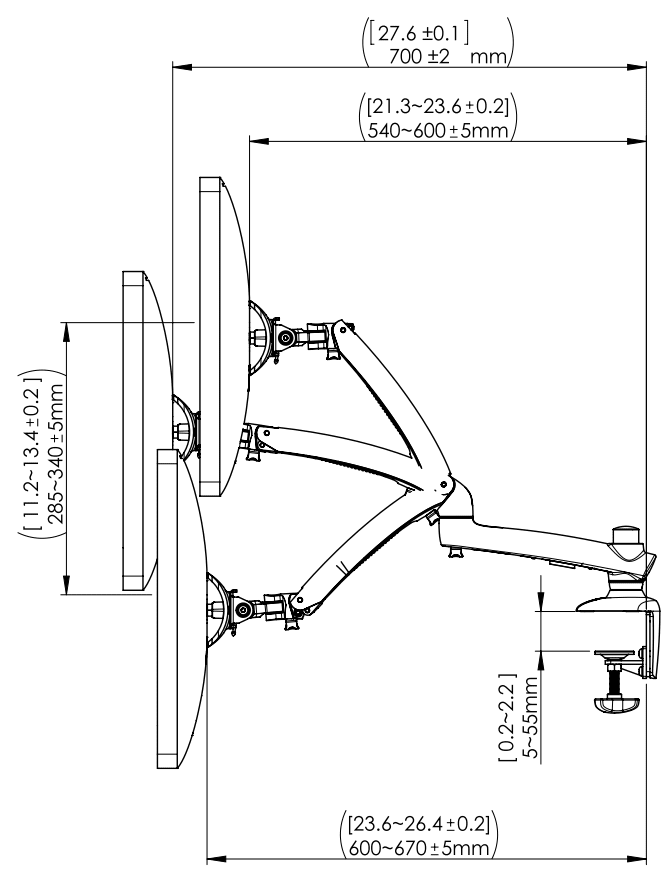
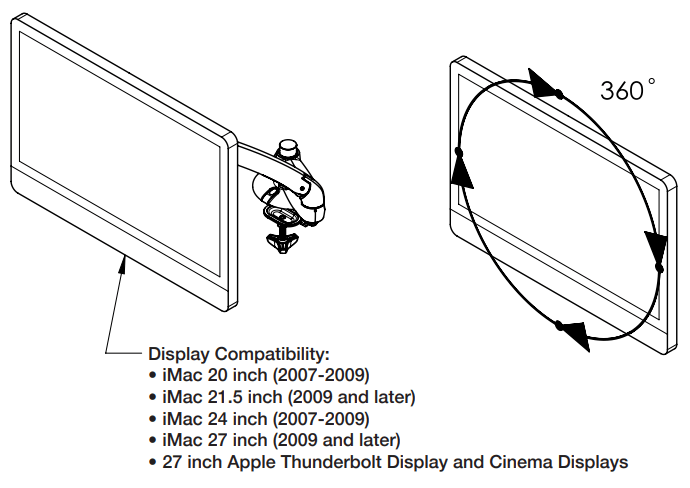
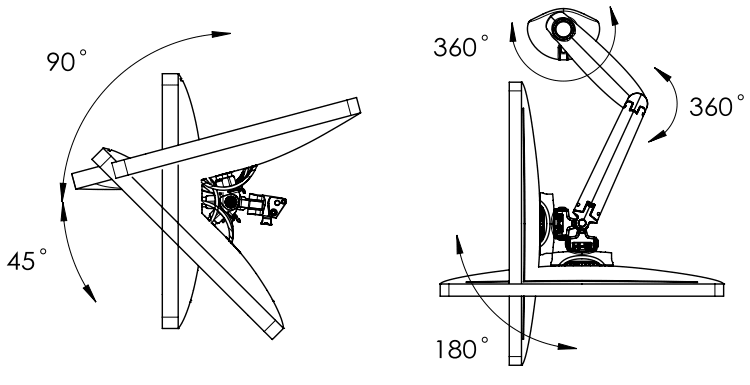
Note: The display angles shown below are examples only. The actual angles used are dependent upon the specific display being used.
NuMount Adapter for VESA-compatible Displays (optional)
The NuMount Adapter enables NuMount Pivot products for iMac to work with third party displays that use the VESA MIS-D 75mm or 100mm mounting pattern. IMPORTANT: Displays over 30 pounds (~13.5 kg) are not supported.
CAUTION: large flat-screen displays can be heavy. If you are unsure about your ability to lift and steady the display (or display assembly described in this document), please enlist the help of another individual to assist you.
1. Skip Steps 1-5 and begin the installation process with Step 2 below.
2. Carefully place your disconnected display face-down on a soft, non-abrasive surface. The packet of screws and spacers that are included with the NuMount Adapter allow it to be connected to a variety of display types. Consult the display documentation for advice on the correct screw type to use with VESA MIS-D mounts.
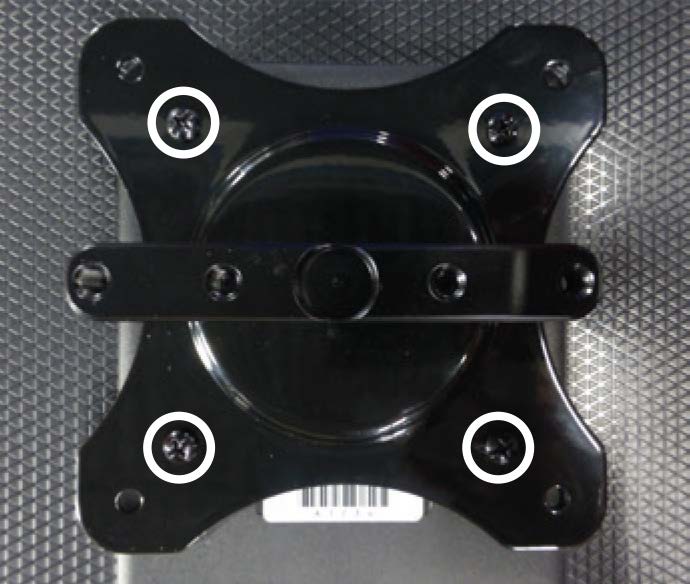
3. Use the appropriate screws —and spacers if necessary — to secure the NuMount Adapter to the back of the display. The example below shows an MIS-D 75mm installation.
4. Look at the Display Arm of the NuMount Pivot. Notice the VESA receiver on the end of the armature, highlighted below.
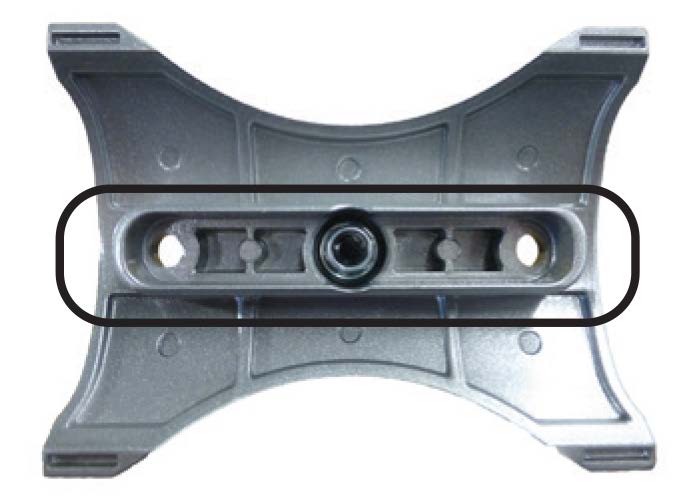
5. While holding the Display Arm steady, align the VESA receiver on the end of the NuMount Pivot with the corresponding horizontal bar on the NuMount Adapter, then gently rest the NuMount Pivot on the VESA mounting plate, as shown below
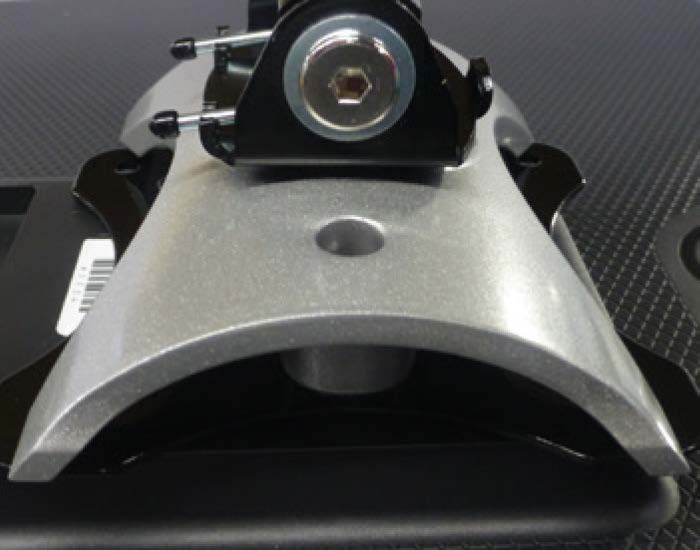
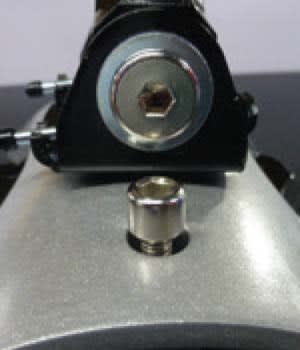
6. Use the two screws included with the NuMount Pivot (P-B) to affix the Pivot to the NuMount Adapter. Use your fingers to tighten the screws initially, then use the included hex wrench (A-D) to finish tightening the screws. Make sure they are fully tightened before continuing. When finished installing the adapter, go to Page 6 in this guide and continue as directed.
© 2019 Newer Technology, Inc. All Rights Reserved. Newer Technology, NewerTech and the n boomerang logo are trademarks of New Concepts Development Corporation, registered in the U.S. Patent and Trademark Office. NuMount is a trademark of Newer Technology Inc. registered in the U.S. Patent and Trademark Office. VESA is the trademark of the Video Electronics Standards Association.
Free Support Chat
Our free award-winning support team is ready to answer all of your questions. Technical support is available Monday - Friday: 9AM - 6PM. Customer Support & Sales is available Monday - Friday: 9AM - 6PM. Support is unavailable on U.S. Federal holidays. Talk to a human today.


 1-800-275-4576