 1-800-275-4576
OWC Drive Guide
Support Manual
The OWC Drive Guide is a formatting application built for Mac and Windows users who require a simple walk-through of the drive formatting process. Drive Guide uses standard Mac and Windows formatting options to create the volumes needed to store information on your new drive.
macOS
Step 1
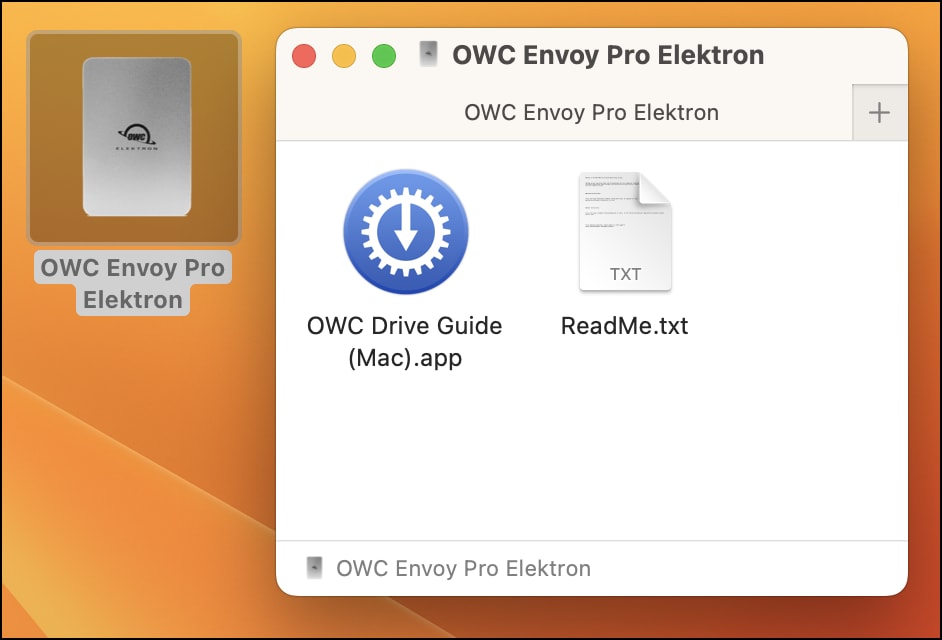
- Connect your new drive to a power source if needed (consult the online user guide if you are unsure), then connect the drive to a Mac using the included data cable.
- After a few seconds a disk icon that matches the name of your device should appear on the Mac Desktop, or within "My Computer" in Windows. Double-click the icon to open up your volume. Then double-click the "OWC Drive Guide (Mac)" app icon that appears in the window to load the welcome screen.
Step 2
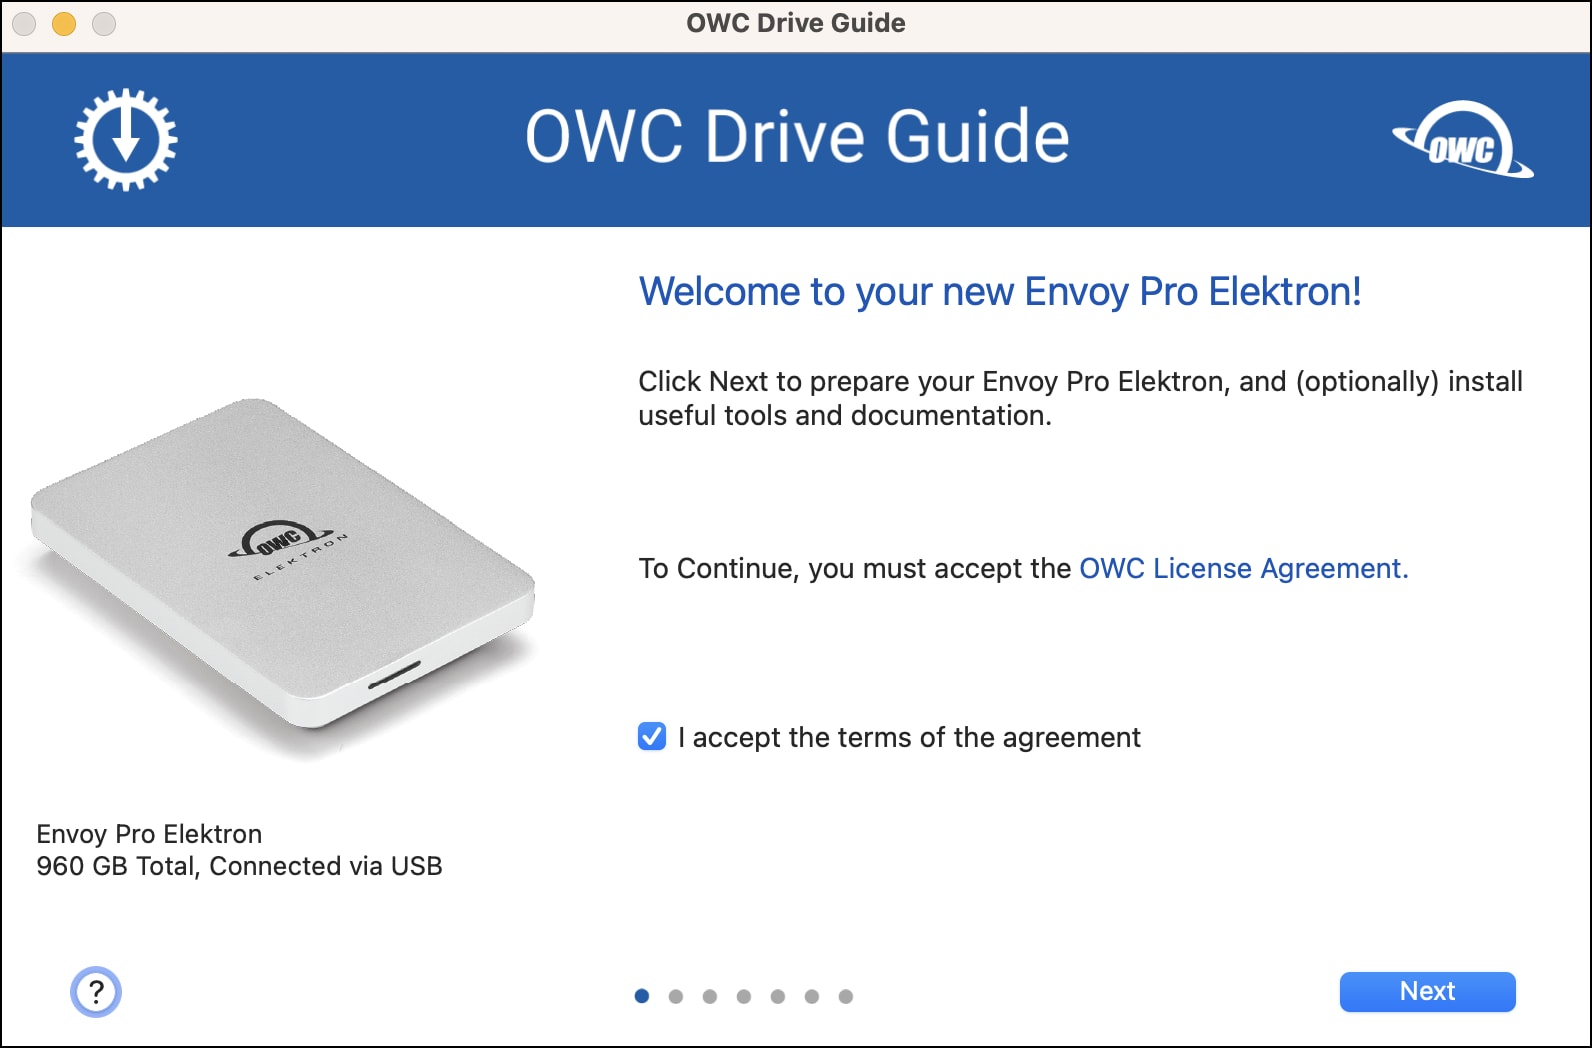
- The product listed and image shown in the following steps may differ from the one you have connected. I.E. the product shown will match or be very similar to the one you purchased. This document uses the Envoy Pro EX as an example.
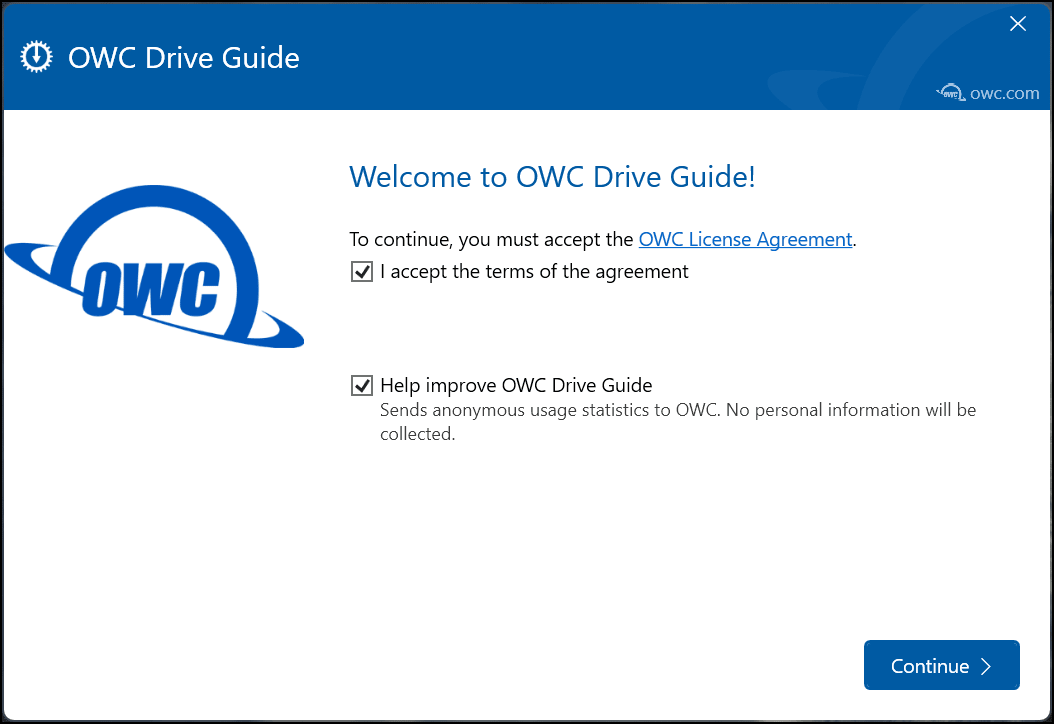
- Choose to accept the terms of the agreement and then click the ‘Next’ button. If you choose not to accept the terms, you will not be able to continue with the Drive Guide process.
Step 3
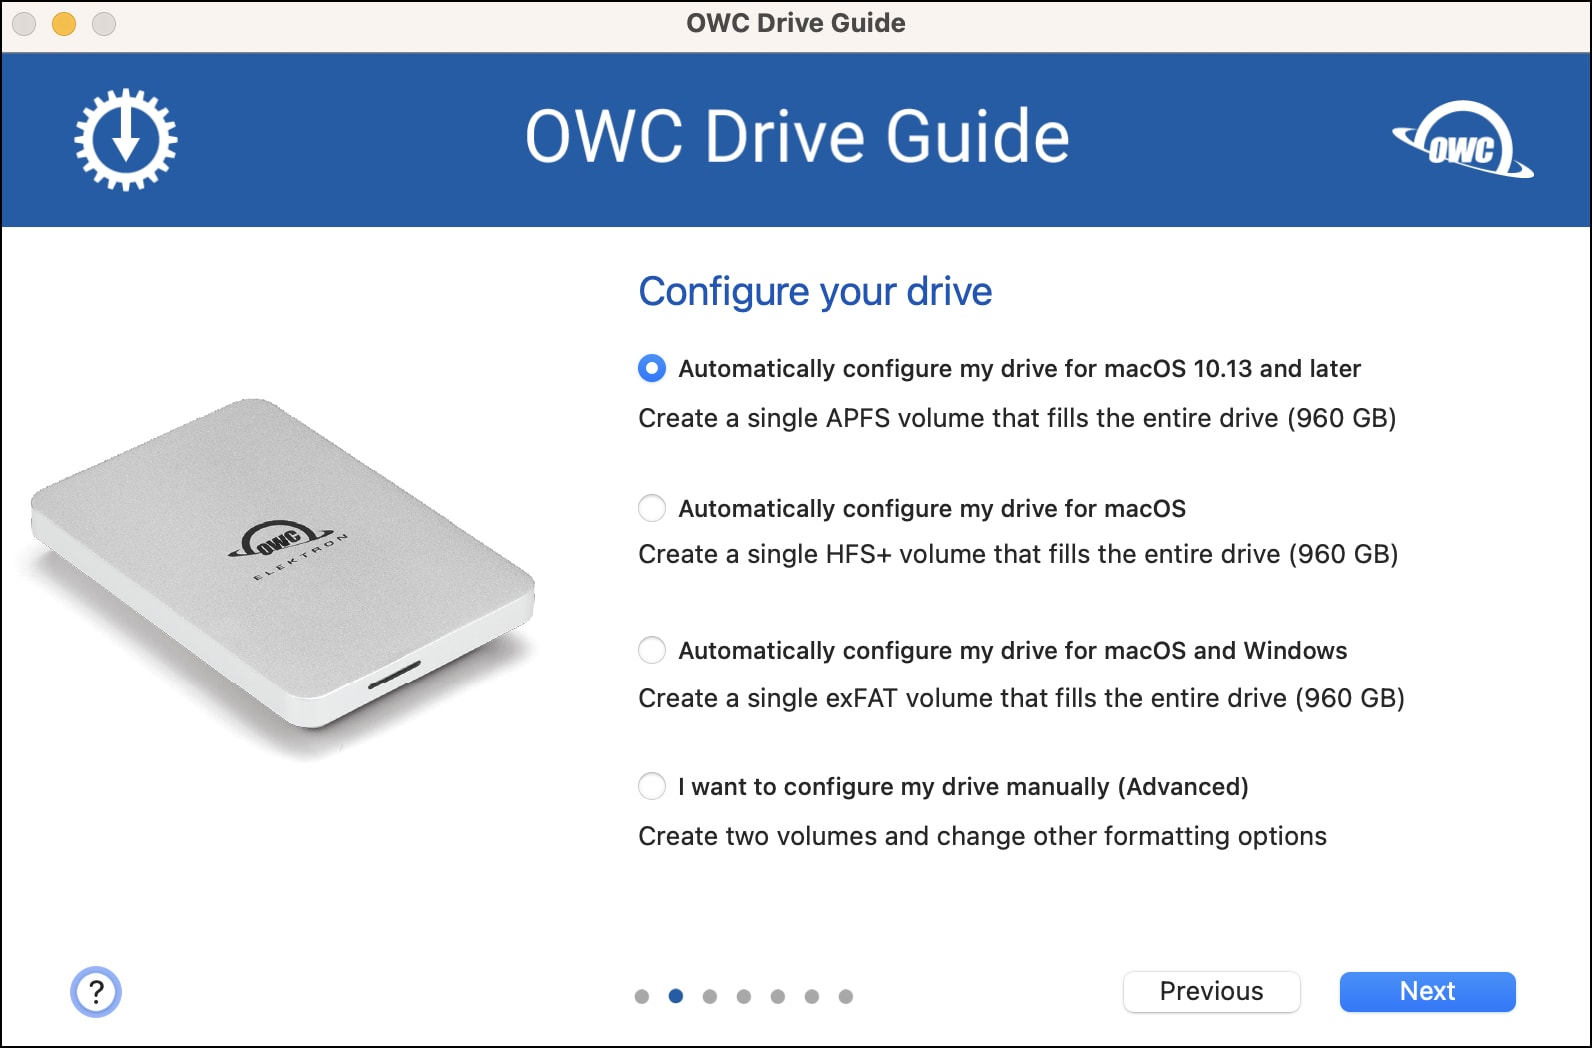
- The configure screen allows you to choose the formatting options that are best suited to your drive (the Mac APFS option is not available for hard drives).
- The ‘Automatic’ options will configure your drive based on the OS type(s) being used.
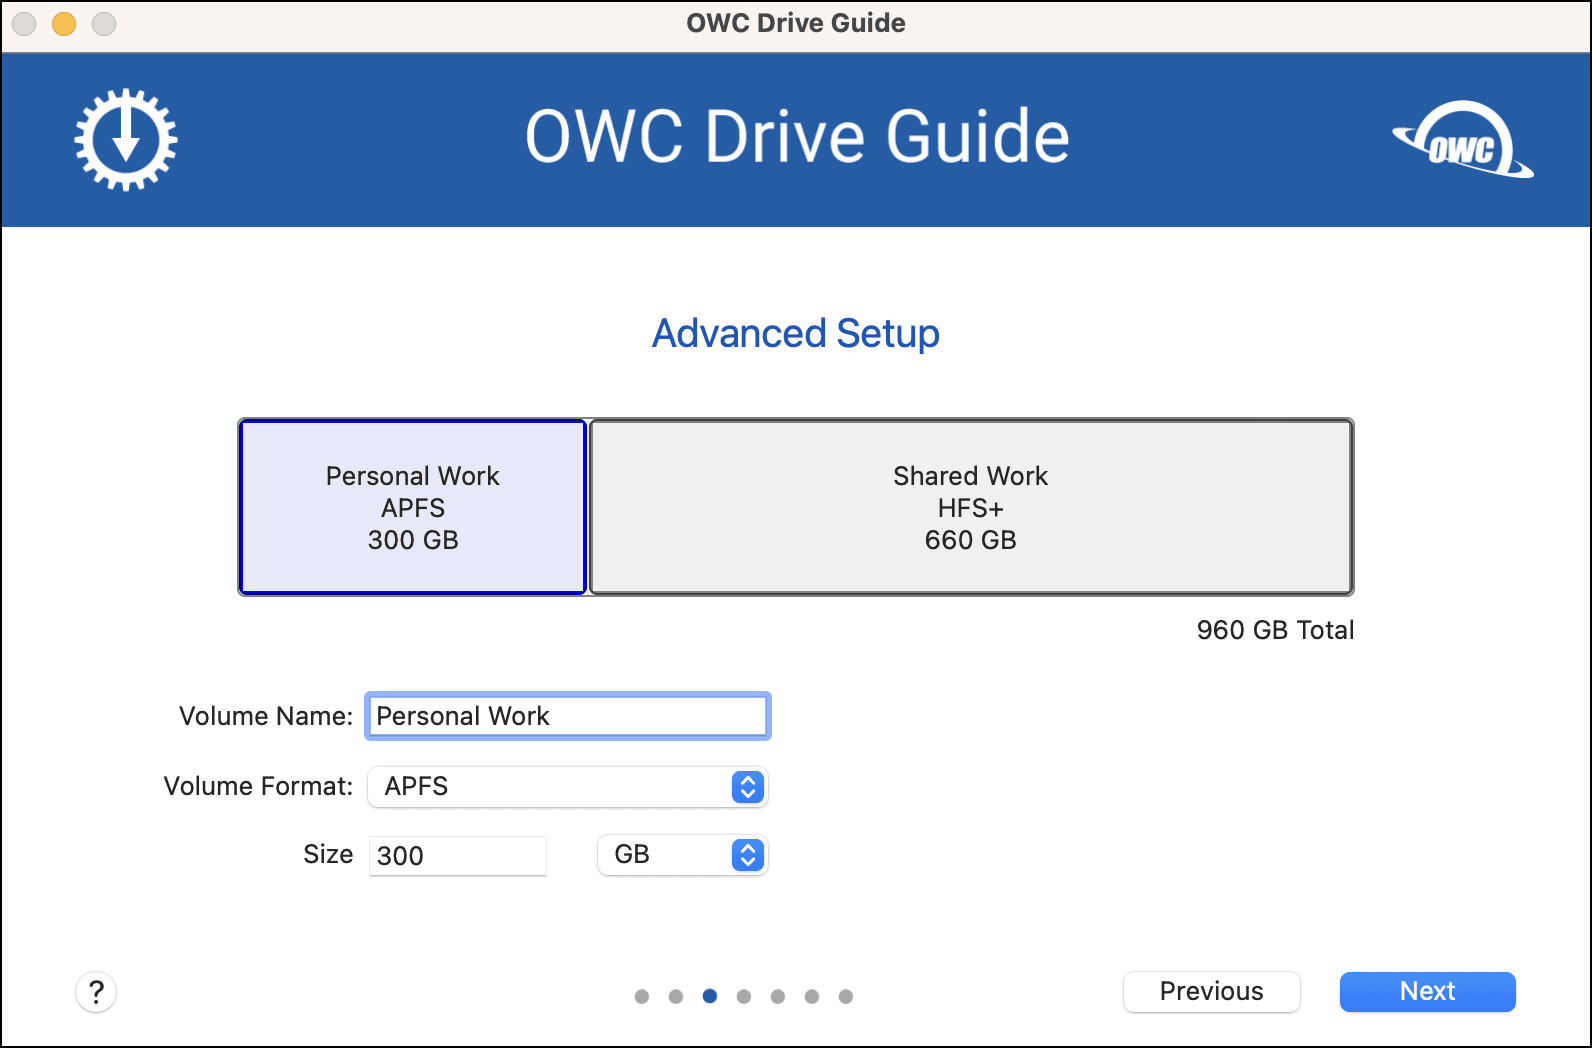
- If you choose ‘Advanced’, you will see the screen shown in the second image below. This option allows you to create two volumes, choose a name and format for each, and the mix of capacities, based on the total capacity of the device.
- Choose the option you want and then click ‘Next’.
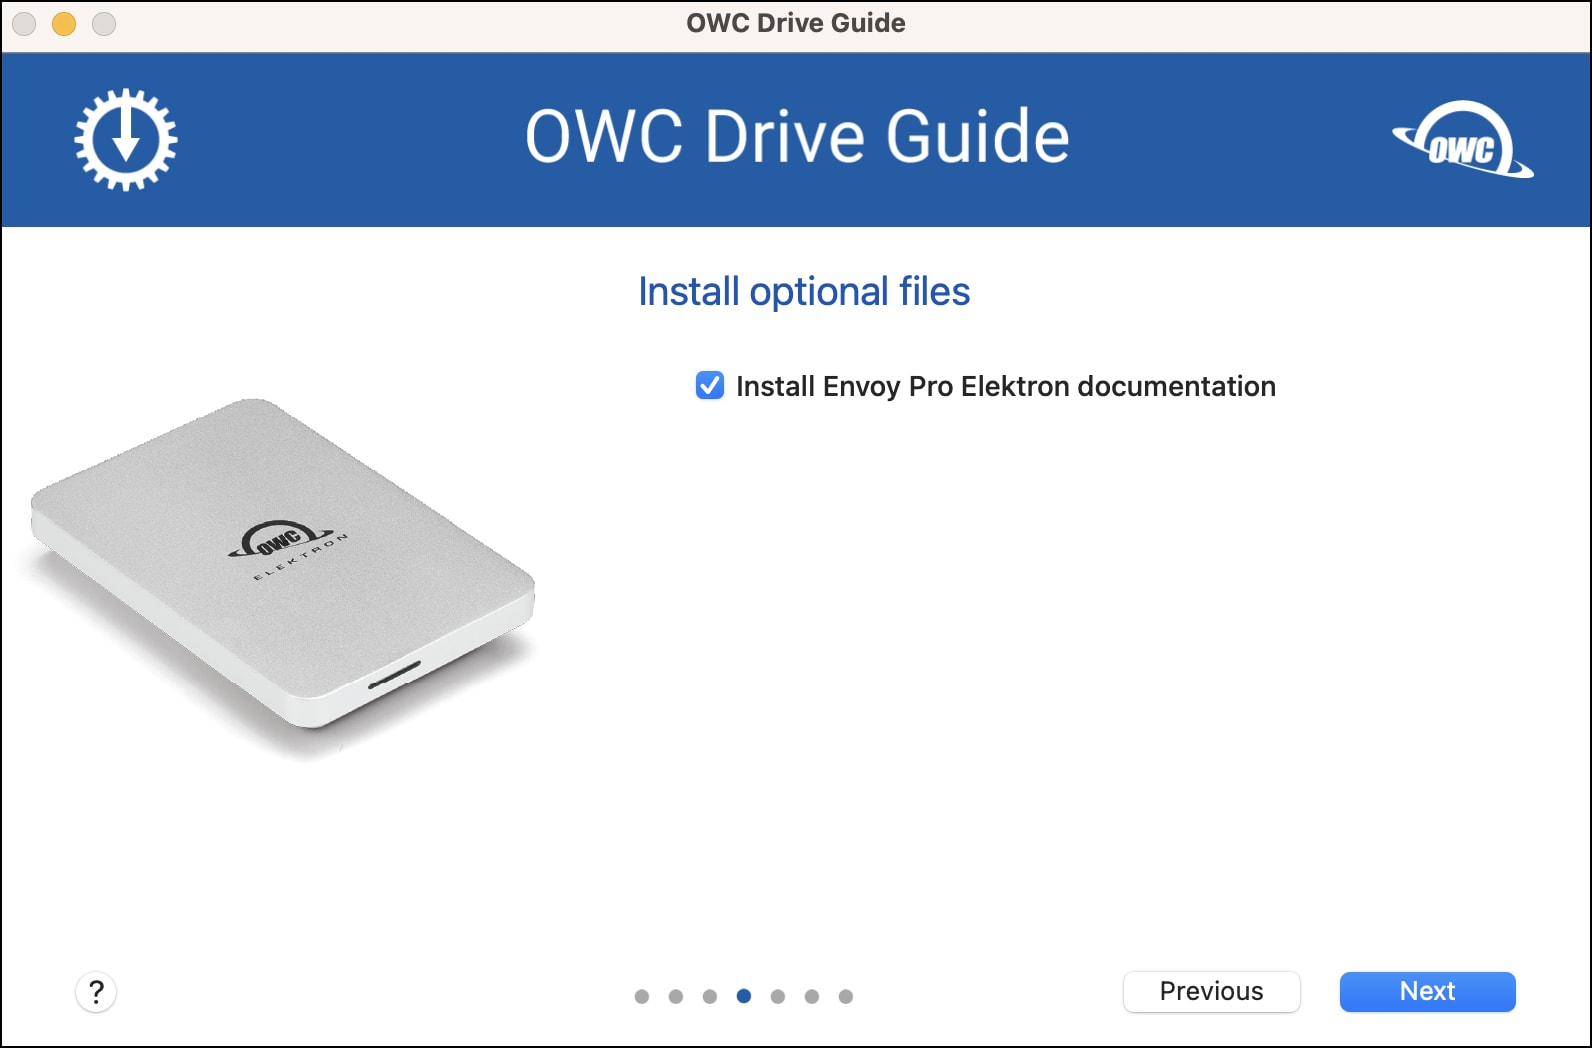
Step 4
- This step provides the option of installing the PDF documentation specific to your drive. When ready, click ‘Next’.
Step 5
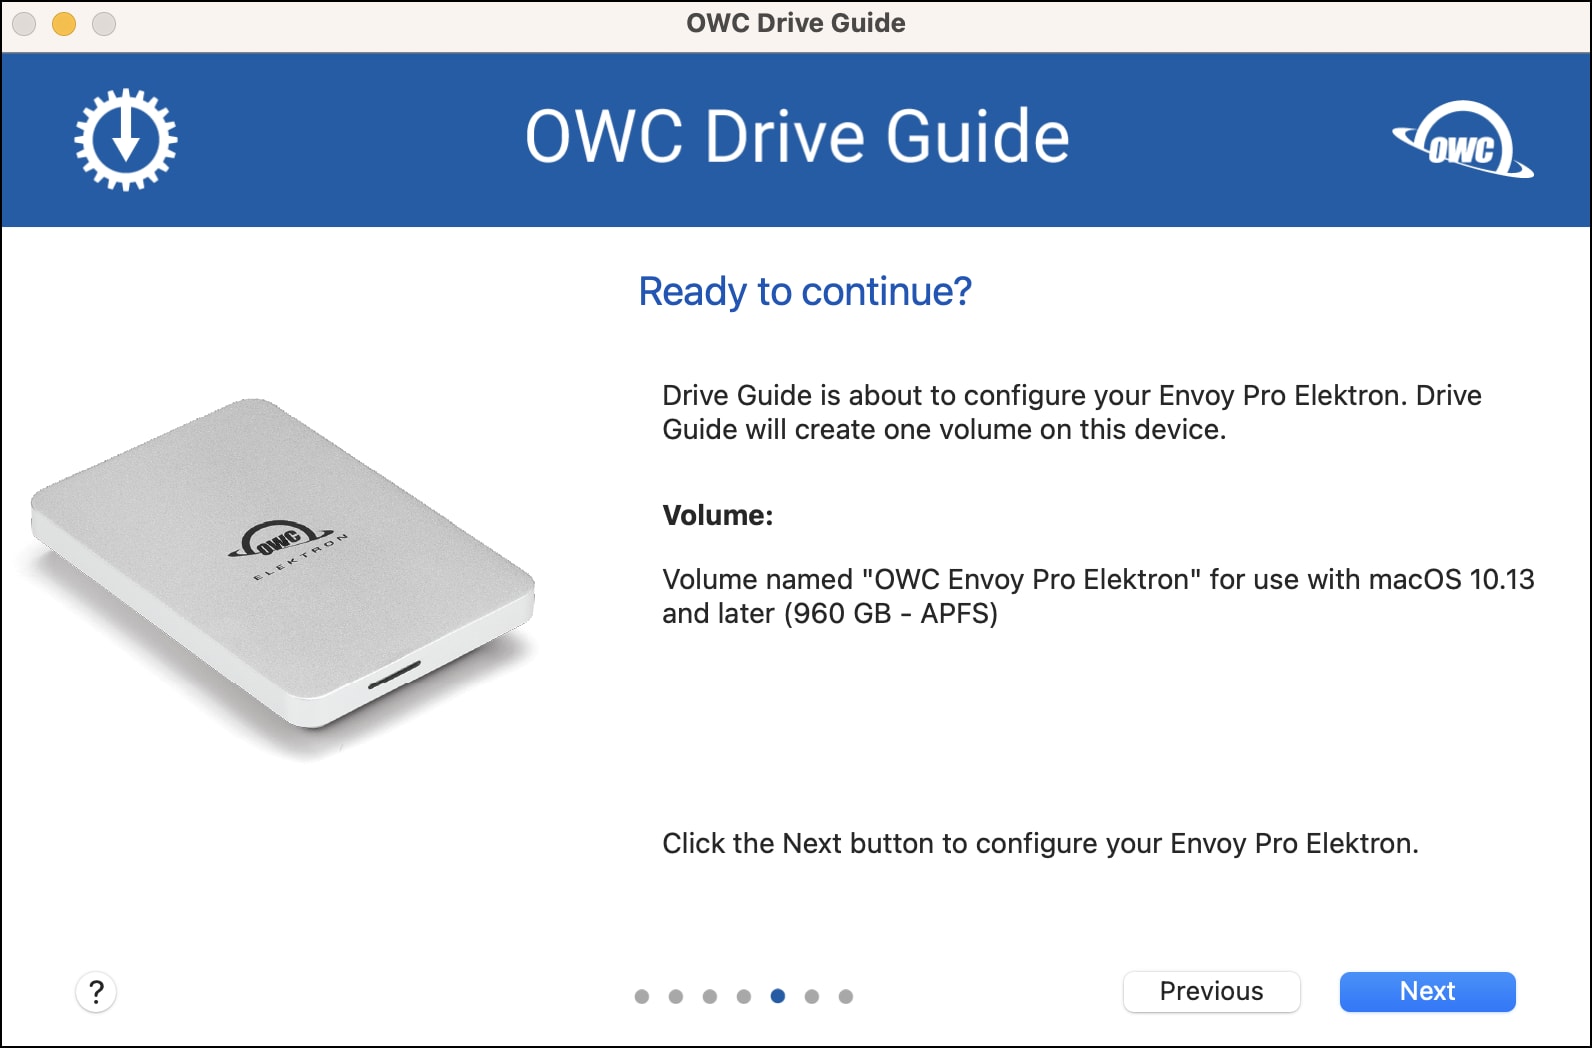
- A confirmation screen will appear, asking you if you are ready to continue. Please review the Volume information, make sure it is what you want, then click ‘Next’.
- If the information is not what you expected (e.g. wrong format or wrong name), click the Previous button on each screen until you are back at Step 3. From there you can make the changes needed and return back to this point, and then to the next step using the ‘Next’ button.
Step 6
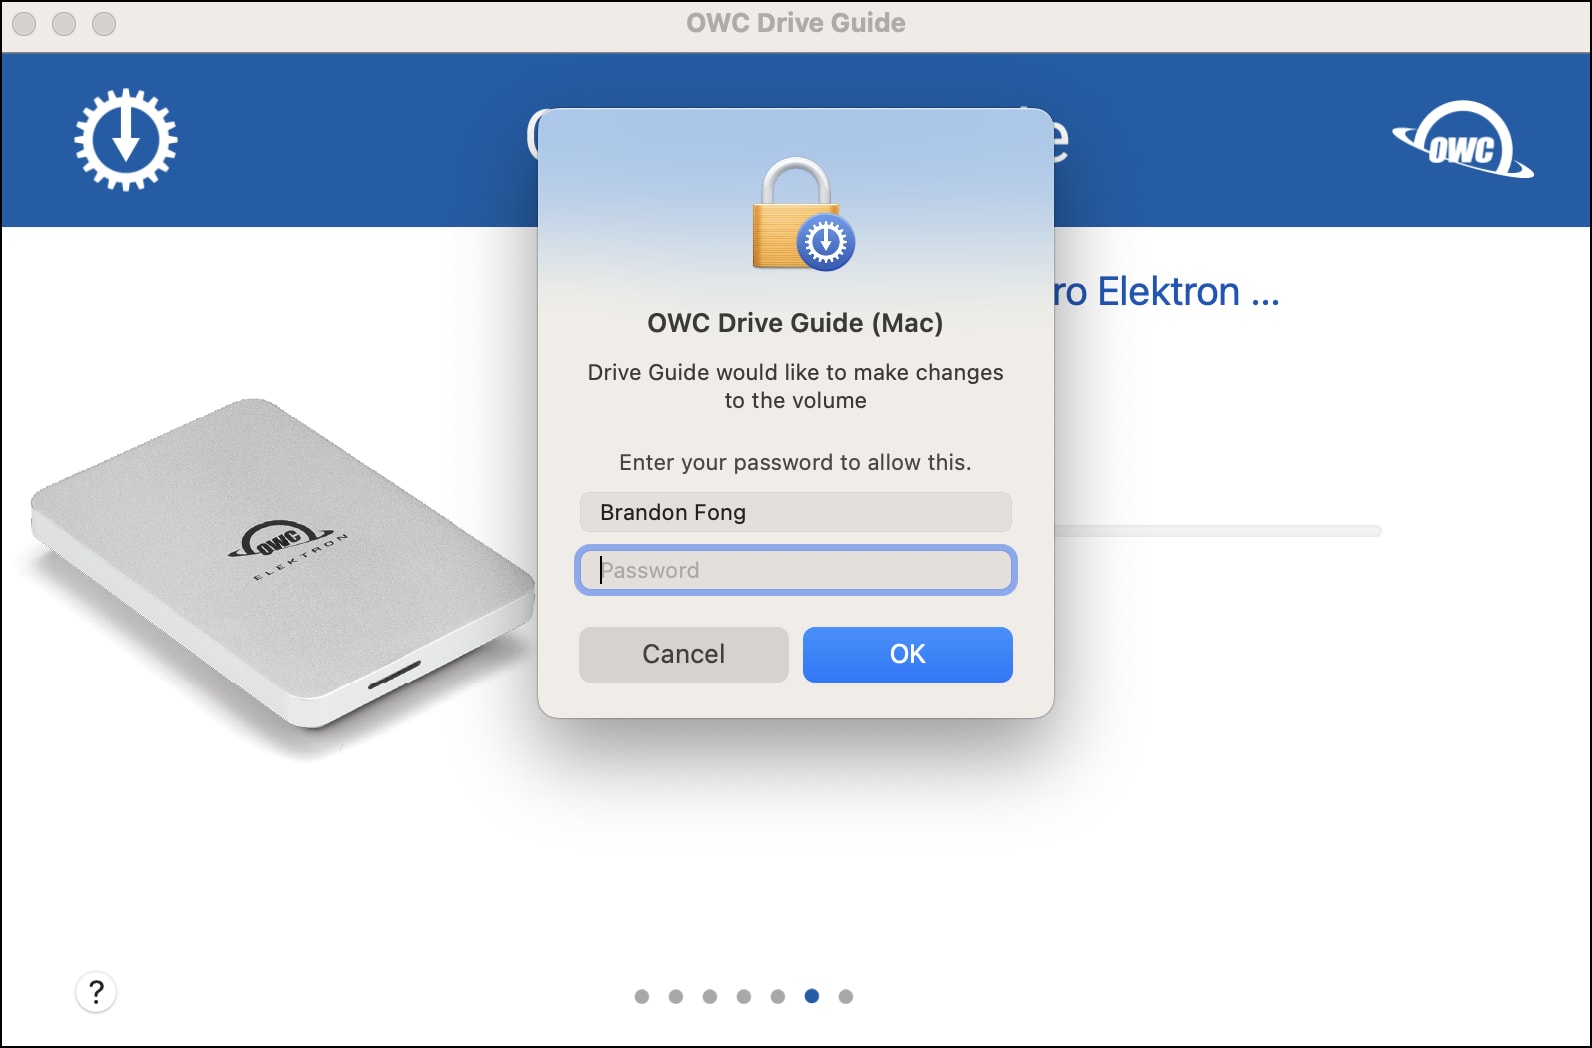
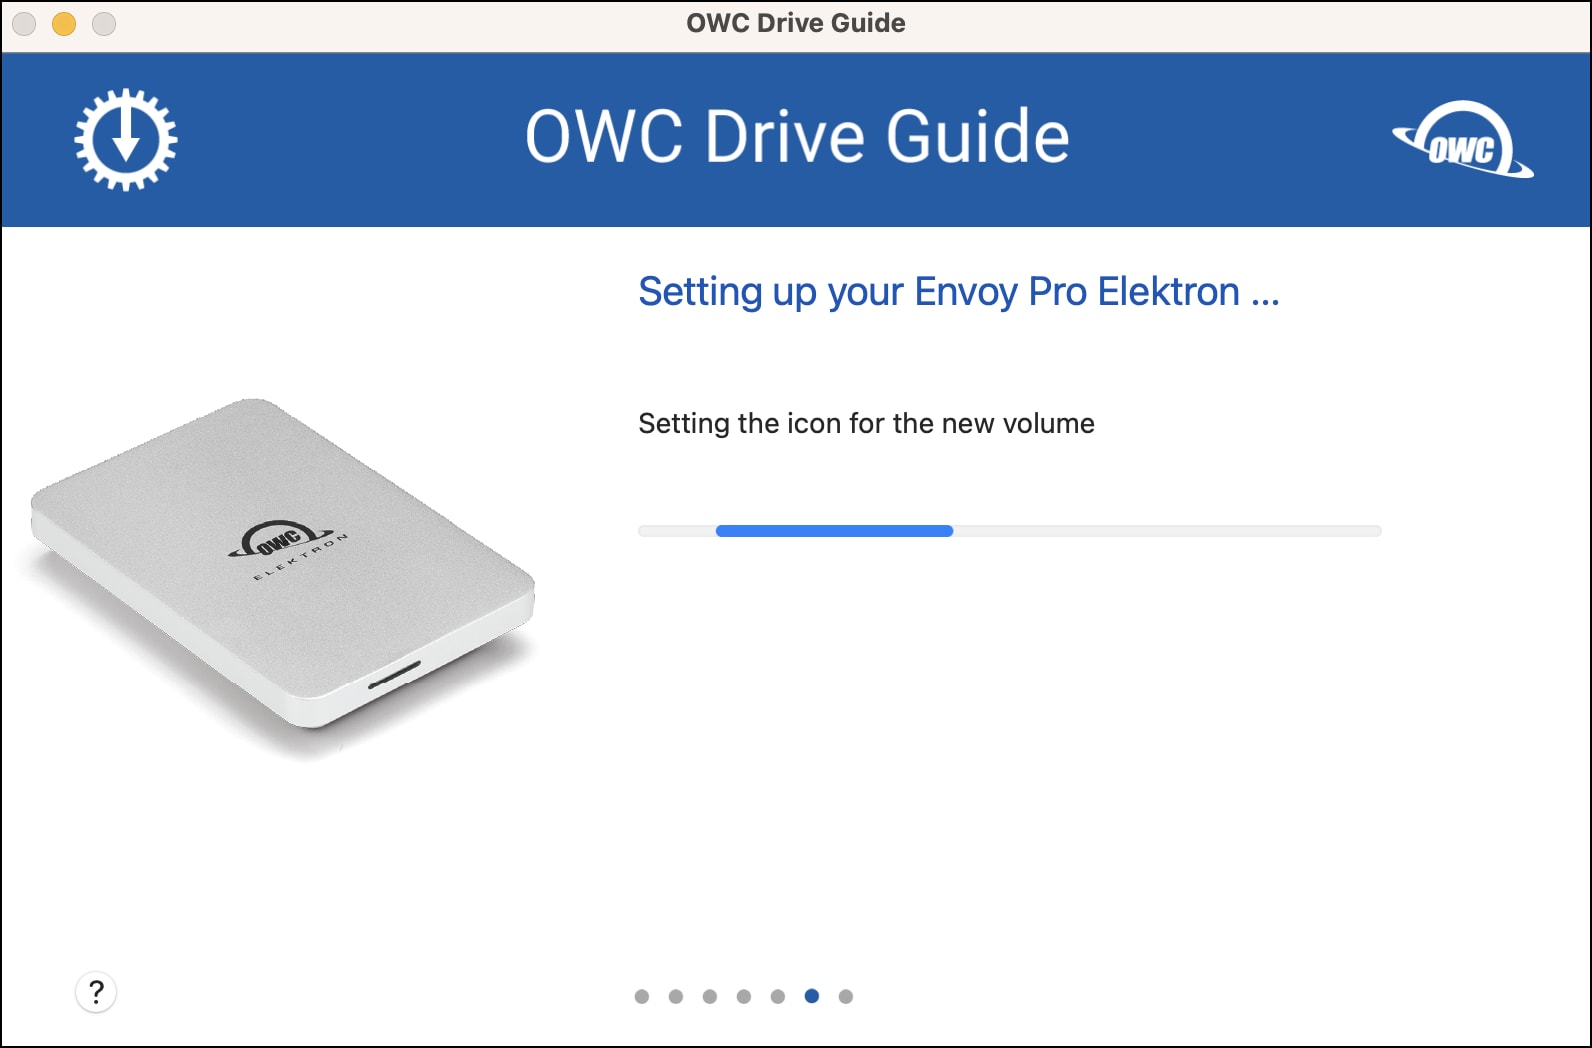
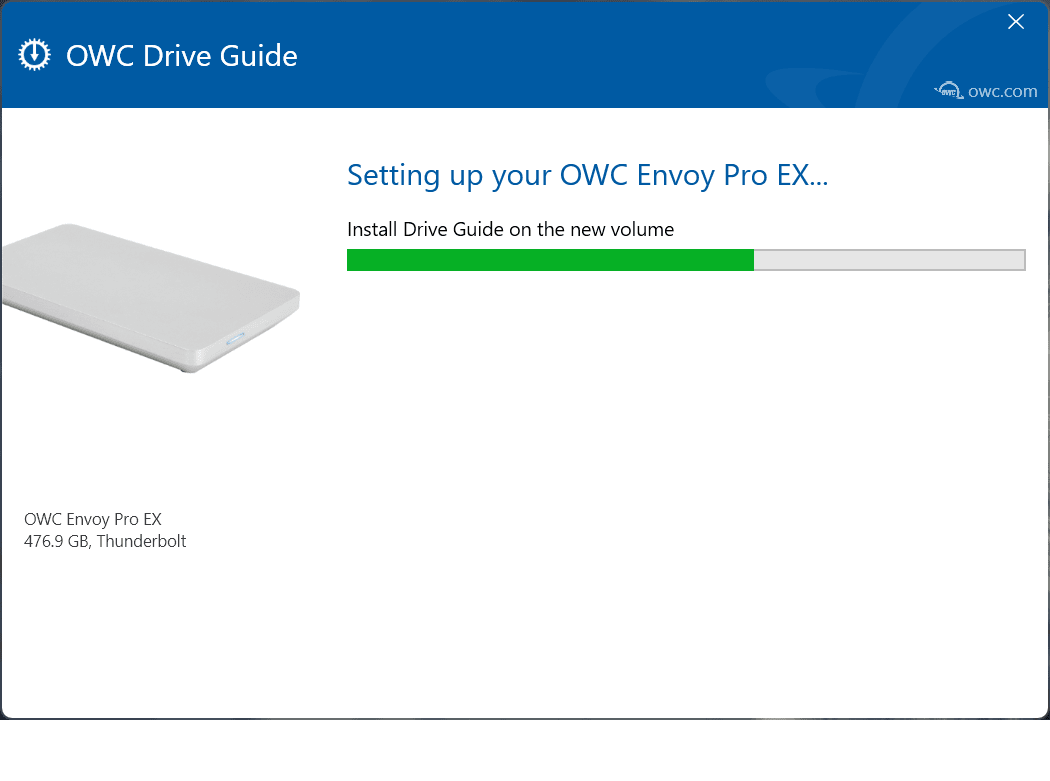
- To start the formatting process you will be asked to provide system credentials, shown in the first image below. Once credentials are provided the progress meter will be displayed.
Step 7
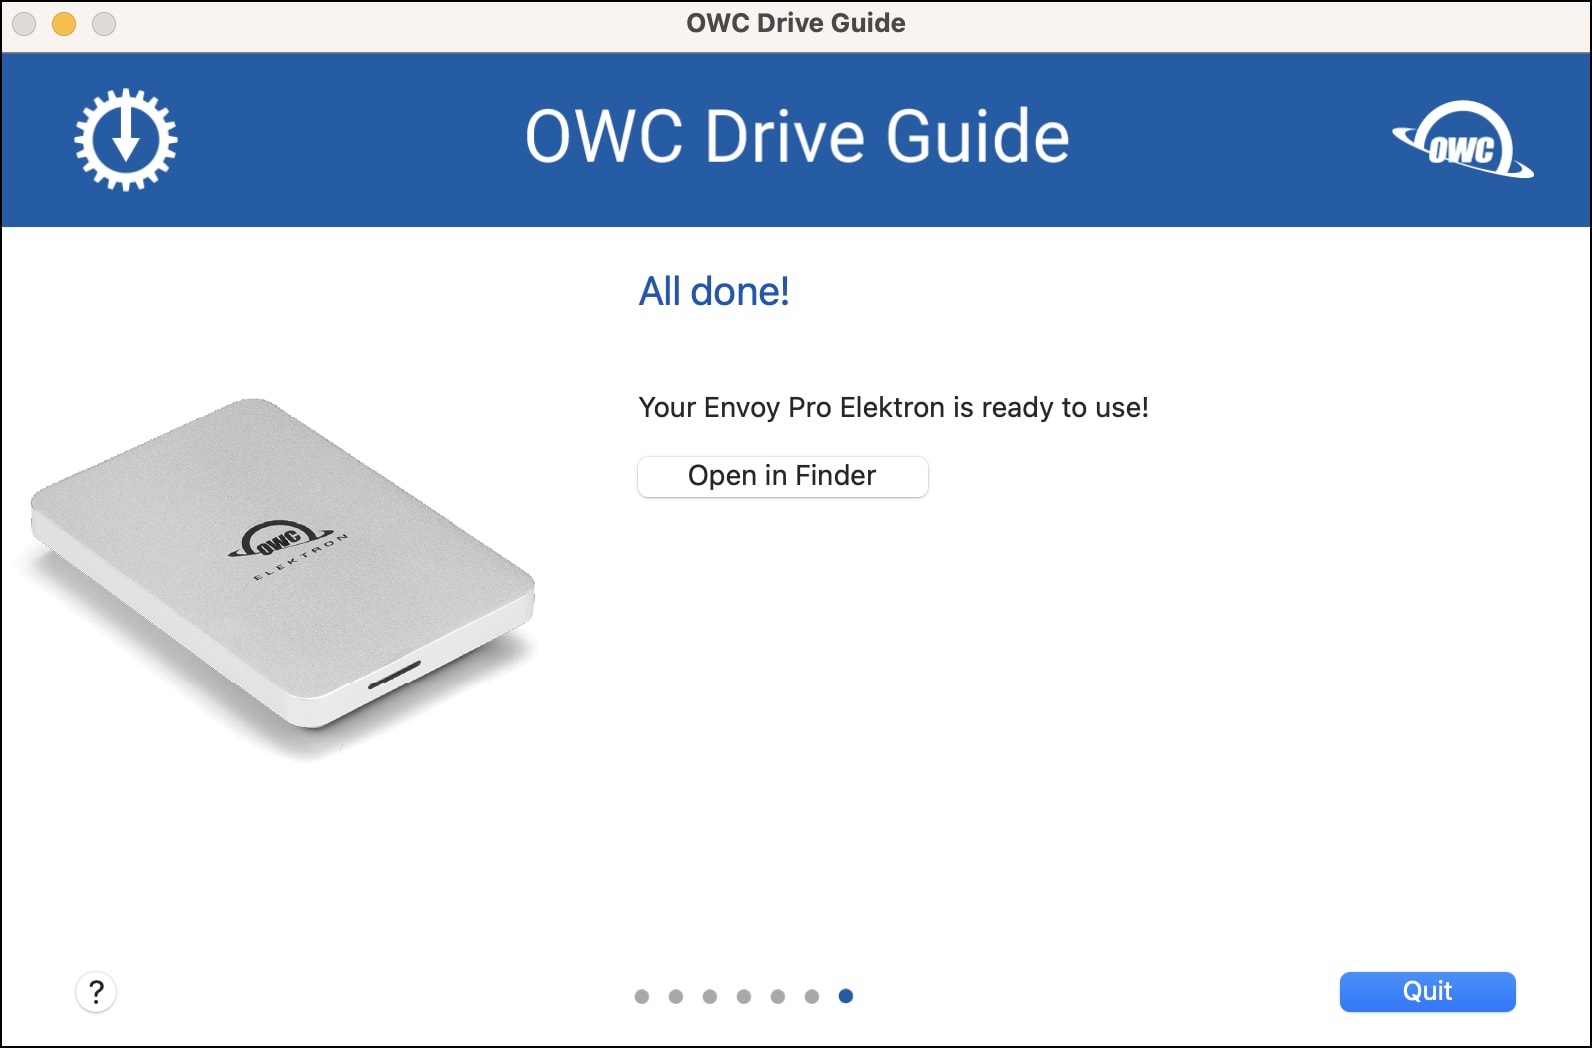
- Once completed a screen is displayed that allows you to wrap up the process and if you want to, open your new volume directly in the Finder or Windows Explorer.
- Click ‘Open…’ or ‘Quit’ to finish the Drive Guide process.
Windows
Step 1
- Connect your new drive to a power source if needed (consult the online user guide if you are unsure), then connect the drive to a PC using the included data cable.
- Download and open OWC Drive Guide for Windows.
- OWC Drive Guide for Windows will launch and a license agreement window will appear. Accept the terms of the agreement and click "Continue".
Step 2
- OWC Drive Guide for Windows will scan and identify the connected OWC drive and prompt to format the disk. Select "Start" to begin the formatting process.
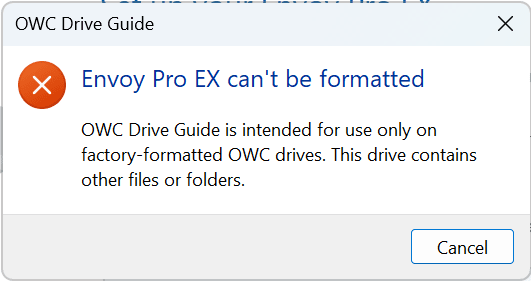
NOTE: OWC Drive guide is intended for use only on factory-formatted OWC drives. Drives that contain files and folders can not be formatted using OWC Drive Guide for Windows. A notification window will appear if connecting a non factory-formatted OWC drive.

Step 3
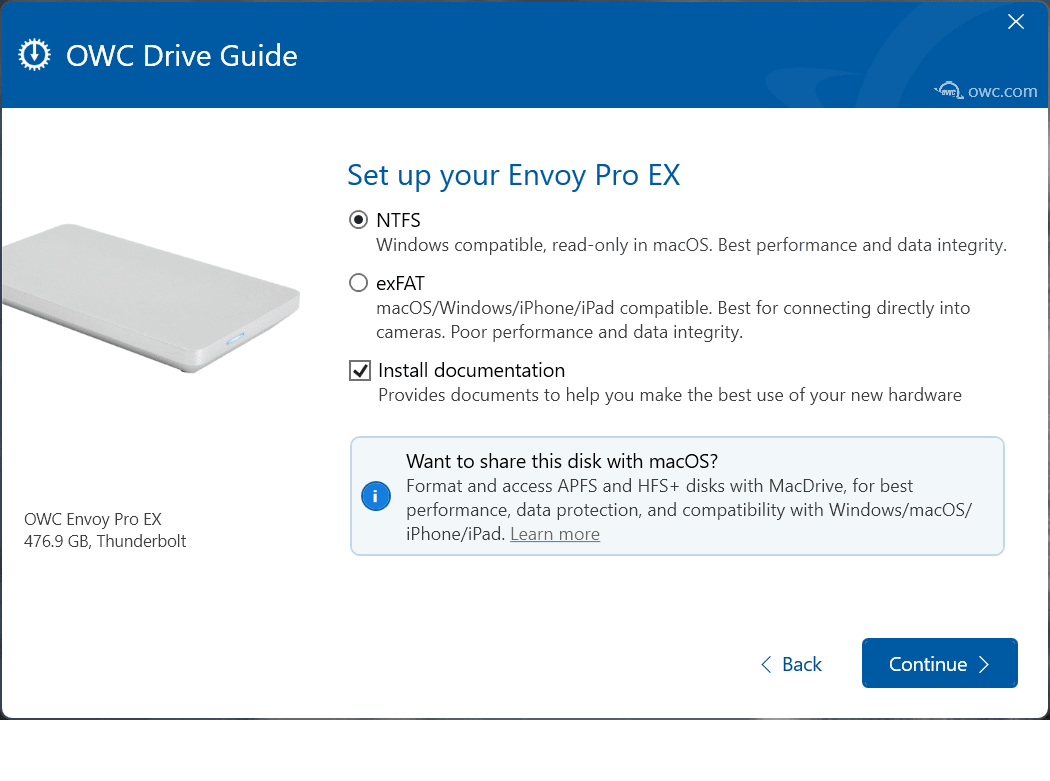
- Selected the desired Windows format NTFS | exFAT. NTFS is Windows compatible and read-only in macOS. exFAT is macOS/Windows/iPhone/iPad compatible. Click "Continue" once the desired format is chosen.
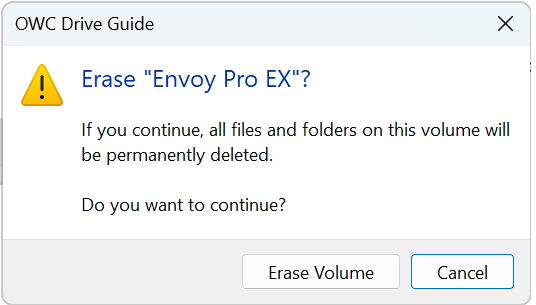
Step 4
- A window will appear notifying that any data on the drive will be erased during the formatting process. Click "Erase Volume" to proceed with formatting the OWC drive. The OWC drive is ready for use once formatting is complete.
© 2023 Other World Computing, Inc. OWC and the OWC logo are trademarks of New Concepts Development Corporation, registered in the U.S. and/or other countries. Mac, macOS, and OS X are trademarks of Apple Inc. registered in the U.S. and other countries. Microsoft and Windows are either registered trademarks or trademarks of Microsoft Corporation in the United States and/or other countries. Other marks may be the trademark or registered trademark property of their owners.
Free Support Chat
Our free award-winning support team is ready to answer all of your questions. Technical support is available Monday - Friday: 9AM - 6PM. Customer Support & Sales is available Monday - Friday: 9AM - 6PM. Support is unavailable on U.S. Federal holidays. Talk to a human today.