OWC Mercury Elite-AL SATA Dual Drive Serial ATA Solution
Assembly Manual & User Guide
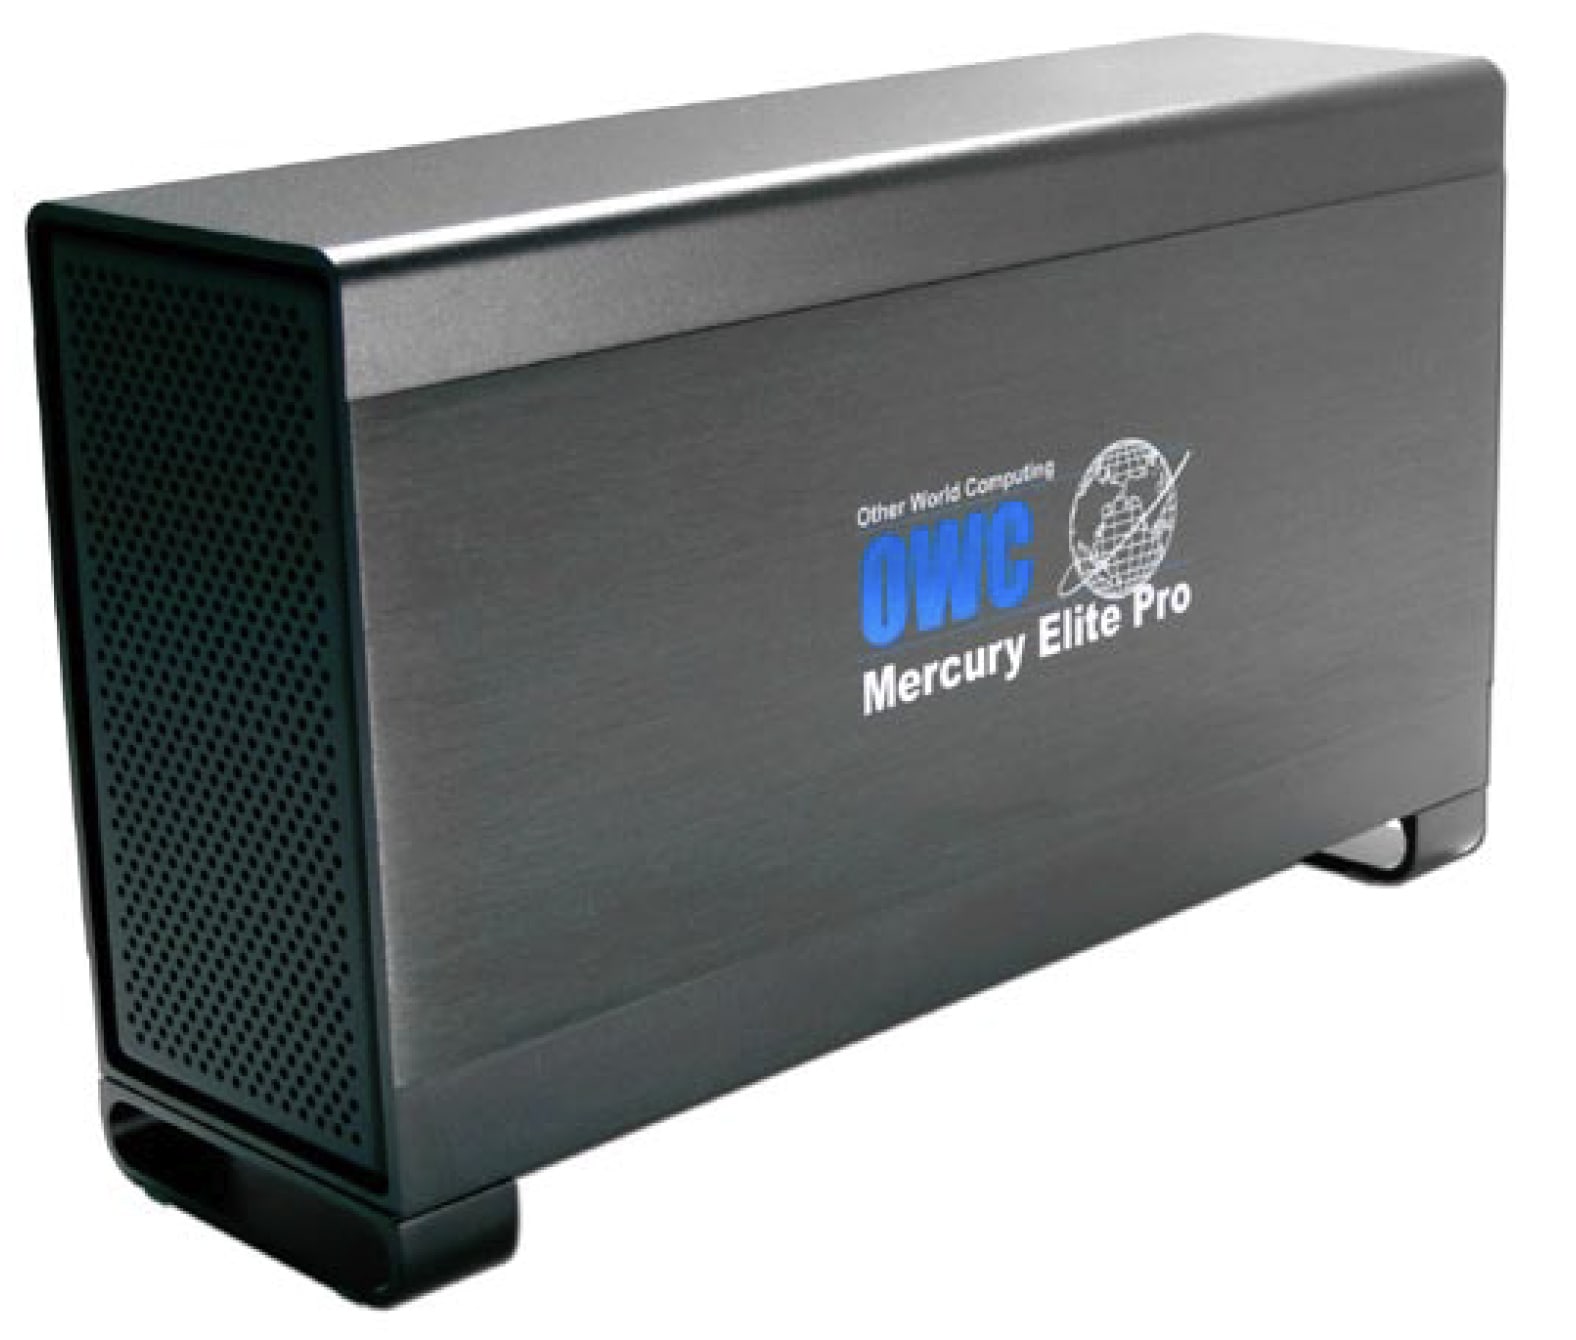
We thank you for your purchase of your new OWC Mercury Elite-AL SATA Dual Drive Solution and are happy to provide you with one of the newest, fastest, and easiest ways to add mass storage to your computer!
For more information about Serial ATA, please visit our tech center at: http://eshop.macsales.com/tech_center/index.cfm
Before starting, if your new OWC Mercury Elite-AL Hard Drive is delivered under extreme hot or cold conditions, you should allow the contents of the package to reach room temperature prior to use.
Treat your new OWC Mercury Elite-AL product just like you do your computer - keep it dry, out of direct sunlight, clean, and avoid static electricity.
Installation / Setup Instructions
Software installation:
Mac OS X 10.2 or later: Drivers not required. Proceed to hardware installation. -Earlier versions of Apple operating systems not supported
Windows XP: Drivers not required. Proceed to hardware installation. -Earlier versions of Windows operating systems not supported
Hardware Installation:
If you have not installed your Serial ATA PCI Controller Card (not included), please do so now following the instructions from the manufacturer.
Be certain that the Serial ATA PCI Controller card in your computer has eSATA ports, or if you have a SATA-1 PCI Controller card, that you have obtained converter cables (not included) to use your SATA-1 PCI Controller card with the OWC Mercury Elite-AL SATA Dual Drive Serial ATA Solution.

To install your hard drive mechanisms into the OWC Mercury Elite Pro dual bay SATA enclosure, remove it from the box it was shipped in and the protective plastic wrap.

Lay the unit on it’s side and remove the bottom screws. Either 2 or 4 will be inserted from the factory.
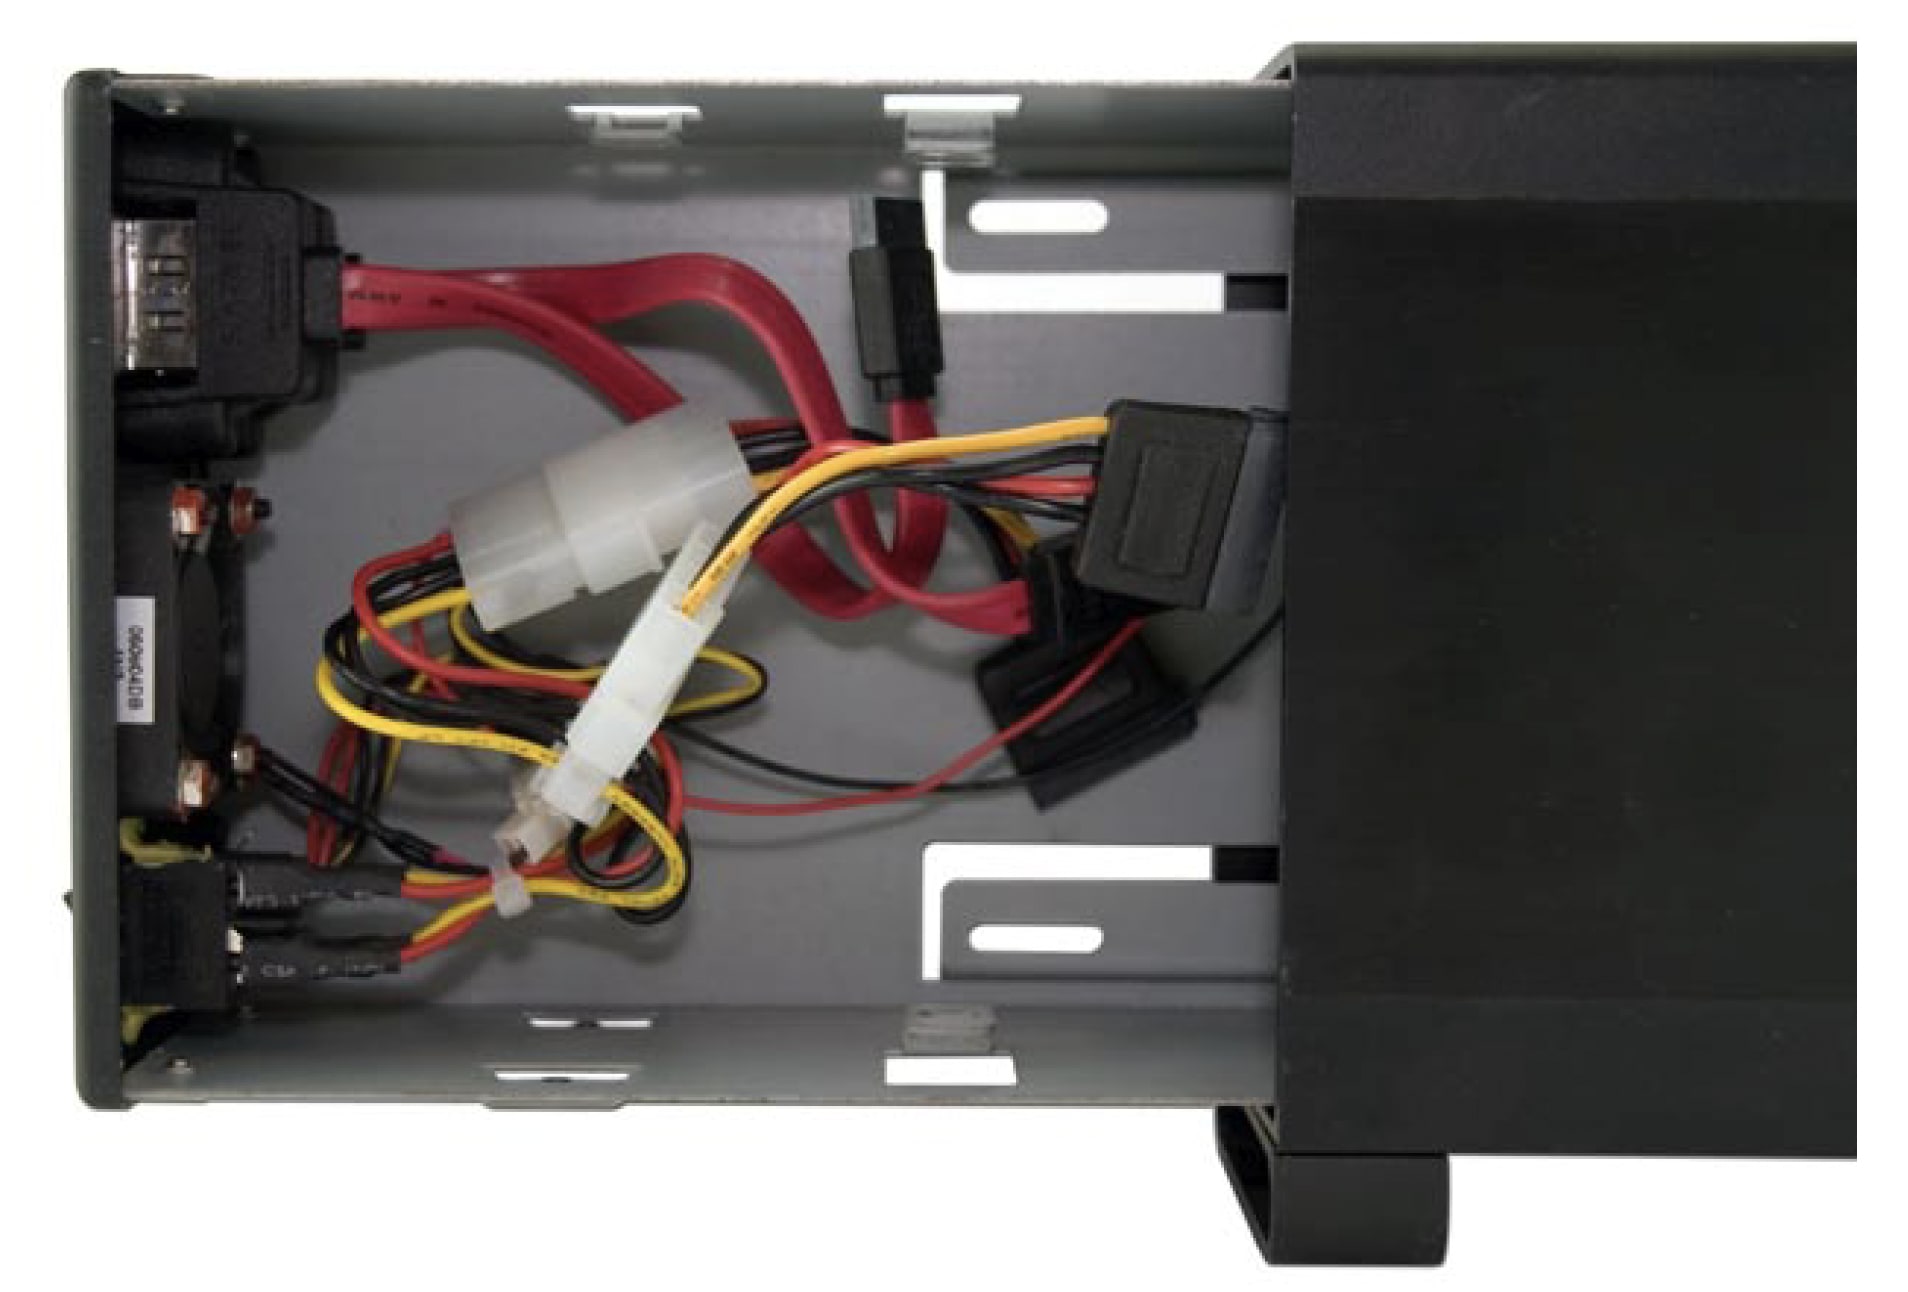
Slide the chassis out of the frame. Note - in this picture, you can see that there are power adapters on the hard drive power plugs. Yours may be included in separate bags, and depending on the drive mechanisms you choose to install, you may or may not need them.
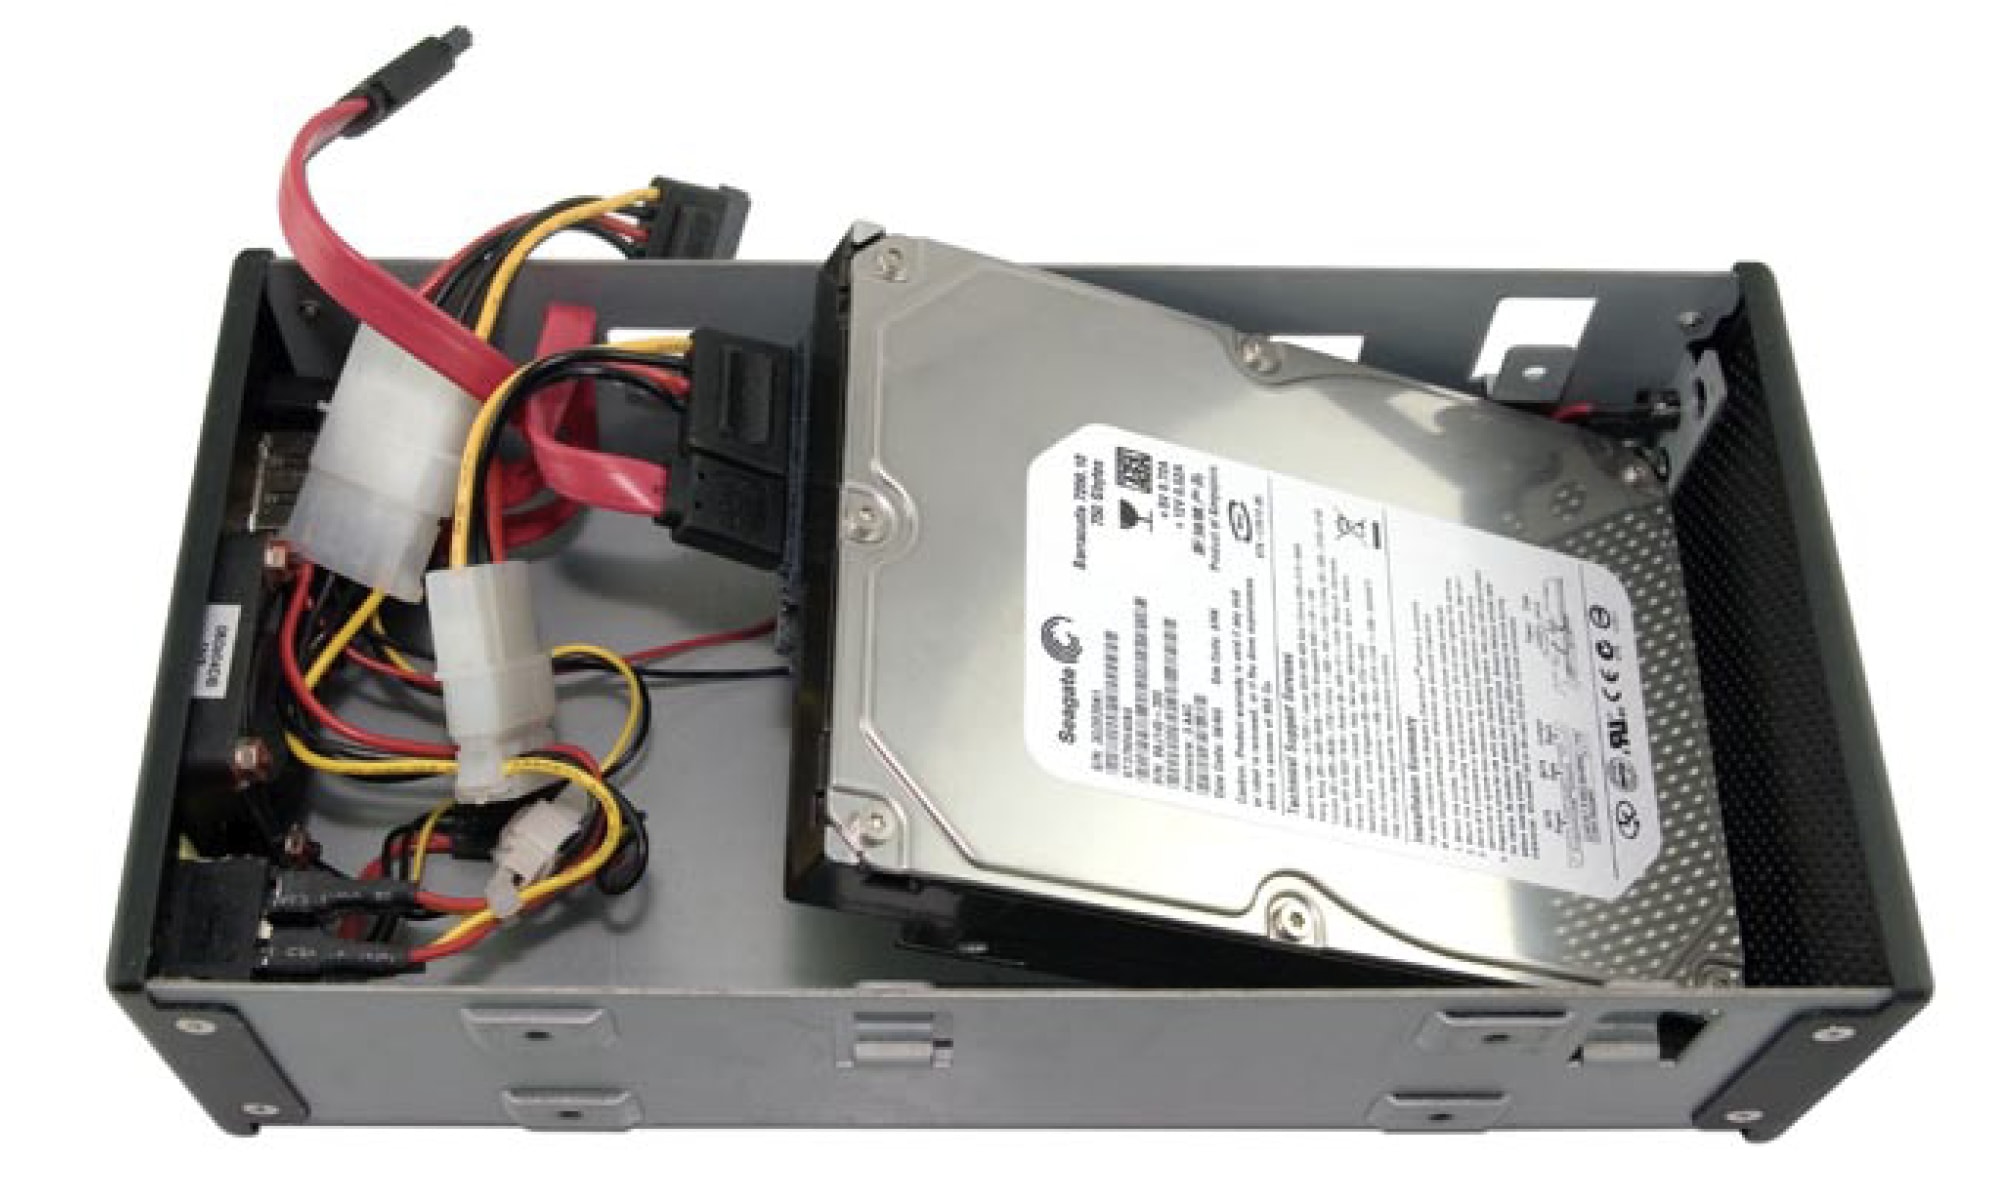
Insert the first drive mechanism into the chassis as shown. Make very sure that you do not pinch or cut the LED wire underneath the drive mechanism; you may need to use a screwdriver to route it around the drive mounting bracket. Attach the Serial ATA power and Serial ATA Data cable to the back of the hard drive as shown.
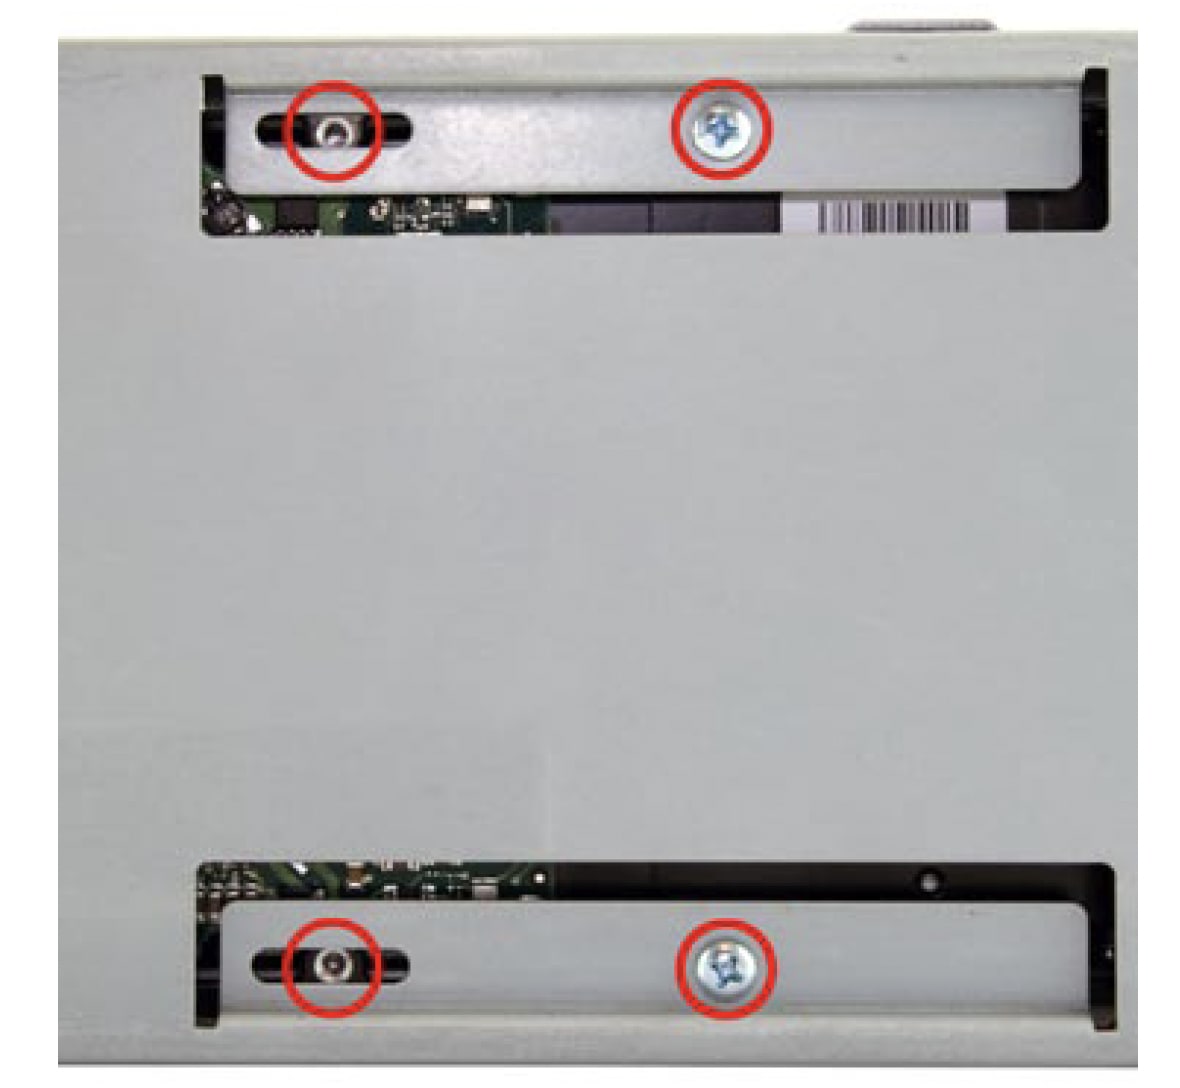
Lower the hard drive down into the chassis fully - and once again making certain you have not pinched any wires, line up the side screw holes and attach your mounting screws through the chassis and into the drive as shown. There are 4 to install, make sure they are all snug.
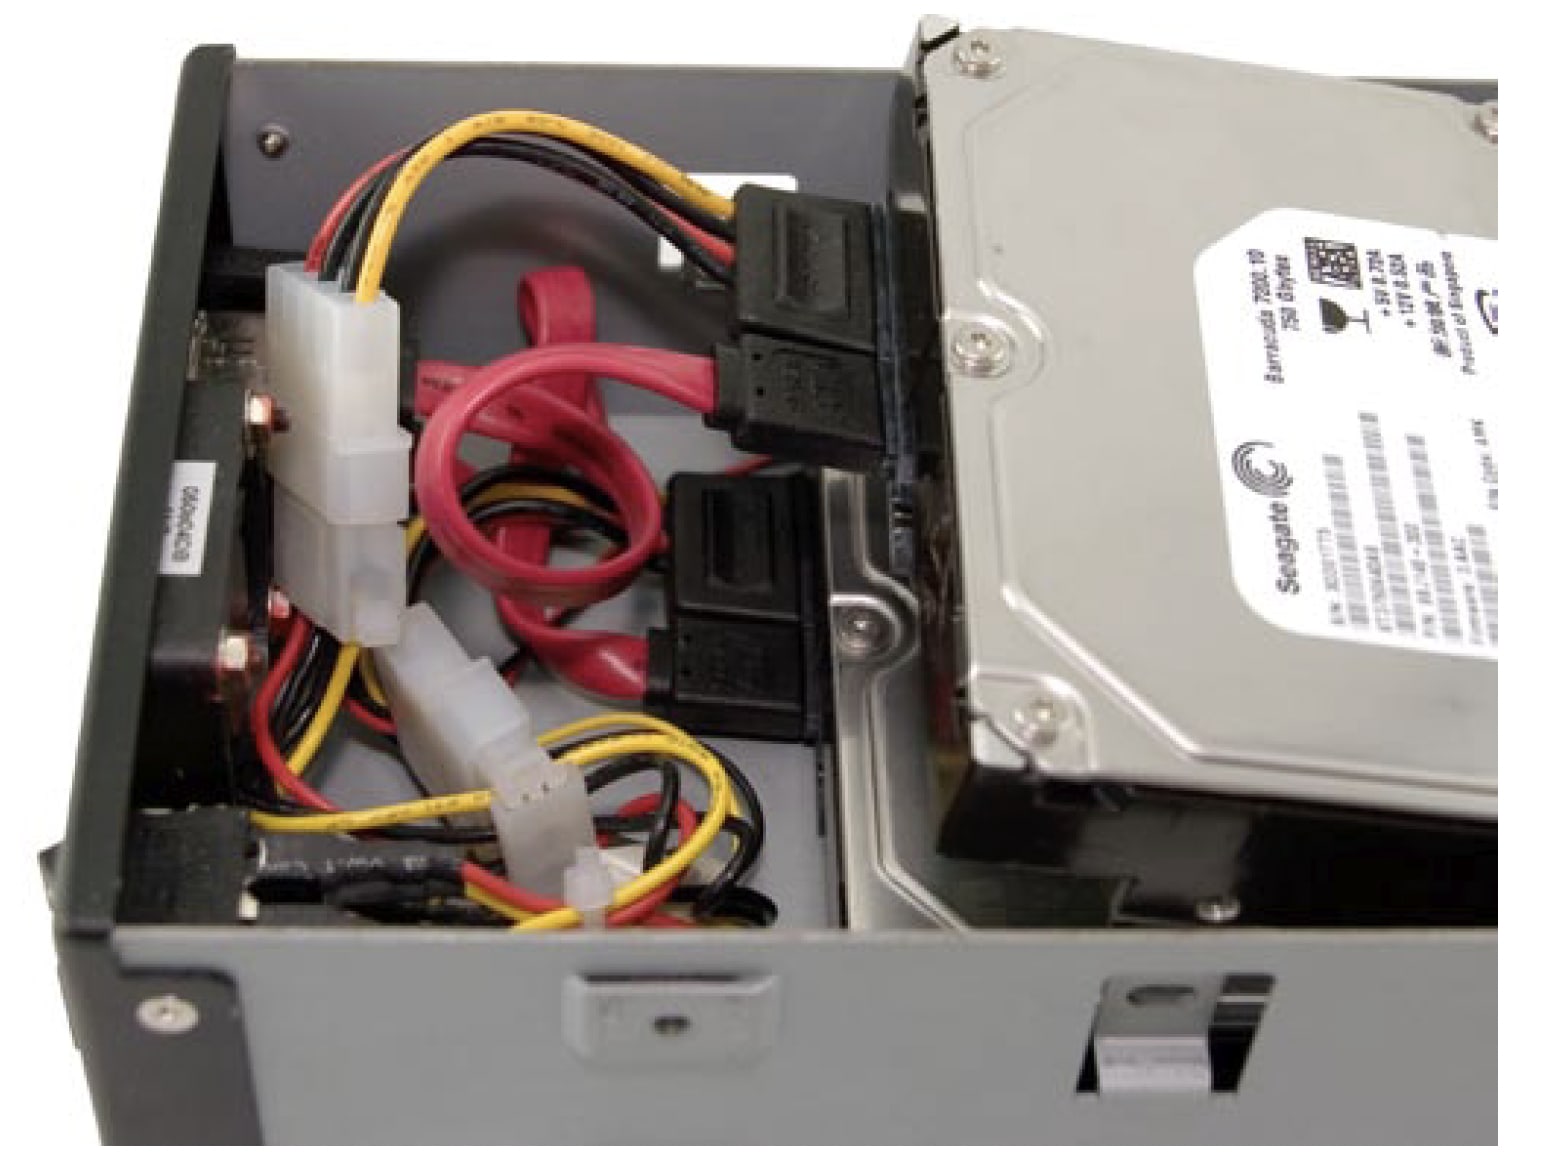
Repeat the procedure for the top hard drive, again, making sure you have not pinched any wires. Attach the power and data cables, and lower the drive completely into the chassis top drive bay.
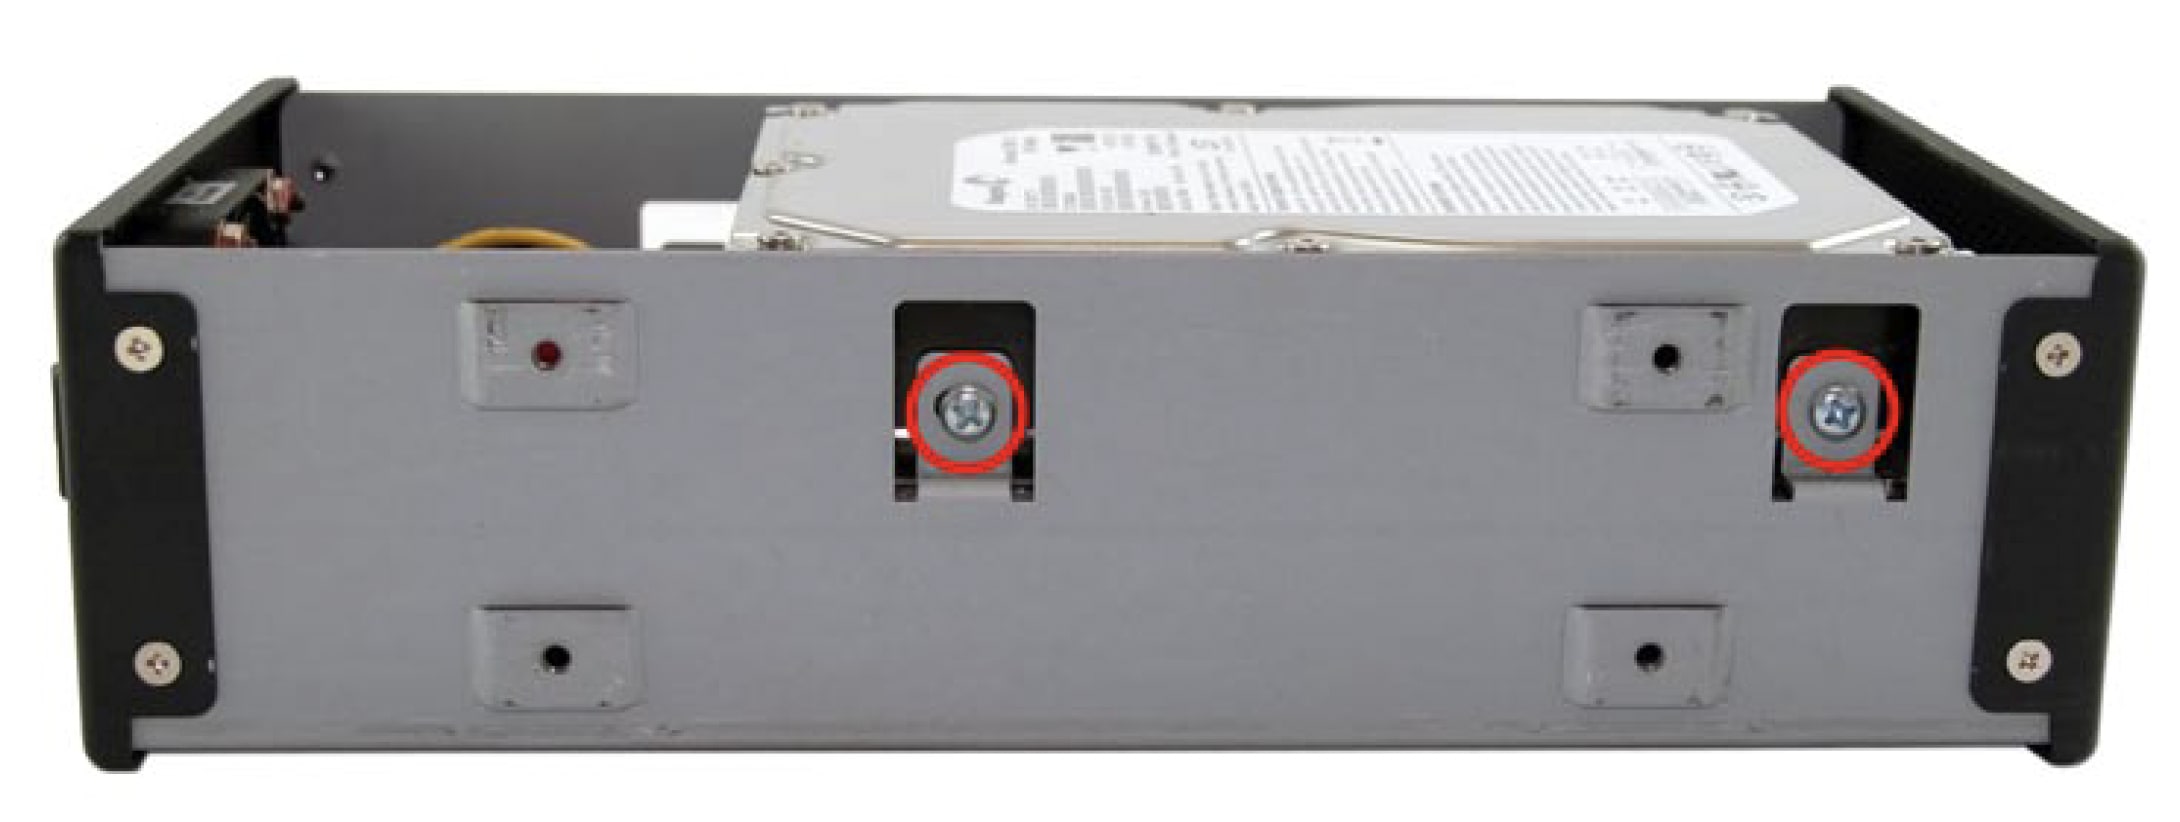
Attach your other 4 drive mounting screws to the top drive through the chassis on the top and bottom screw holes, as shown. Firmly tighten these screws as well.
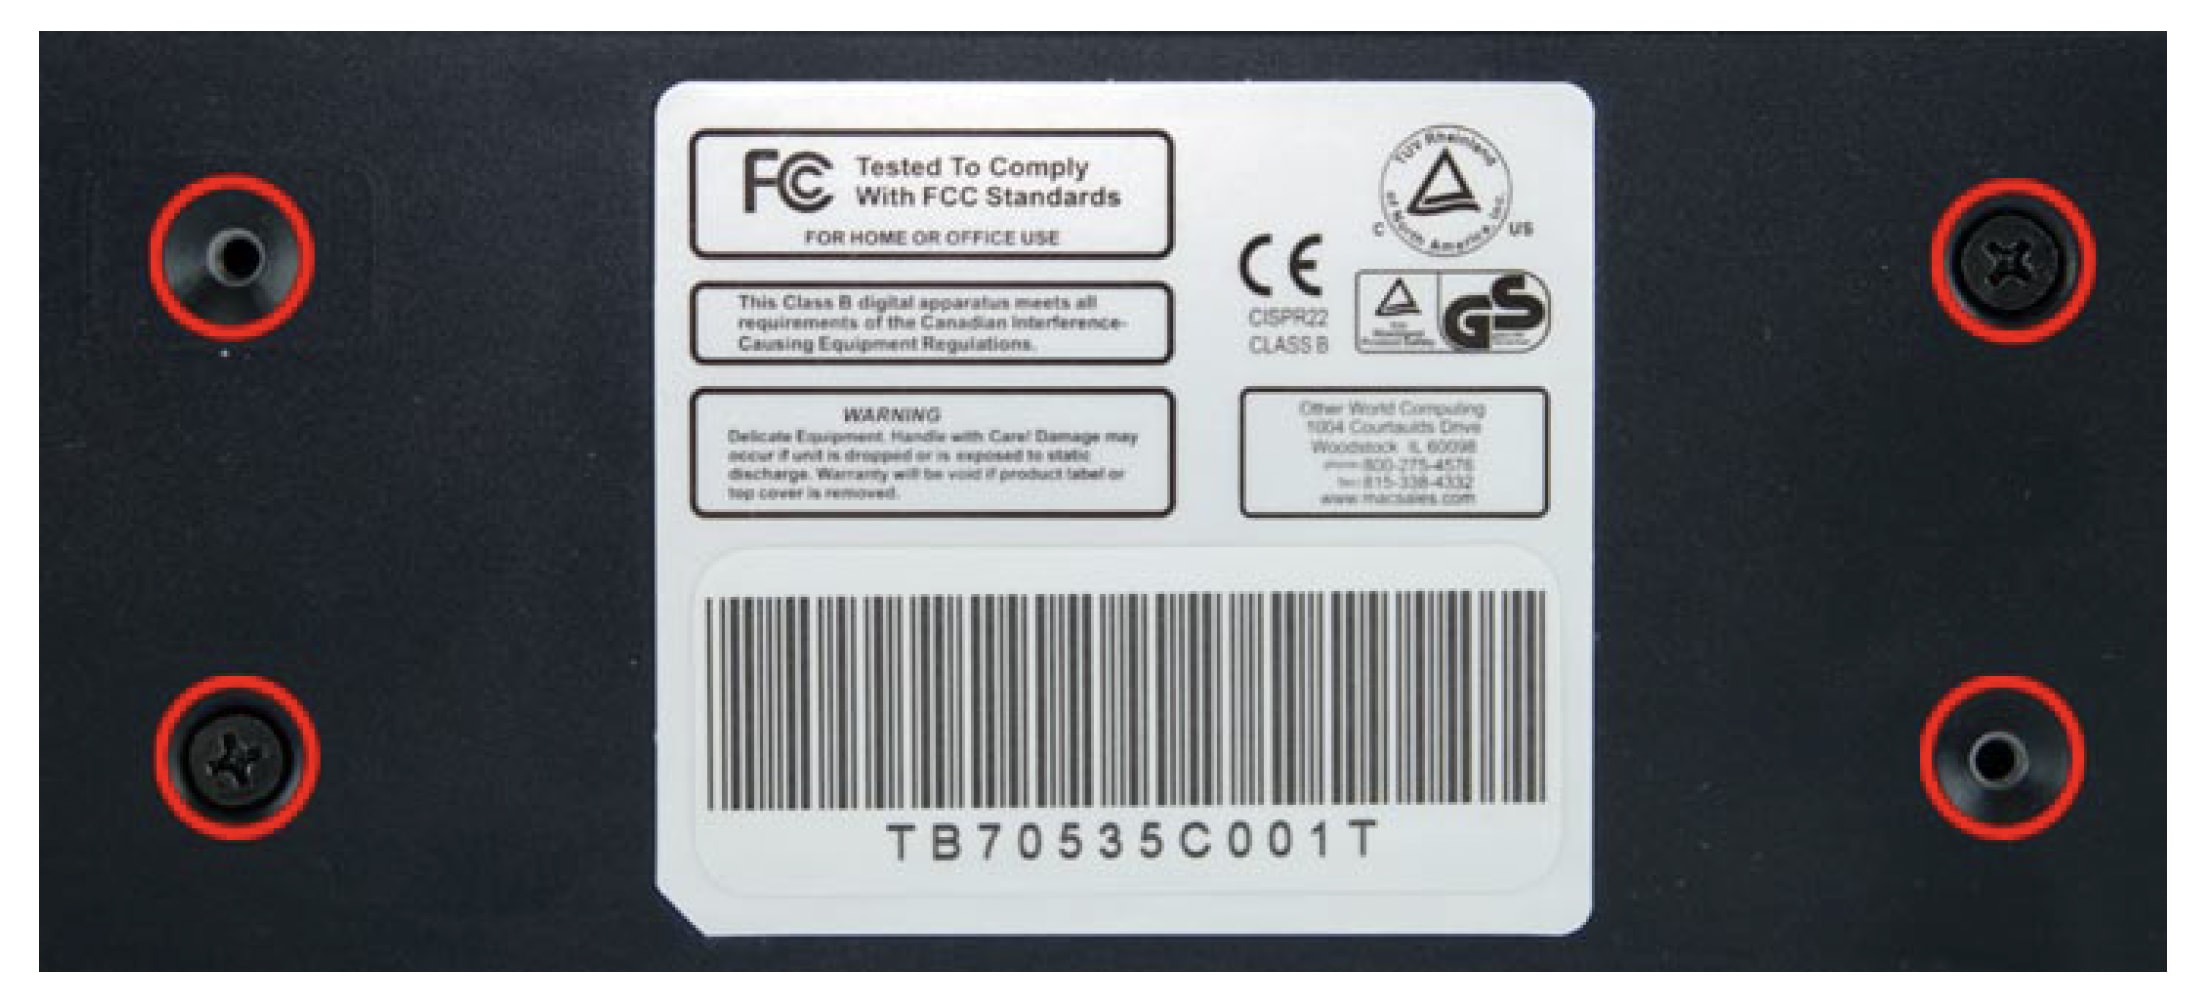
Once you have the drives fully installed, slide the chassis back onto the enclosure frame, and line up the bottom holes. Using the included screws, attach the chassis to the frame firmly.
Unpack your new OWC Mercury Elite-AL SATA Dual Drive Serial ATA Solution and examine it’s contents.
Contents include:
- External Enclosure
- Power Transformer
- Power Cable
- (2) eSATA Cables
- (2) Legacy SATA Power Cables (Not required, and not in all boxes)
- Screw Packet
- Software CD
Familiarize yourself with the connections on the back of the OWC Mercury Elite-AL SATA Dual Drive Solution - you will need to use these to connect your new drive to your computer.
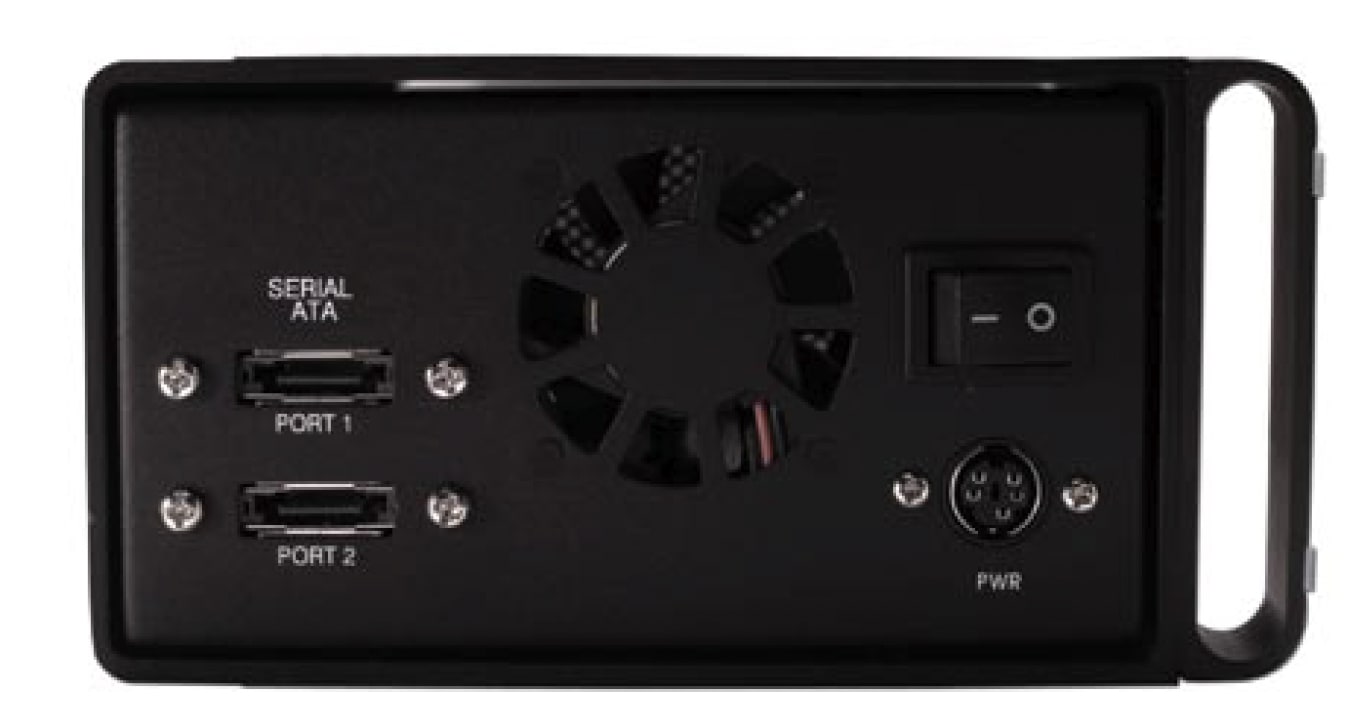
Hardware Installation:
Installation of the hardware is simple on any platform.
- Plug the AC power cord into the wall and to the DC transformer.
- Plug the DC power cord into the OWC Mercury Elite-AL SATA
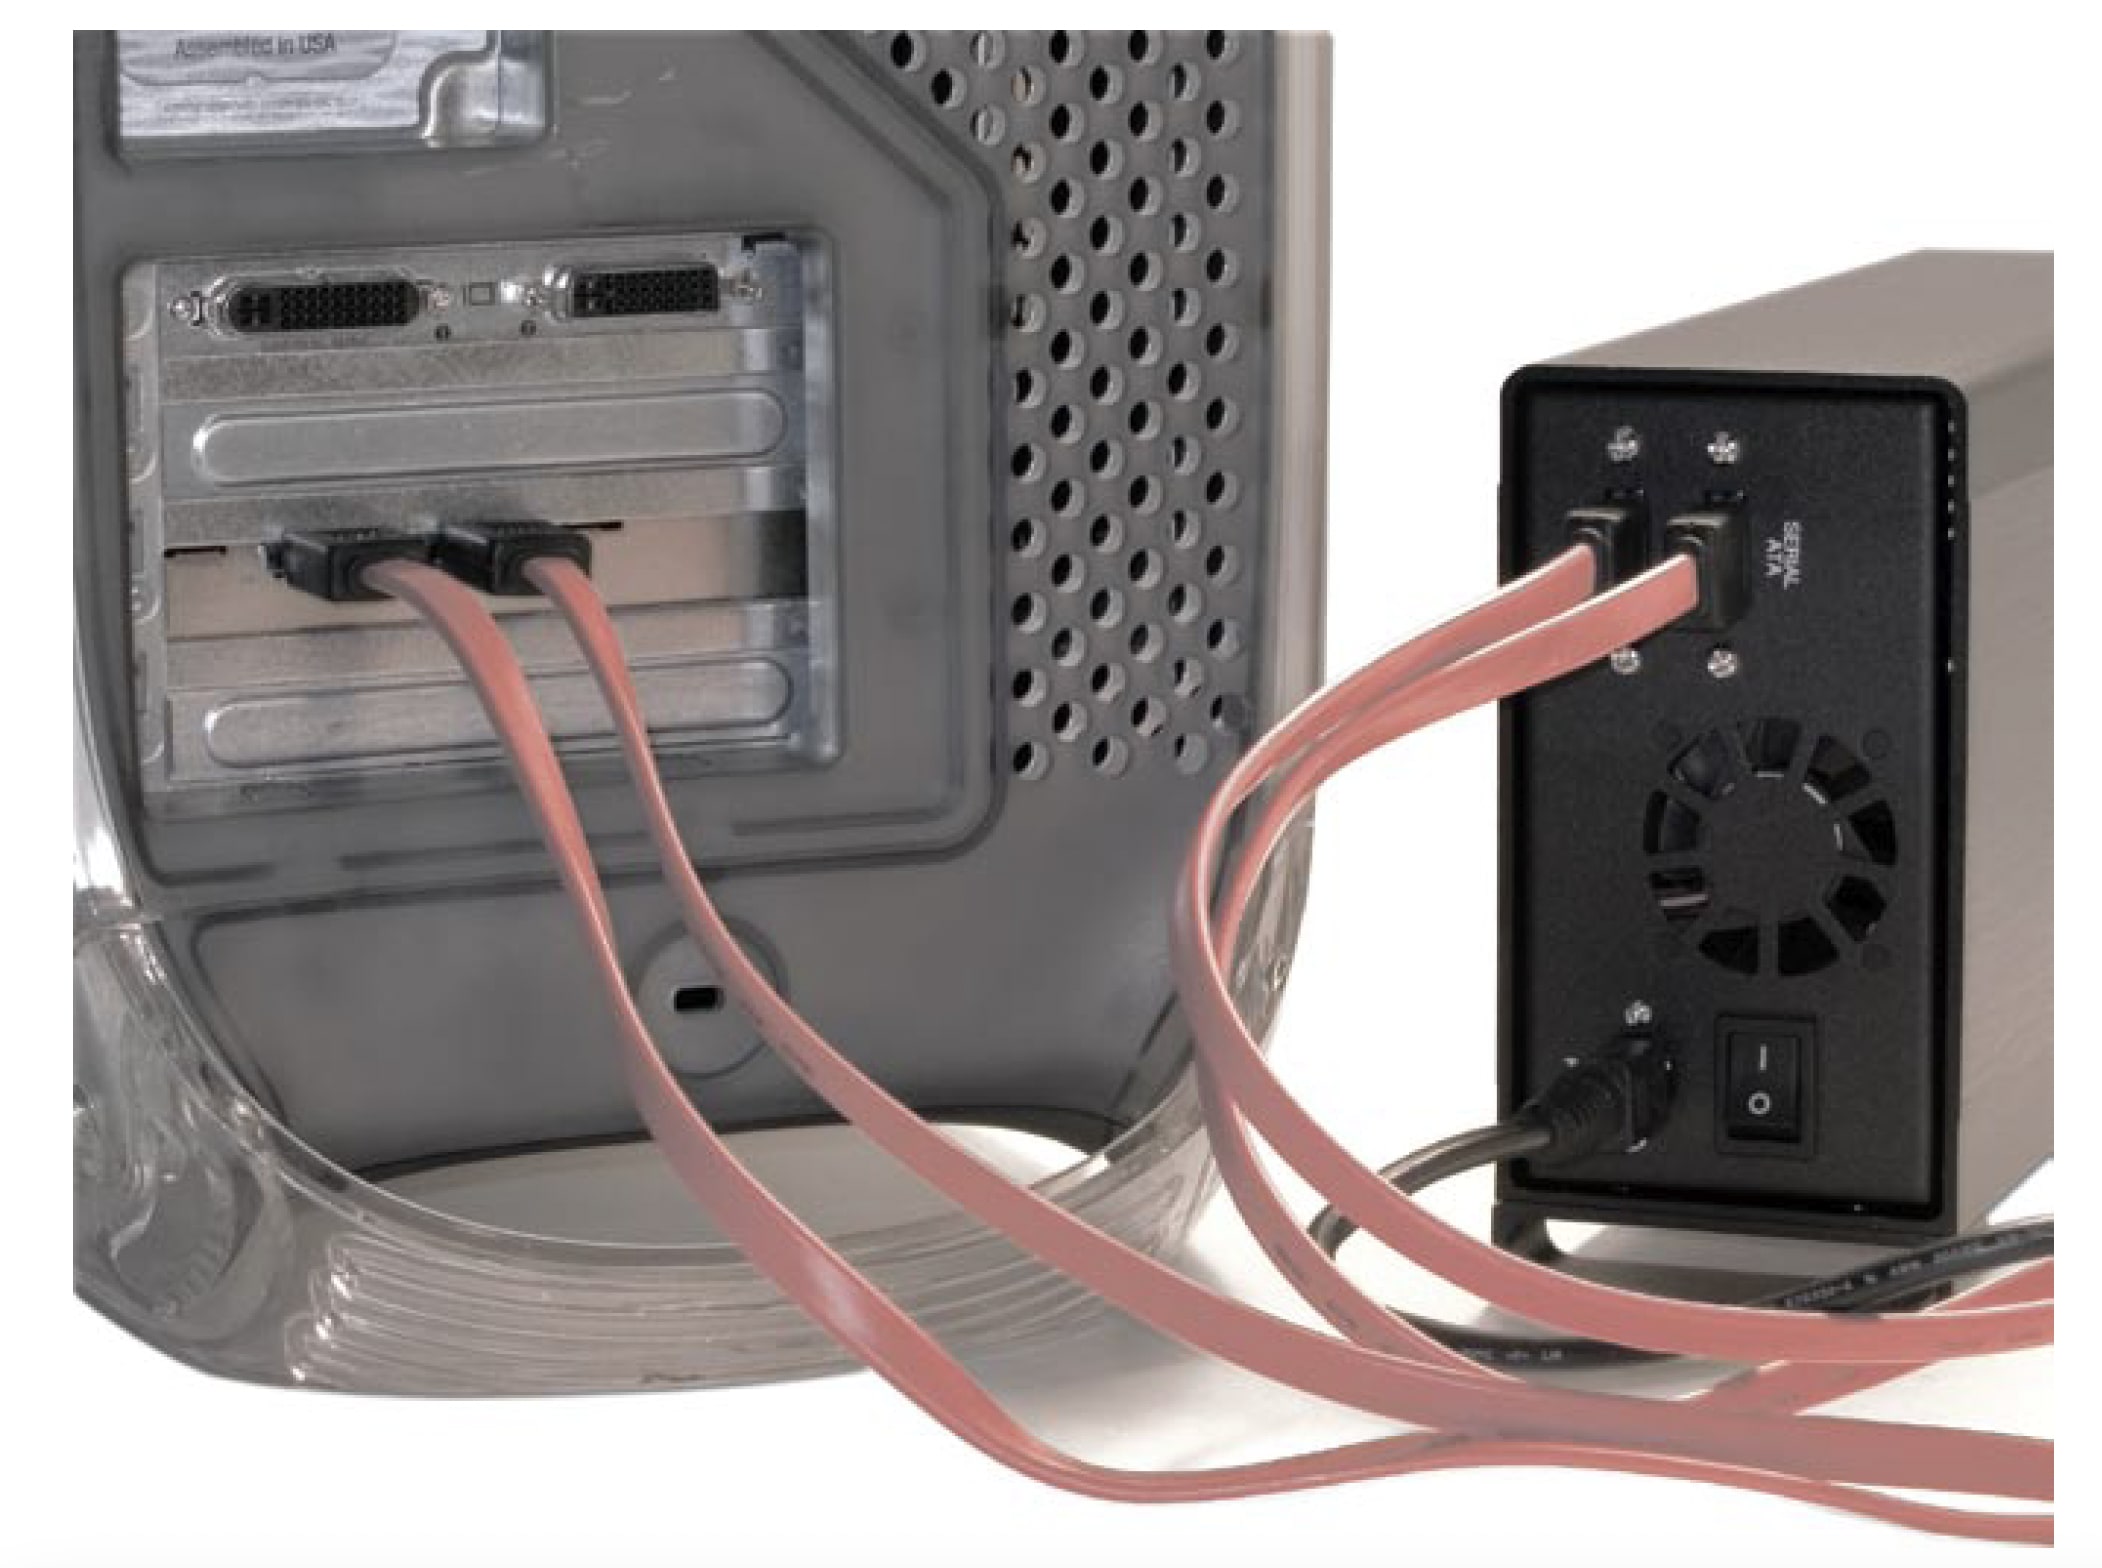
- Connect the two Serial ATA cables from the OWC Mercury Elite-AL SATA to your PCI Serial ATA Card..
- Power on the OWC Mercury Elite-AL. If you wish to create a RAID using the OWC Mercury Elite-AL SATA drive, please turn the page over.
Creating a RAID using the OWC Mercury Elite-AL SATA
In the following steps, we’re going to show you how to set up your new OWC Mercury Elite-AL SATA drive using Mac OS X. If you wish to use your drive with another OS, please visit our website to see step by step instructions on other operating systems and how to configure your new drive.
Remember - you can set up your OWC Mercury Elite using many different types of eSATA interface card - some with advanced features that will need to be followed rather than the basic steps outlined here. Read your interface card manual first to avoid any unnecessary steps.
Creating the RAID is a simple task. Begin by hooking up your OWC Mercury Elite-AL SATA drive to your computer.
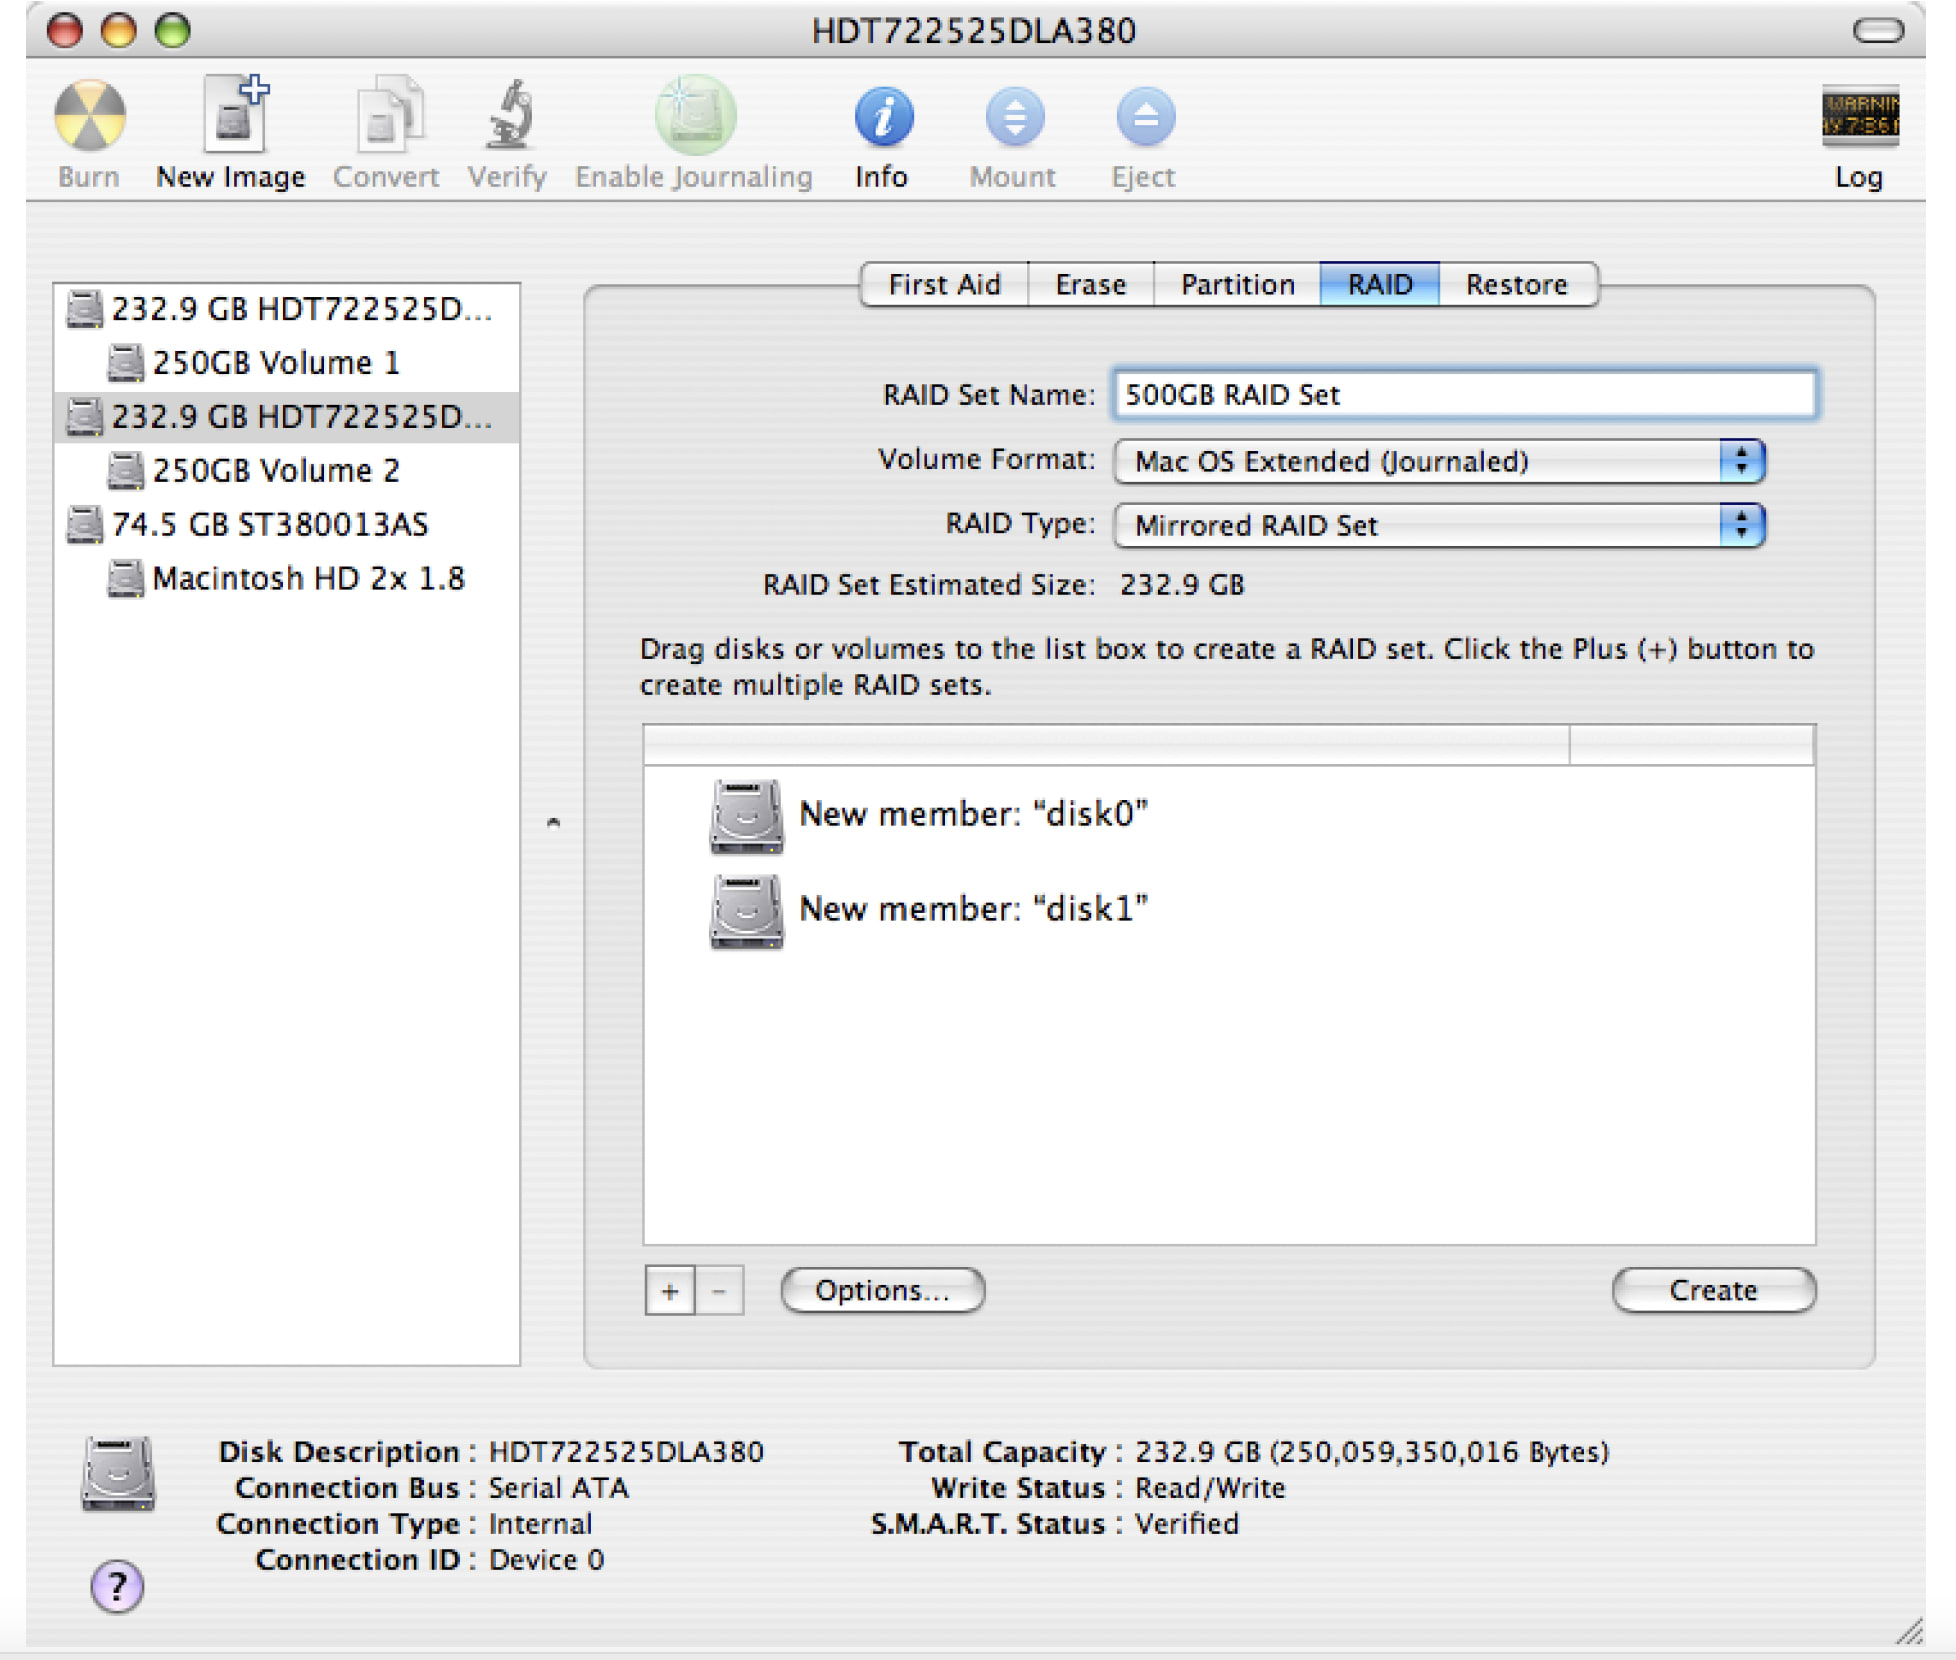
Upon boot, your two new drives will show up as unformatted volumes and you will be prompted to initialize them using Disk Utility. Click to initialize and Disk Utility will open automatically. On the left side of the screen, you will see 2 unmounted, unformatted volumes. Click on one of those and format it. Full instructions for this procedure are available at http://eshop.macsales.com/tech_center/fwhdd.cfm
Do the same for the 2nd volume and you’re ready to configure your drives as a RAID - or, stop now, if you want 2 individual volumes.
Choose one of the identical drives in the SATA Dual Bay Case, here they are named 250GB Volume 1, and Volume 2.
Click on either of the drives, and the above screen will appear. Then, click on the RAID tab, and drag the 2 identical drives, one at a time to the window as shown.

Notice the button named “RAID Type”. You can choose from RAID 0 (Striped), or RAID 1 (Mirrored). You also can concentrate the two discs into one large partition. See the back of this manual for explanations as to what each type of RAID offers.

Now that you’ve decided on what type of RAID you wish to use, type the name of your drive you wish to use in the top box. You can also decide what format you wish to use, the most common for Mac OS X is Mac OS X Extended (Journaled), as shown here.
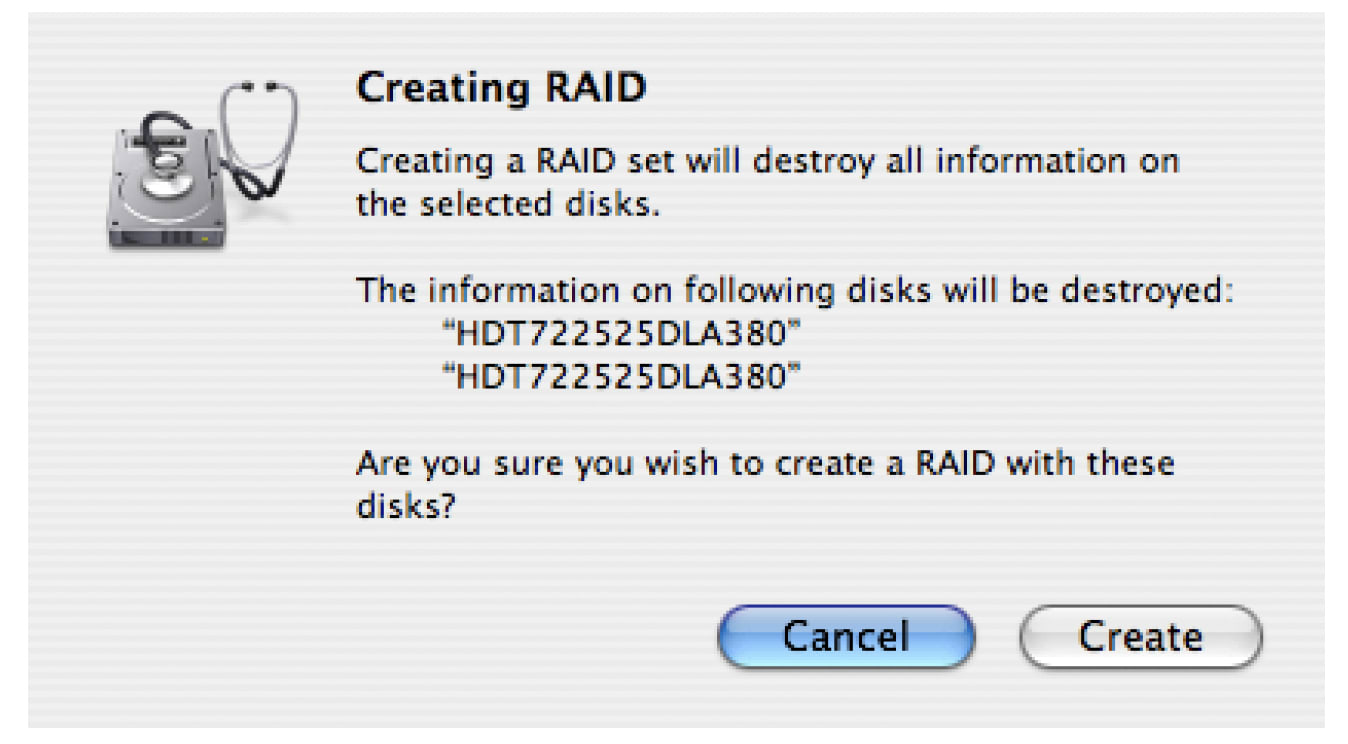
When you’re ready to create your RAID, click on the Create button. Remember, you’re erasing the drives!
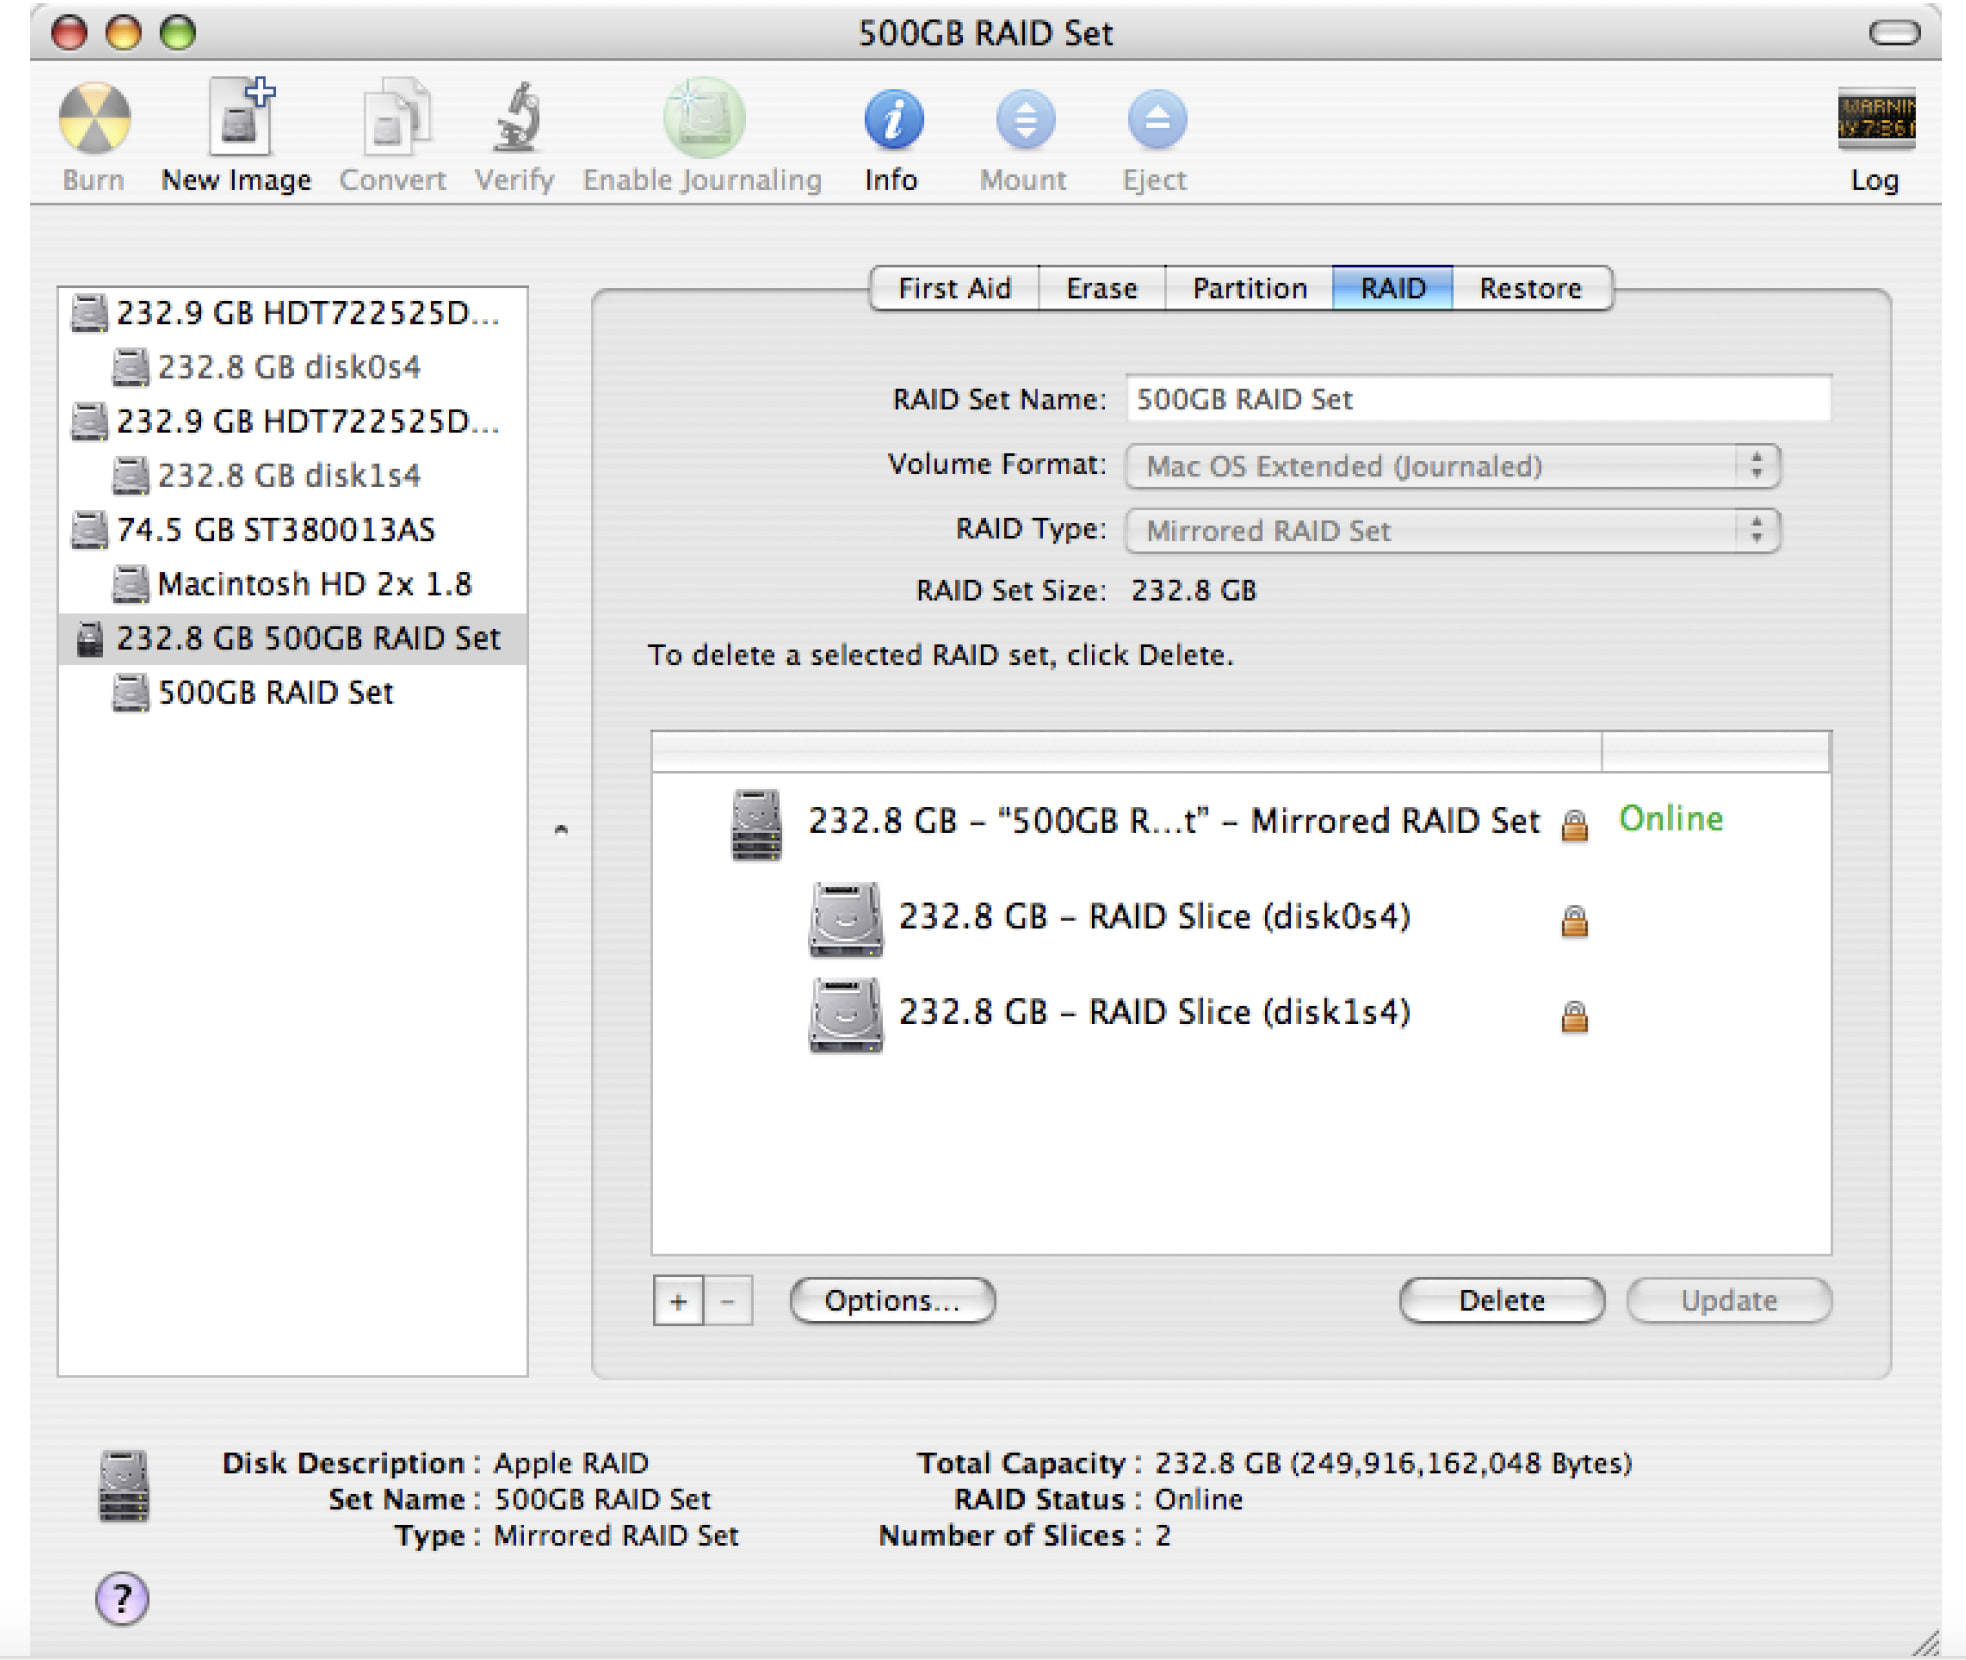
The RAID has completed building and is now online and ready to be used. Enjoy!
Troubleshooting:
If you disconnect the OWC Mercury Elite-AL SATA RAID from the computer, you must hook up the SATA cables back into the same ports as you disconnect them from. You may want to number the cables, and the ports as if you cross the cables, the RAID will break. It’s simple to fix - just reverse the cables.
Also, you may experience booting problems to your RAID after an unexpected shutdown, or if you reset your PRAM. If your machine does not see your RAID as a startup volume, reboot holding down the option key.
Definition of RAID 0, RAID 1, and Concentrated Disk Set
RAID 0: A RAID 0 (also known as a Stripe) distributes data evenly across two or more disks. This method is very fast and is primarily used for audio and video capture, and is fantastic for editing because of the high speed. However, there is no redundancy when used, and if one drive fails in the RAID 0 stripe, data will be lost.
RAID 1: A RAID 1 (also known as a Mirror) writes exactly the same data to more than one drive. This is primarily used where data redundancy is the primary focus, always having a backup. Speed is compromised over the other two types of RAID, but that is not the real use of this type of RAID.
Concentrated Disk Set (JBOD): This is not truly a RAID. A Concentrated disk set is when you have multiple drives that you wish to show up as one contiguous volume, but do not want to stripe the drives together using a RAID 0. While both accomplish the same task, taking multiple drives and creating one large volume, the Concentrated disk set, or JBOD (Just a Bunch of Disks) does not write data evenly across the drives - it simply fills one drive up, and then continues writing to the next drive, and so on. If a drive were to fail using this setup, data recovery is much more probable than a RAID 0 setup.
For technical support, please visit http://eshop.macsales.com/tech_center/index.cfm
Other World Computing’s 1 year Limited Warranty is not transferable and subject to limitations.
Free Support Chat
Our free award-winning support team is ready to answer all of your questions. Technical support is available Monday - Friday: 9AM - 6PM. Customer Support & Sales is available Monday - Friday: 9AM - 6PM. Support is unavailable on U.S. Federal holidays. Talk to a human today.


 1-800-275-4576