Windows 10 Formatting & File History Guide
OWC 2.5 inch and M.2 SSDs, general purpose storage solutions
Overview
This guide provides a recommended method to format your new drive using the built-in Disk Management application, as well as a section describing some recommended options for using the File History feature to back up and restore files from your user account.
If you would like to see related Windows topics you can visit the Microsoft Windows 10 support site for more information. Though many of our products work with Windows 10, OWC does not provide direct support for the operating system. We have provided this set of recommendations as a courtesy to our Windows customers. If you have any questions about using specific OWC storage solutions with Windows, please contact our award-winning support team.
Notes
- This guide assumes the drive will be formatted using a single partition, installed either in a spare drive bay in the PC, on a PCIe card, or in an external enclosure. For information on working with multiple partitions, please visit the Microsoft Windows 10 support site.
- This guide shows the basics for setting up the File History function in Windows 10, as a way to back up files in your user account, including the ability to replace an existing file or missing file from a selection of previously backed up versions. This feature is similar in concept to the Time Machine function in macOS.
- While there are third party PC backup options available, OWC recommends this always-available, Microsoft-supported backup option when possible.
Disk Management: Initialize and Format (new disk)
This section assumes that you have installed a new drive into a PC or a connected storage enclosure, and are formatting it for the first time. The main difference: extra steps are required to initialize a brand-new disk (Steps 2-4 in this case) that are not required for disks that have already been used with Windows.
Step 1
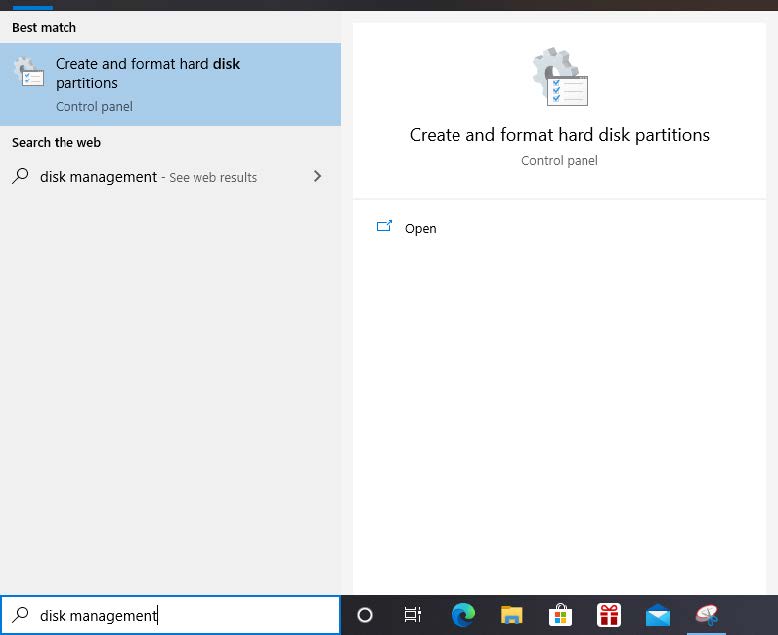
Open the Start Menu and type ‘disk management’ until the option to format the drive appears a the top of the search results. Select it.
Step 2
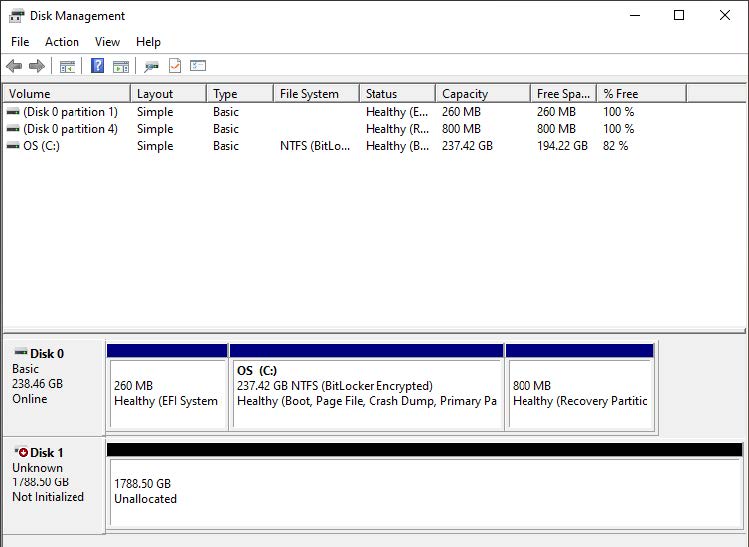
The Disk Management Window should open, and the new target disk should be one of the items listed across the bottom half of the window. It should display with the following info at left : ‘Disk [number]’; ‘Unknown’; [Capacity]; ‘Not Initialized’
Step 3
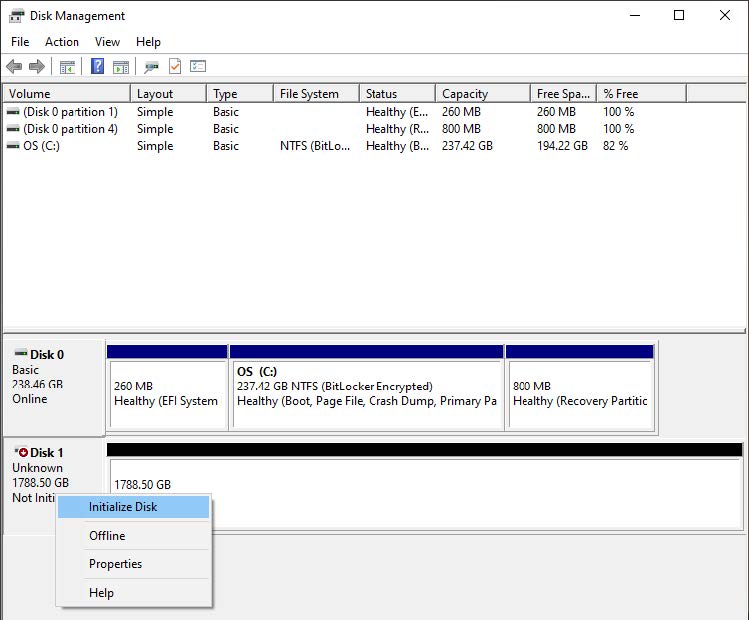
Right-click on the panel that displays this information then choose ‘Initialize Disk’.
Step 4
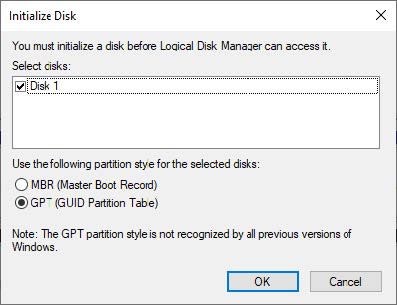
A dialog window should open allowing you to verify the correct disk has been selected before continuing, and to set the Partition option (either MBR or GPT). Choose GPT unless you intend to use the drive with older versions of Windows, then click OK.
Step 5
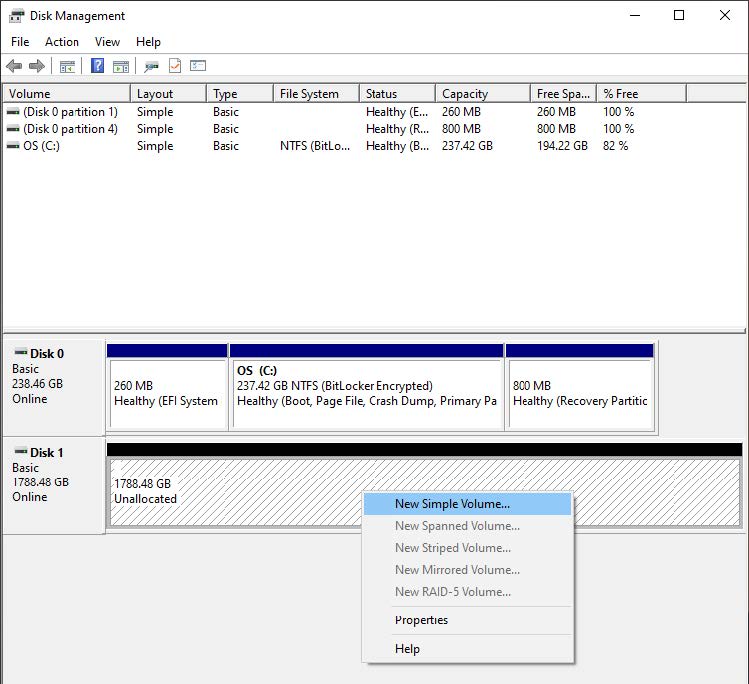
Once the disk as been initialized Windows should return you to the main Disk Management window. Find the cross-hatched area next to your drive’s info where it says ‘Unallocated’, right-click, then choose ‘New Simple Volume’
Step 6
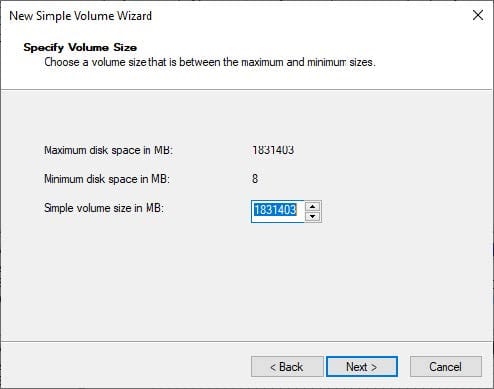
The Volume Wizard dialog will appear. The first screen is a welcome message that you can dismiss by clicking ‘Next.’ The first settings screen allows you to choose the volume size (shown below). It will default to the maximum available capacity. For this example we’ll assume this is the desired value. Click ‘Next’
Step 7
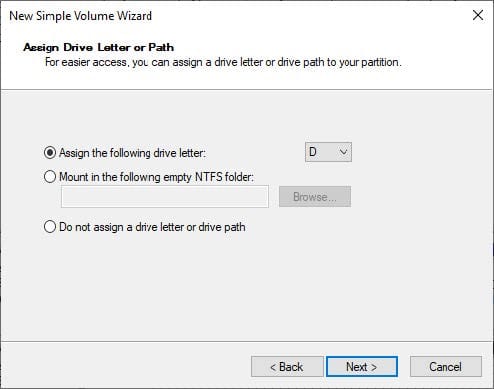
The next option available is to assign a new letter to the drive. Choose one from the pop-up menu and click ‘Next’.
Step 8
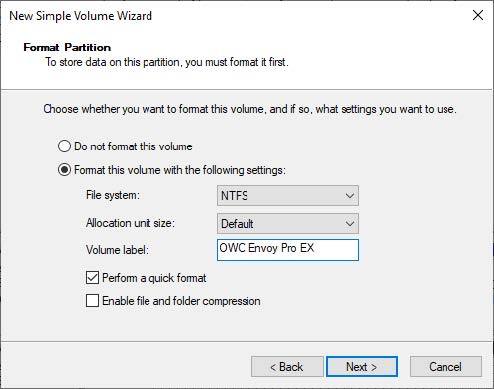
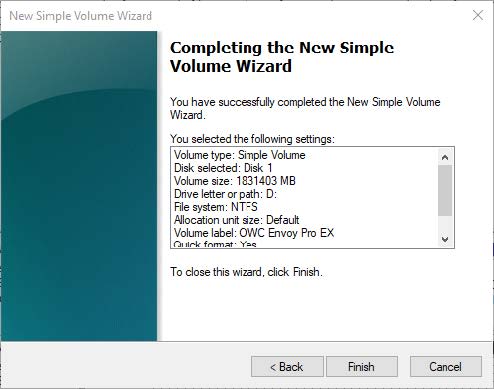
The next screen will allow you to set the format type and related settings. Unless you have a specific reason not to, choose the following settings: File System - NTFS; Allocation Unit Size - Default; Volume Label - choose a name for your drive. You can leave the “Perform a quick format” option checked and the ‘Enable file and folder compression’ option unchecked. Click ‘Next’
A screen will appear like the one below. When complete the process, click ‘Finish’.
Step 9
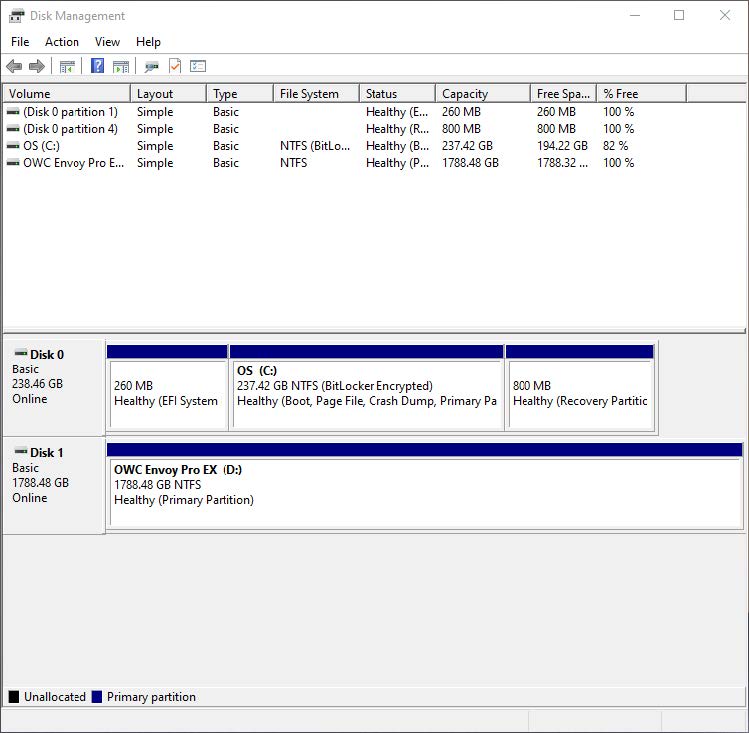
In the Disk Management window you should now see the newly formatted drive. For our example it’s Disk 1 / Drive D.
Setting up Windows File History
This section covers the process of configuring Windows File History to begin backups of selected user account folders.
Step 1
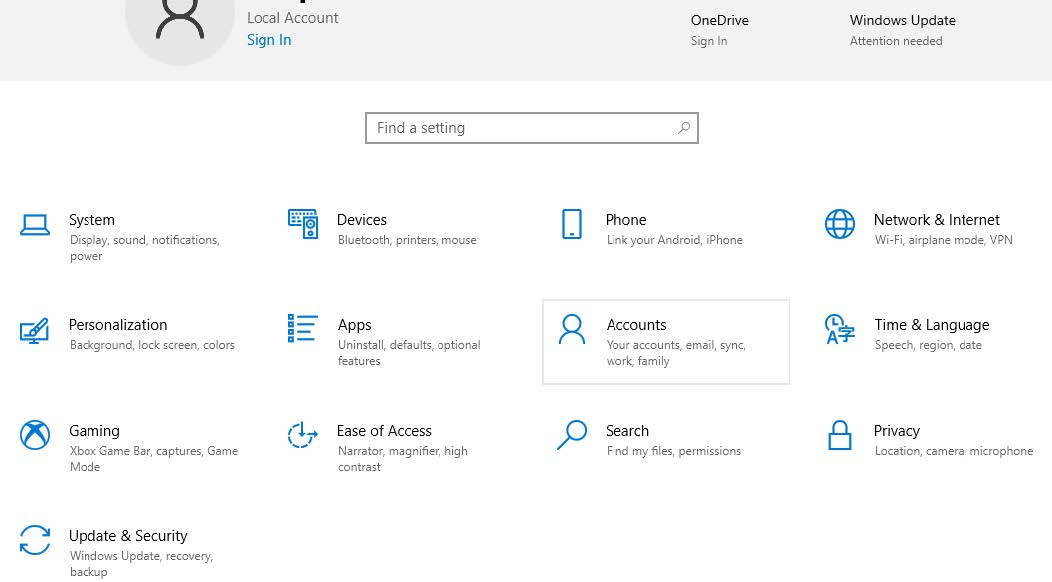
Open the Start Menu and choose the ‘Settings’ item. A window like the one below should appear.
Step 2
Click ‘Update & Security’, then choose ‘Backup’ from the sidebar (not shown in the following series of steps). If it’s not already, make sure your backup drive is available before proceeding to the next step.
Step 3
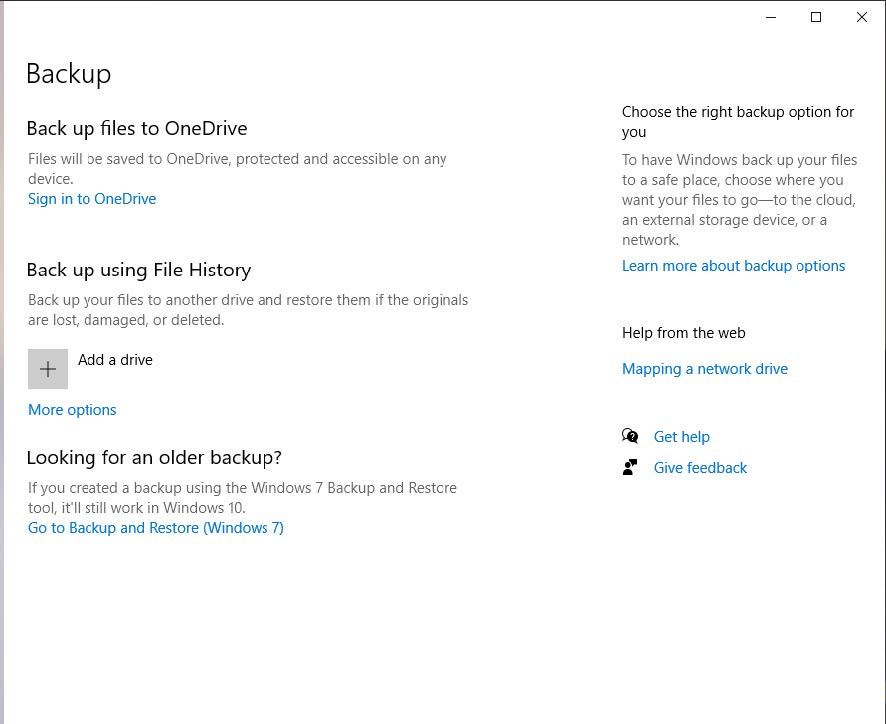
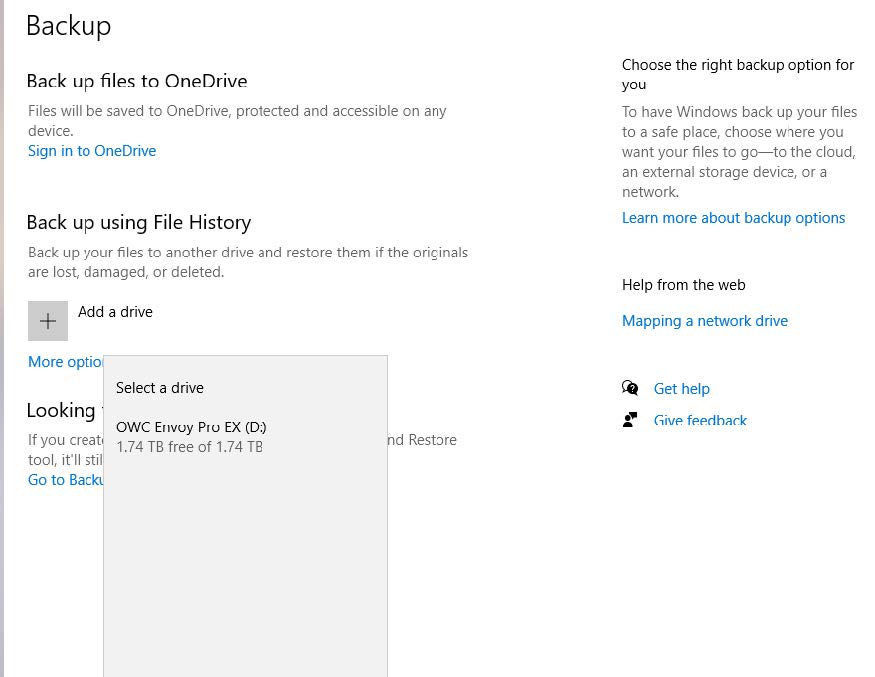
Click the + button next to ‘Add a drive’ and select the drive from the list once it appears. By default, File History will backup the files in every folder within the user account’s home folder, once per hour as long as the drive you selected is available. See the following steps for customization options
Step 4
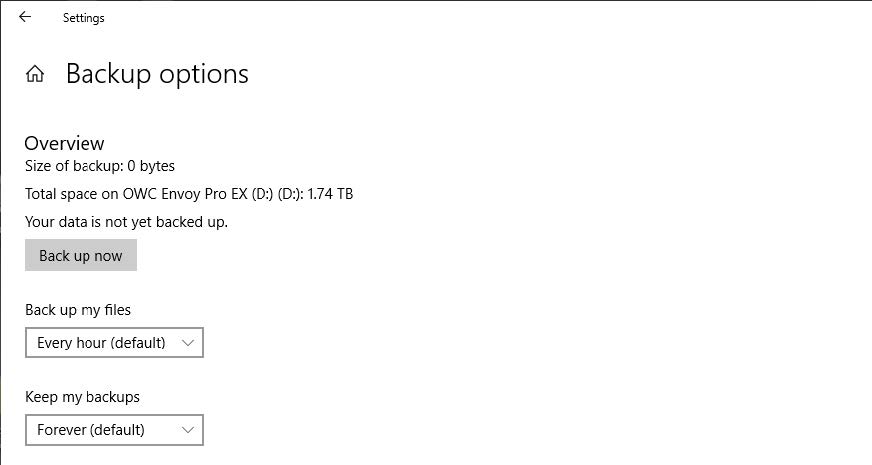
Click ‘More Options’ (located just under the + button). The window below will appear.
From the ‘Back up my files’ menu, you can choose any of the following instead of the default of 1 hour: 10, 15, 20, 30 minutes, and, 3, 6, or 12 hours, and ‘once per day’. There’s also a ‘Keep my backups’ setting that allows you to keep the files you’ve backed up: Forever, 1 month, 3 months, 6 months, 9 months, 1 year, 2 years, or ‘Until space is needed’. While we cover additional customization options, when you’re done you can return to this screen and click ‘Back up Now’ to ensure the computer begins to backup your files. Note: depending on your Windows configuration it may have begun automatically once the drive was selected.
Step 5
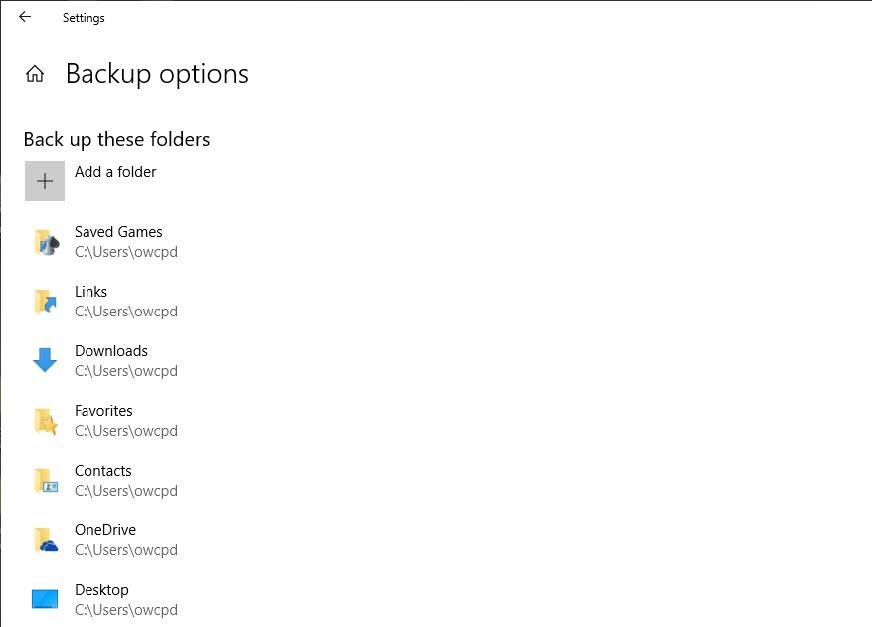
Scroll down to view the ‘Backup to these folders’ area. If you would like to backup the contents of a folder other than one of the defaults, click the + next to ‘Add a folder’. You can remove a default folder by right-clicking it and choosing ‘Remove’.
Step 6
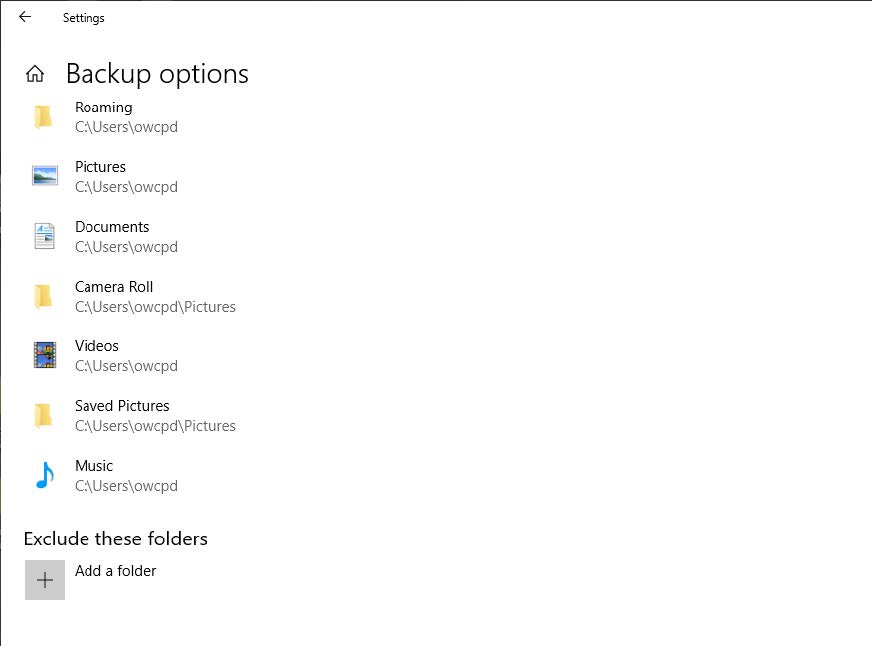
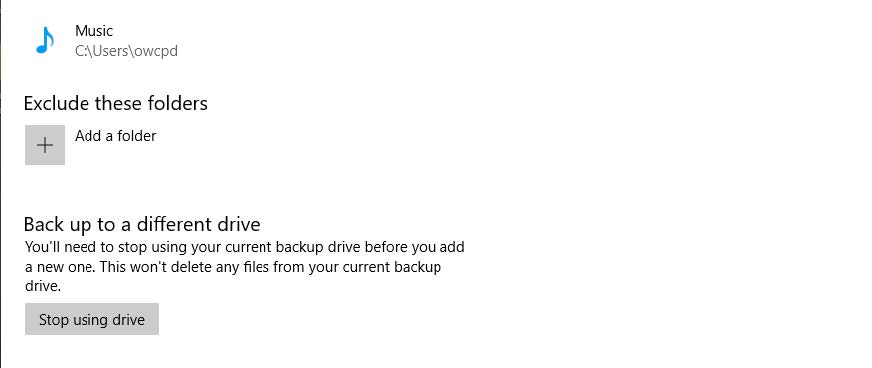
To remove a folder and also prevent any of its sub-folders from being included in the backups, scroll down to the ‘Exclude these folders’ area (shown near the bottom of the screen below), then click the + button. Navigate to the target folder and select it.
Step 7
To stop using your current backup drive click the ‘Stop using drive’ button under the ‘Backup to a different drive’ area. Once you do this you can start again at Step 3 to select the new drive.
Restoring Files with File History
This section covers the process of restoring specific files using the Windows File History. There are multiple ways to arrive at the same result, including navigating via Windows Explorer and right-clicking a file to see its history options, but we use the File History window.
Step 1
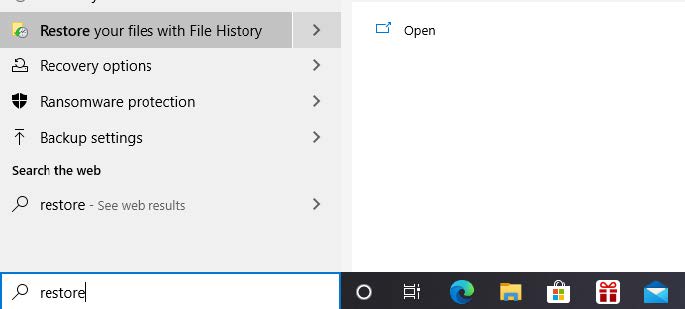
Open the Start Menu and type ‘Restore’. An option that says ‘Restore your files with File History’ should be listed. Select it.
The File History window should open. If you’re not there by default, clicking the Home button will take you to a view of all available backed up folders (as shown below).
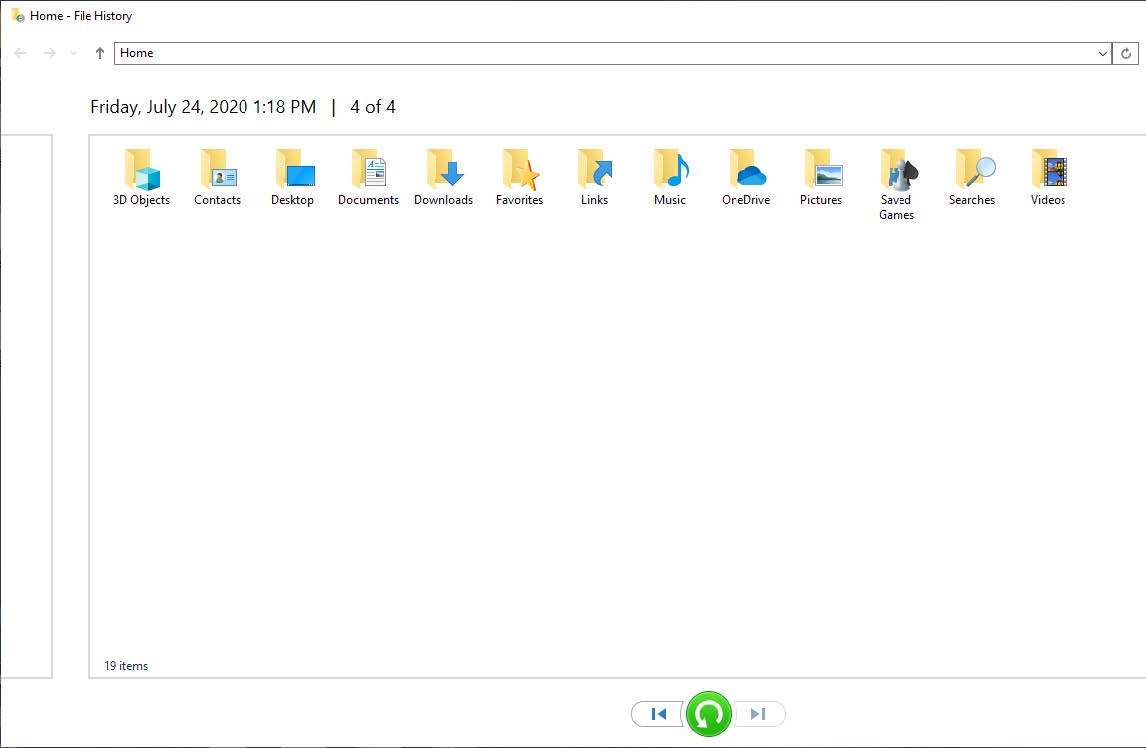
Note the three buttons at the bottom of the screen. The left arrow button will move you back in time, showing earlier sets of folders and files that have been backed up. The right arrow will move you forward in time. The green button will restore the selected file or folder in its original location. These buttons can be used within specific folders as well.
Step 2
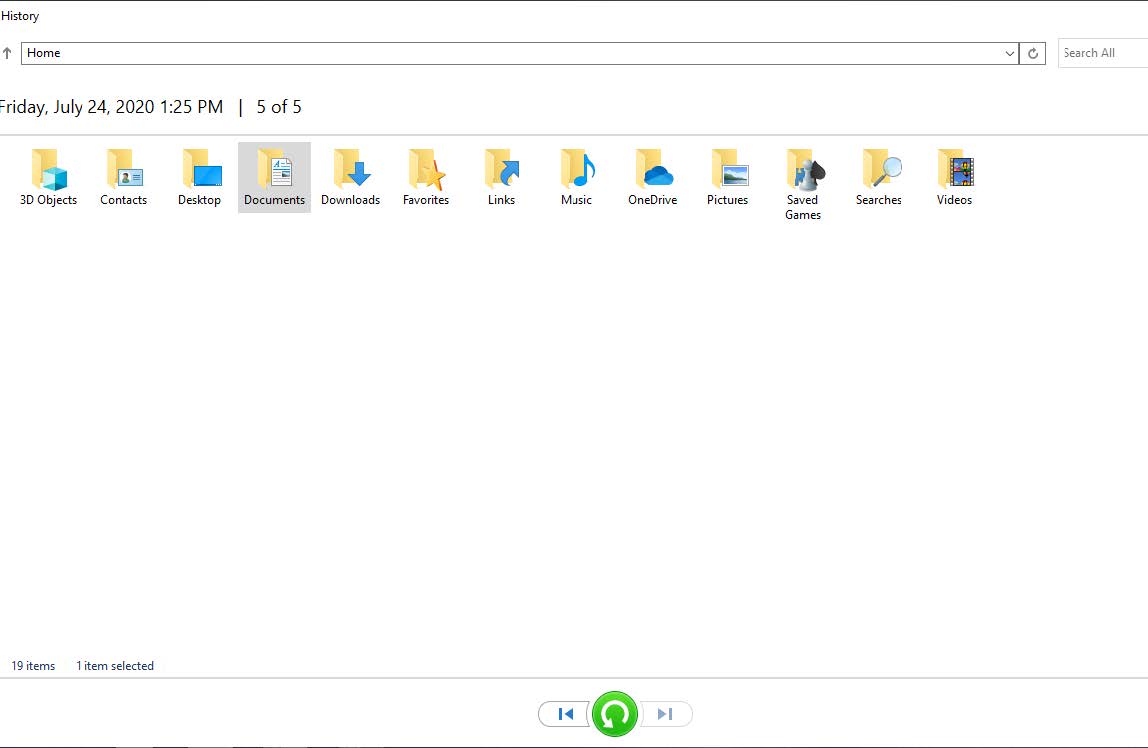
Double-click on the folder which contains the file(s) you need to restore (below), then use the navigation aids to find the correct version (bottom image).

Step 3
Select the file and then click the green button to restore it in its original location. Unless the file is very large this should happen right away so that if you navigate to the same location in Windows Explorer, you should find the newly restored file already there. Repeat this process as needed. The same process can also be used to restore entire folders and their contents.
Free Support Chat
Our free award-winning support team is ready to answer all of your questions. Technical support is available Monday - Friday: 9AM - 6PM. Customer Support & Sales is available Monday - Friday: 9AM - 6PM. Support is unavailable on U.S. Federal holidays. Talk to a human today.


 1-800-275-4576