Created on: May 16, 2022
Last updated: July 10, 2024
Details
As of Windows 10 v. 1809 the default disk removal policy is "Quick removal" instead of "Better performance". Prior to October of 2018 and Windows 10 version 1809, Microsoft had the default setting for storage devices to "Best Performance" relying on the user to manually and safely remove their drives through the "Eject" function. They quickly realized that users do not Eject their drives before removing, at time causing data corruption and loss. Due to this fact, Microsoft changed its default storage policy to "Quick Removal" starting Windows 10 1809. This setting protects the data better while reduces the performance due to Windows checking the status of the storage every milliseconds. So if you would like to get the best performance from your memory card readers or removable drives, change the default policy back to "Best Performance" while you need to make sure you Eject the drive properly to prevent data loss or corruption
- OWC storage solutions that are experiencing slow read/write speeds should consider checking and changing the Windows disk removal policy. Changing from ‘Quick removal’ to ‘Better performance’ can increase disk performance.
- “Quick removal” is a safer option as it ensures connected disks can be removed directly from the Windows system. However, users may experience a decrease in read/write performance. Write caching is also disable while in “Quick removal”
- “Better performance” improves disk performance but requires that users follow the "Safely remove hardware" procedure before disconnecting disks. Loss or corruption of data can occur if “Safely remove hardware” isn’t followed while in “Better performance”. Write caching is enabled while in “Better performance”.
OWC storage solutions that are experiencing slow read/write speeds should consider checking and changing the Windows disk removal policy. Changing from ‘Quick removal’ to ‘Better performance’ can increase disk performance. OWC offers the application OWC Disk Performance to help change the Disk Removal Policy. Changing from Quick removal to Better performance can also be changed manually.
OWC Disk Performance
The OWC Disk Performance tool allows Windows 10 and later users to easily change Windows disk removal policy to favor "better performance" or "quick removal" with just a click.
- Download OWC Disk Performance
- Launch the installer and follow the prompts. No restart is required afterward.
- The app will not show up in the Task Bar as the installer allows for the tool to be opened as a last step.
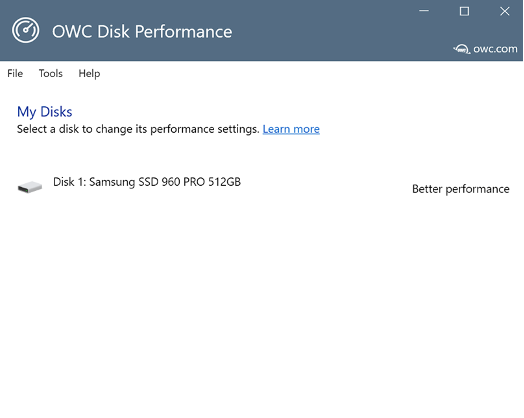
- Most connected drives will appear with the ‘Quick removal’ setting. Click on the disk label to change the setting. Note: The disk label may show the make and model of the drive inside the external enclosure rather than the enclosure.

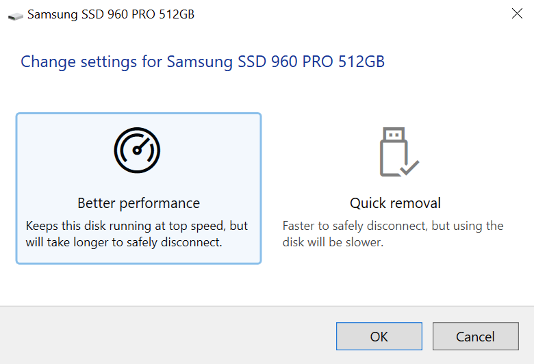
- Two options become available ‘Better performance’ and ‘Quick removal’. Select the desired setting and click OK.
- Returning to ‘My Disks’ displays the current setting. The tool can be closed if everything is correct. No restart is required.
Usage Notes:
- The setting applied will persist on the specific host computer until it is changed again.
- If the customer leaves the setting intact and the app is removed from the system, the setting should persist in that case.
- Nothing runs in the background; the app changes a built-in setting that Windows uses when managing external storage.
- Connecting the drive to a different computer will mean having to install the app on that computer and change the setting again; the setting does not follow the drive.
Manually Change Windows Removal Policy:
- Connect the device to the computer
- Right-click Start, then select File Explorer
- In File Explorer, identify the letter or label that is associated with the drive (for example, USB Drive (D:)).
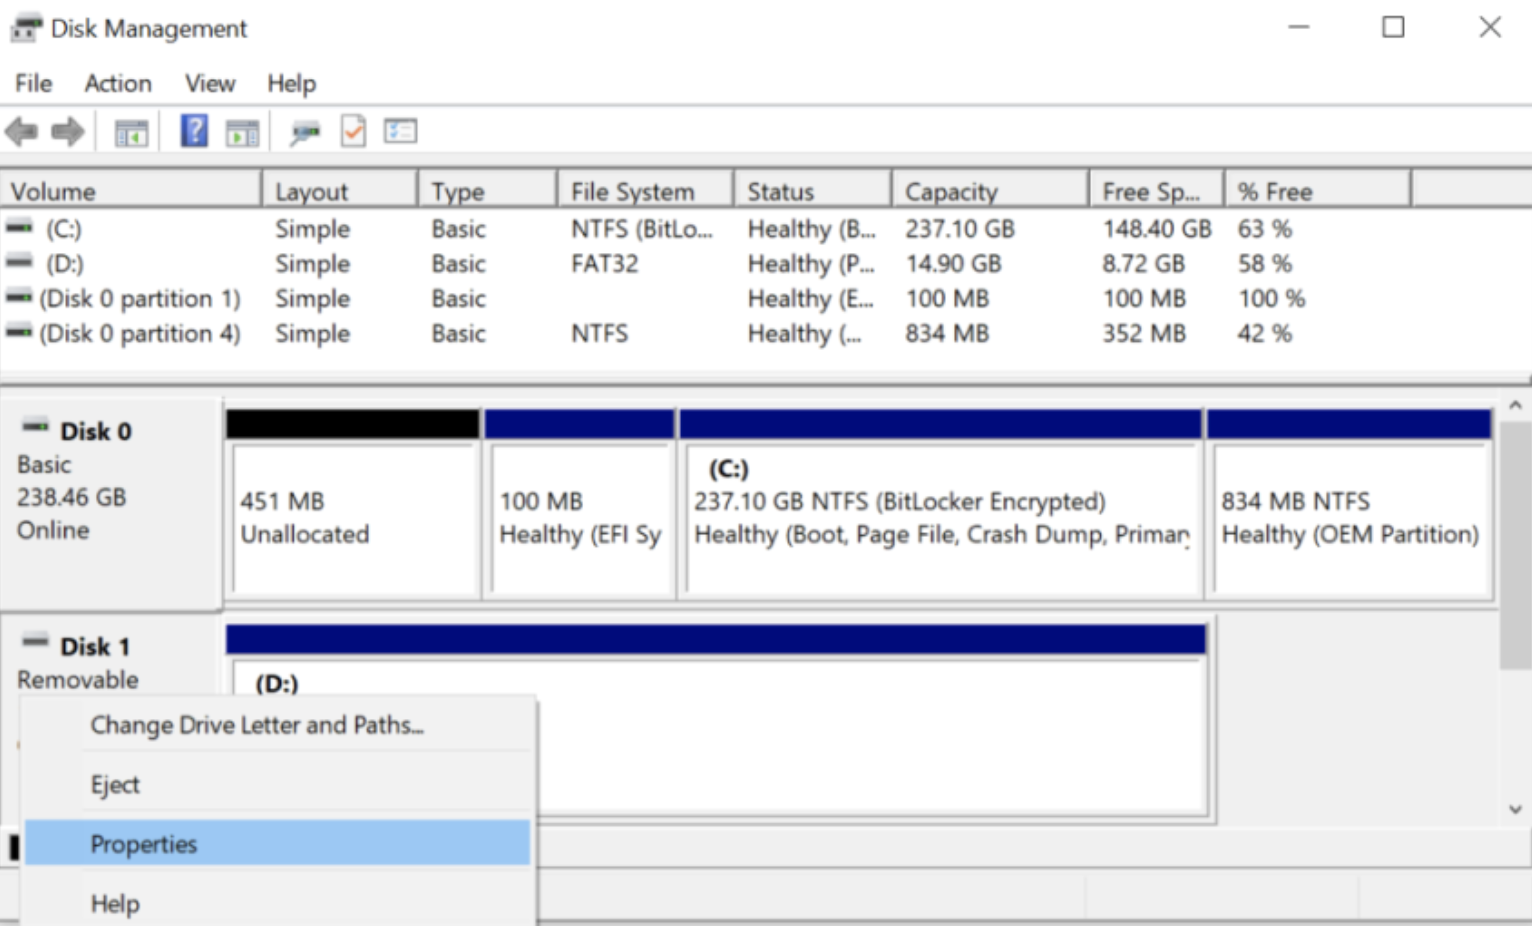
- Right-click Start, then select Disk Management
- In the lower section of the Disk Management window, right-click the label of the device, and the select Properties.
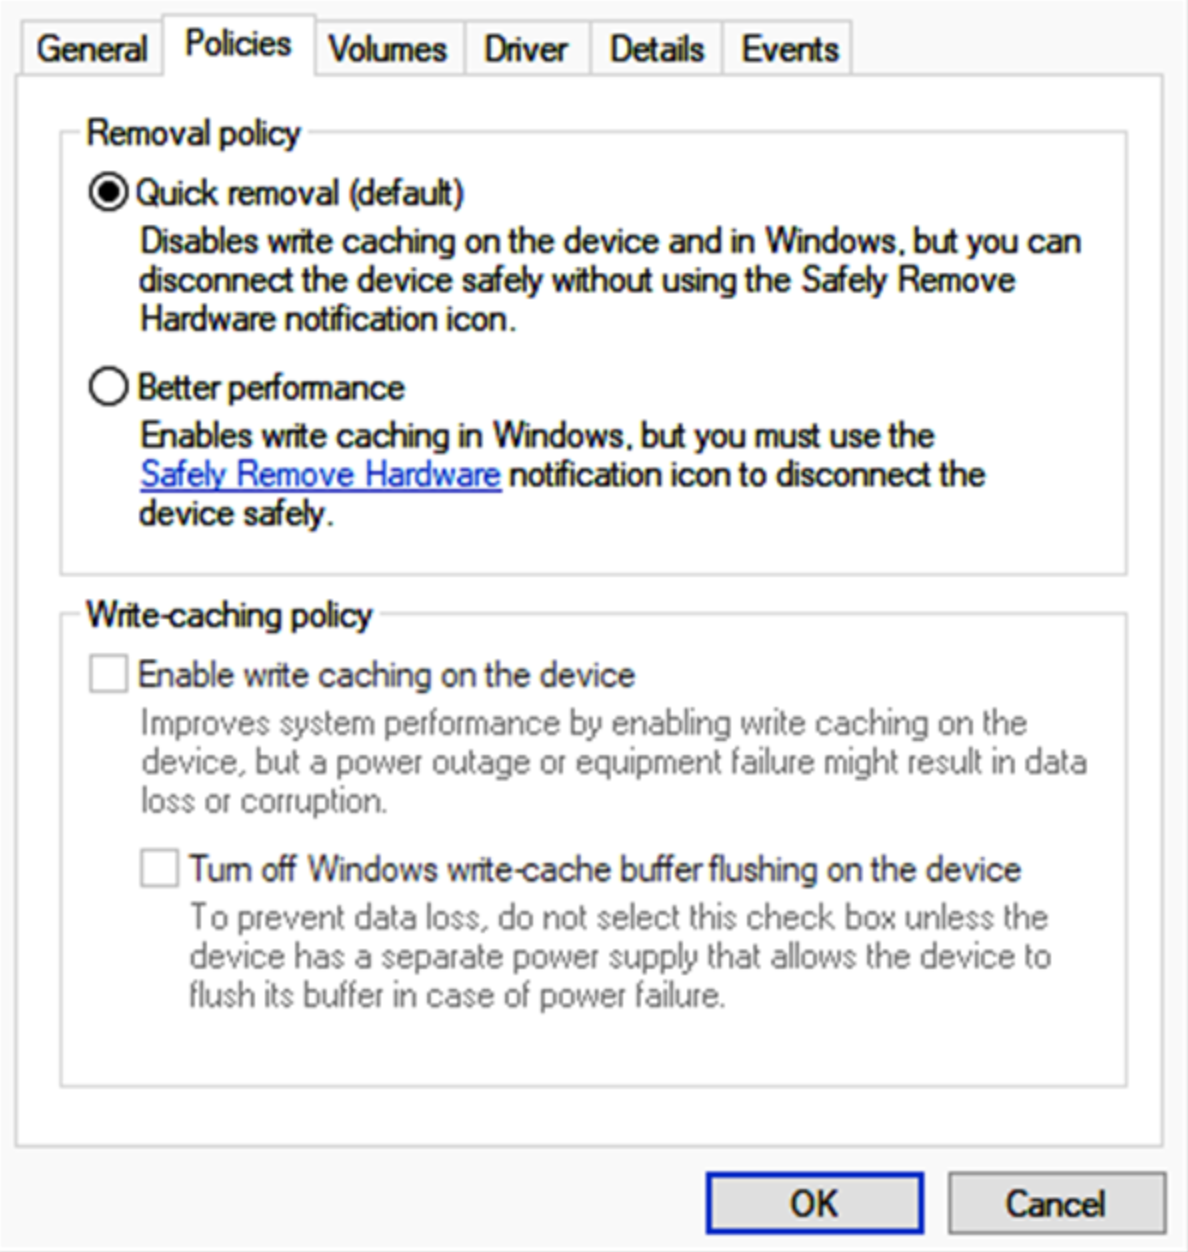
- Click Policies, select the desired policy, and then click OK.
 1-800-275-4576