Apple’s Reminders app is probably one of the most underused apps on both iOS and Mac OS X. Many people place meeting or personal reminders into Calendars, setting notifications to tell them when they need to do something. As for lists, a lot of folks find it easier to just use Apple’s Notes app or an app that’s specific to the task – like a grocery list app. There’s one feature of Reminders that is incredibly useful, though – the ability to create location-based reminders.
What’s a location-based reminder? Well, have you ever wanted to be reminded of something when you get to a particular location? Think of something like “Remind me to wash the car when I’m at the gas station,” “Remind me to pick up an HP 75 printer cartridge for Dad when I’m at Staples,” or “Remind me to call Mom when I’m leaving the house.” Reminders can be set up to give you a notification when you arrive at or leave a specific place.
Location-based reminders can be set up in both Mac OS X and iOS, and sync to all of your devices through iCloud. Let’s look at how to do this on an iPhone first.
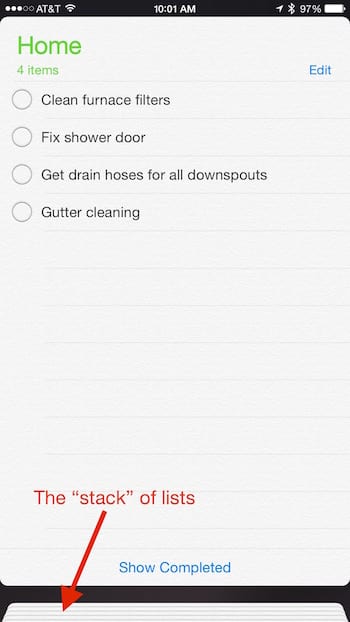
1) Launch the Reminders app. If you have more than one list in Reminders, you can display all of them by tapping the “stack” at the bottom of the currently viewed list (see image below).
2) Tap on an empty line of the open list to type in a new reminder. I’ve typed in “Buy a HP 75 printer cartridge” as my reminder.
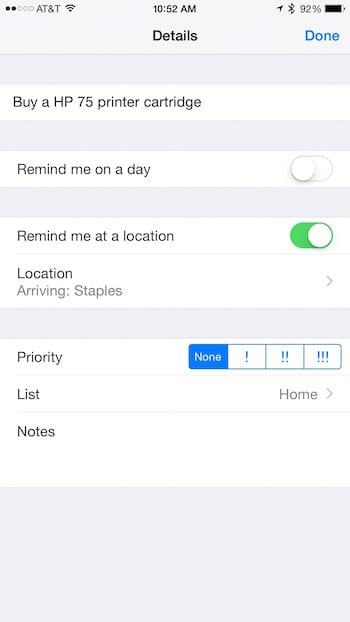
3) Tap the new reminder to view the information button on the right hand side (see image above). Tap on the information button to display the Details sheet. The button looks like a small “i” with a circle around it.
4) Tap the “Remind me at a location” button to turn on the feature. The button is green when it is enabled.
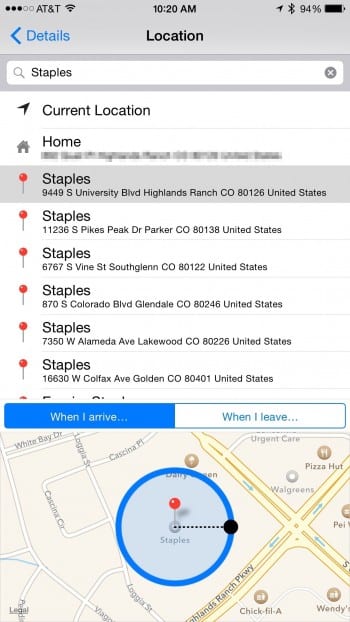
5) Tap “Location” to display the location entry window (below). For a contact, just start typing their name in the search field. For a named location like a store, school, or restaurant, type in the name of the location and all applicable local locations are displayed by their distance from your current location. In the example below, I typed in “staples” and got a list of red pins showing all Staples stores in my vicinity.
6) Tap on the correct address to select it as the reminder location. Reminders displays the location of the pin on a map, as well as a circle displaying the geofence (area where the reminder will be triggered). Note that it’s possible to make the geofence bigger or smaller by dragging the edge of the circle in or out.
7) Tap either “When I arrive…” or “When I leave…” to specify when you wish to get the reminder. In this case, I want to be reminded when I get to the Staples store. To leave the Details page, simply tap “Details” at the top of the location entry window. Your reminder should now show that you wish to be reminded when you arrive or leave a specific location (see below).
8) Tap “Done” to save the reminder and sync it to your other devices.
That’s all you need to do to get that gentle reminder in the form of an iPhone and/or Apple Watch notification when you get to your destination. Setting up location-based reminders in the OS X version of Reminders is similar, although the app doesn’t do as good a job of searching for specific locations. For example, typing in “Staples” to find the office supply store, my only choice is “Staples, MN” — definitely a bit out of my way. So with Mac OS X, be sure to have either the exact address of the location you’re going to or use an existing contact with a street address. Here’s the Mac OS X process:
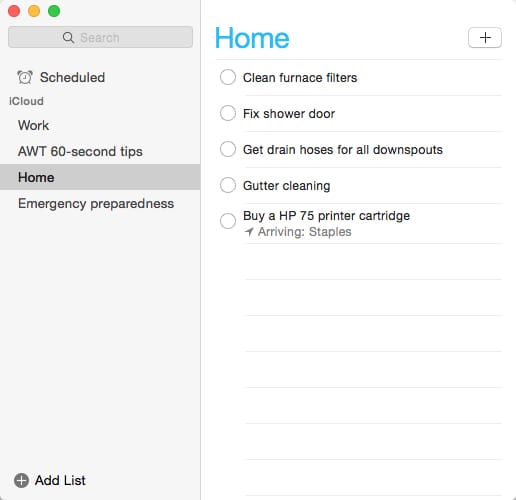
1) Launch the Reminders app from the Dock or Applications folder. All available lists are listed on the left side of the Reminders window (see screenshot below):
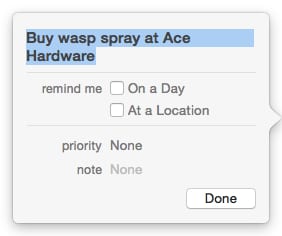
2) Click the + button to add a new reminder, or just click on the next empty line to start typing. I typed in “Buy wasp spray at Ace Hardware” as my reminder.
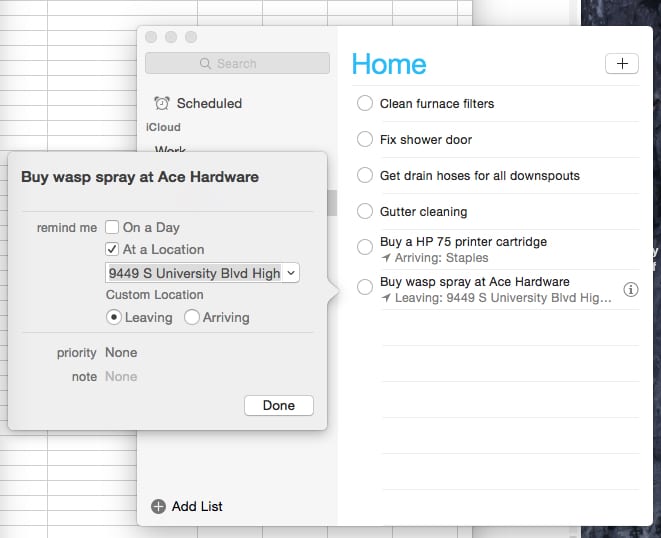
3) Hover your mouse pointer near the new reminder to see the information button on the right hand side of the reminder (it looks like a small “i” with a circle around it). A details sheet is displayed (see below).
4) Check the “At a Location” checkbox. Type in the address of the location, or enter the contact name (see image below). Hint: for frequently visited locations, you may wish to create contact cards in the Contacts app containing the street address.
5) Click the “Done” button to save the reminder and sync it to your other devices.
Personally, I find location-based reminders to be much more useful than time-based ones! You do need to remember to delete location-based reminders after you’ve used them; otherwise, a notification appears for the same reminder every time you are near the specified location.
Be sure to bookmark the Rocket Yard for more expert tips and tricks for your iDevice or Mac!



I used to use this feature quite a bit before I discovered how fast it ate my battery.