During the month of April, we’re going to forego the usual Friday Five and replace it with a series of articles that deal with audio and video content production, editing and distribution. That’s the focus of the annual NAB (National Association of Broadcasters) Show, running this year between April 16 and 21 in Las Vegas, NV. (If you’re attending the show, be sure to visit Team OWC at Booth #SL14205).
OWC and MacSales.com’s upgrade products are very popular with content creators, and we’re hoping that readers who want to dip their toes into the waters of video and audio production will give it a try. Today’s topic: How to get started with podcasting.
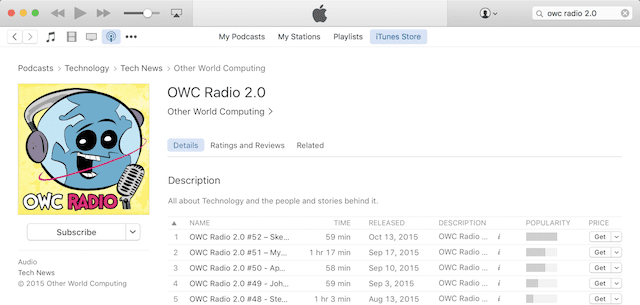
So, what is podcasting? Think of it as an episodic radio (or TV) show with a specific theme that is “broadcast” not over the airwaves, but over the Internet. To get an idea of just how many podcasts are out there and the breadth of topics available, fire up iTunes, click the … button in the upper left corner, and select Podcasts. We’re not going to cover video podcasting in this post, but just realize that the mechanics of delivering the content is the same.
There are four main steps to making a podcast:
- Developing a podcast idea
- Recording episodes
- Editing episodes
- Publishing episodes
Let’s look at these four areas in more detail…
1) Developing a podcast idea
This can be the hardest part, and fortunately you should only have to go through it once for every podcast. Everyone thinks they have a story to tell, but does anyone really want to listen? Sometimes, you may have an audience ready to listen; for example, a church leader may have a congregation that can tune in on sermons, a tech blogger may have followers who want to hear the latest about what’s going on, or a sports talk radio personality might want to gain an “off-the-air” following.
There are some questions you should ask yourself when developing the idea for a podcast:
- Can I sustain this topic day after day, week after week?
- Is my topic something that is already well-covered?
- What can I bring to my topic that nobody else can?
- Will I have guests on my podcast?
- How long should each podcast be?
- Do I have the time to record, edit and publish this podcast?
If you feel you have a story to tell that’s unique, told from a unique standpoint, and have the time available to expend the effort to make a podcast that might not be heard by anyone (at least at the start), then by all means consider doing this podcast.
Note that although there are podcasts that are hours in length and published each and every week, many listeners find 30 minute podcasts to be long enough. To keep your listeners from getting bored or impatient, definitely use this as a rule of thumb. Perhaps if you become famous enough down the road, you can lengthen the podcast…
One thing to realize is that the podcast process becomes easier as time goes by. Initially, you may find that you are spending a lot of time recording, editing, and going through the publishing of your podcast. Don’t worry; you will find shortcuts and learn your way, and soon it may take only 45 minutes a week to do a 30 minute podcast.
2) Recording episodes
Recording audio can be as simple as launching an app on your Mac or iOS device and talking, but if you want to be gentle on the ears of your listeners, you’ll take some steps to ensure good sound.
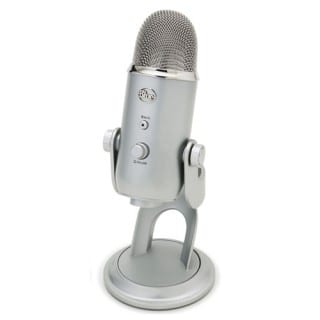
First, consider getting an external microphone that you can place closer to your mouth. Your recording setup doesn’t have to be as fancy as mine — I use a professional-quality USB microphone mounted with a shock mount on a studio boom arm, with a big pop filter in front of the mic. But having a directional microphone that can isolate the sounds coming from your mouth from background noises is helpful, a shock mount can help make sure that your mic doesn’t pick up tapping when you’re clicking a mouse to start up a recording or humming from a disk drive, and that pop filter means that you can get really close to the microphone without getting a loud POOF sounds whenever you make a plosive (that “P” sound your lips make).
If you’re recording two or more people in a room, get one microphone for each and feed the signals into a mixer. The mixer can help even out the sound levels between quiet and loud speakers, and makes for easier cable organization. The mixer output can be monitored for quality, then channeled into your Mac for recording.
For field recording, a clip-on microphone for your iPhone can provide a quality boost over the built-in mic, or you may wish to use a dedicated digital recorder like the Zoom H4N or H6.
OWC has a full line of microphones and audio accessories to choose from, all of which can help you capture the best possible sound whether you’re in the studio or the field.
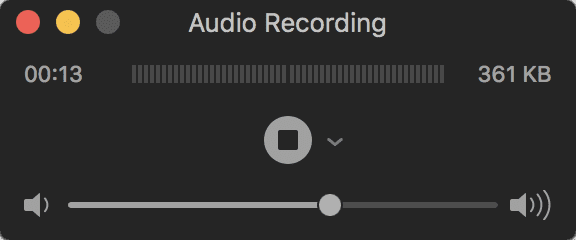
Now, how do you record the audio? You’re going to need an app for that. On the Mac, I have one really easy recommendation — use the built-in and somewhat misnamed QuickTime Player app. It also records audio, has some minimal editing capabilities, and saves in the popular MPEG-4 Audio (.M4A) format.
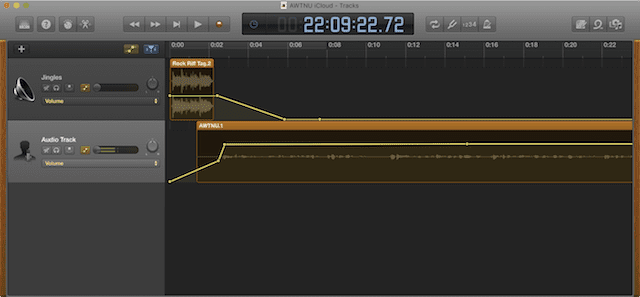
Apple’s own GarageBand app used to feature settings for podcasts, but those were inexplicably removed a few years ago. Budding podcasters can still use the app to record and edit audio, but you may have some difficulties finding the correct settings to give your voice just the sound quality you want. At the end of this post I’ll provide you with links to a pair of video podcasting tutorials that are well done and show you exactly how to use GarageBand on the Mac to record, edit and publish podcasts.
For recording from multiple sources and creating output in compressed or lossless file formats, my app of choice on the Mac is Audio Hijack ($49, free to try). It works well when using an other app — like FaceTime or Skype — as a source, perfect for those situations where your guests aren’t in the studio.
On the iPhone, the built-in Voice Memos app is a great way to capture sound in .M4A format. Use it to record your piece, then share it with a another iOS app or even send it to a Mac through AirDrop for editing.
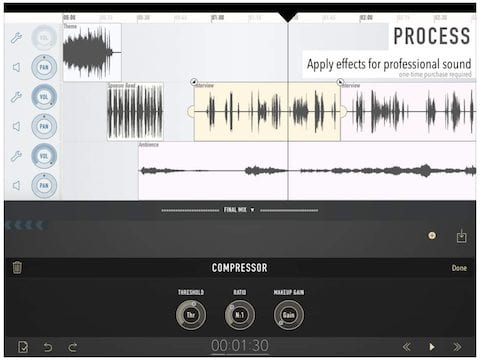
One of my favorite iOS apps for both recording and editing is Ferrite Recording Studio, which is free to try but has some in-app purchases that provide extra power for editing and adding extra tracks.
While recording, don’t worry if you have the occasional slip-up, sneeze, doorbell or phone ringing — that can all be taken out in edit. One good thing to do is always have Notes open or a pad and pencil close by so you can mark down the times during your recording where your “edit point” begins and ends. Some advanced recording apps actually let you add edit points with a tap or click, a real help when recording is underway.
3) Editing Episodes
So, about editing… You’ll want to at least do some basic editing to your podcast, like adding some intro music to the beginning of it (make sure it’s copyright-free), cutting out interruptions, or maybe even adding in advertising. To do that, you’ll need an editing app that can handle the cutting, sound level adjustments, and multiple sound tracks that are involved.
As mentioned, GarageBand does provide a way to layer tracks and do editing of your podcasts, and it has the benefit of being included with every Mac. It’s also available on iOS for free. The app mentioned earlier in the recording section — Ferrite Recording Studio — is well worth the $19.99 total price tag if you’d like to be able to do all of your podcast creation on the iPad or iPhone.
Should you decide that being a professional podcaster is in your future, you may want to look at Apple’s Logic Pro X ($199.99) for Mac. It’s a music production application, but can be used for fine control of voice recordings as well. Be forewarned, however, that it has a bit of a learning curve…
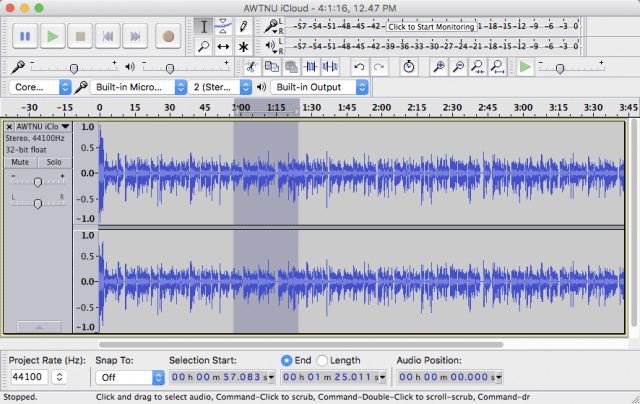
One very popular and free app is Audacity (above), which is available in versions for many operating systems including OS X. Audacity offers a full spectrum of recording and editing tools, including auto ducking of tracks (perfect if you want background music playing as you speak at the beginning or end of a podcast), an exhaustive set of effects, and even a way to add metadata descriptions to your sound files.
While space doesn’t permit us to provide a complete tutorial on podcast editing, let it suffice to say that the process involves moving segments of sound recordings into the proper place on a timeline, increasing or decreasing the volume of segments to create a balanced recording that isn’t too loud or too quiet in parts, improving the sound with filters and adjustments, and then compressing the final result to a small, but high-quality file. The online manual for Audacity provides an excellent tutorial in the process of “mixing a narration with background music,” which is perfect for podcasting. Even if you’re using another podcast editing app, this tutorial is a good way to understand more of the editing process.
4) Publishing Episodes
To make your podcast available for the world to hear, it has to be hosted somewhere — in other words, the podcast sound file and the associated metadata that describes the podcast has to be stored on a server.
The metadata — in the form of what are called ID3 tags — describes such things as the title of the podcast, the name of the artist (or podcaster in this instance), the name of the episode, the chronological order of the episode and the podcast cover art.
If you have a web server — and particularly if you’re using a content management system like WordPress — it’s quite simple to not only use the server to host the files, but also create the necessary RSS (Real Simple Syndication) feed file that describes the podcast episodes to podcatcher apps like Downcast and Apple’s own Podcast app and also to iTunes. Many web hosting services like Squarespace also offer ways to host media and produce the necessary RSS feed file.
Other third-party podcast hosts exist; one of the best-known is Libsyn, which provides solutions running the gamut from hosting for the occasional user to professional plans used by some of the most popular podcasters in the business.
To make your podcast available to the world, you’ll also want to submit it to iTunes. There’s quite a bit to submitting the podcast, so I’ll point you to this source on iTunes Connect for the details.
At this point, you might be forgiven if you think that setting up a podcast is a bit too much of a hassle. If that’s the case, you might wish to consider a service that lets you and up to three guests make a recording, provides full editing tools, includes hosting and even sets up a RSS feed for the podcast. Cast is new and requires Google’s Chrome browser on OS X, but works surprisingly well. For those who are considering podcasting but don’t want to invest a lot of time and money up front, Cast even offers a free trial.

For further details on podcasting, here are some links to various free tutorials that describe the entire process. While some of them are a bit dated, there are still great nuggets of knowledge to be found and techniques you can’t find anywhere else.

