From The Beatles to David Bowie to Beyonce, most music recorded over the past seventy years has made use of effects to enhance our favorite songs. Thanks to modern computing power and the advent of effects plugins, there is a virtually unending supply of effects available for use in the music production process. In this article, I’ll cover what I consider to be five of the most popular and important effects commonly used in modern music production. Once you have an understanding of these effects, you can take your raw tracks to the next level during the arrangement or mixing phase of your creative process. In the followup article to this primer, I will get to specific plugin brands I like, and some of my favorite plugins for each of the effects discussed below. For now, let’s dive right in and get acquainted with some of the basics.
Delay & Echo
What is Delay?
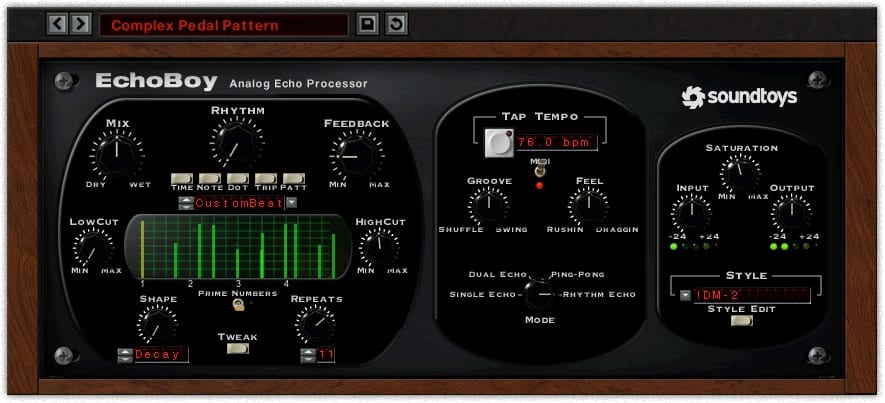
Delay, aptly named, is one of the most popular effects in music production. Whether you’re using a plugin or piece of hardware to achieve this effect, the delay effect processor essentially takes whatever signal you send to its input and plays it back after a time (or multiple times) of your choosing. Most delay effects offer multiple parameters that you can customize, including how many times to repeat the delay (often referred to as decay) and the delay time (usually expressed in milliseconds or note length if you’re syncing to a click track).
Slapback and Long Delays
In simple terms, delay and echo are typically defined as being either short delay or long delay. A very short delay is sometimes called slapback, and it’s one of the most popular uses of delay. If you listen to early rock, you will instantly hear the use of slapback on many lead vocal tracks. Slapback delay utilizes a very short delay, usually between 60 and 120 milliseconds, blended to taste with the original, dry audio. When executed well, the mix of dry and wet signals creates an effect that sounds less like an actual delay and more like a doubling effect. This technique can help the vocal sit better in a mix.
With longer delays, the goal is to achieve a rather pronounced effect. This can be heard in sounds that are repeated multiple times and that decay progressively with each repeated echo. This technique was and is used extensively in reggae music, but is often found in pop and contemporary music as well.
Reverb
What is Reverb?
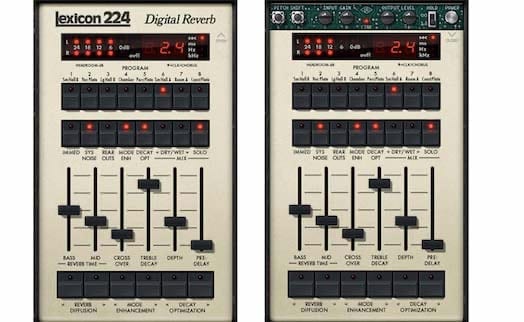
Reverb, or reverberation, is the audible effect created when a sound is reflected off a surface or multiple surfaces and back to the listener (or microphone). The interaction of these multiple reflections and their varying decay times combine to create a complex effect that allows the listener to get a sense for the physical space in which they are located. For example, a large cathedral is extremely reverberant with a long decay time, while an average bedroom closest would have almost no reverberation and a very short decay time.
Creating a Sense of Space
Reverb effect plugins and hardware units recreate the sense of physical space through a number of parameters. At a basic level, these include decay time (or reverb time, the length of the reverb) and pre-delay time (the amount of time before the plugin or hardware unit starts generating reverb). You can use reverb effects to create many types of spaces, from small wooden rooms to grand concert halls to canyons and caves. Many reverb effects processors can even create spaces not found in the physical world. An example of this is something called nonlinear reverb, and you can make really interesting sounds by adjusting various parameters.
By mastering the reverb effect and its parameters, you can bring elements of your mix to the front by using less reverb, or push them to the back by injecting a sense of space with more reverb.
Chorus
What is Chorus?

Chorus happens organically when distinct, individual sounds occur simultaneously and are approximately in unison. The slight differences in pitch and time between these individual sounds is the chorus effect itself in action.
A Thicker Sound
Chorus effect processors use a combination of delay and pitch-modulation to simulate what you would hear if you had multiple sources of slightly varying pitch attempting to create sound in unison. Using Chorus plugins and outboard gear, you have the benefit of being able to tweak aspects of the chorus effect, including stereo width, the amount of pitch variation, and delay.
Using a chorus effect is a great way to achieve a thicker sound when you need some additional weight, for instance, when a vocal hook enters in the chorus section of a pop song. It’s also commonly used as a stereo widener on guitars and synths.
Distortion

What is Distortion?
Distortion is the result of an audio signal “clipping” — or being so loud as to hit and go beyond the maximum loudness supported by whatever piece of gear is being used. The result is a compressed sound that adds odd and/or even harmonics to the original signal.
Tube vs. Solid State
Tube gear, in particular, adds even harmonics, which is considered by many to offer a pleasant and warm enhancement to the audio signal. This happens when the tube (or multiple tubes) are overdriven and pushed beyond their normal rating, resulting in soft clipping.
Solid-state gear (which uses transistors) generates harder clipping and adds odd harmonics, a signature for dirtier distortion. The dirtier sound is a result of hard clipping in the audio path due to the use of transistors, which are less forgiving than tubes.
Common Uses for Distortion
While the most common application for a distortion effect is on electric guitar, you can apply a distortion effect to just about any audio source. In modern music, you’ll often find that distortion is used as an effect to enhance everything from kick and snare drums to vocals, bass, piano, and more. There are no rules, so go ahead and dirty it up!
Compression

What is Compression?
Compression is an effect that reduces the dynamic range of an audio signal. The quiet parts increase in volume and the louder parts and peaks are lowered, or attenuated. Compression creates a more even signal and allows the average loudness to increase since the peaks are better controlled.
If you’re a visual person, think of a sandwich as your audio signal source. Now imagine holding that sandwich and squeezing the top and bottom of the bread. You’ve compressed your sandwich — the bottom got pushed up, and the top got pushed down. This is what’s happening to your audio signal when you use compression.
Basic Compression Settings
Most compressors generate compressed audio by way of a few common variables. They are input, threshold, ratio, attack, release, and gain (or makeup gain). Some compressors have fewer controls while others have more, but these are the basics.
- Input — controls the signal level hitting the input stage of the compressor
- Threshold — sets the level the signal must cross before the compressor begins reducing, or attenuating, the signal
- Ratio — often shown as 2:1, 4:1, 8:1, etc. — this is how much compression will be applied once the signal crosses the threshold.
- Attack & Release — Attack is how fast the compressor will react once the signal has crossed the threshold.
Release is how quickly the compressor will stop compressing after the signal falls below the threshold. - Gain — Output gain or makeup gain is how much you would like to increase the overall signal after it has been compressed. If you are reducing the signal to a great degree for a special effect, you may find you want to apply additional gain at the output stage to make
– up for all the compression you are doing.
Different Compressors. Different Sounds.
There are hundreds, if not thousands, of compressors available for you to use — some tube, some solid-state, some plugins. They all provide varying degrees of coloration to your audio signal, from natural and transparent, to warm and gooey — that’s a technical term. 😉
How you apply compression depends on your goal.
You may want to tame a vocal performance and apply light compression, or perhaps you’ve decided to crush a room mic you used as part of a drum kit recording. There are some advanced techniques we’ll cover in a future article having to do with parallel compression (often used to inject some energy), and sidechain compression (for a pumping effect).
In general, the most common use for compression is to achieve a greater level of control over a performance, without sucking life out of the sound. It’s also popular to dial in more aggressive compression when you are after a specific, squashed sound for effect.
Quick Tips if You’ve Never Used Compression While Mixing
- Load up a compressor plugin on a vocal or instrument track. Feel free to use a compressor that came with your DAW — it’ll work just fine for this purpose.
- Dial-in some settings, these should be a decent starting point:
- Ratio: 3:1
- Threshold: -10dB
- Attack and Release: a medium setting on each should be fine to start.
- Adjust the threshold and look to get between 3 and 5dB reduction on average.
- Set output gain to about 3dB
- Play around with various settings, and listen for what it’s doing to the audio. How does the threshold affect the compression? How does the ratio affect it? The attack time? Release time?
If you’re just starting out, learning how to dial in compression is a skill you will grow into over time. It’s very common for beginners to over-compress and end up with mixes that lack punch, but you’re well on your way to more complex mixes now that you understand these five effects.
In the next article, we’ll be getting to the good stuff where I cover some of the best plugin brands and some of my favorite plugins for each of the effects we discussed in this article. Stay tuned!




Thank you Josh for a great breakdown of basic effects. I knew much of what you shared, but your articulation of the variations really helps to know the terms and the results. For reasons of not knowing these sorts of things keeps me from using them, or feeling frustrated with the results, likely because I was trying to use the wrong effect to obtain a certain result. Please keep writing… I enjoy and get a lot from your articles!
Incidentally, can you recommend any website or book on DSP that helps coach us medium-skill users, simple enough to understand by most anyone but not so much as to disappoint a more advanced person? Perhaps an article on that would be useful.
Hey Brian, thanks for reading and I’m glad you are enjoying the articles and finding them helpful!
As for a book on DSP, is there a particular aspect of DSP you want to go deeper on? Depending on what kind of information you are after, I highly recommend The Computer Music Tutorial from MIT Press. It’s a little pricey, but what’s great about it is that it’s not software specific, so it’s big on understanding the underlying concepts that you’ll use in whatever software you choose.
If, after reading the synopsis, you think it’s not quite right, just let me know and provide some additonal info about what you’re looking for and I can try to make another recommendation. Beyond that there are a couple sites (paid) that are pretty popular… PureMix does a ton of in-depth tutorials. For 30,000 views from some of the world’s top engineers, there’s always Mix with the Masters. I find it valuable to see how mix engineers approach their mixes, and some of the video series are really great for helping you get inside their mind and thought process. PureMix definitely gets more technical though, and really walks you through some of the basics, like how to treat and mix vocals etc.
Hope this helps, and thanks for reading! I should have a new article up later this week!
-J