
Want to share some holiday cheer? There’s nothing better than posting a holiday movie you’ve created in iMovie to Facebook or sharing it with friends and relatives in other ways. In this quick tutorial, I’ll show you how to create a holiday video with iMovie — even if you’ve never launched the app on your Mac before. In a forthcoming article, we’ll show the differences between the Mac and iOS/iPadOS versions of iMovie.
Here we go!
Capture The Special Moments
For the purpose of this article, I’ll assume that you’ve used your favorite camera — your iPhone — to capture the video clips that you’ll use in your holiday video.
If you’re waiting until Christmas Eve or Christmas Day to record the excitement and wonder of opening presents, here are a few tips to help you make the most of making those video clips:
- Capture short clips — 10 to 20 seconds in length at the max. Why? Our brains have been trained by TV and movies to see a lot of very short clips, edited into a coherent story. Don’t bore people with long video shots.
- Have several people capture video at the same time from different angles. This can be fun and keep everyone in the final movie, including the people behind the cameras.
- Make sure you have adequate light. Be sure to have a lot of light on your subjects so that your video is crisp and clear, without dark shadows on the faces of the family and presents.
- Did you know you can use photos for content in iMovie? A well-posed photo or two can serve as a focal point of your movie.
When your family get-together is over, your video clips and photos should be moved to your Mac. If you use iCloud Photos to store and sync your photos between devices, chances are good that all of the images will be on your Mac in a few minutes. If friends or relatives have also captured images on their iPhones or iPads, have them use AirDrop to send the photos to your Mac.
Make Your Movie
Ready to become a filmmaker? Start by launching iMovie from your Applications folder. If it’s the first time you’ve launched iMovie or if the app has been recently updated, you may see a few splash screens showing new features. Once you have cleared those, you’ll come to the main iMovie screen. There are two tabs on this screen; Media, which is where you can grab video clips and photos to add to your movie, and Projects. iMovie opens to an empty Project page with a big Create New button with a plus sign ( + ) on it. Click that button.
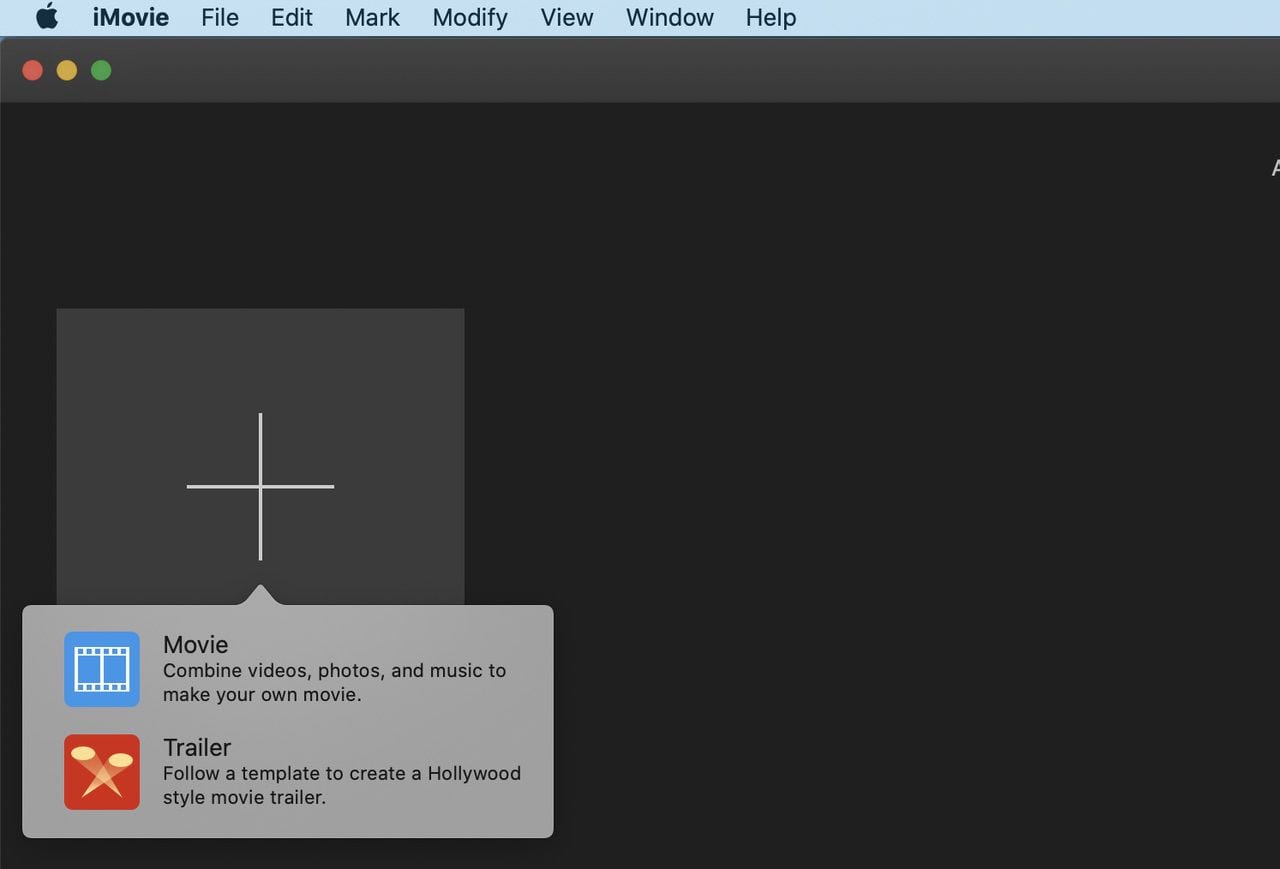
As you can see in the screenshot above, iMovie gives you a choice to make a movie or a trailer. While trailers are fun — they’re like standard movie preview trailers — we’re going to make a movie, so select Movie.
Now you’re seeing a window with the title “My Movie.” Want to change that to something more descriptive? At the top of the iMovie window is a button marked “Projects” with a left arrow ( < ) next to it. Click on that, and a dialog appears so you can give your project a name. In the screenshot below, we’re calling it “Christmas 2019”.
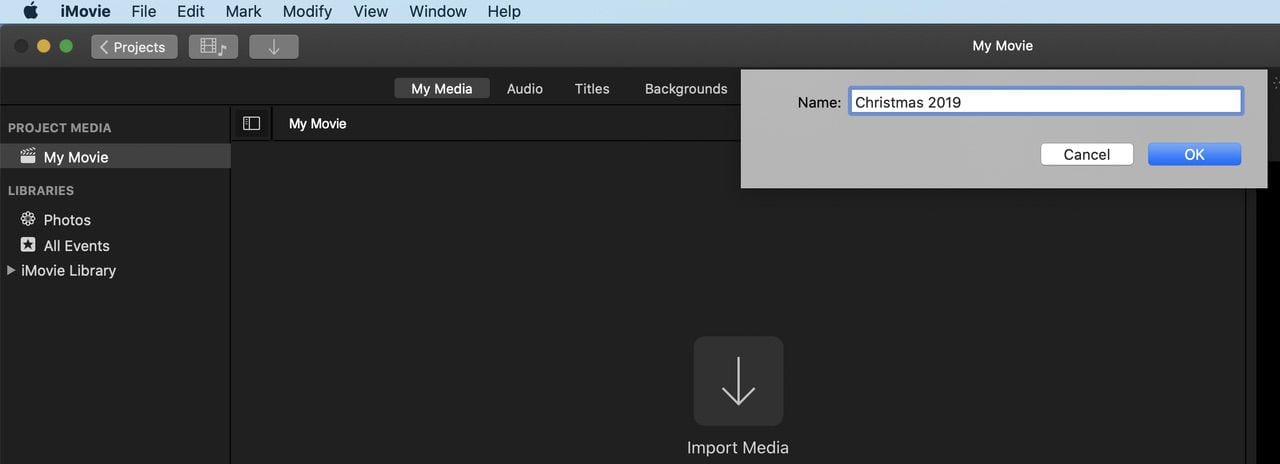
Naming the project takes you back to the Project Browser, so just double-click the Project called Christmas 2019 to begin working on it.
Add Content
We’ll start by dragging our content from the Photos Library into the space at the bottom of the screen. For this example video, I’m just going to add some videos and photos. Don’t worry about adding content in order by time; you can change that later.
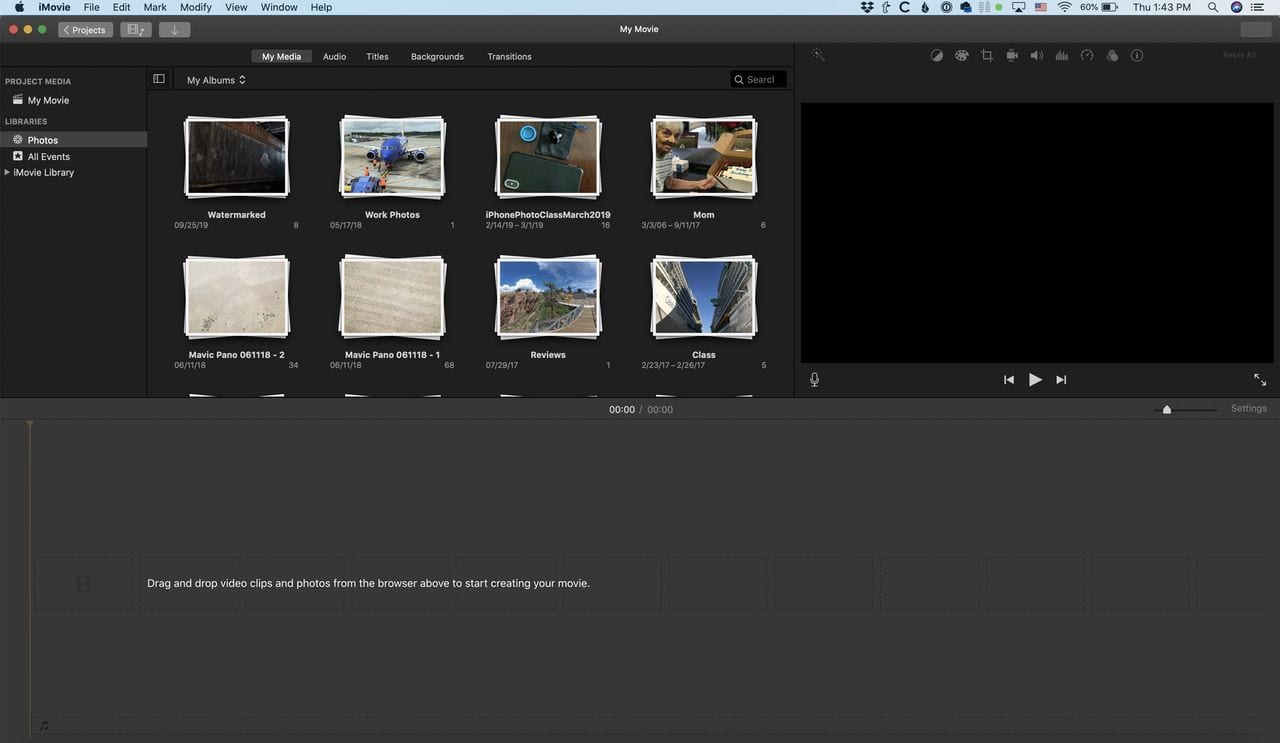
Hint: if you have a lot of video and photos, it can take a while for iMovie to list them. Before you start your video, you might want to create a new album in the Photos app for your project that contains just the photos and videos you want to use. Once you’re in iMovie, select Albums from My Media and you’ll be able to add your content much faster.
You can either drag the content to the bottom of the iMovie project screen or click on the video or photo you want to add, then click the + button. This adds the imagery to the end of the video timeline. As you add content, you’ll notice that the total length of your video increases. Don’t make your movie too long, or it won’t be very easy to share. In our example, the video is a little over a minute long (see screenshot below).

By the way, when you add a photo, it is automatically given a “duration” for how long it will show on the screen. The default duration is 4 seconds, but you can change that in iMovie > Preferences or drag the edge of a photo segment to the left or right to lengthen or shorten the duration.
Add a Title to the Beginning of the Video
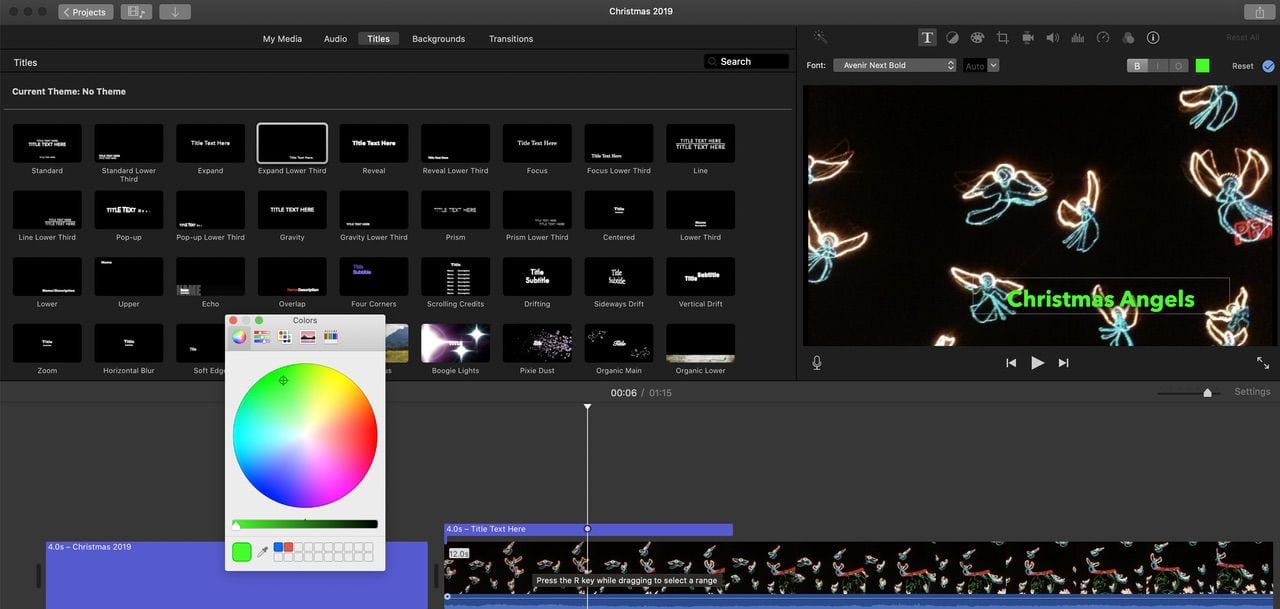
It’s not a “real” movie until you have opening titles! We’ll add a simple title to the beginning of our movie. To begin, click on “Titles” in the tabs at the top of your project and you’ll see a variety of static and animated titles. For this movie, I chose one called “Reveal” and dragged it to the beginning of the video timeline at the bottom.
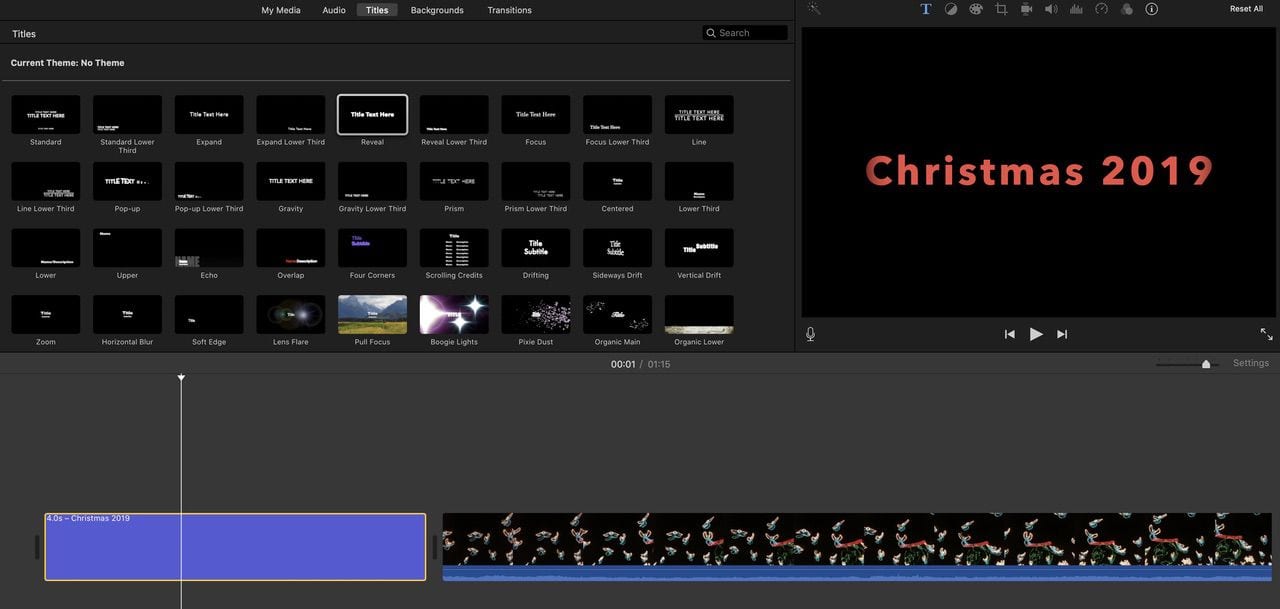
Double-clicking the title box lets me change the font, the color, and a number of other details. By default, the title duration is 4 seconds — that can be lengthened or shortened by clicking on the end of the title box, then dragging it one direction or another.
Want to add a title to a photo or video clip? It’s common to use what are called “Lower Third” titles so that you can add text without covering up the subject. Just drag any one of the Lower Third titles (or any title, for that matter) down to the piece of video or the photo you want to add a title to. You can see in the screenshot below that I’ve added a short title to some video of animated Christmas angels.
You can also add “end credits” to your video if you want to using a similar process. iMovie includes “scrolling credits” as a standard title so you can include all of your vast filmmaking crew and actors to the movie!
Add Transitions
As TV and movie consumers, we have grown accustomed to transitions between shots. While most of these are straight cuts from one shot to another, there are also dissolves (where one video clip “dissolves” into another), fades to black or white, wipes, and more.
Applying transitions is simple — just click on the Transitions tab in the project window, click on a type of transition, and then drag it down between two clips. You can change the duration of the transition to make it less jarring or more abrupt by double-clicking on the transition button between the clips, then filling in a new duration.
Make Your Photos or Video Clips Look Better
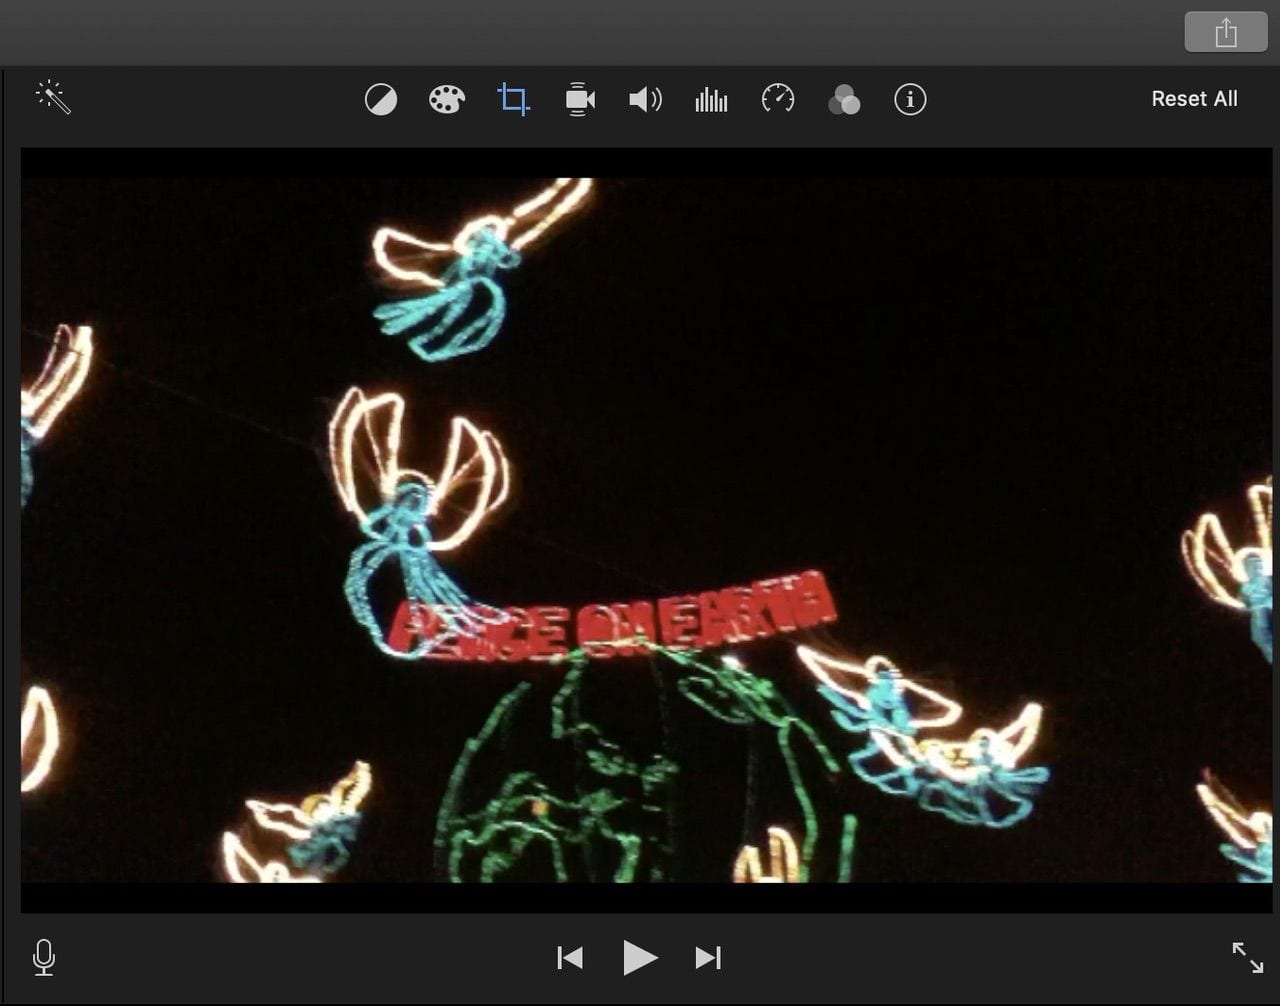
If you hadn’t already edited your photos or video clips in the Photos app on your Mac, iPhone or iPad, you can actually do some limited editing in iMovie.
Click on any video clip in your video timeline, and it appears in the preview window at the upper right corner of the iMovie screen. Above that are a set of tools. In the screenshot below, you see (from left to right) a “Magic Wand” tool that does its best job of adjusting the video or photo to look better, a contrast adjustment tool, a color adjustment tool, a cropping tool, image stabilization, sound volume, sound equalization (including reduction of background noise), speed, and audio and clip filters.
Share Your Video
When you’re done with your masterpiece, it’s time to share it. Under File > Share… you have a choice of sharing the movie through email, on YouTube, Facebook, Vimeo, or as a file.
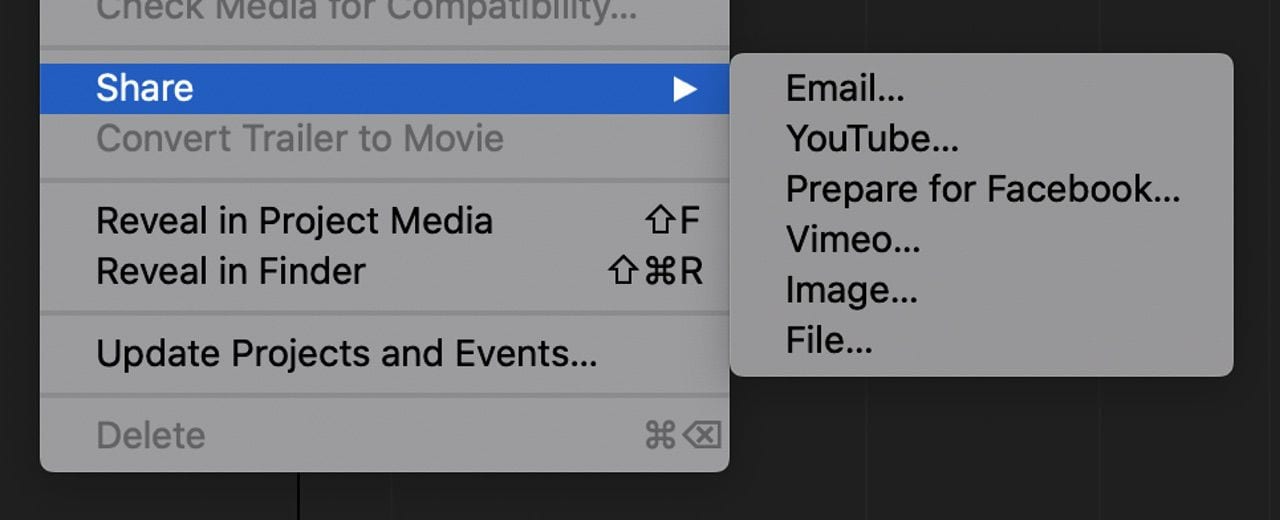
Emailed videos are limited to about 10MB of size, so you may need to downsize the video to a resolution like 854 x 480 or 428 x 240 to send it. For much higher resolution, you’ll probably want to share through one of the other methods. In that case, the best way to upload the videos is to save them as a local file, then use the chosen site’s default upload method.
For More Information
While I’ve provided the rudiments of iMovie to you in this post, there’s a lot more to learn about the free app. Apple has a full iMovie Support page, and it’s even possible to sign up for Today at Apple classes at your local Apple retail store.


