The Mac has so many features that it’s not uncommon for new Mac users to overlook helpful tricks, as well as for old hands to simply forget about them. In this New Year, the Rocket Yard takes a look at often overlooked but surprisingly helpful tips for managing Mac’s desktop.
Managing the Desktop
The Mac’s Desktop is that area of the display between the menu bar at the top and the Dock at the bottom. The desktop is where apps display their windows, and disks, and servers, files, and folders can display their icons. The desktop background image, icons, and general settings can be changed and customized by the user. You primarily interact with all of the desktop denizens with your mouse or trackpad, as well as any third-party pointing device you may choose to use.
Suffice it to say, the desktop is where all the action occurs.
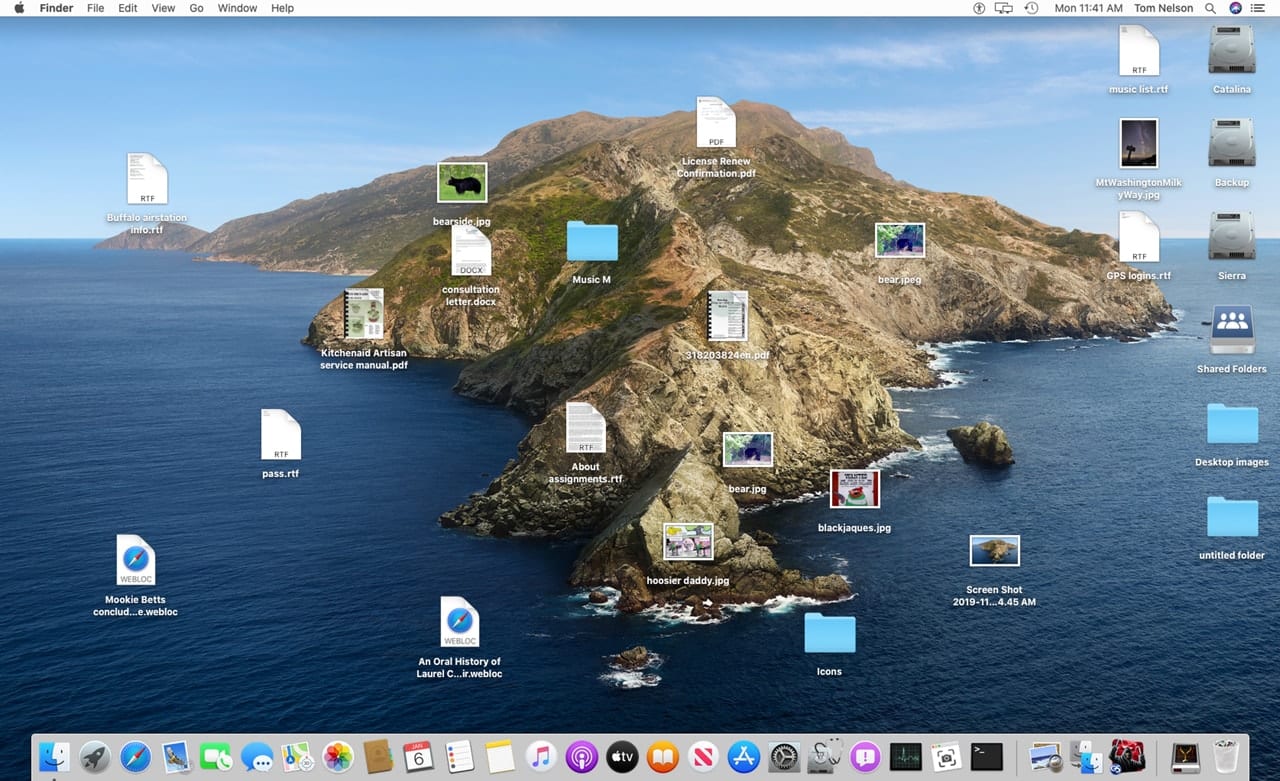
As the primary play area the desktop can get a bit messy, so we’ll start with tips for keeping the desktop well organized.
Most of the items on the desktop (files, folders, drives, servers) can be placed anywhere you wish, though there can be some restrictions depending on desktop settings. You won’t find these desktop settings in the System Preferences; instead, many desktop options are available directly from a menu when you place the cursor over the desktop:
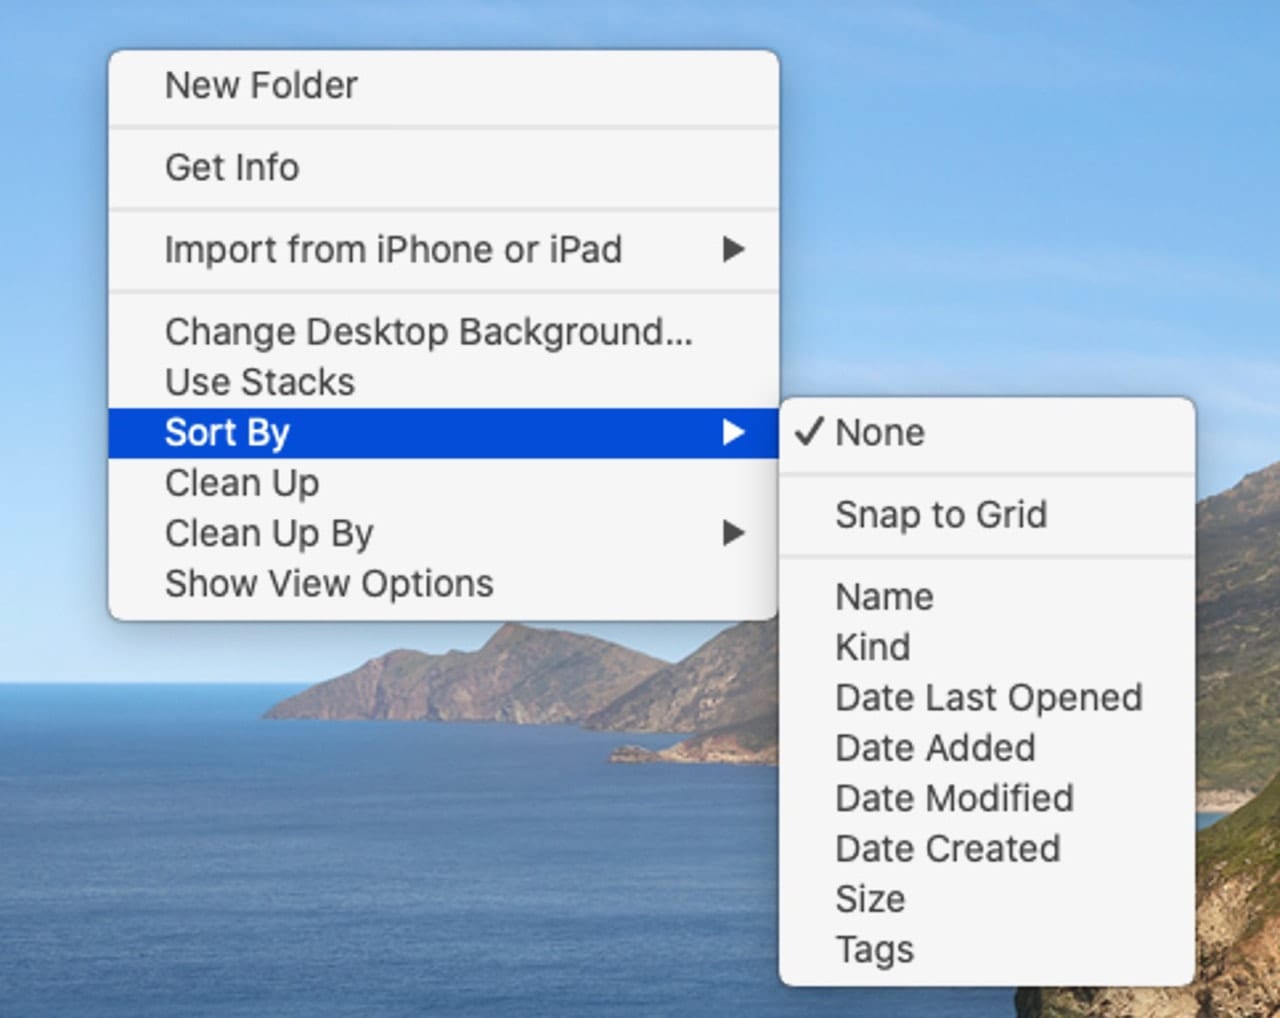
Move the cursor to an empty spot on the desktop. Make sure it’s not over a file, folder, or disk, then right-click or control-click the mouse or trackpad. A popup menu will appear, with a number of options that pertain to the desktop:
Change Desktop Background: This menu item will open the Desktop & Screen Saver preference pane, where you can select an image to use for your desktop. You can also have the desktop image change automatically, or make use of a dynamic desktop that brightens and dims depending on the time of day.
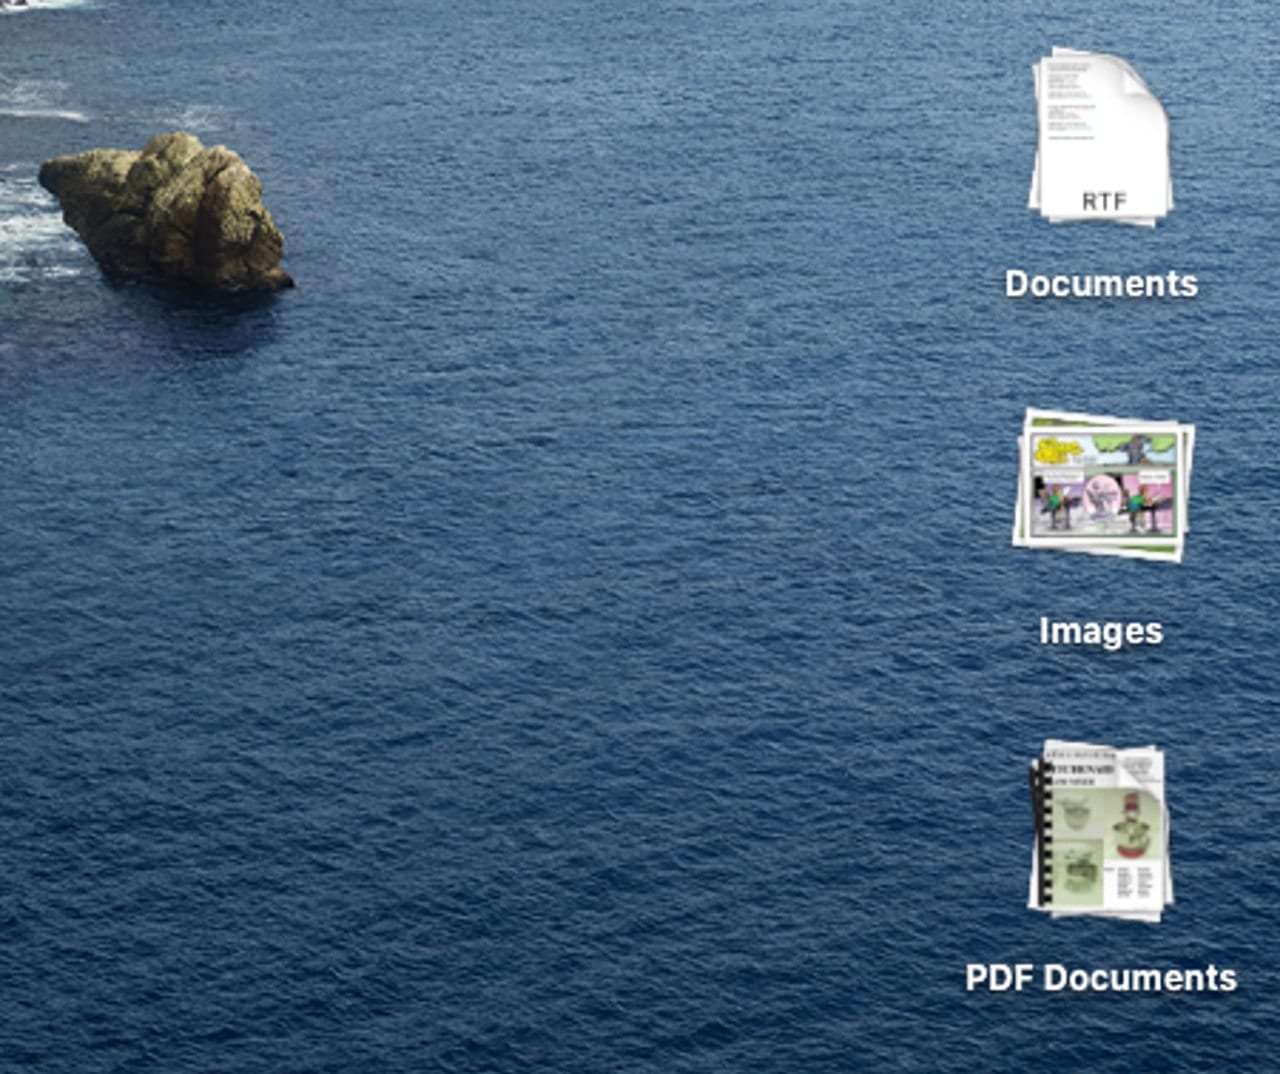
Use Stacks: The Mac has had the ability to display items in stacks for a while, but it pertained to how items were shown in the Dock. With macOS Mojave and later, Stacks became a display option for the desktop. Stacks automatically collects related items on the desktop and displays them in stacks. Stacks are usually organized by kind, such as documents, images, and spreadsheets, but there are quite a few stack options.
You can find out more about using Desktop Stacks in the Rocket Yard guide: Mess Up Your Desktop with 6 of Our Favorite ‘Hidden’ macOS Mojave Features. Don’t worry, these tips work with macOS Catalina as well.
Sort By: The desktop is really just a special type of Finder window that displays the content of the desktop folder. As a Finder window, it has all the same sorting options for displaying files and folders:
- None: No sorting options; items you place on the desktop stay about where you place them. Use this setting when you want complete control over item placement on the desktop.
- Snap to Grid: The desktop has an invisible grid that can be used to snap items you drop on the desktop to. This keeps all the desktop items evenly spaced and can prevent items from being cluttered or appearing on top of each other. See View Options, below, for setting the grid spacing.
- Name: Sorts items on the desktop by name. Using this option will rearrange items so they appear in alphabetical order, sort of. There are some desktop restrictions for where items are placed, such as the startup drive, which is usually located at the top right of the desktop, so it will appear there no matter what its name is. Name sorting is also by kind, meaning drives, files, and folders are all sorted separately by name.
- Kind: This sorts the items on the desktop by their type. You should see all the drives listed together, as well as folders and files, with files further divided by type of file (images, documents, media, etc.).
- Date Last Opened: Items most recently used will appear first in this sorting option.
- Date Added: Sorts by date and the time the item was added to the desktop.
- Date Modified: Sorts by the last time the item was changed.
- Date Created: Sorts by the date the items were originally created.
- Size: Uses the file or folder size as the sort option.
- Tags: Sorts the desktop by items with tags you have added. You can find out more about tags in the Rocket Yard guide: 10 Mac Features You Probably Don’t Use But Should.
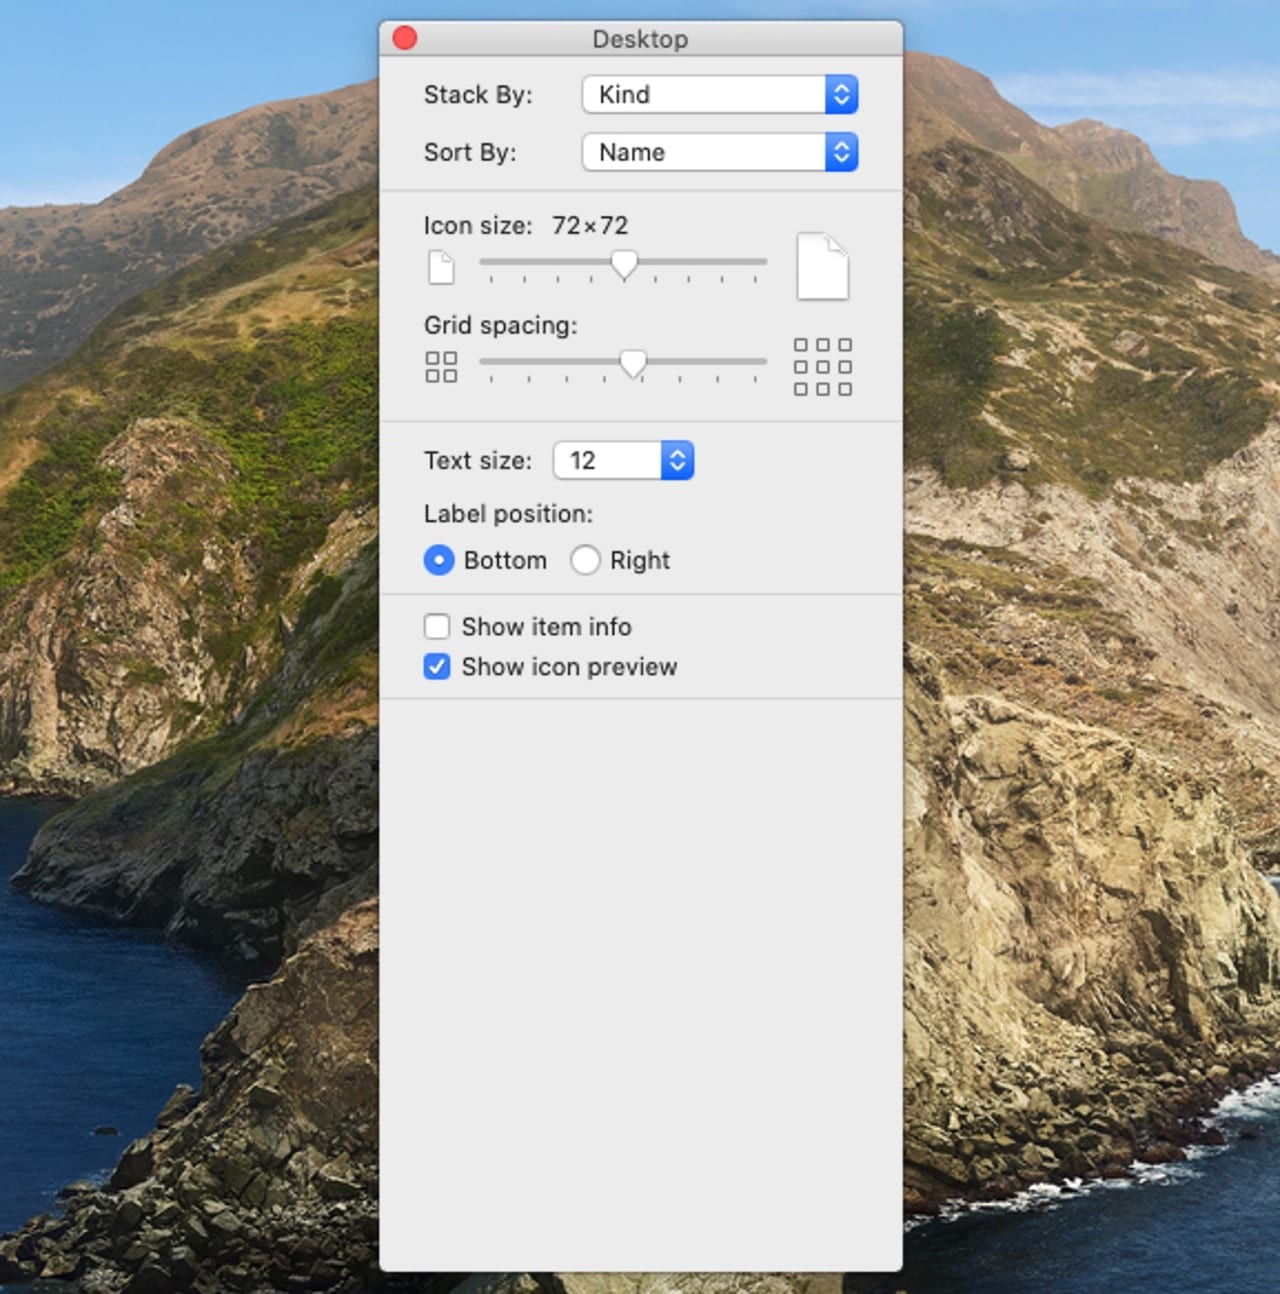
Show View Options: This menu item will open the Desktop viewing option’s dialog box. Here you can set the sorting order used by Stacks, as well as the general sorting order for the desktop (this is a repeat of the sort order options listed above). In addition, the view options include:
- Icon Size: Sets the display size of all icons on the desktop.
- Grid Spacing: Adjusts the spacing of the invisible grid used on the desktop to snap items to.
- Text size: Selects the size of the text used for an item’s name.
- Label position: The text name of an item can be placed either at the bottom or to the right of the icon.
- Show item info: With this option selected, each item includes an additional line of information such as size or how many items are in a folder.
- Show icon preview: Icons can either appear with a generic icon for the item type or with a thumbnail representing the content of the file.
Clean Up: This item is only shown when the Sort by option is set to none. When Clean Up is selected, items on the desktop will be arranged in an orderly fashion, snapping to the current grid settings. Use the Clean Up option when your desktop becomes too messy.
Clean Up By: This item is only shown when the sort by option is set to none. Clean Up By allows you to perform the same basic one-time cleanup as above, but it allows you to select a sorting option to use.
The Dock
The Dock is another major element of the desktop. It appears at the bottom of the display, but that’s just its default setting. You have a great deal of control over where and when the Dock appears, as well as what icons the Dock holds.
The Dock is primarily an app and document launcher that gives you quick access to your most often used apps. It has a number of features and settings you can customize, including controlling its size, location on the display, magnification settings, or use of animation.

Customizing the Dock and exploring its potential would be a couple of articles all on their own. If you would like to learn more about the Dock, check out:
- macOS 101: How to Take Full Advantage of the Dock
- Tech 101: Mastering the Iconic macOS Dock, Part 1
- Spacers, Stacks & Swapping: Mastering the Iconic macOS Dock, Part 2
- Terminal Tricks: Mastering the Iconic macOS Dock, Part 3
- Quick Tip: Getting the Mac Dock to Only Show Running Apps
The above articles will help you organize the Dock to your heart’s content.
The Menu Bar
The Menu Bar sits at the top of your Mac’s display and is populated with an array of menu items and icons that allow you to check the status of various Mac settings, and perform various commands that control your Mac, as well as the currently active app.

The menu bar contains four primary areas; from left to right they are:
Apple menu: Contains commands that affect your Mac as opposed to ones that affect only the currently running app.
App menus: The next section contains all of the currently running apps’ menus. You’ll find the usual File and Edit menus, along with any number of additional menus needed by the current app.
Status menus: This section is usually separated from the App menus section and will appear towards the right-hand side of the display. It’s populated with a number of Apple-supplied items including a clock, Bluetooth status, Wi-Fi status, Sound, and other items. Third-party developers who supply a number of specialized apps and utilities for Mac users also use the Status menus section to provide information pertaining to their apps, or to show app status. Find out about some of our favorite Menu Bar apps in: 15 Mac Menu Bar Apps You Should Check Out.
Spotlight: The Mac’s built-in search utility. You can use Spotlight to search your Mac for a wide range of items from emails you may have received to the answer to math problems. You can find out more about Spotlight in the Rocket Yard guide: More Shortcuts, Time Savers for Spotlight in macOS.
Siri: You can activate Siri on the Mac by clicking on its icon in the menu bar. For more information about Siri, check out: Tech Tips: More Ways to Use Siri in macOS Sierra.
Notification Center: At the far right is the notification center, which can be used to view details about the day’s events and catch up with notifications that were sent to you that you might have missed. Discover more about the Notification Center in the Rocket Yard guide: Tips for Using the Mac’s Notification Center.
Mac Desktop Wrap Up
The Mac’s desktop is where most users will spend their time, customizing how the desktop appears as well as acts; it’s one of the keys to having a fun and fruitful time working with your Mac.Let us know how you’ve customized your desktop, and which default settings you’ve changed to better meet your needs.

