Have you ever searched online for an application icon? Maybe you wanted to add the Zoom logo to a Keynote presentation on videoconferencing. Or perhaps you needed a high res image of the Excel emblem for a tattoo to prove how much you love Microsoft. And once you find what you are looking for, it’s a darn jpeg that would leave an unsightly white background anywhere you put it.
Not helpful.
Thankfully, there is an easy way to render a high-resolution PNG image file with a transparent background for any icon on your Mac. And it can be done in less than 30 seconds in 3 simple steps with this Rocket Yard tip. Here’s how:
Create a Transparent Image from a Mac Icon
- Select an application in the macOS Finder and choose “Edit > Copy” or hit ⌘C.
- Open the Preview app and select “File > New from Clipboard” or hit ⌘N.
- A new Untitled document will be created with several iterations of the graphic running down the left-hand side. Don’t freak out. It’s supposed to be that way.
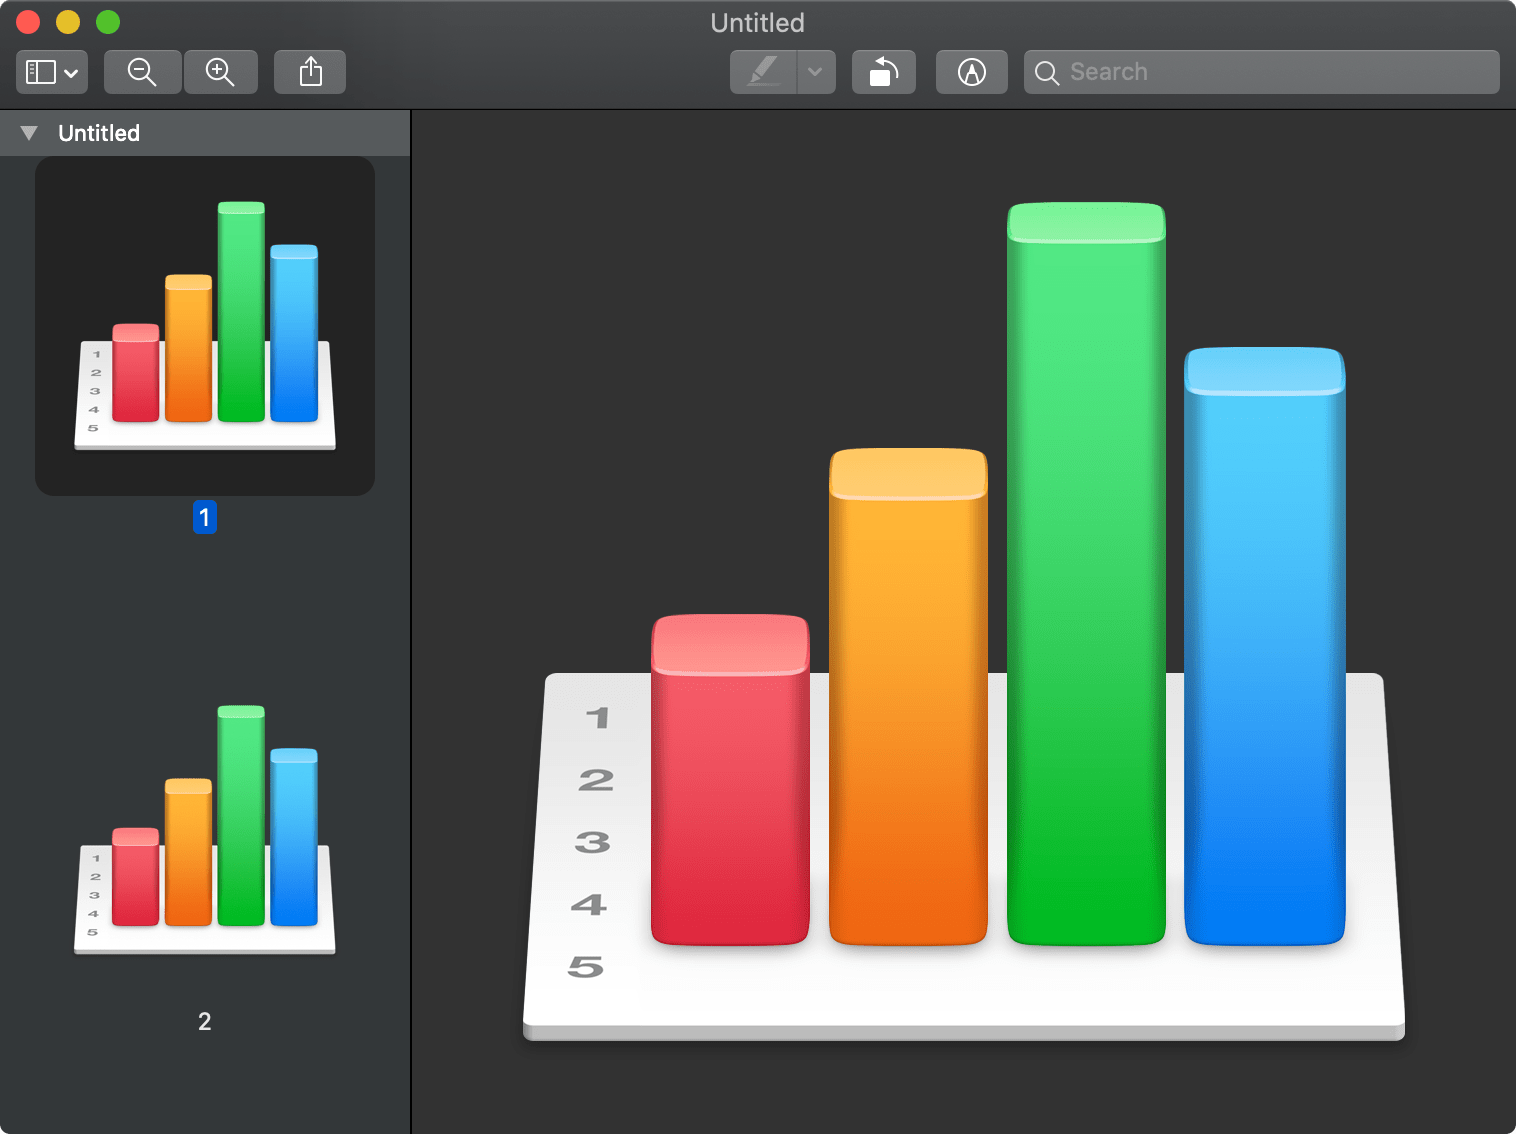
- A new Untitled document will be created with several iterations of the graphic running down the left-hand side. Don’t freak out. It’s supposed to be that way.
- Choose “File > Export…”
- Select “PNG” from the Format drop-down menu at the bottom of the dialog box.
- Make sure “Alpha” is checked because this preserves the transparency channel. Unchecking it will result in the undesired white background mentioned above.

- Give it a name, choose a location, and hit “Save.”
Done – you’ve just saved a Mac app icon as a transparent PNG!
Epilogue: How Did That Work?
I’m the kind of person that likes to know why certain things work the way they do and not just how to do it. So, if you’re like me, below is a little more info. If you could care less, then feel free to comment on how helpful this tip was, and carry on about your day! :-)
Here’s what happened.
When you copied the application from the Finder, Preview was smart enough to know that you wanted to extract the graphic element when you requested it to create a new file. In this case, the app’s icon.
What kind of graphic is an icon?
The icon filetype is called – get this – an Apple Icon File, or .icns. Just like jpg, png, gif, tiff, etc., it is an image file. Or, more accurately, a collection of images. This is why you saw multiple occurrences of the same graphic when you opened the file in Preview.
Each of the images in the .icns file is a different size, typically ranging from 16×16 pixels to 1024×1024. They double in size along the way: 16 > 32 > 64 > 128 > 256 > 512 > 1024 and contain retina versions, which are 2X the standard size.
Why the different sizes?
macOS uses the fixed-size images to scale and display them at any intermediate size as needed. For example, when you resize a Finder window in Gallery mode, the icons smoothly shrink and grow – anywhere from 16 to 1024 pixels square. And because they are PNGs, they maintain their transparency.
Of course, you can save your image in any of the supported graphic formats using Preview, but for the purposes of being able to use it in presentations, visual artwork, websites, print media, transparent PNGs are your best and easiest option.
Like I said, quick and easy!





Tried eliminating the white background on an icon following your directions. Didn’t work. Still have the white. I’m using a brand new iMac. It worked on my laptop, but not here.
Thank, this will help me when writing lab manuals for my department.
Like you, I like to know why not just the how!
I appreciate the article!
LB
Very cool, thank you. I had NO idea that ‘Preview’ was so smart! I’ve been using Image2Icon so far.
Preview is one of those apps that is surprisingly powerful and full of surprises!
What OSX version are you using to do this? I tried it with 10.14.6, and it did not work.
This was done using 10.15, but I thought for sure it was the same in 10.14 Mojave. Try augmenting the process a bit:
Let me know if that works for you!
@ 70 years old this was very easy and works like a charm! Thanks for sharing!
Excellent tip! Thank you.
Great tip! Thanks! Useful applications for that and more are GraphicConverter and Image2icon.