The beginning of a new year means one thing… it’s time to start getting ready for tax season again. Many of us are good at scanning and organizing documents into various folders. Scanning and organizing makes it difficult to find just one document. macOS has a good search capability built into Finder and Spotlight, but it’s really designed to search either your entire hard drive or one specific folder. Here’s how to refine a search to focus only on designated folders that can be anywhere on your hard drive.
Simple Searches
Let’s look at how searches operate in macOS. What most of us do is organize similar documents in folders. Now, if you only have one folder for a project or company, you could just search that folder or your entire Mac using Command ( ⌘ ) – F. You may get hundreds of hits if you have a lot of documents, which is why many people create smaller, more focused folders.
That creates a problem, though. To find a document, you may need to search a number of different folders. Wouldn’t it be nice if macOS had a way to search only specified folders? For example, if I know that a particular document is in folder A, folder B, or folder C, could I just search those three folders at the same time?
There’s no “automatic” way to do this in macOS, but there is a workaround…
Smart Folders and Saved Searches
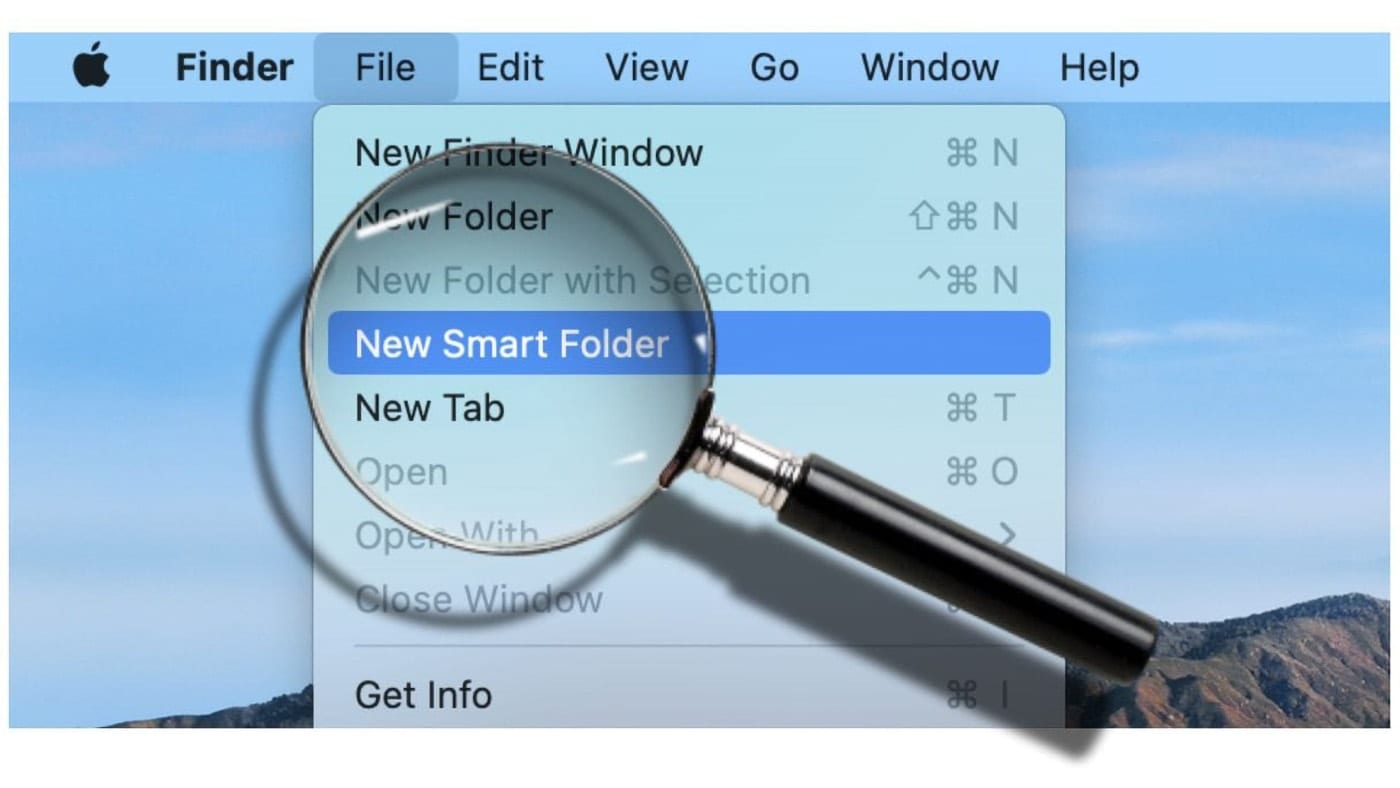
The workaround is to use the power of Smart Folders and Saved Searches. Smart Folders are created in Finder using File > New Smart Folder. Let’s say I open my Documents folder and create a new smart folder. What I see is something similar to this:
At this point, the Smart Folder does nothing. When you create a search in a folder or on the entire Mac for a word, then every time that word is used in a document or file name, it shows up in the Smart Folder. As an example, I’ll create a Smart Folder to search an old document archive I have for the term “DVD”. There are 46 documents found in that folder.

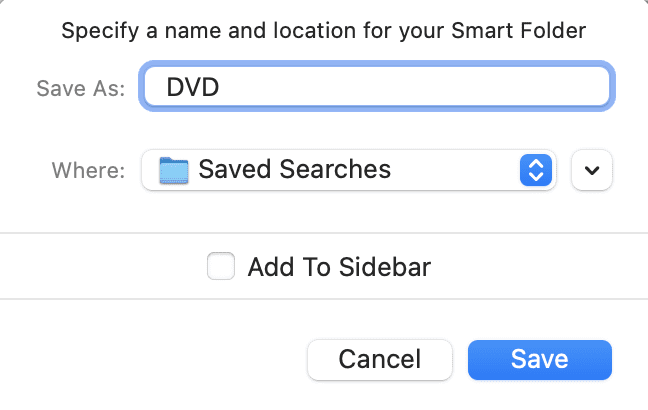
What I want to do here is save this search, creating a Smart Folder. This is done by clicking the Save button on the right side just below the search field, then giving the Smart Folder the name DVD. I’m also going to check the “Add To Sidebar” box, making the search easy to run with just a click on the Finder sidebar.

Where Are Saved Searches Saved?
The Saved Searches location is where Smart Folders are saved, and it is found in the Library folder on your Mac. To find it, hold down the Option key while clicking the Finder Go menu and Library appears – select it.
In that folder is a document called Saved Searches, and inside it is the new DVD Smart Folder Saved Search. That search is saved in a file; we can edit the file with TextEdit and add other folders that we want the Saved Search to search inside.
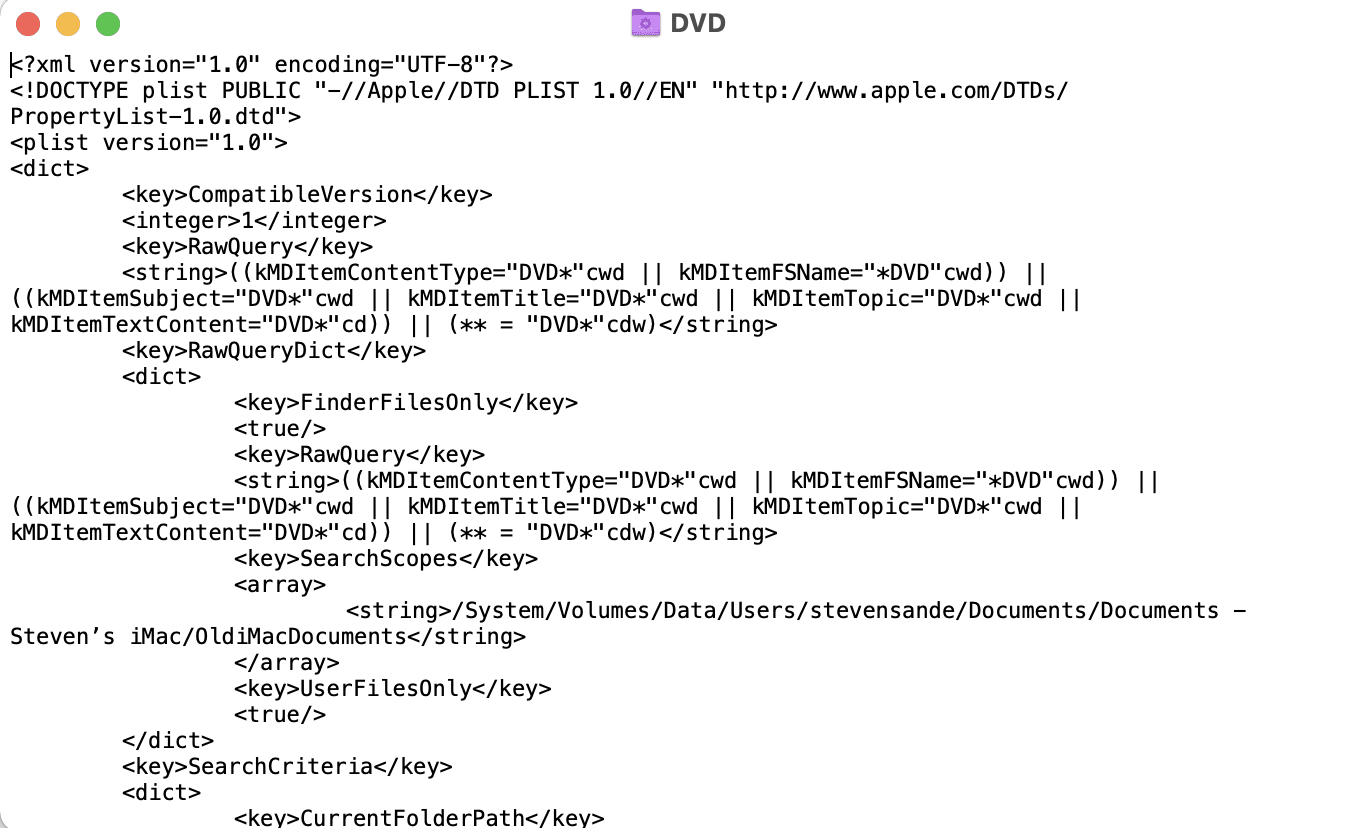
Launch TextEdit (in the Applications folder), then cancel when it asks if you wish to create a new file or open an existing file. Drag the DVD Smart Folder Saved Search file and drop it on the TextEdit icon in the Dock, and we can see what’s in the file.
Saved Searches Are Defined In XML Files
In that seemingly impenetrable mess of text is our Saved Search. This is stored in an Extensible Markup Language (XML) file format. Scrolling through the file reveals some familiar items – the name of our Smart Folder (DVD), the path to the folder I was searching (/System/Volumes/Data/Users/stevensande/Documents/Documents – Steven’s iMac/OldiMacDocuments) and so on.
The folder path shows up in three different arrays – a list of things, so to speak. It’s found in the SearchScopes, CurrentFolderPath, and FXScopeArrayOfPaths arrays.
Find The Paths to Multiple Folders
Before adding additional folders to our search, let’s find their paths. My initial search was in the Users folder, under my username stevensande, in the Documents folder, in another folder called Documents – Steven’s iMac, and finally, a folder called OldiMacDocuments. The way the UNIX underpinnings of macOS sees this is as this path – /System/Volumes/Data/Users/stevensande/Documents/Documents – Steven’s iMac/OldiMacDocuments.
I want to search in another folder called “ACC Classes”. The path to this folder is /System/Volumes/Data/Users/stevensande/Documents/ACC Classes. And for good measure, let’s add another folder named “NaNoWriMo”. It’s path is /System/Volumes/Data/Users/stevensande/Documents/NaNoWriMo.
Back to our DVD Saved Search document in TextEdit…
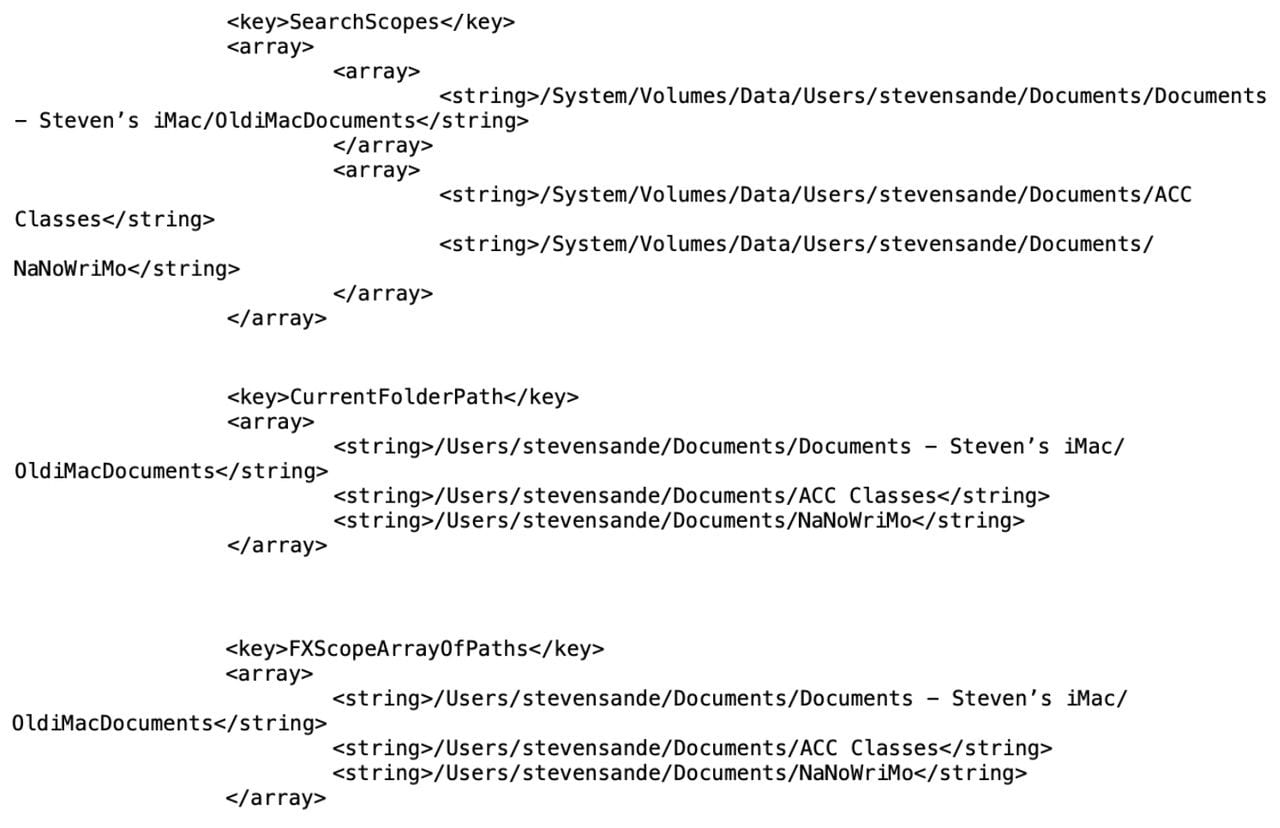
Let’s create additional search strings for each folder in each one of the three arrays described earlier – SearchScopes, CurrentFolderPath, and FXScopeArrayOfPaths. SearchScopes is a bit different than the other two in that it requires a path from the root, but you can somewhat mimic the format and just copy and paste in your paths.
This composite screenshot shows what the arrays looked after editing. This image is just for clarity – the arrays are scattered throughout the DVD Saved Search document:
Relaunch The Finder
We’re almost there! Save the edited TextEdit document holding your saved search. You’ll need to do one more thing before trying the multi-folder search – relaunch the Finder. This doesn’t mean you have to reboot your Mac. Press Option, then click on the Finder icon in the Dock. At the bottom is “Relaunch” – select that. Any open Finder windows disappear for a short time.
With the Finder relaunched, running the DVD Saved Search now returns all hits on documents either containing DVD in the title or in the body of the text. The initial search of one folder found 46 documents; now searching three folders the search finds 50 documents.
A Lot Of Work Just to Search Multiple Folders!
You’re probably thinking “This is a lot of work just to search more than one specific folder at a time!” The good thing is, once you have created and modified your Saved Search, you can use it from then on. Since it is also a Smart Folder, new documents that meet your criteria and are stored in the specified folders automatically appear in the search results.
There are third-party apps like Thomas Tempelmann’s excellent Find Any File (FAF) utility that supercharges the Mac’s native search abilities, but I prefer to not clutter up my Mac with too many apps. FAF also doesn’t let users specify just certain folders – instead, it tends to search entire drives.


How do I select, copy, and paste (or drag and drop) criteria settings from one Smart Folder to another?
How do I specify volume(s) to search in a Smart Folder criteria (or a specific folder in a finder file’s path)?
I found the “document container” criteria, but it only specifies the immediate parent folder of a finder item. I want to limit searches to everywhere below (within) a certain container (folder or volume).
I have been looking for this answer for so long – I cant even tell you how many hours/days/weeks of work this is going to save me in the long run!! Thank you so much for posting and explaining it so clearly
Thanks Steve, good hack! I just did it, definitely helpful. I have found a difference with this edited smart folder compared to my previous, and is that when the folder is open it always shows the search criteria at top, which in my case is not bad at all.
HoudahSpot is better.
The problem with Smart Folders to search is that they corrupt over time and stop working. Apple should allow a flexible search interface, much as Sherlock was in Mac OS 9 Classic. Working on both indexed and non-indexed disks.
A bit of an error when this is stated:
“… There are third-party apps like Thomas Tempelmann’s excellent Find Any File (FAF) utility that supercharges the Mac’s native search abilities,
… FAF also doesn’t let users specify just certain folders – instead, it tends to search entire drives.”
FAF has a “where” option that allows the use of “inside folder…” which needs to be selected… ;-)
Being an old Unix head, I still prefer the decidedly non-Apple “find” on the command-line. It has an arcane set of search options, but therein lies its power.