

You can use the Disk Utility in macOS to create a disk image from a disk or a connected device. A disk image (.dmg file) is a file that looks and acts like a mountable device or volume.
What is a disk image and why should you care?
For example, a disk image is usually a copy of a certain optical media, but you can also create a disk image from your hard drive or a USB flash drive. As noted by Faronics — a company that “delivers software that helps manage, simplify, and secure multi-user computing environments” — there are several advantages to using them, such as:
- You can copy one system to a large number of identical computers, which means you don’t have to set up every computer separately or set up the whole operating system from scratch. One image can be put on several Macs.
- They’re convenient for incremental backups since you can make as many different images as you want.
- Images are saved as files. If you want/need to keep data from a Mac, you don’t need to keep the actual hardware around. Just create an image of that drive and store it.
Creating a disk image
With the Mac’s Disk Utility — which is found in the Utilities folder inside the Applications folder on your Mac’s drive — you can create a disk image that includes the data and free space on a physical disk or connected device, such as a USB device. For example, if a USB device or volume is 80GB with 10GB of data, the disk image will be 80 GB in size and include data and free space. You can then restore that disk image to another volume.
Here’s how:
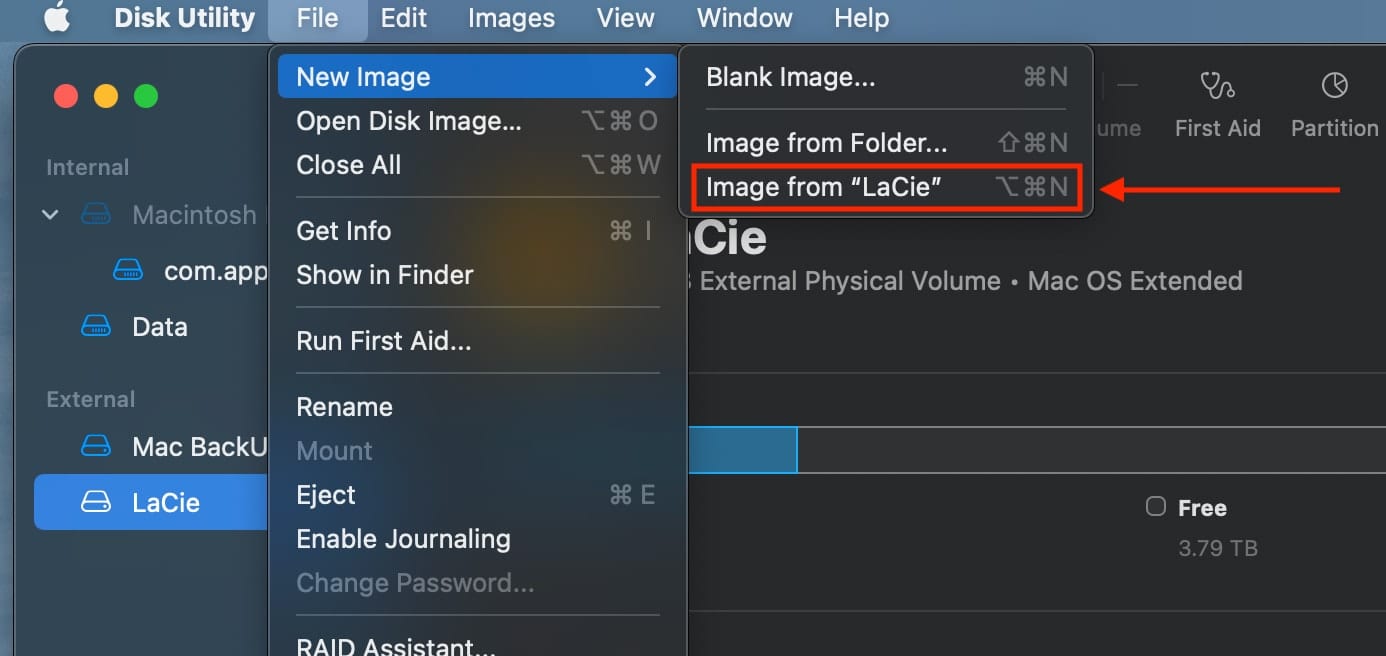
- Select a disk, volume, or connected device in the sidebar.
- Choose File > New Image, then choose “Image from [device name].”
Enter a file name for the disk image, add tags if necessary, then choose where to save it. This is the name that appears in the Finder, where you save the disk image file before opening it.
Click the Format pop-up menu, then choose an option:
- Read-only: The disk image can’t be written to, and is quicker to create and open.
- Compressed: Compresses data, so the disk image is smaller than the original data. The disk image is read-only.
- Read/write: This allows you to add files to the disk image after it’s created.
- DVD/CD master: Can be used with third-party apps. It includes a copy of all sectors of the disk image, whether they’re used or not. When you use a master disk image to create other DVDs or CDs, all data is copied exactly.
- To encrypt the disk image, click the Encryption pop-up menu, then choose an encryption option.
- Click Save, then click Done.
Disk Utility creates the disk image file where you saved it in the Finder and mounts its disk icon on your desktop and in the Finder sidebar.
How to create a secure disk image
You can also use the Disk Utility in macOS to create a secure disk image for confidential documents that you don’t want others to see without your permission. With Disk Utility launched:
- Choose File > New Image > Blank Image.
- Enter a file name for the disk image, add tags if necessary, then choose where to save it. This is the name that appears in the Finder, where you save the disk image file before opening it.
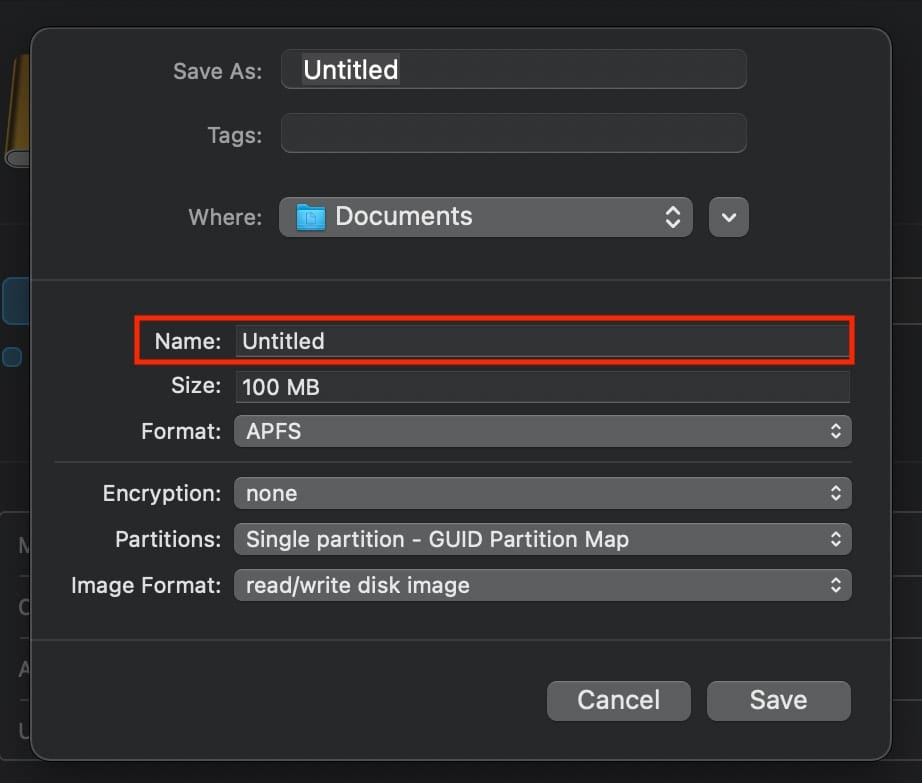
- In the Name field, enter the name for the disk image. This is the name that appears on your Desktop and in the Finder sidebar.
- In the Size field, enter a size for the disk image.
- Click the Format pop-up menu, then choose the format for the disk: Mac OS Extended (Journaled) or Mac OS Extended (Case-sensitive, Journaled)
- Click the Encryption pop-up menu, then choose an encryption option.
- Enter (you’ll have to do this twice) a password to unlock the disk image, then click Choose. Make a note of the password and save it somewhere handy. If you forget it, you can’t open the disk image.
Use the default settings for the rest of the options:
- Click the Partitions pop-up menu, then choose Single Partition – GUID Partition Map.
- Click the Image Format pop-up menu, then choose “read/write” disk image.
- Click Save, then click Done.
As before, Disk Utility creates the disk image file where you saved it in the Finder. It mounts its disk icon on your desktop and in the Finder sidebar. In the Finder, copy the documents you want to protect to the disk image.
If you want to erase the original documents so they can’t be recovered, drag them to the Trash, then choose Finder > Empty Trash.
When you’re done using the documents on the secure disk image, eject the disk image. As long as it’s available on your Desktop, anyone with access to your computer account can use the docs on it.
To access the data in a disk image, double-click it. It appears on your desktop, and you can add, remove, and edit files on it just as you would with a disk.
How to restore a disk image to a disk
- You can also use the Disk Utility to restore a disk image to a disk. To restore a disk image with a single volume to a disk:
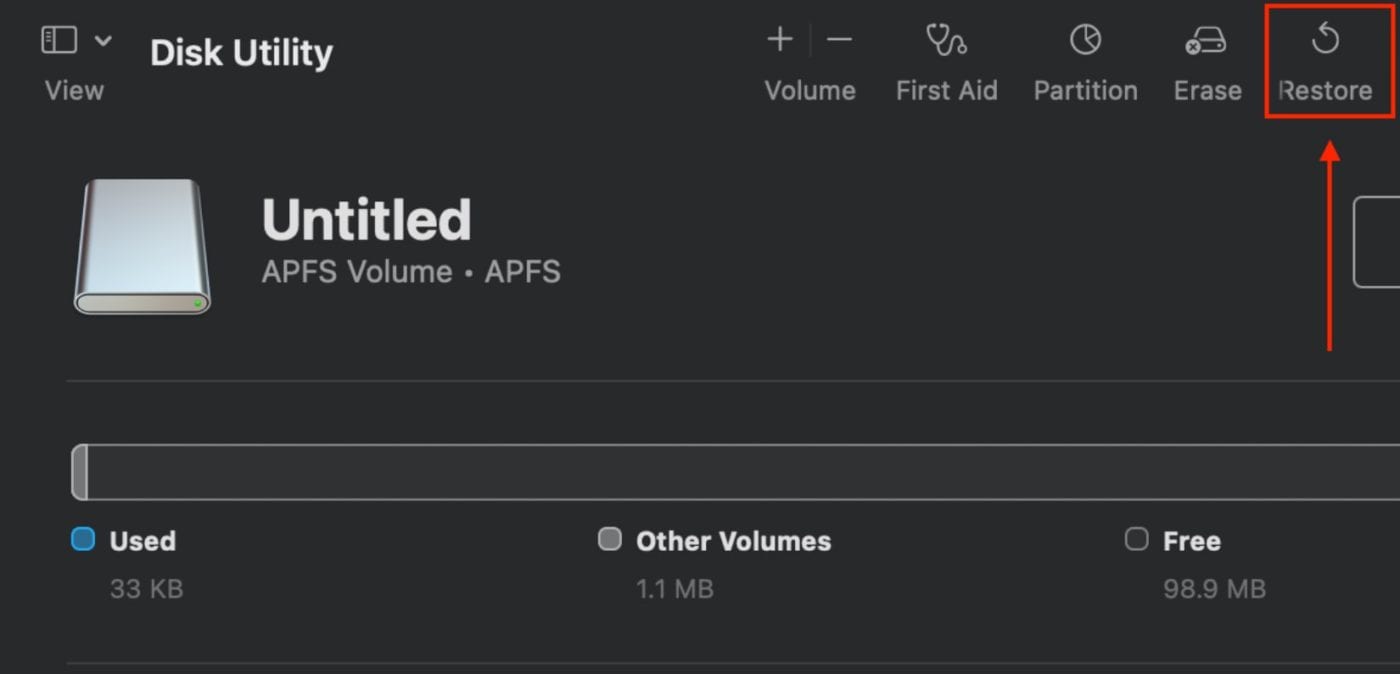
- In the sidebar, select the volume that you want to restore, then click the Restore button or choose Edit > Restore. This is the volume that is erased and becomes the exact copy.
- Click the Restore pop-up menu, then choose the volume you want to copy. If you’re restoring from a disk image, click the Image button, then navigate to that disk image.
To restore a disk image with multiple volumes to a disk, you’ll have to partition the destination disk, then restore each volume individually.
- Open the disk image by double-clicking it in the Finder.
- The disk image’s volumes appear as disks in the Finder.
- Select the disk in the sidebar, click the Partition button, then partition the destination disk.
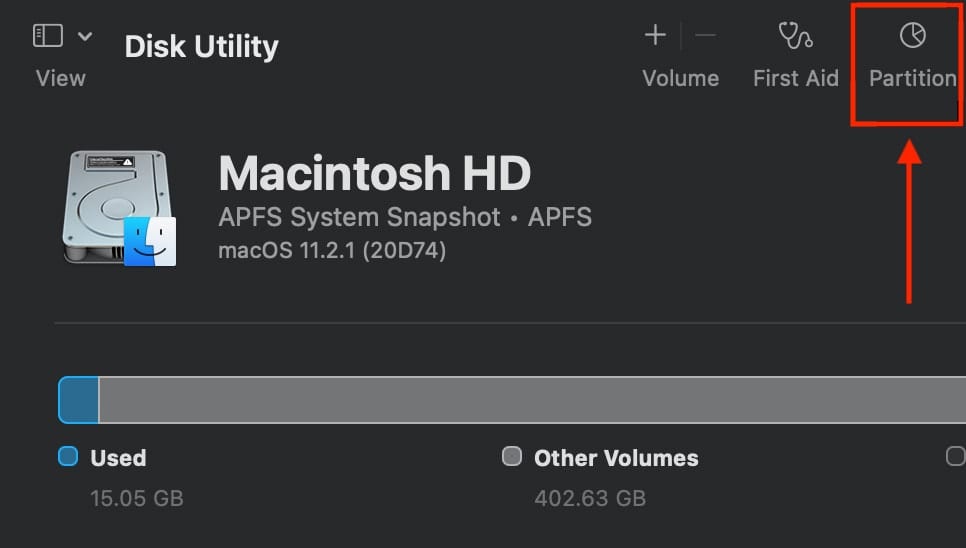
The destination disk must have as many partitions as the disk image, and each of the disk’s partitions must be at least as large as the corresponding partition in the disk image.
- In the sidebar, select the volume that you want to restore, then click the Restore button or choose Edit > Restore.
This is the volume that is erased and becomes the exact copy.
Do one of the following:
- Restore from a volume: Click the “Restore from” pop-up menu, then choose the volume you want to copy.
- Restore from a disk image: Click Image, choose the disk image you want to copy, then click Open.
Click Restore.
Repeat steps 3–5 for each remaining partition.


This doesn’t seem to work with APFS formatting. This used to work perfectly with HFS. You show this using an HFS formatted drive not an APFS drive.
Thanks. When creating a disk image as “blank image”, does the Mac overwrite such disk space with 0 or 1, effectively deleting and sanitizing such space? For both HFS+ and APFS? I ask because that is done in a single pass and could be a great, effective and fast sanitizing method. Just create such blank image with the same size than the destination disk! Thanks.