It’s easy to quit an app in macOS. And if you need to quit all apps simultaneously that’s also a breeze. Let’s look at how to do this in macOS Ventura.
Closing one app at a time vs. closing a window on macOS
If there’s an app that you only use occasionally, it’s best to quit it when you’re not using it. As Apple notes, apps use significant energy, so there’s no need to spend that energy unnecessarily.
To quit an app, choose App Name > Quit App in the menu bar. For example, choose Preview > Quit Preview (or press the keyboard shortcut Command-Q).
However, note this unique feature of macOS: if you click the red Close button in the top-left corner of an app’s window, the window closes, but the app remains open. In other words, you haven’t truly quit the app.

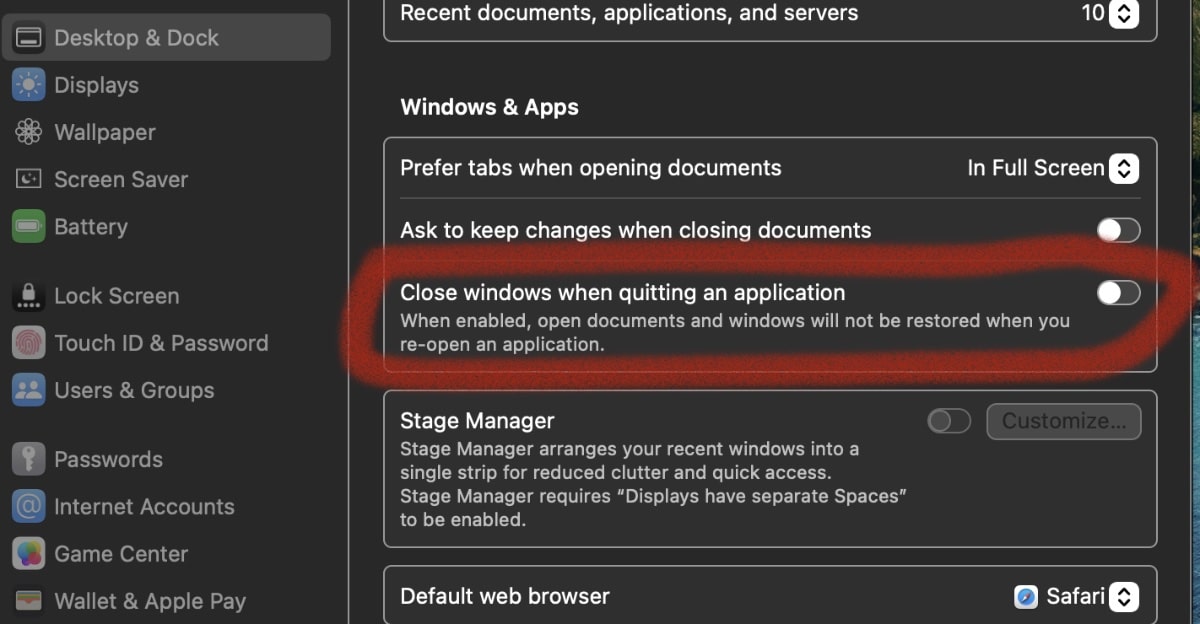
If an app has windows open when you quit it, the windows conveniently pop up the next time you open the app. To have app windows close and not be shown the next time you open apps, choose Apple menu > System Settings, click Desktop & Dock in the sidebar, go to Windows & Apps on the right, then turn on “Close windows when quitting an application.”
How to quit all apps simultaneously in macOS
The easiest way to quit all running apps at once is by using the Automator app to create an automation. Automator is found in the Applications folder.
° Launch Automator and select New Document (or press Command + N).
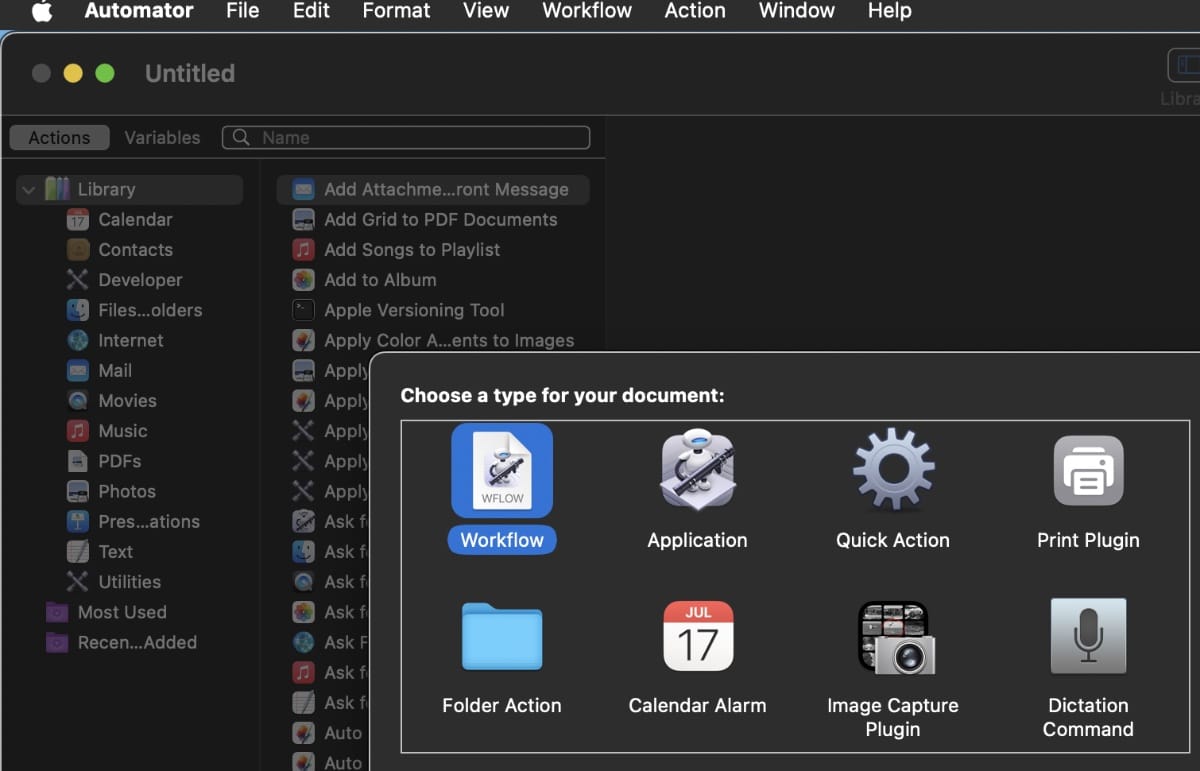
° Select Application and click Choose.
° In the top-left corner, ensure that the Actions option is selected. You will see that a lot of actions are included in the Library. Scroll down the list of actions until you find Quit All Applications.

° Drag the “Quit All Applications” into the gray area on the right.
° Click File > Save
° Name your application in the Save As box and click Save. (We called ours Kill Switch.)
Now in your Applications folder you have an app that when opened, will quit all other apps. Double-click on its icon to run the automation. You can even drag the app into your dock for easy access.
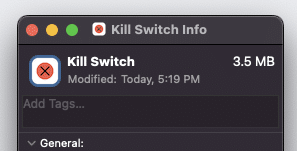
Tip: By default, macOS uses the Automator robot icon as the icon for any apps you create from scripts. If you want to change the icon, find the app you created in Finder, right click it and then click Get Info. Copy the image or icon you want to use, and then click the small icon preview in the top-left corner of the Get Info window. Then press Command+V. Voila. Icon changed. If you like the icon we used here, you can download it by clicking here.





This was super helpful! After creating my “Kill Switch,” I created a command that opens all of my applications that I first open each morning of the workday! Thanks, this will save me a lot of time!
Thank you, Dennis-
What a smart guy you are!
I appreciate your informative posts, even when I can’t use them all.
And once in a while there will be that special tip that was just what I needed.
What I especially like is the clear way you explain things, so even a non-nerd can understand it!
:)
Ruthie