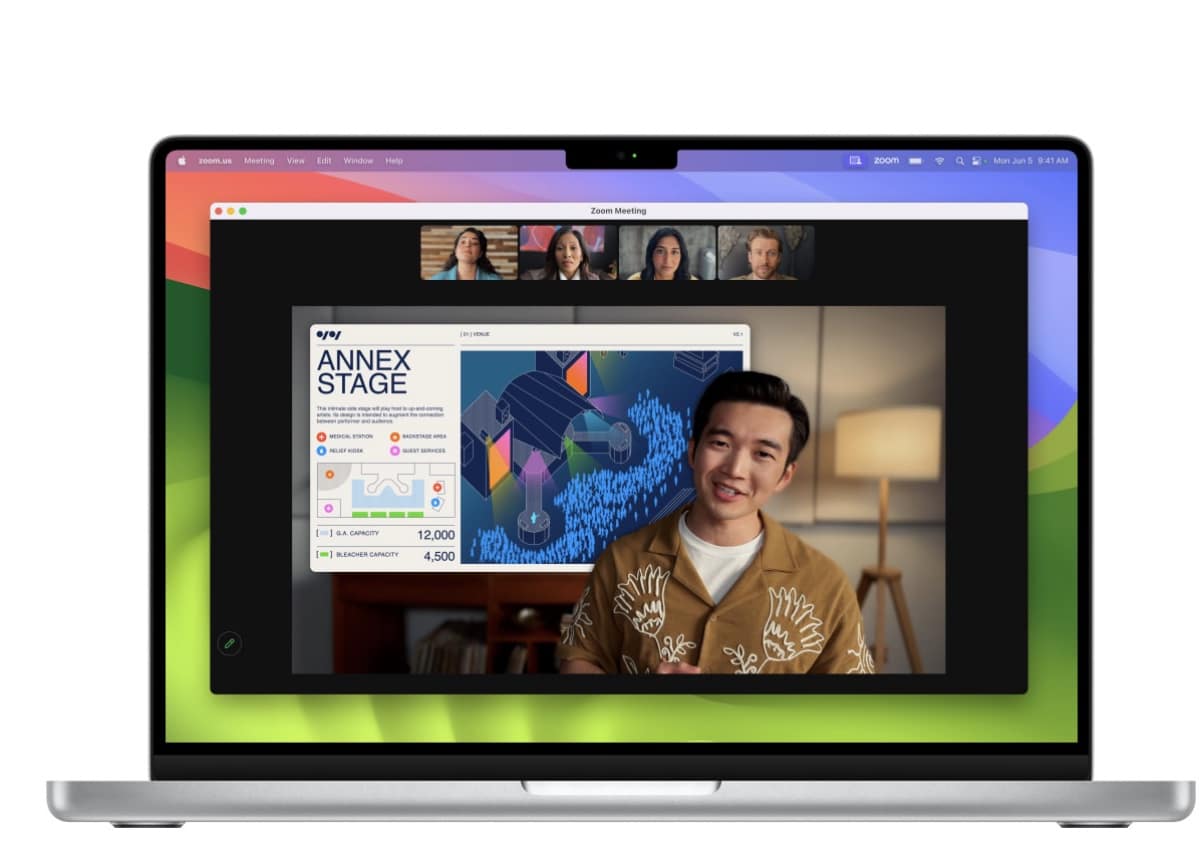
macOS Sonoma introduces a new feature called Presenter Overlay that’s designed to improve the look of presentations in video conferencing apps such as FaceTime, Zoom and Teams.
Presenter Overlay lets you place yourself on the top of a video presentation, such as a PowerPoint or Keynote deck. It removes your background and places a small floating picture of your mug ahead of the content you’re presenting. You can move the floating picture anywhere you want.
To use Presenter Overlay, you have to be running macOS Sonoma on a Mac with an Apple Silicon processor (sorry, Intel Mac owners). And, of course, the app must be updated to support the new feature.
How to use Presenter Overlay
If your Mac set-up meets all those conditions, here’s how to use Presenter Overlay (I’m using FaceTime as my video app).
Join an ongoing meeting or start a new FaceTime Call.
° Click on Screen Share Icon.

° Choose whether to share a specific window or your entire screen.
° Choose Small or Large under the Presenter Overlay Menu. In Small Overlay, your face will appear in the movable bubble, so it’s easy to be seen while showcasing your works. In Large Overlay, your mug will remain prominent in Large Overlay while your shared screen is framed next to you. You can choose to share an App, Window, or your entire Screen.
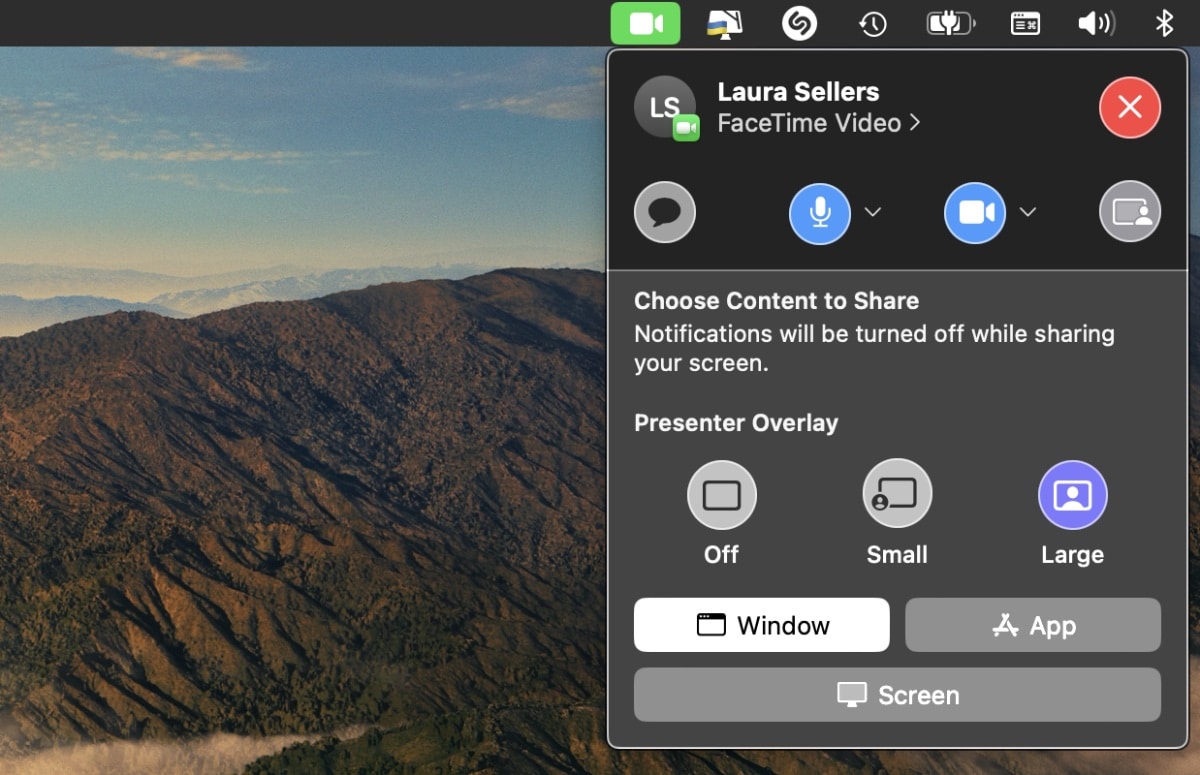
If the participant on your call is using an iPhone, he/she will receive a Join Screen Sharing pop-up and must hit Open to start viewing.
How to customize Presenter Overlay
There are various ways to customize the Presenter Overlay feature.You can choose a background color or image for a presenter overlay. You can drag and drop your presenter overlay to where you want it to appear on the screen.
You can choose which camera you wish to use (if your Mac has one than one option). You can also choose which microphone to use (again, if your Mac has more than one option).
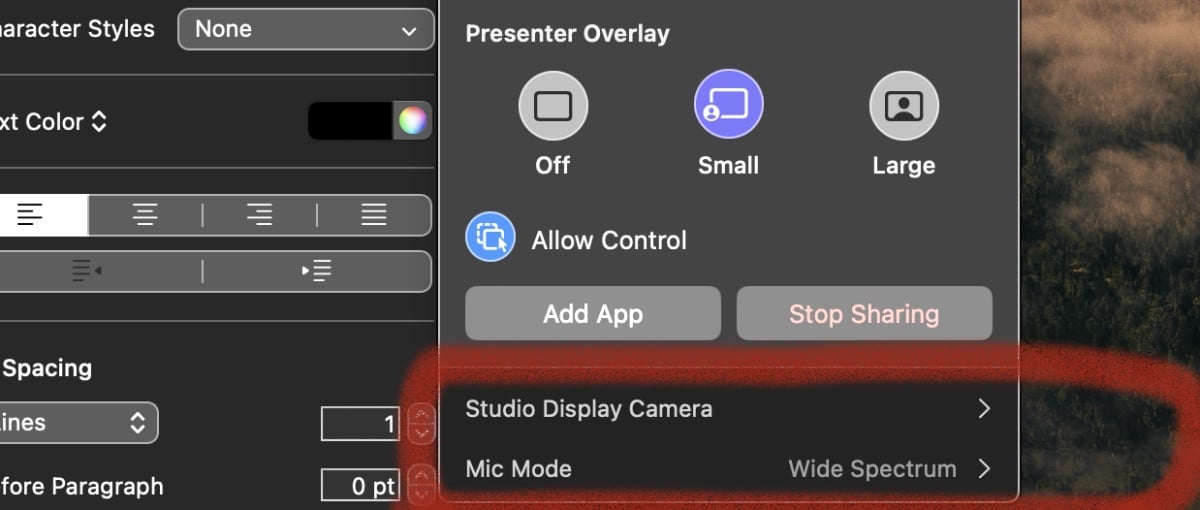
The overlay’s size is adjustable and can be placed at any location on your screen via drag and drop. Finally, in some apps such as Zoom you can choose from these effects (Center Stage, Portrait, and Studio Light).
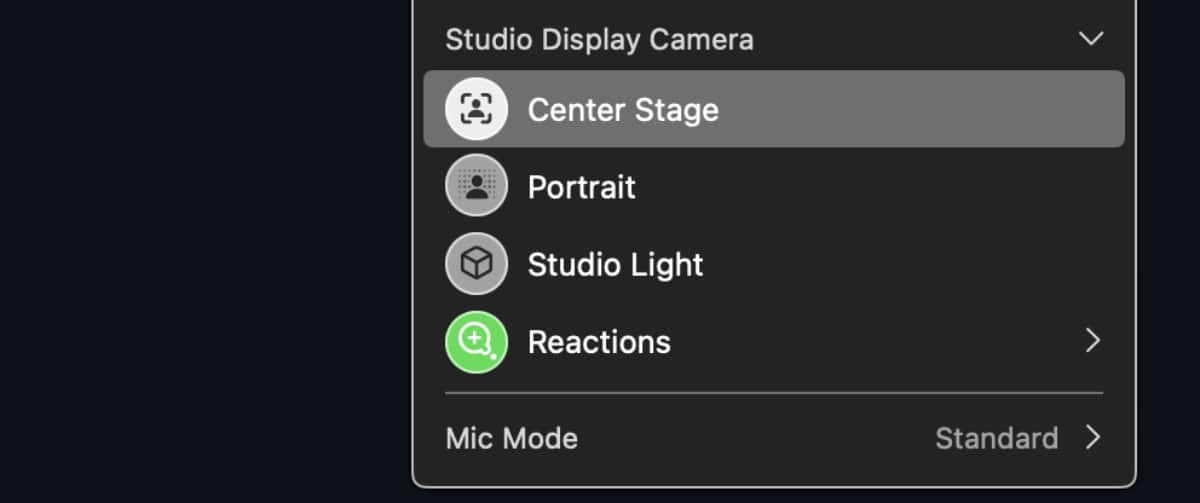
Center Stage uses the iPhone’s Ultra Wide camera to keep the user in the frame as they move around on video. It’s best to use this feature with bright lighting to reduce graininess, or noise, in the video. Portrait blurs the background to make the video look more professional. Studio Light can brighten the user’s face and slightly darkens the background.
As I tested this article, the latter effects didn’t appear in FaceTime. It’s possible Apple has changed this — or will change this — in future Sonoma updates.
