 1-800-275-4576
GripStand Station
Basic Use
Your GripStand Station comes fully assembled and ready to use. To start using the GripStand Station, simply connect the USB cables from the back of the GripStand Station to your iPad power adapters and then slide your iPads, in their GripStand cases, into the slots for each iPad in the GripStand Station. Each iPad in it’s GripStand case slides face down on the side rails.
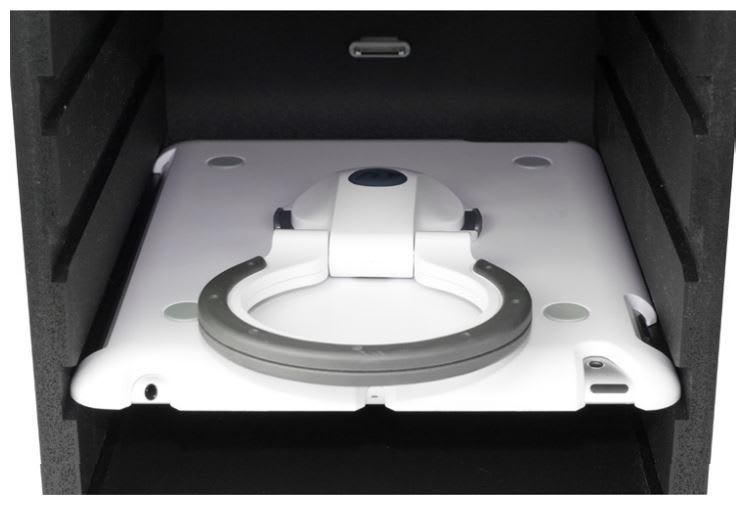
Once the iPad reaches the back of the GripStand Station, you will feel slight resistance and may even hear a “click” as the iPad connects with the 30-pin dock connector. The GripStand Station is designed to prevent damage to the iPad’s dock connector by distributing the insertion force across the surface of the GripStand case, not the iPad itself. Gentle pressure is all that is needed to insert the iPad into the GripStand Station.
Your iPad(s) will now begin charging. If you are running iOS 5, you can set your iPads up to sync wirelessly. For more information on configuring your device for this function, please see http://support.apple.com/kb/HT1386.
Security Options
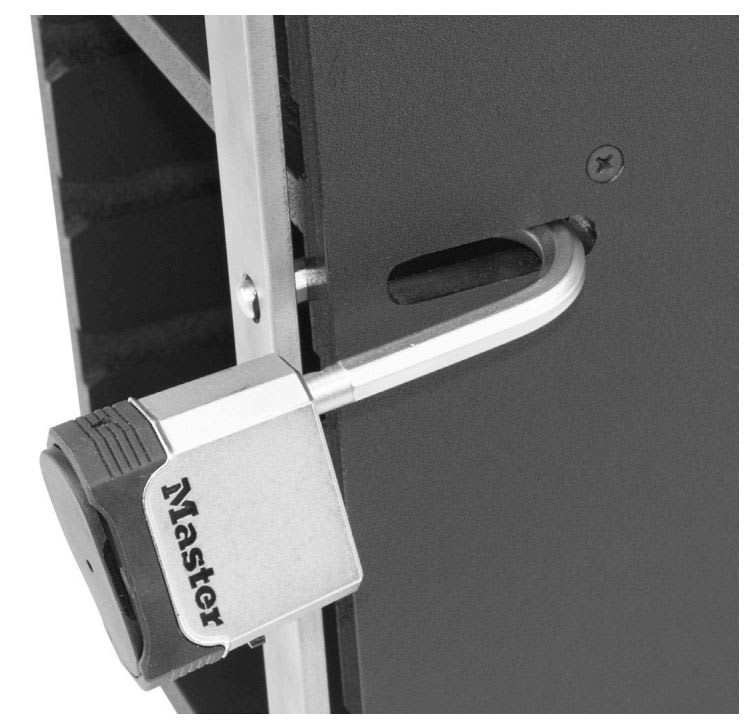
The GripStand Station includes a built-in slot for a durable stainless steel locking bar (sold separately) and a cutout to use any standard 2” long shackle padlock to secure your iPads into the GripStand Station. A double-length version of the security bar is available if you utilize multiple GripStand stations stacked on top of each other.
The GripStand Station security accessories are available at: http://www.newertech.com/gripstandstation
- Insert iPads
- Slide locking bar into place
- Insert padlock into GripStand Station side and through the locking bar
- Latch padlock
Mounting Options
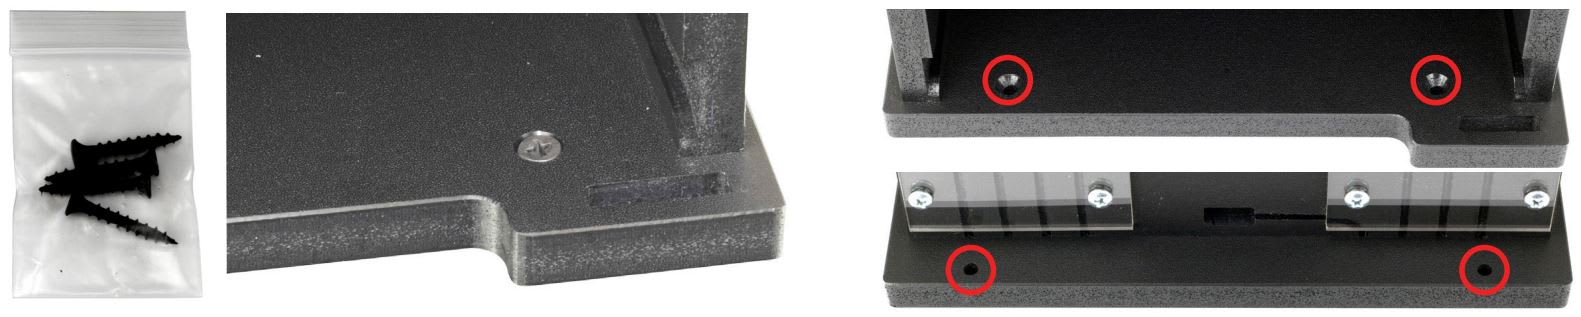
The GripStand Station incorporates fixed mounting points at the front and the back of the base for fastening down to a desk or counter. This will eliminate any possibility of the GripStand Station rocking back on the desk surface should a student insert the iPad into the the GripStand Station with too much force. The GripStand Station includes four Phillips multipurpose screws for mounting. If you need a more tamper-proof installation, you can change to another screw type. One-way screws or spanner-head screws are common; the only thing that you need to be certain of is that you use a tapered head screw for the front screw positions to avoid damaging an iPad. Look at the included screws and match the size and shape of the head for proper use.
Stacking the GripStand Station
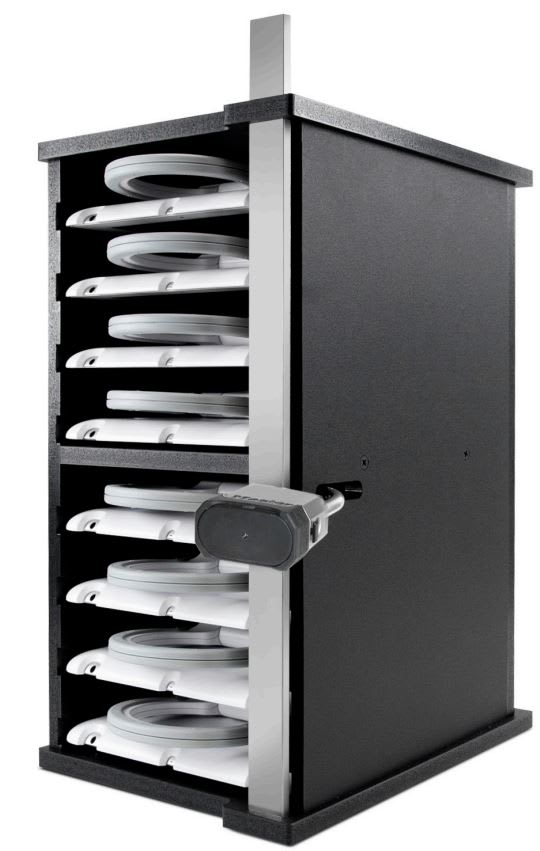
The GripStand Station is designed to be able to be stacked 2 high for areas requiring the minimum use of desk space.
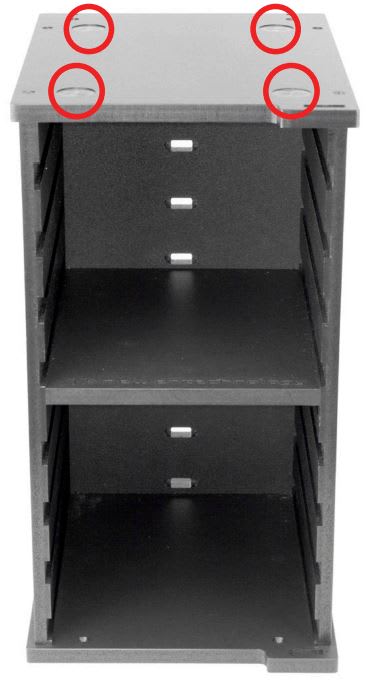
The GripStand Station utilizes large, low-profile anti-skid rubber feet that are specially designed prevent stand movement and to perfectly nest into cutouts on the top of the GripStand Station to facilitate stacking.
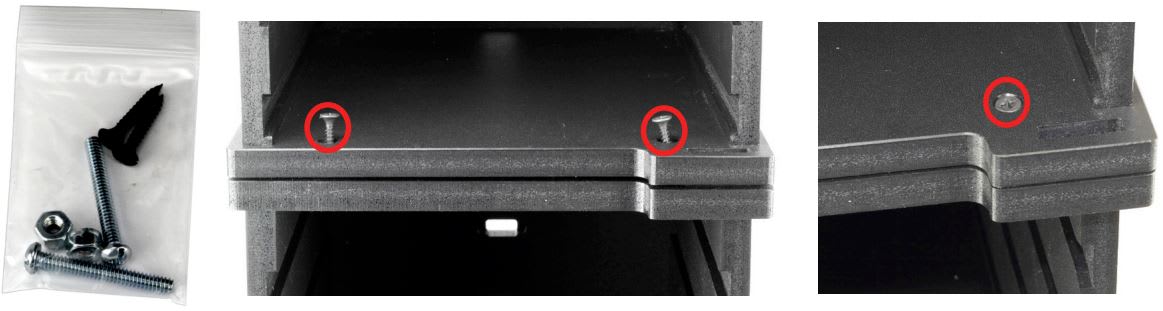
You will find a plastic bag with Phillips multipurpose screws for joining the two GripStand Stations together at the front, and machine screws with locking nuts for joining the units together at the back.
To join the GripStand Stations together, follow these steps:
Front Screws: Insert the Phillips screws through the holes in the top unit into the bottom GripStand Station driving them into the plastic top of the unit below.
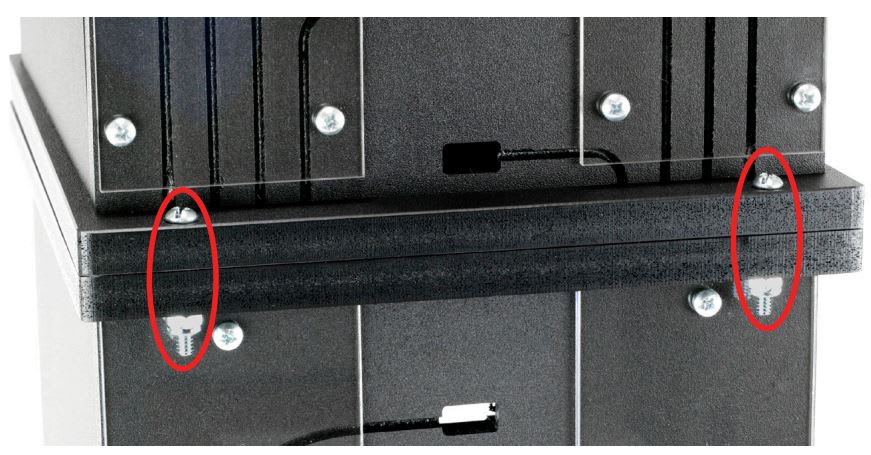
Back Screws: Insert the machine screws through the holes and fasten each nut securely to it.
IMPORTANT: Verify that the front screws are fully inserted- they must be flush with the flat surface to avoid damaging an iPad in the bottom slot.
Free Support Chat
Our free award-winning support team is ready to answer all of your questions. Technical support is available Monday - Friday: 9AM - 6PM. Customer Support & Sales is available Monday - Friday: 9AM - 6PM. Support is unavailable on U.S. Federal holidays. Talk to a human today.