OWC Envoy Pro Ex
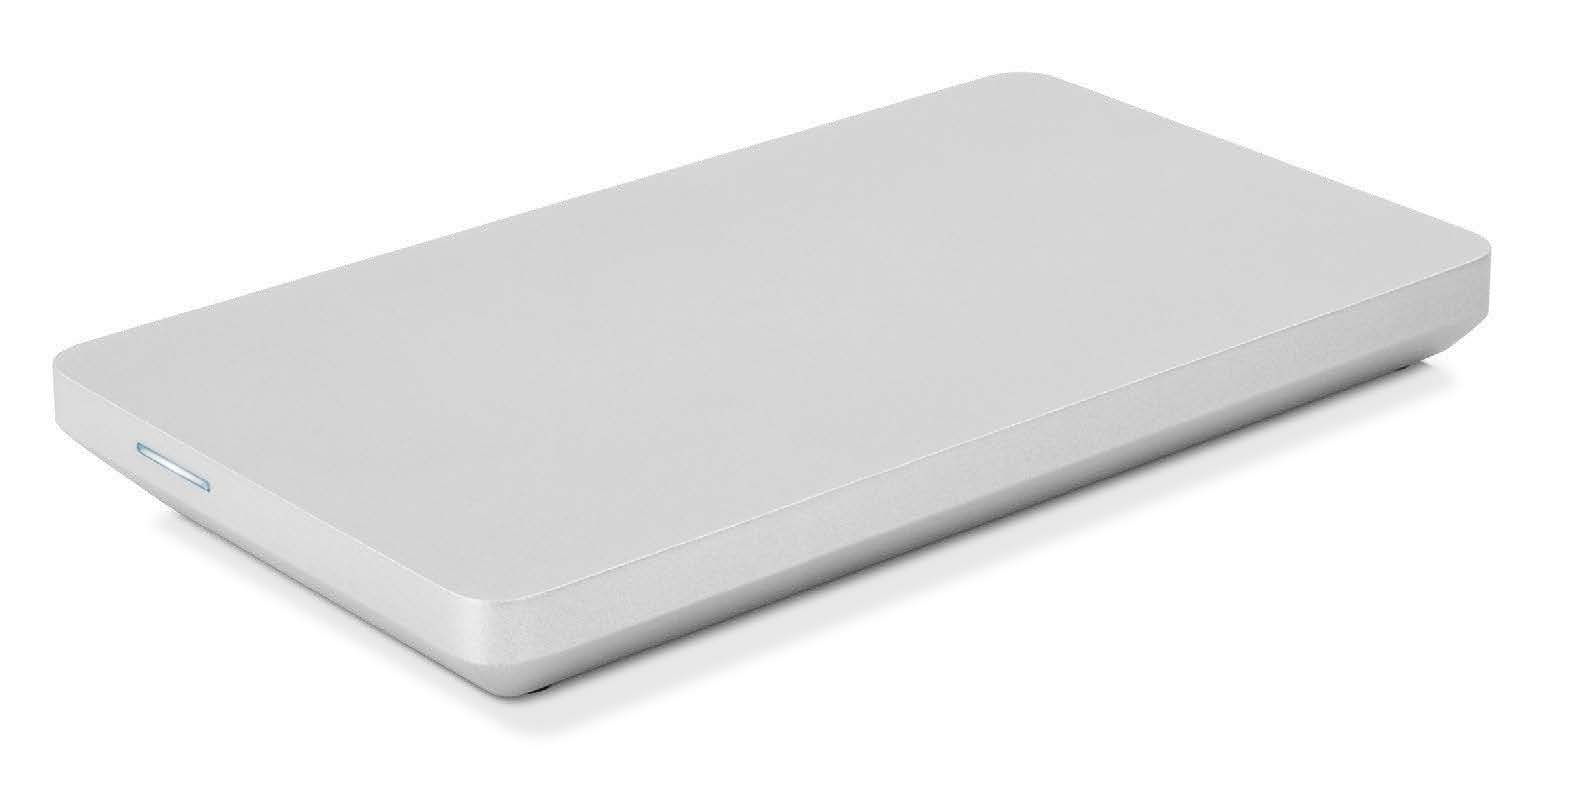
Introduction
1.1 System Requirements
Operating System
- Mac: macOS 10.12 or later
- PC: Windows 10 or later
Hardware
- Mac or PC with a Thunderbolt 3 or USB-C port
- USB-C hosts with USB 3.1 Gen 1 will function normally but Thunderbolt 3 or USB 3.1 Gen 2 are recommended for best performance.
- NVMe M.2 SSD in 2280 form factor with M-key connector
- Not compatible with AHCI PCIe M.2 SSDs
- Not compatible with SATA M.2 SSDs
1.2 Package Contents
- OWC Envoy Pro EX with USB-C
- USB 3.1 Gen 2 cable (Type-C to Type-C)
- Screw packet¹ & Rubber feet
1.3 About This Guide
The instructions below are for customers who purchased the Envoy Pro EX with USB-C enclosure and need to install their own NVMe M.2 SSD. This device requires an M.2 drive with a 2280 form factor. Please contact our customer service team if you still have questions after reviewing the steps that follow.
Features & Usage Notes
2.1 Enclosure Features
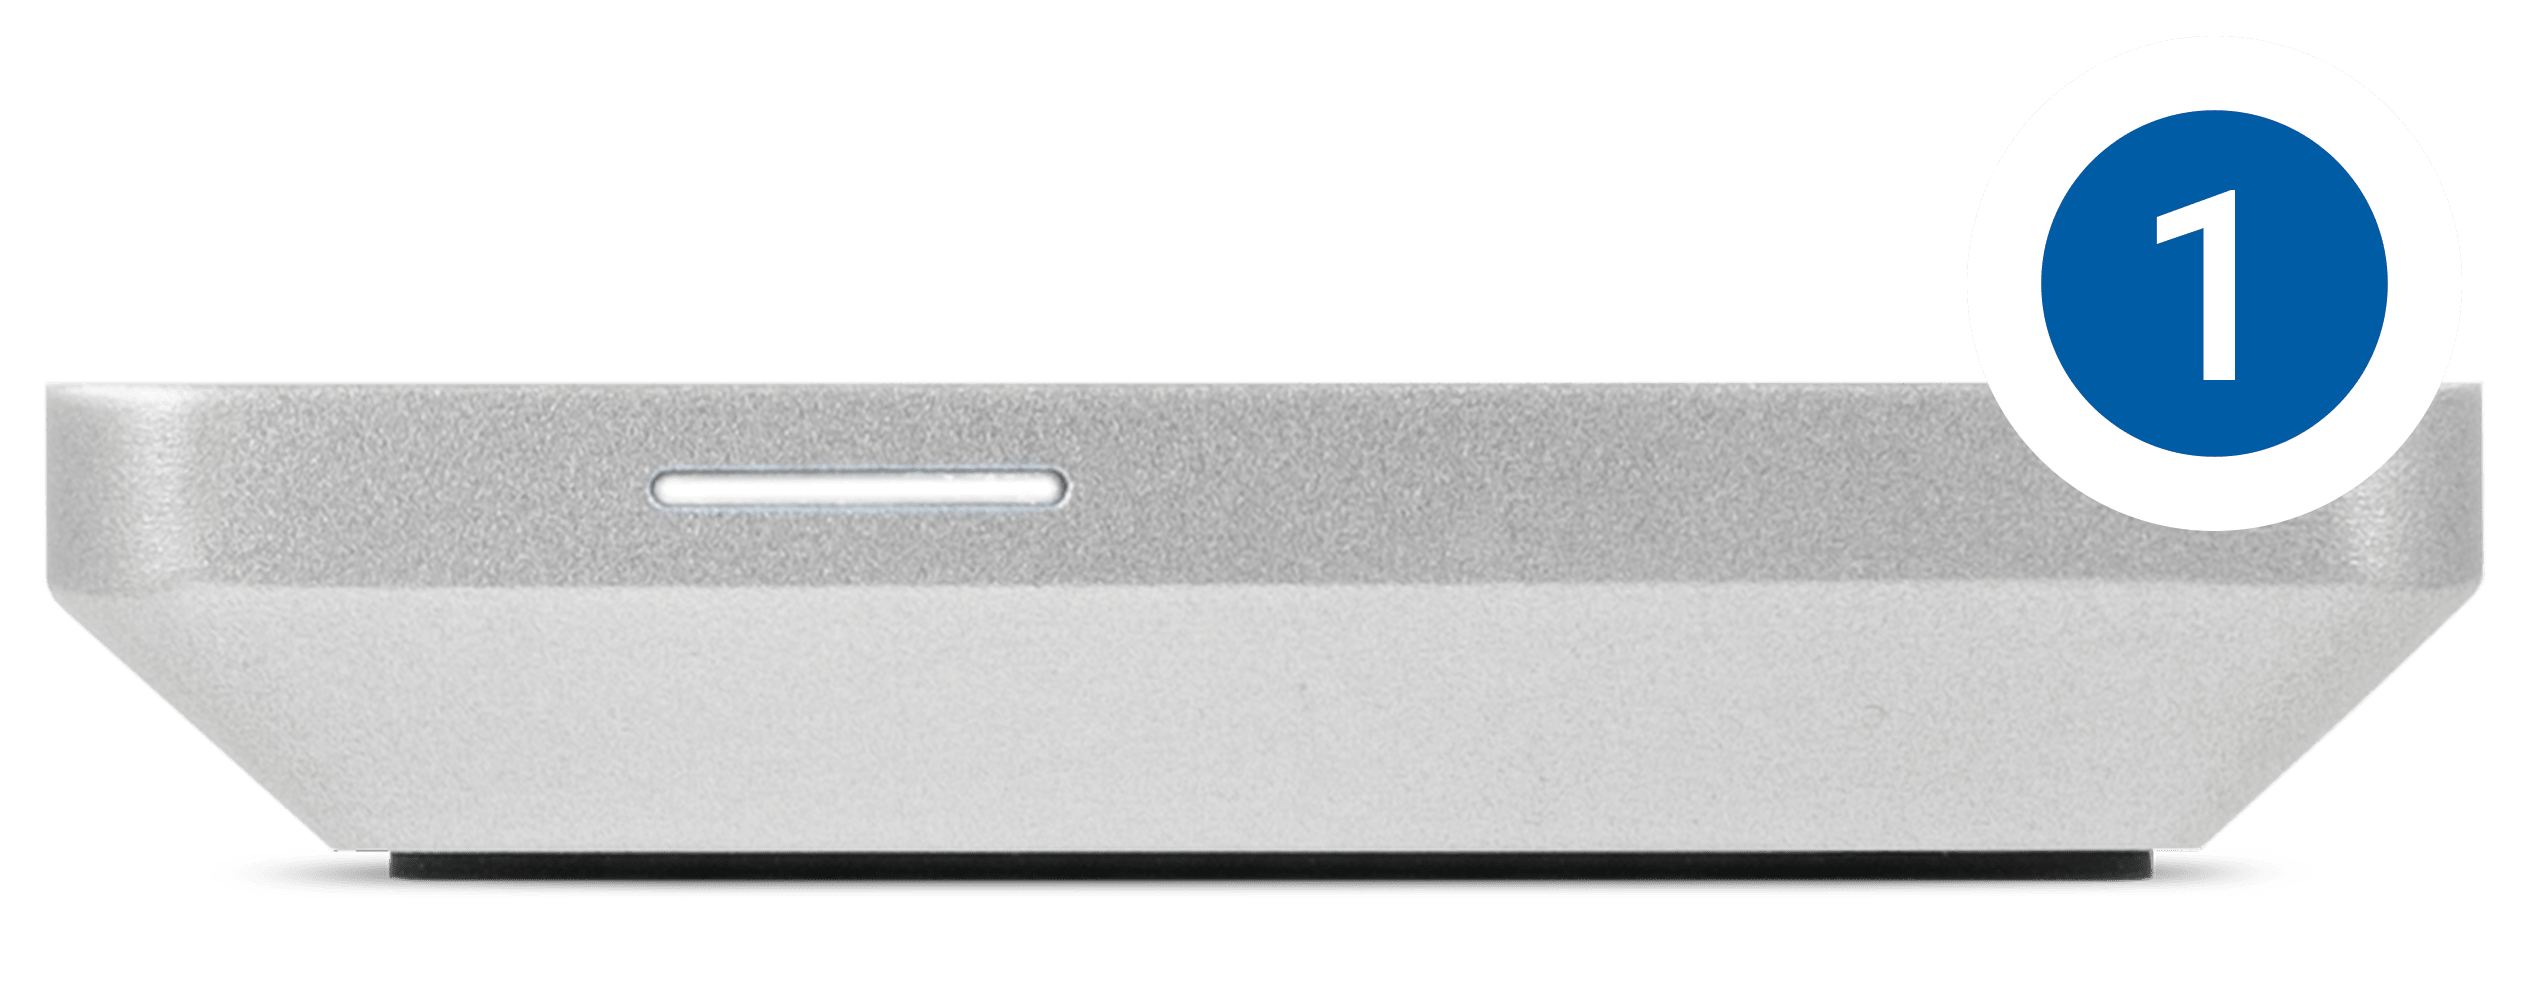
- LED Indicator – This LED emits a solid white light when the Envoy Pro is powered on and flashes during drive activity.
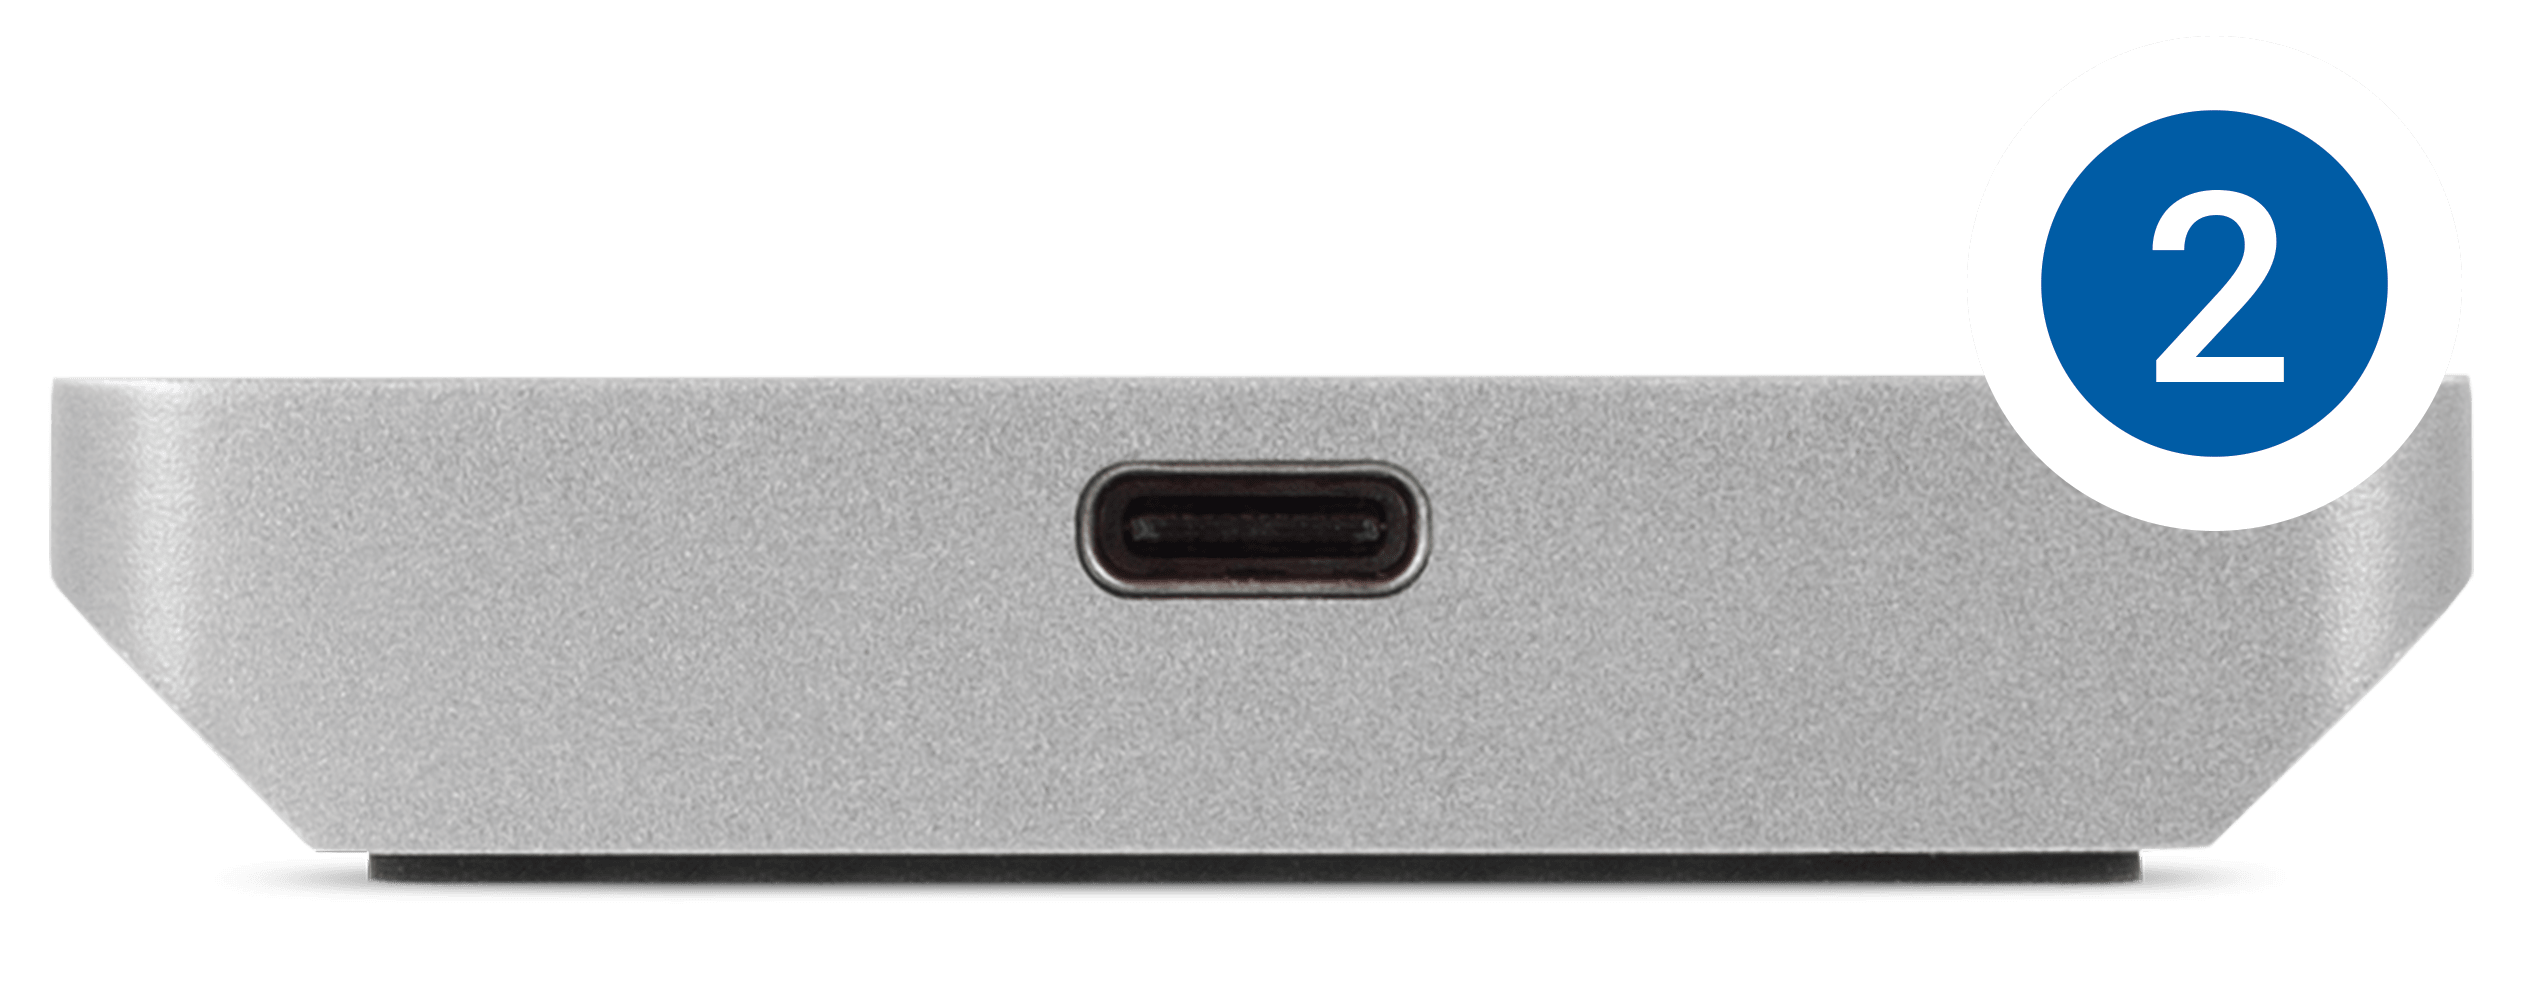
- USB 3.1 Gen 2 port – Attach the included USB 3.1 Gen 2 cable here.
2.2 Drive Assembly
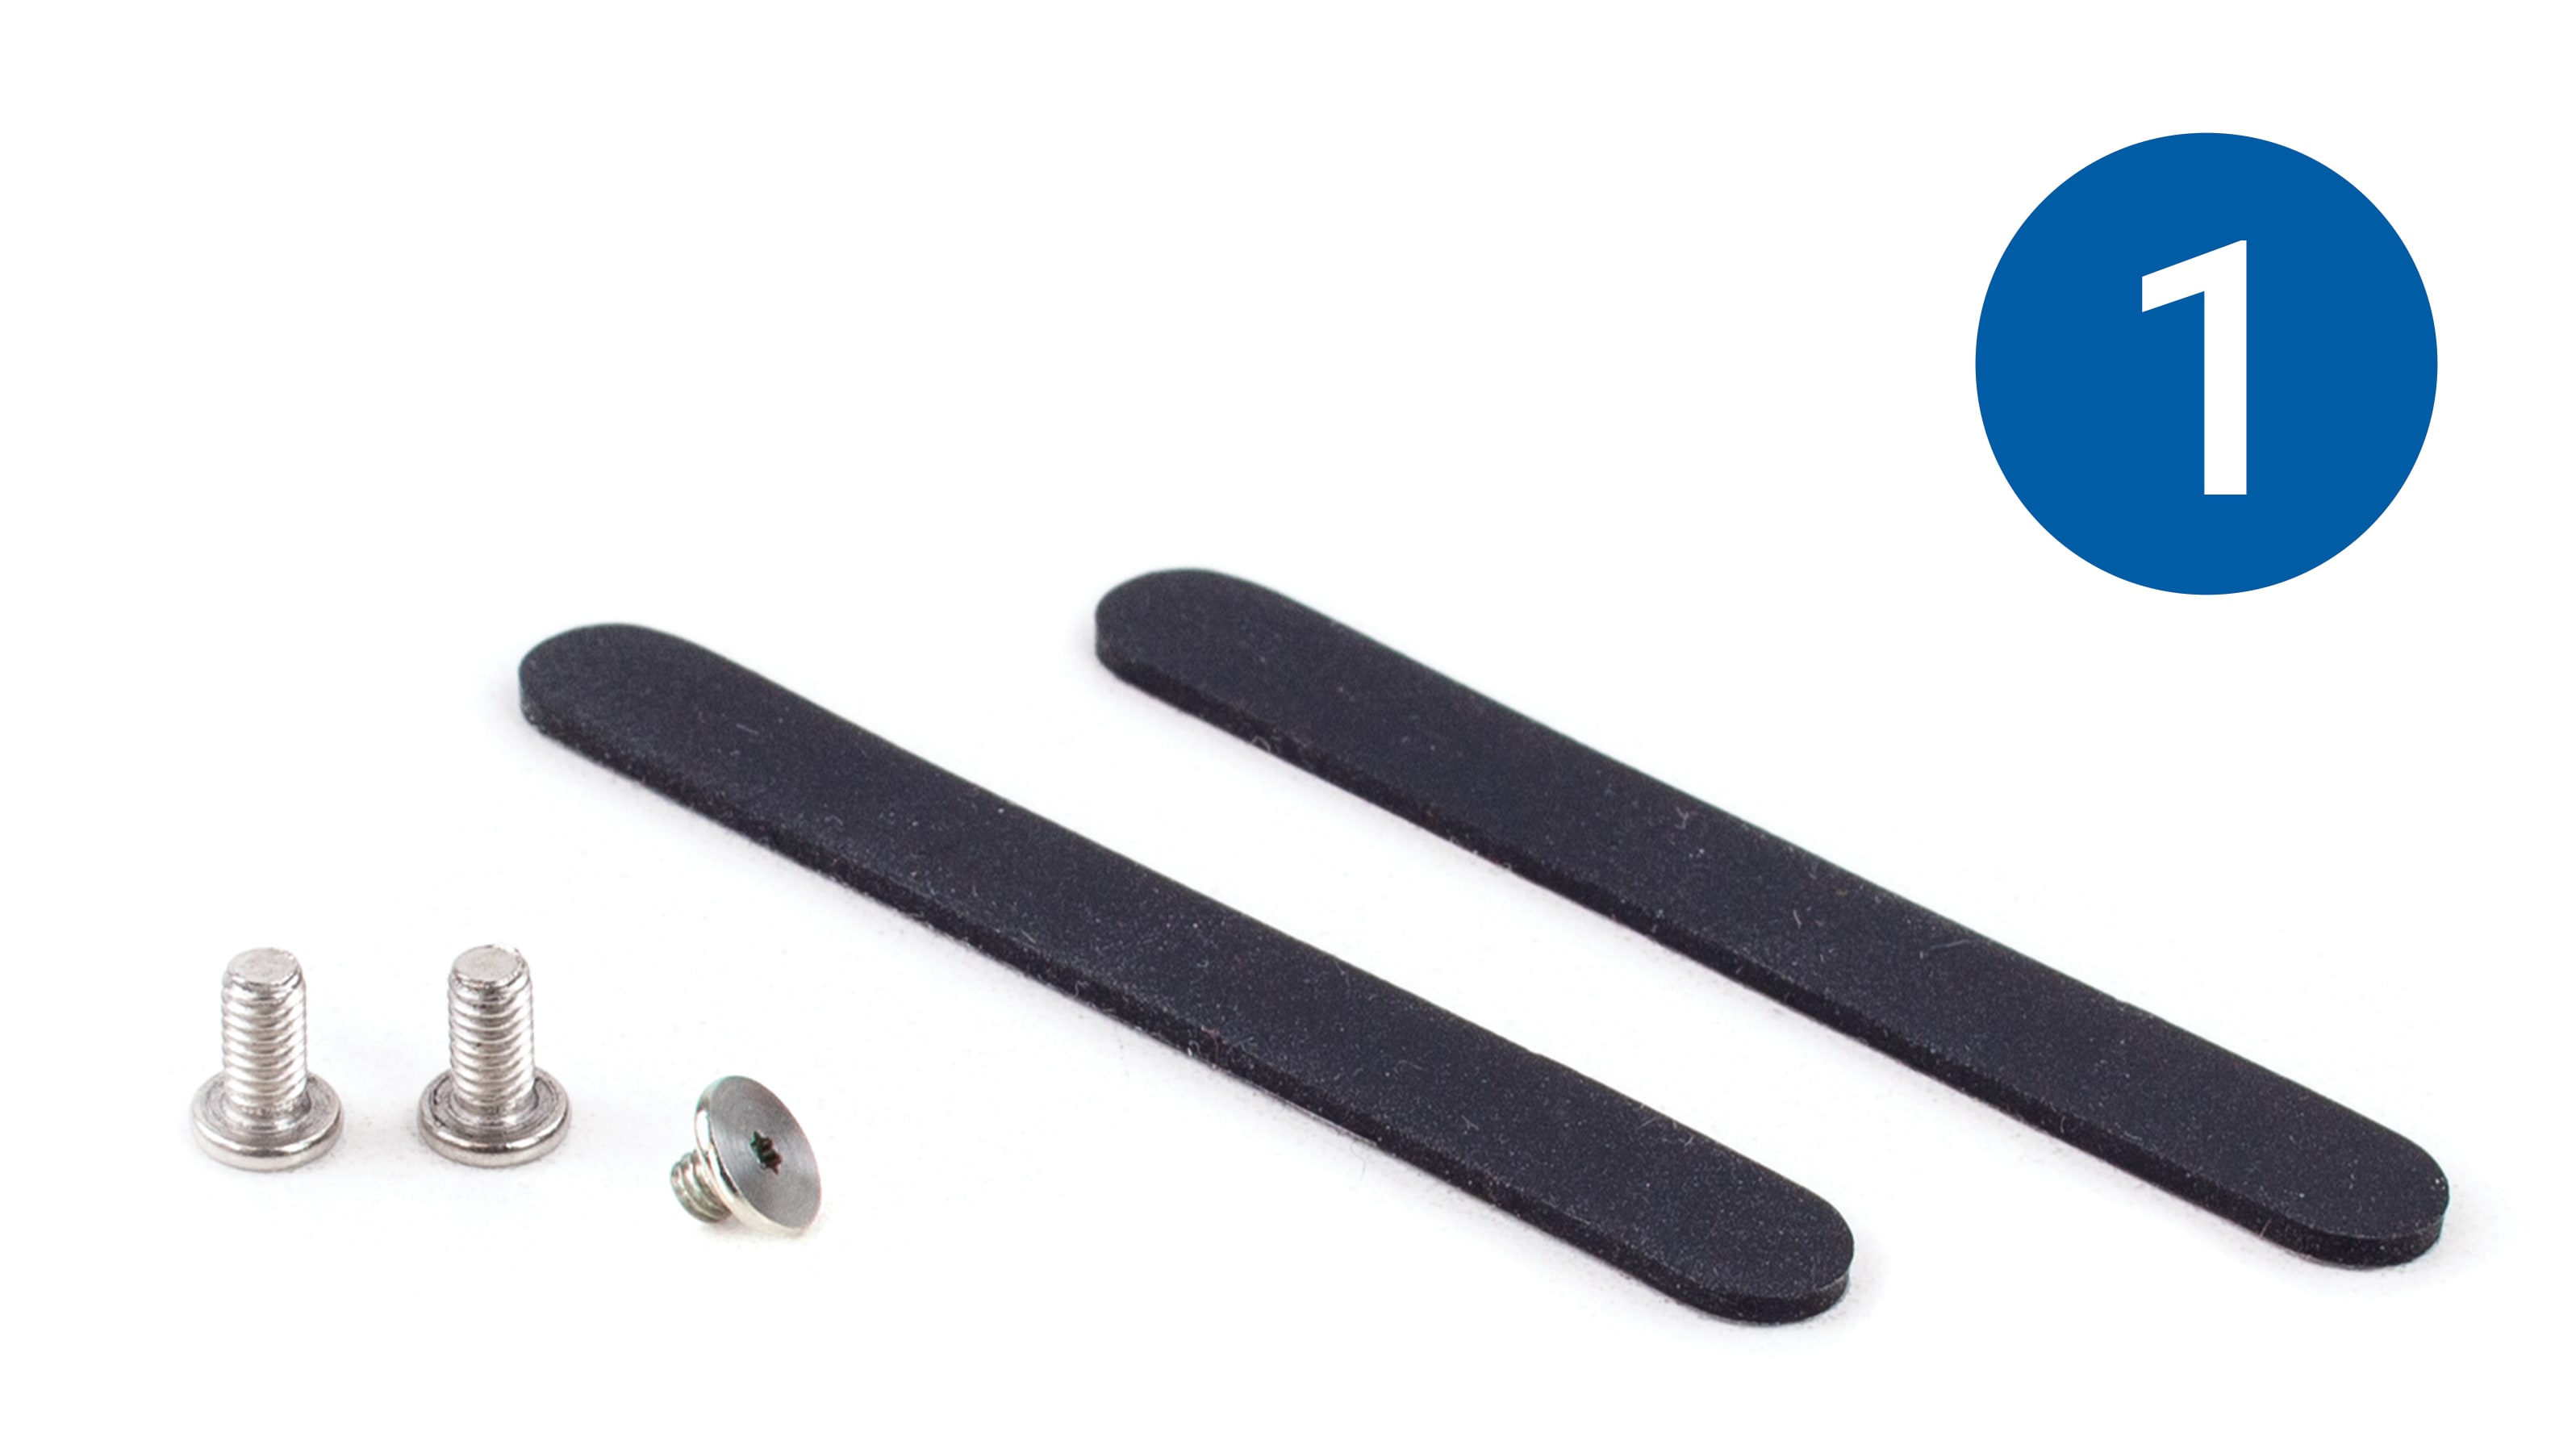
1. Remove the enclosure (in the protective foam bag) and the screw packet from the box. The packet should contain two drive enclosure screws, one drive mount screw, and two rubber feet.
2. Remove the enclosure from the foam bag, turn the enclosure over then remove the two screws secured at opposite corners. Set the screws aside
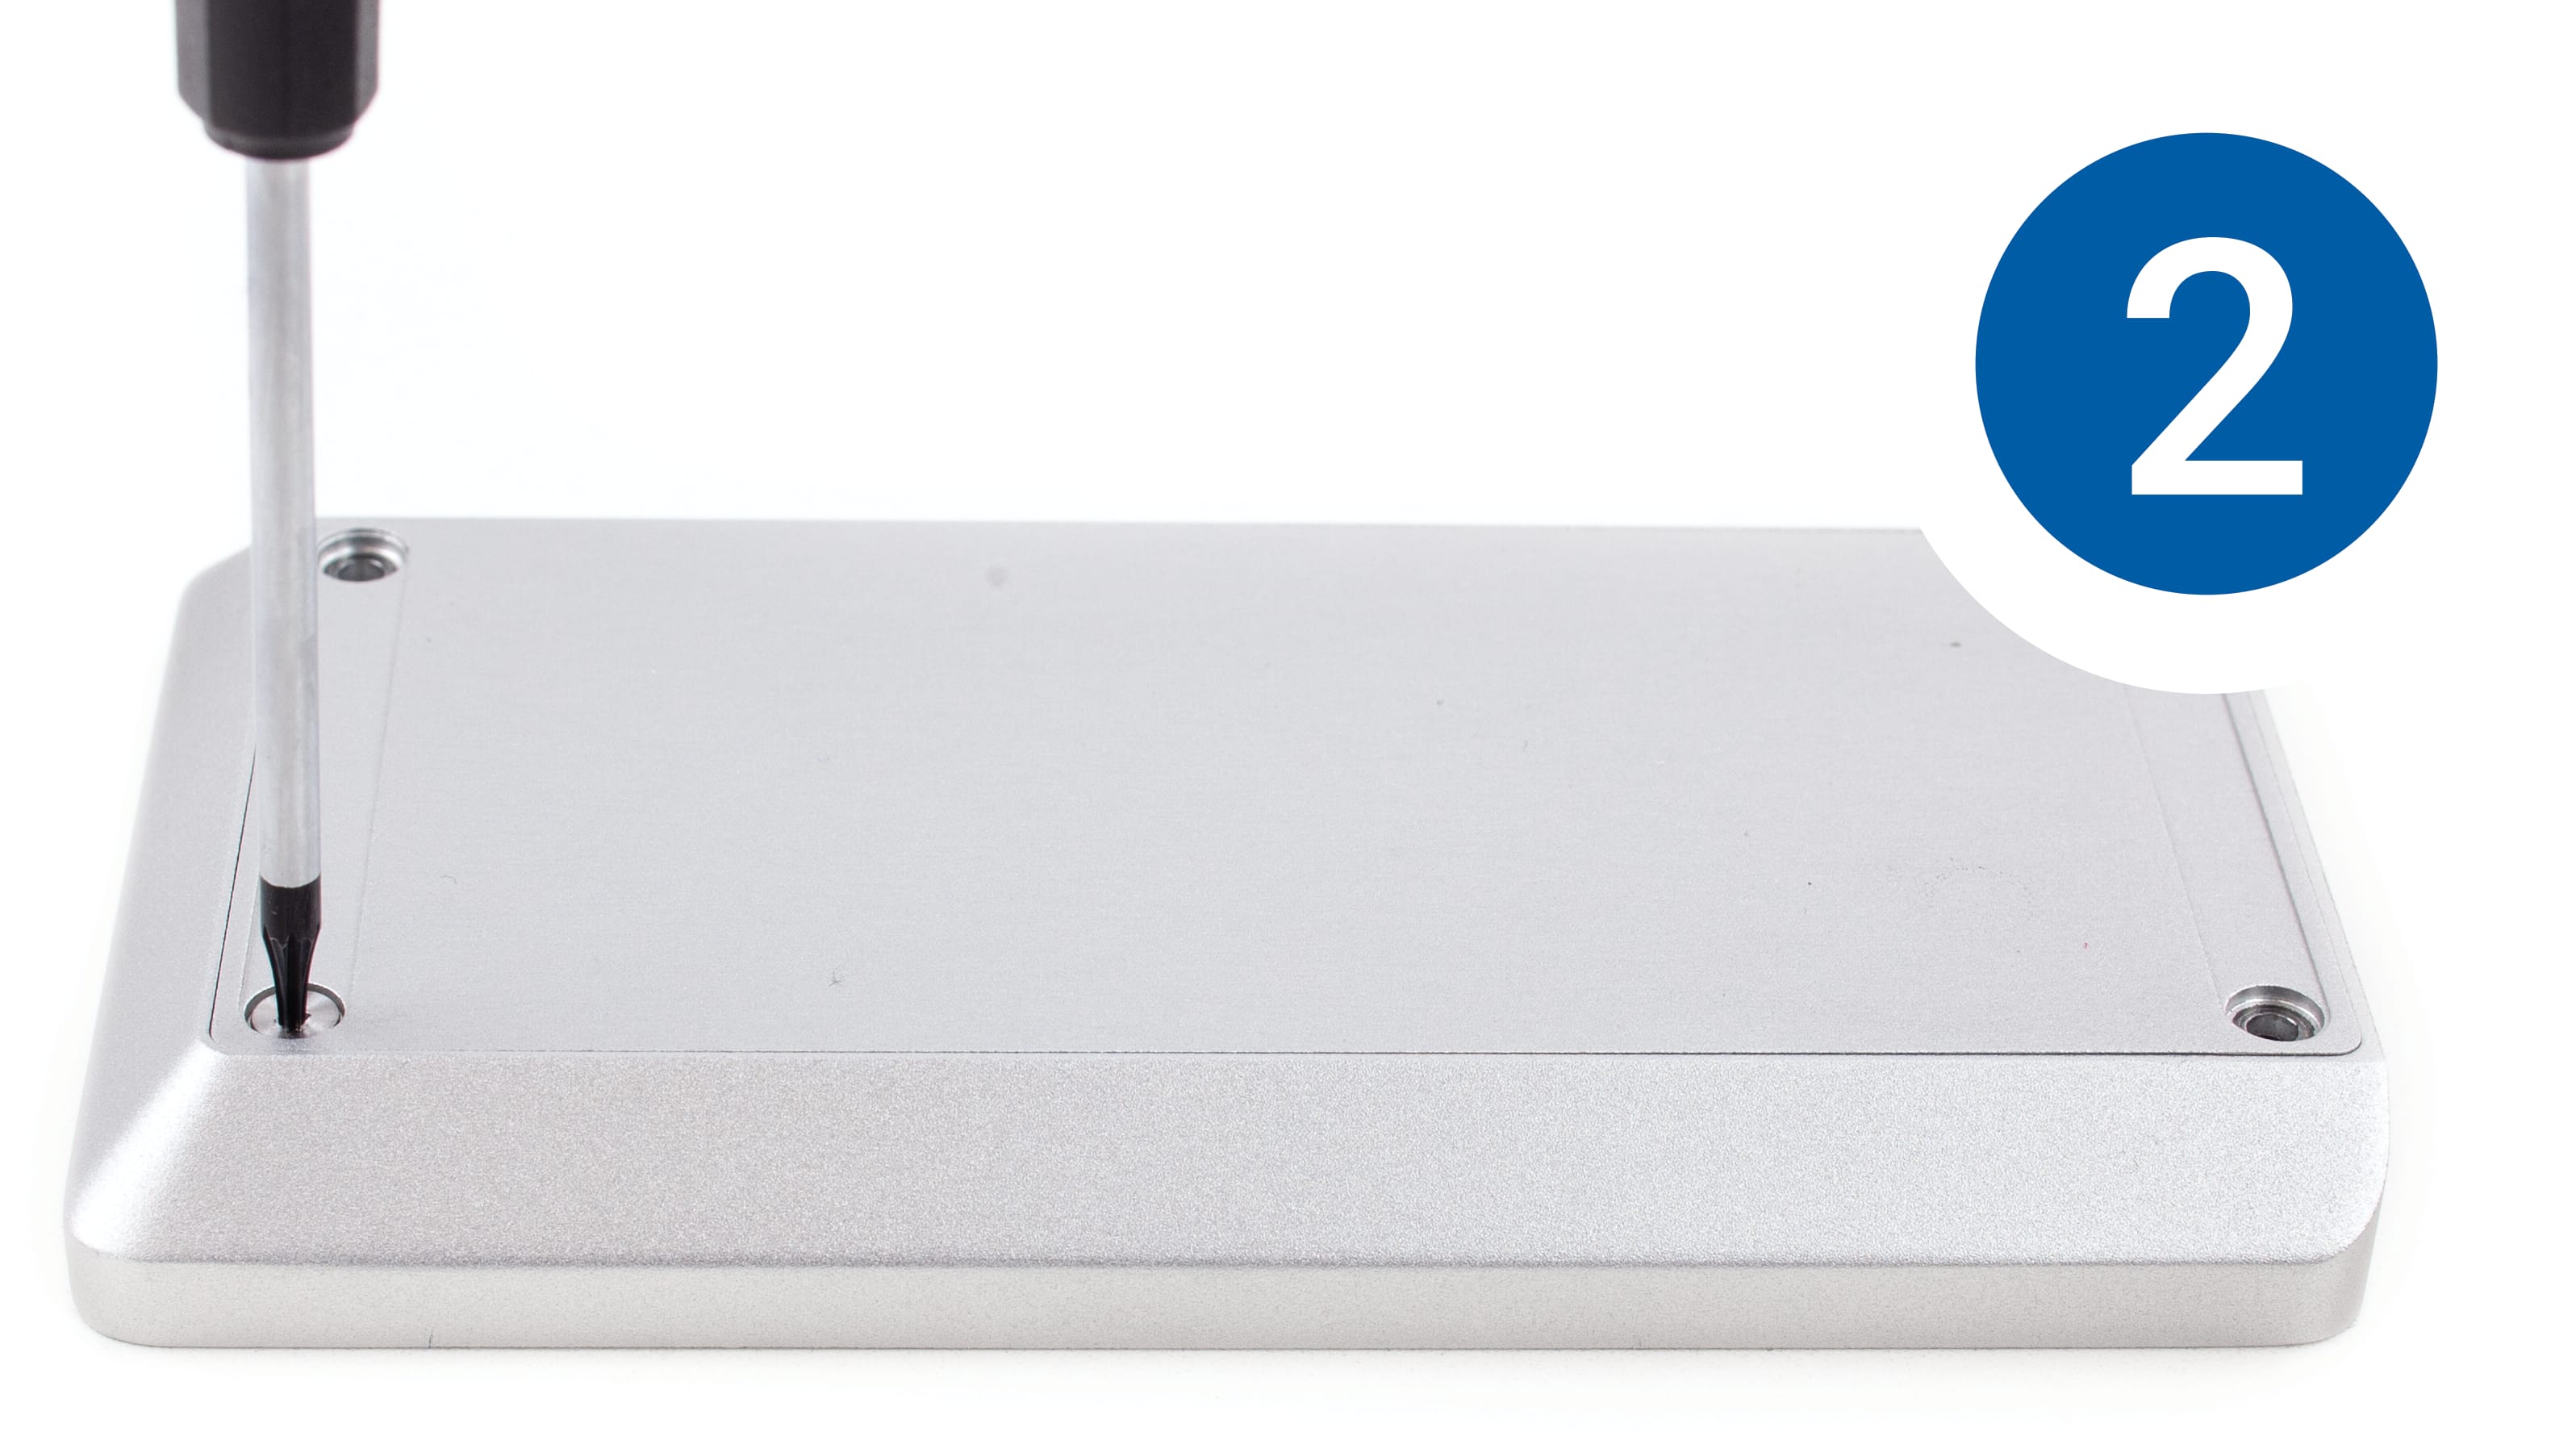
3. Remove the bottom cover. Note that the underside has a thermal pad; the orientation of the cover will be important later.
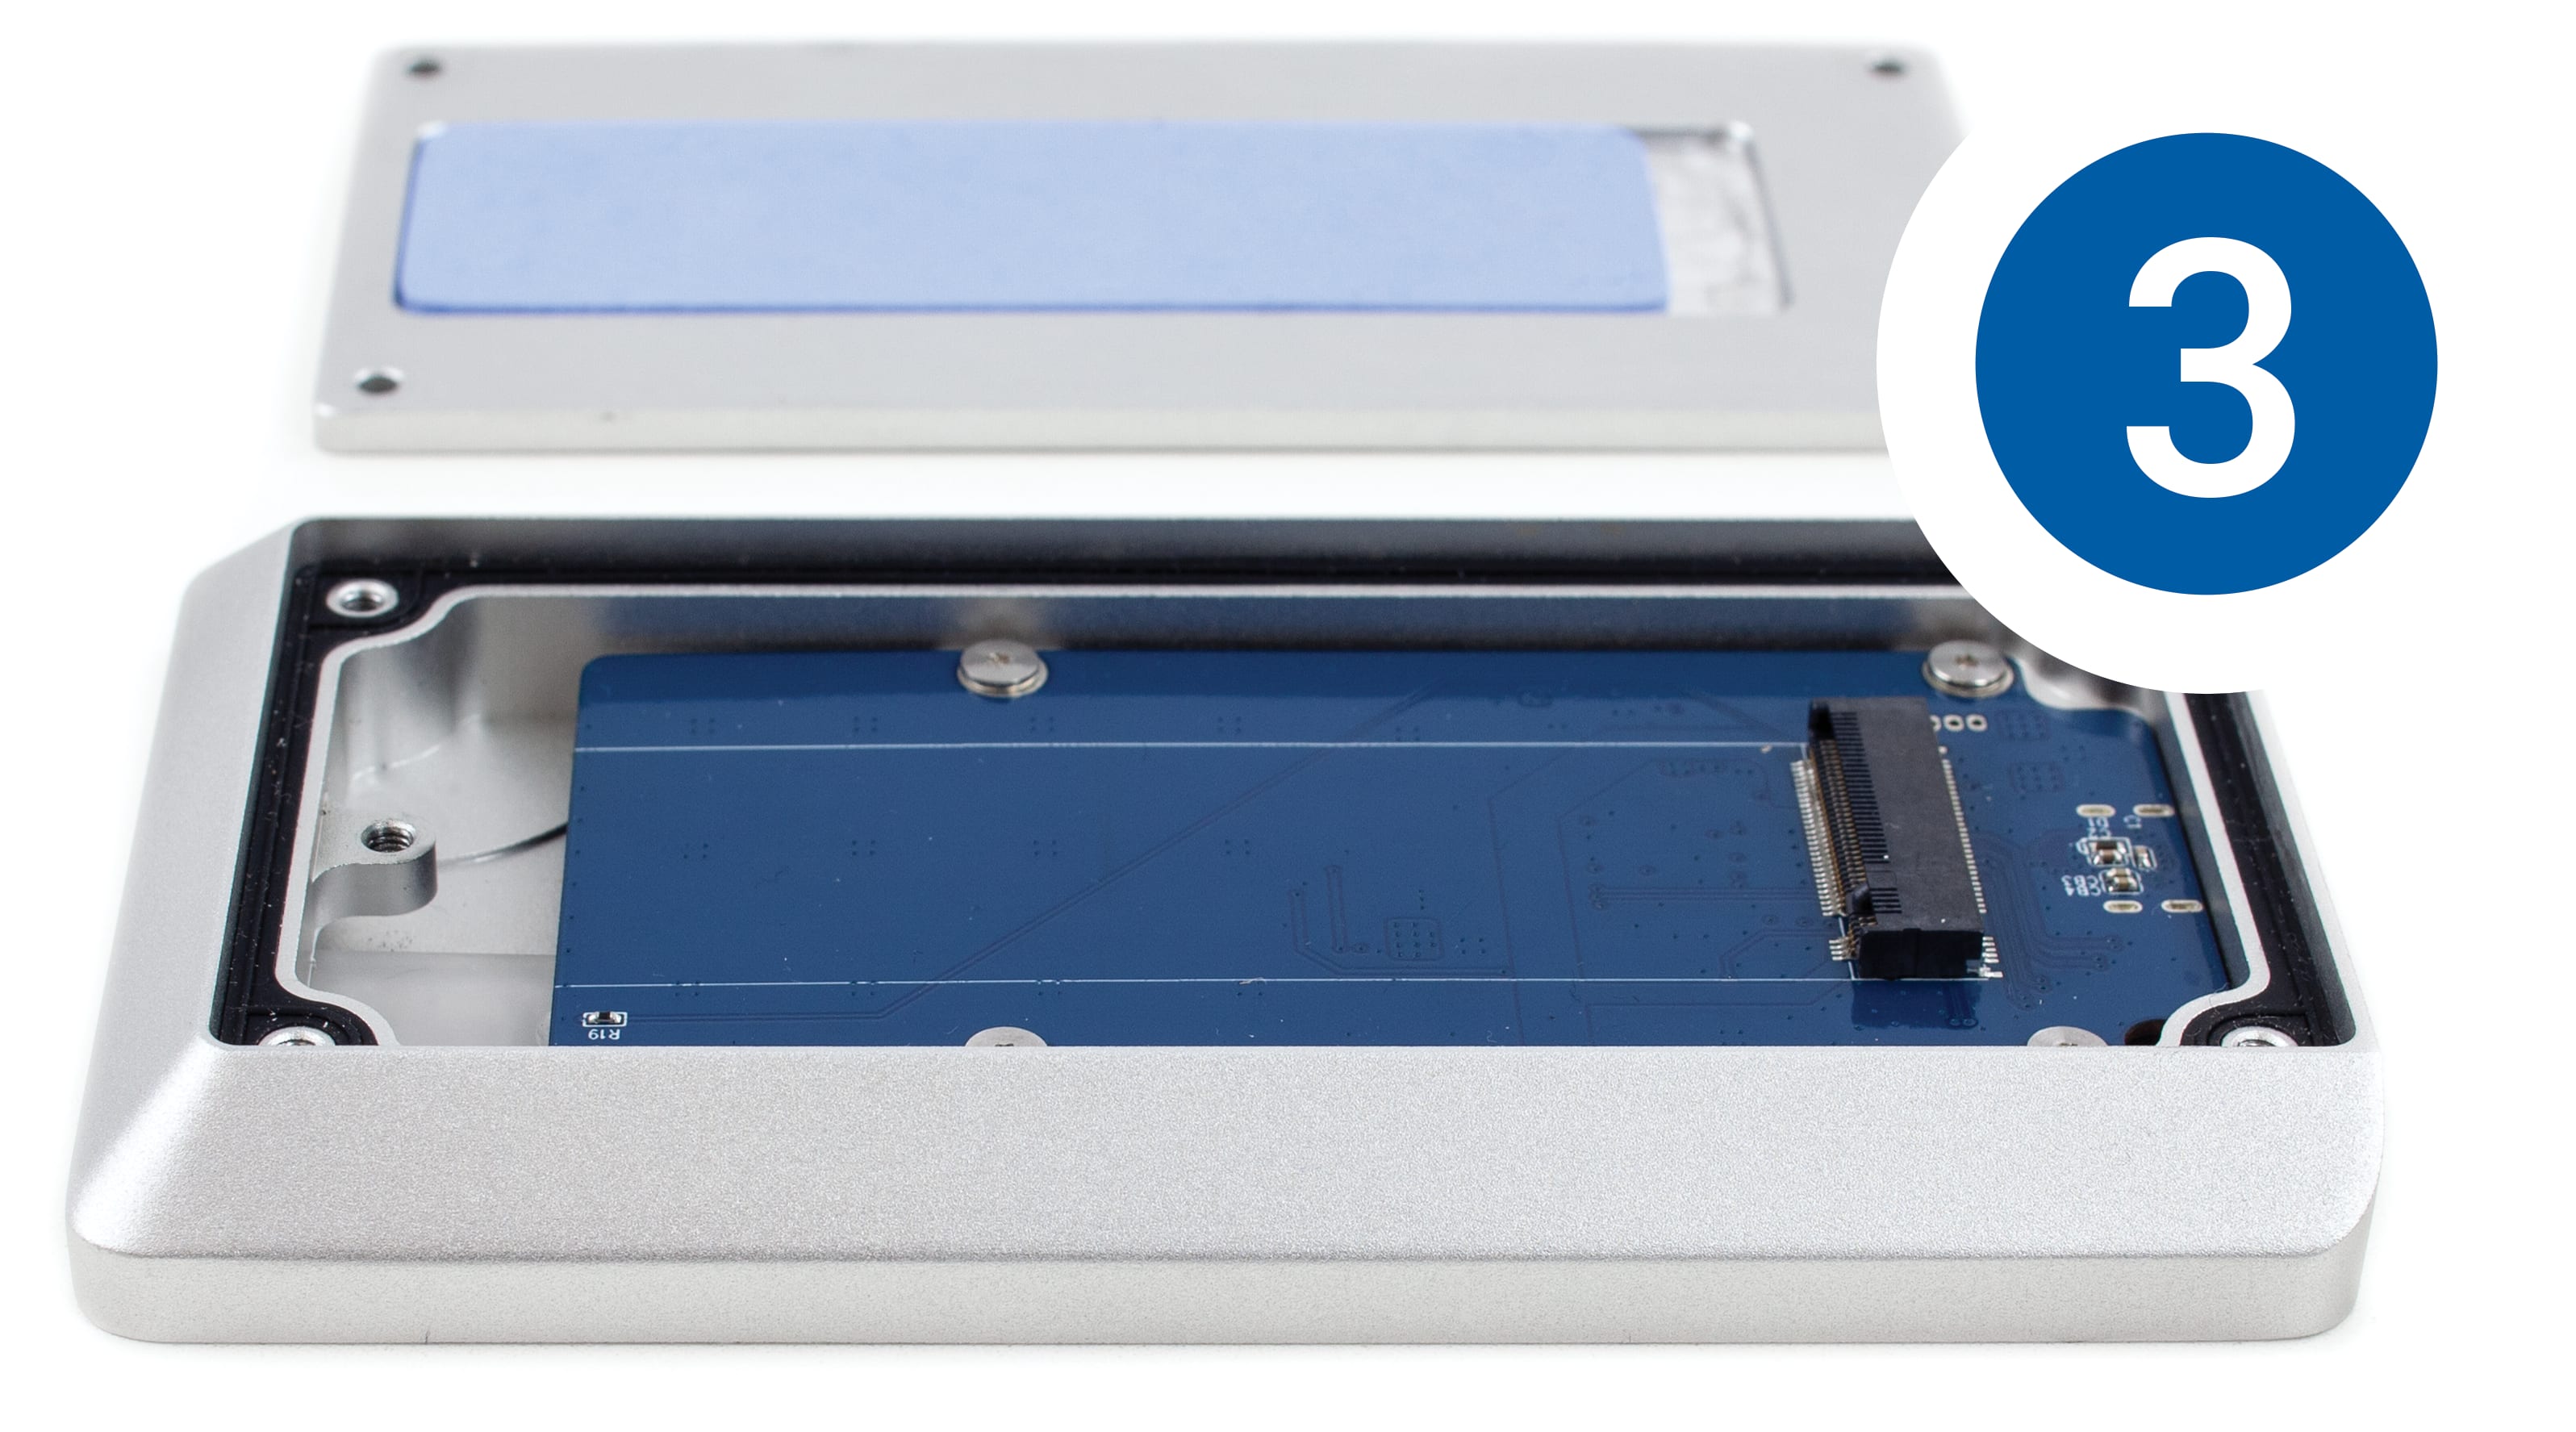
4. Set the top portion of the enclosure on a static-free work surface, face up, then align the M.2 SSD connector with the black PCIe connector on the Envoy Pro’s circuit board. Carefully seat the drive into the connector.
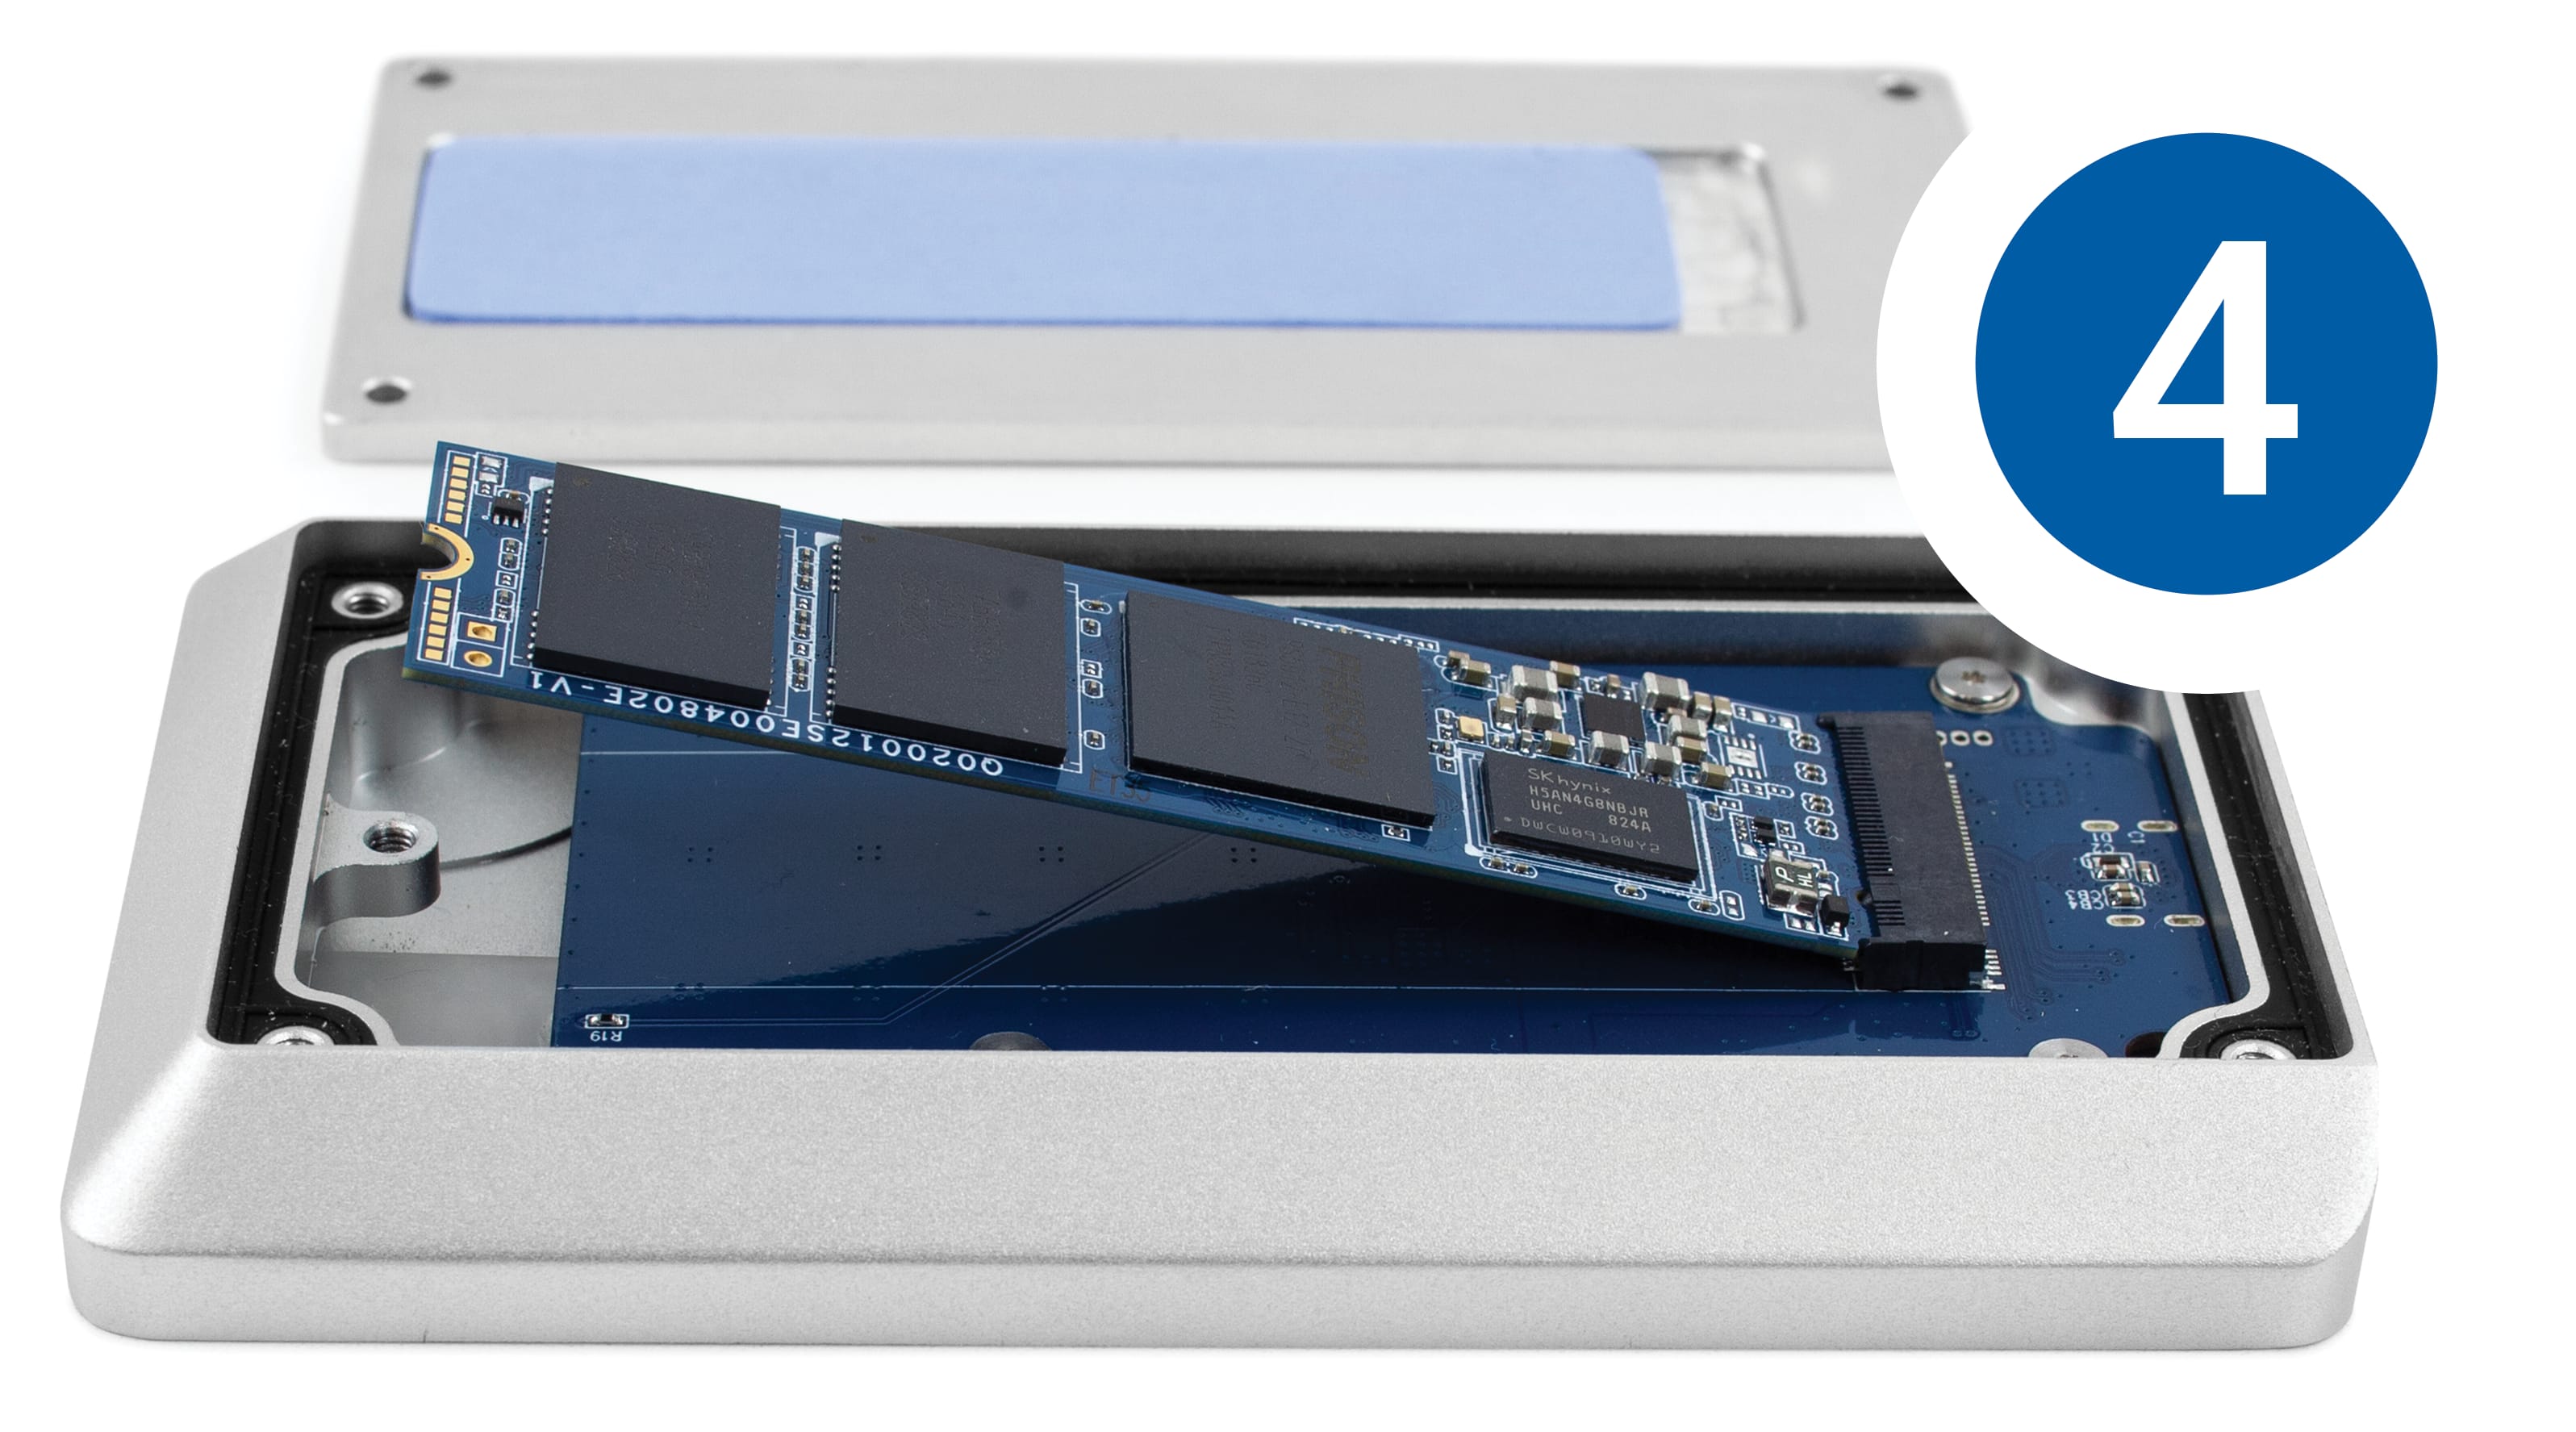
5. Using the shorter drive mount screw from the packet, carefully secure the M.2 SSD to the drive post.
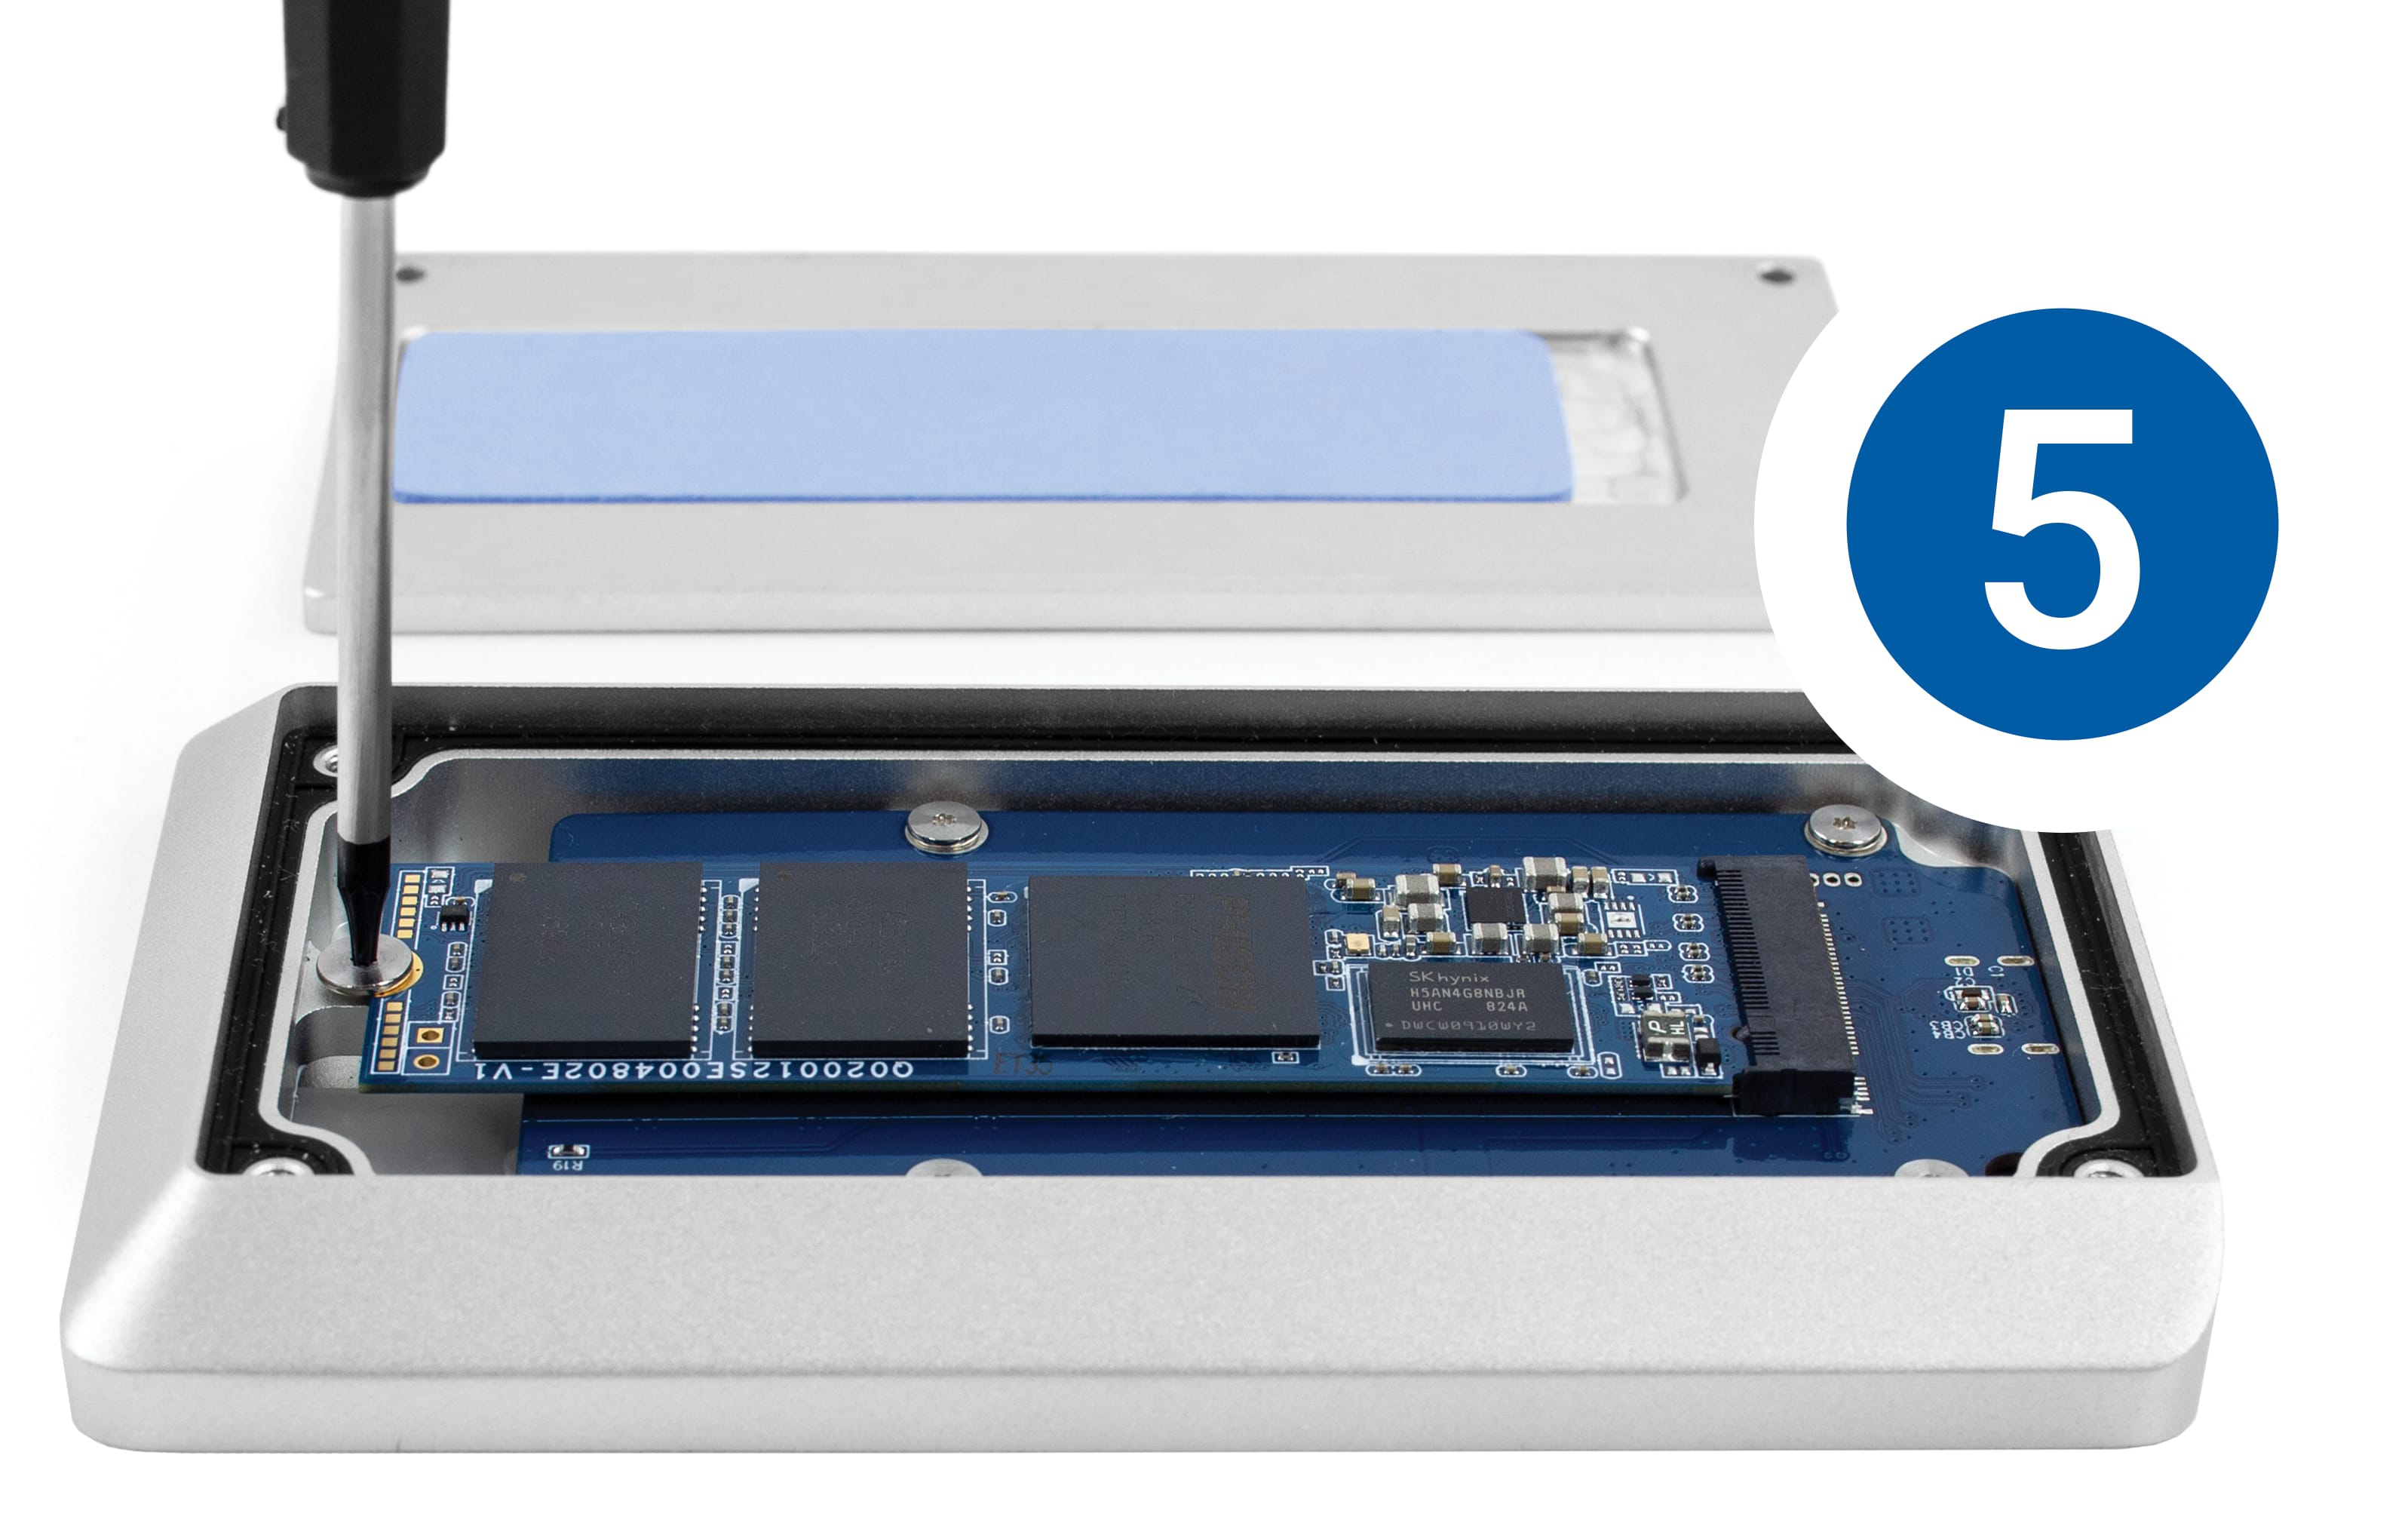
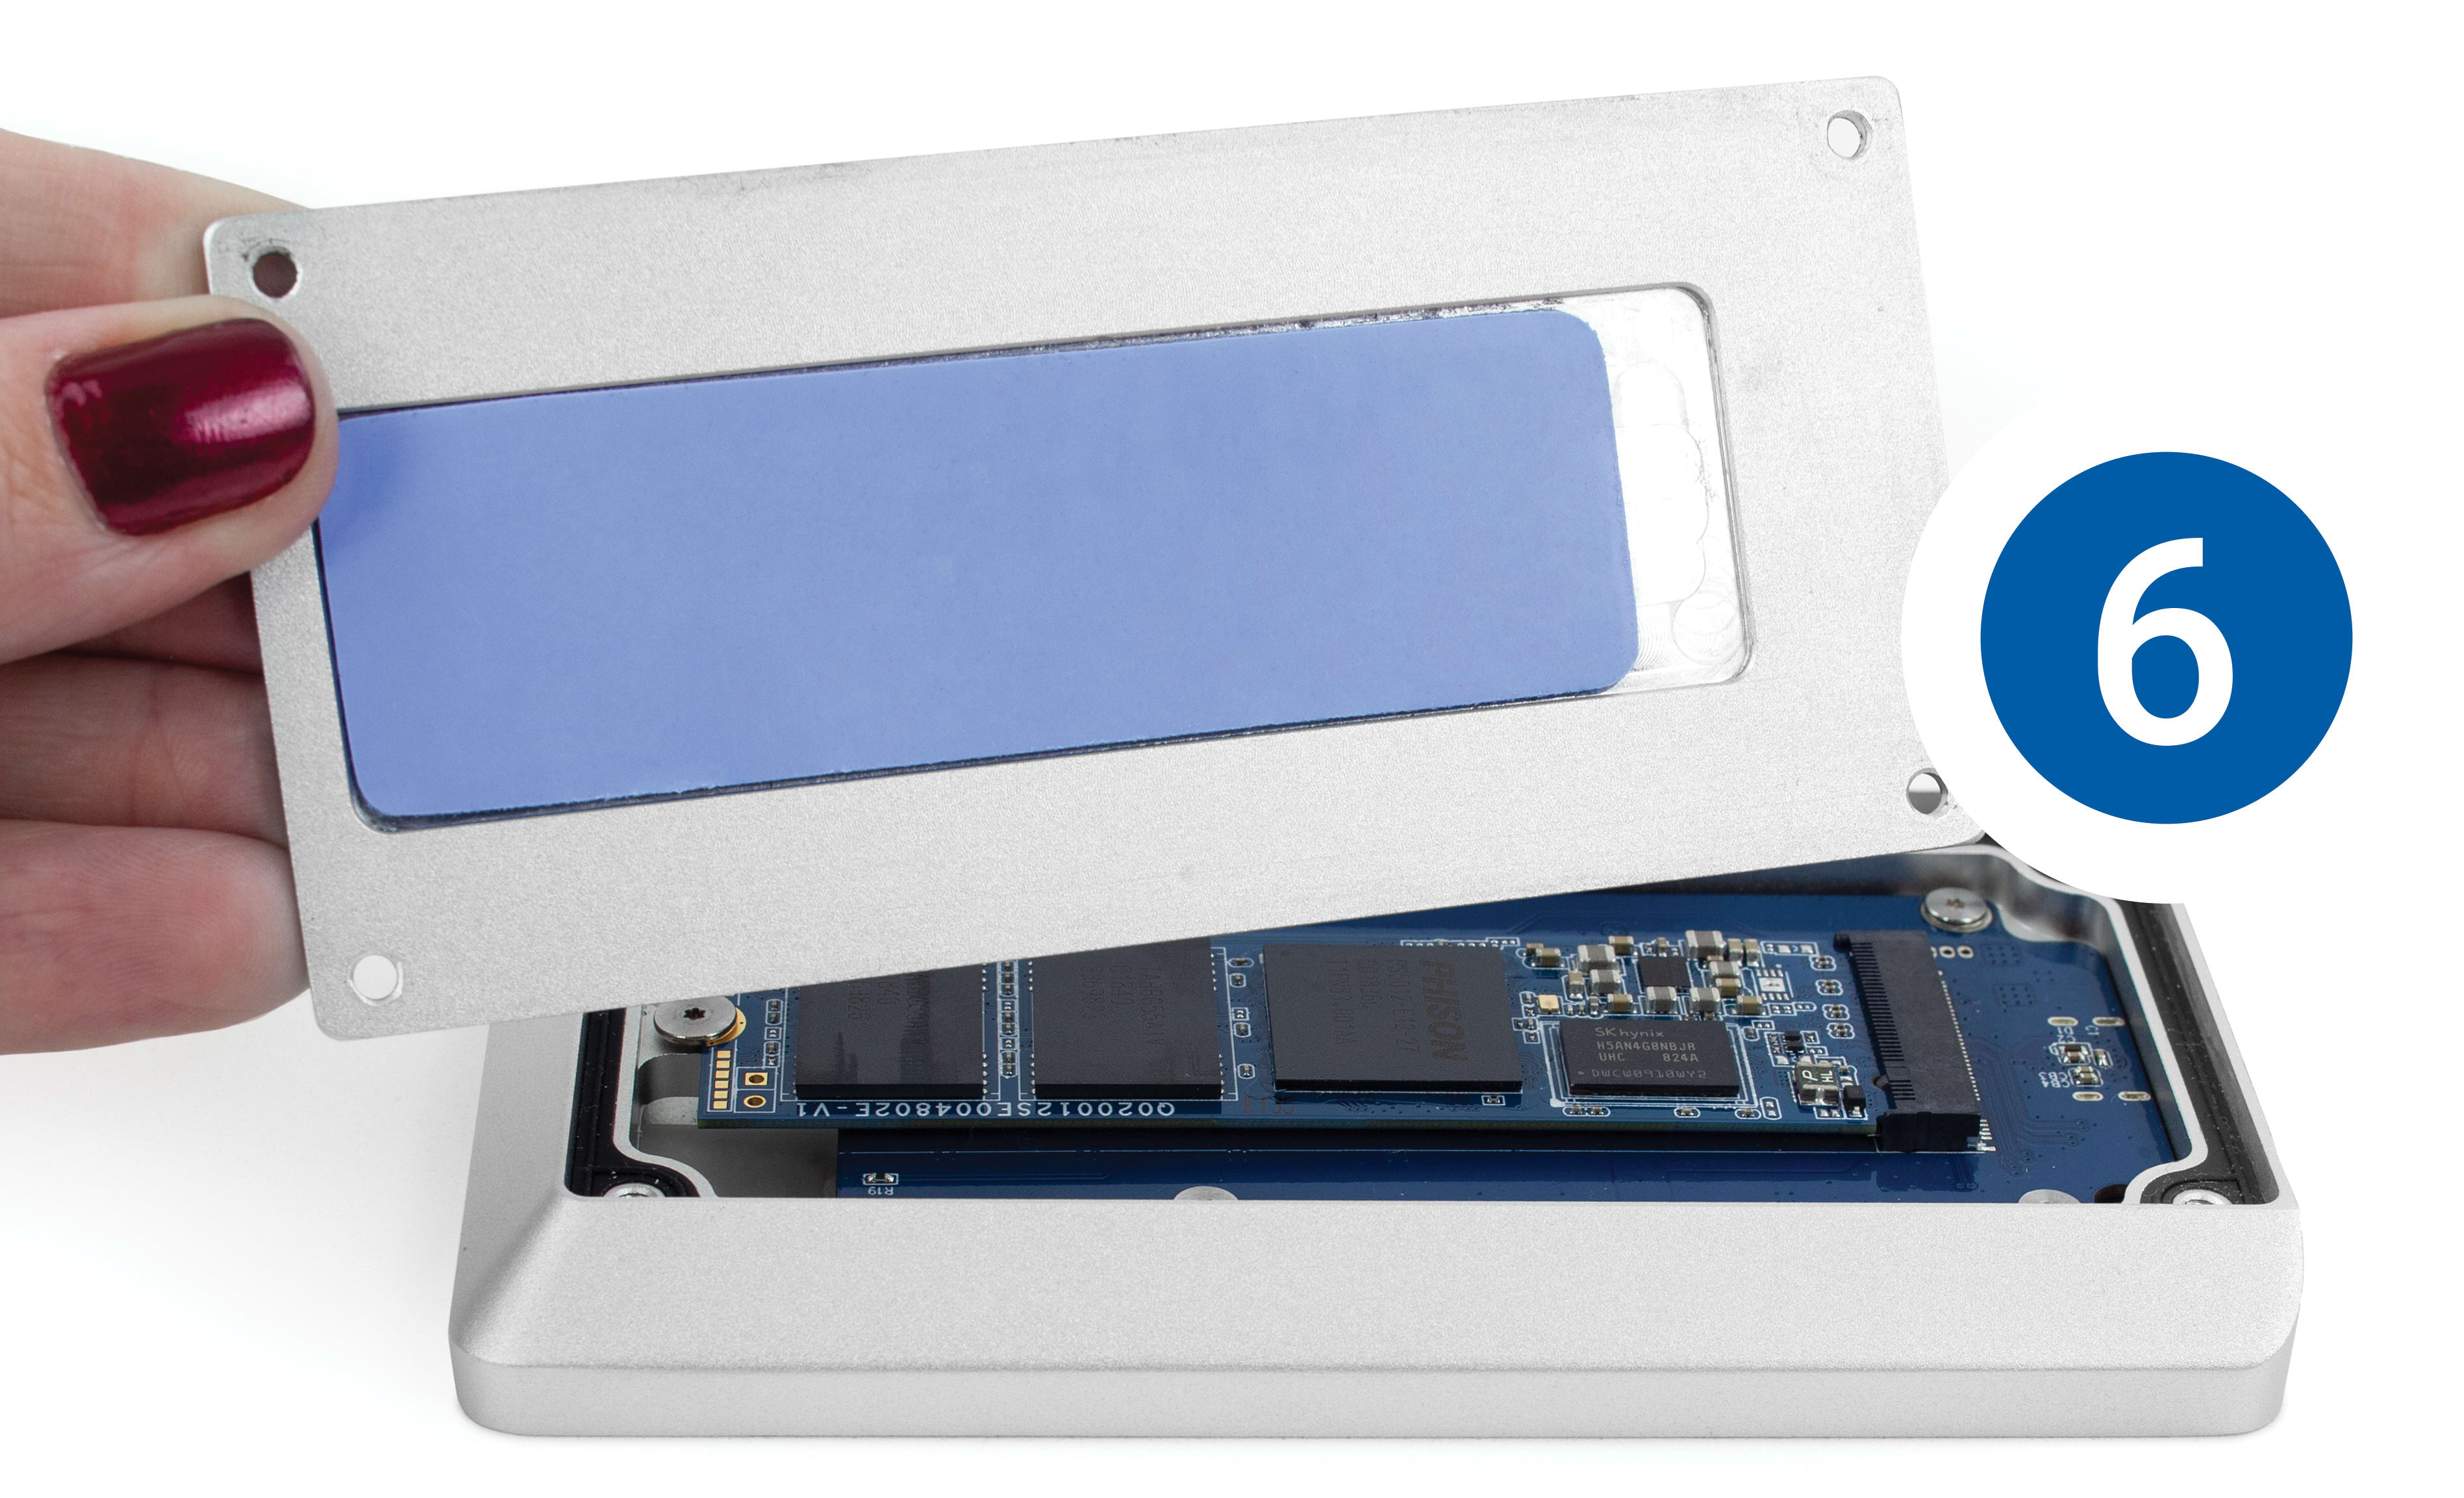
6. Reseat the bottom cover onto the top portion of the enclosure. Make sure the small cutout section where the thermal pad is, rests above the PCIe connector, not the drive mount screw.
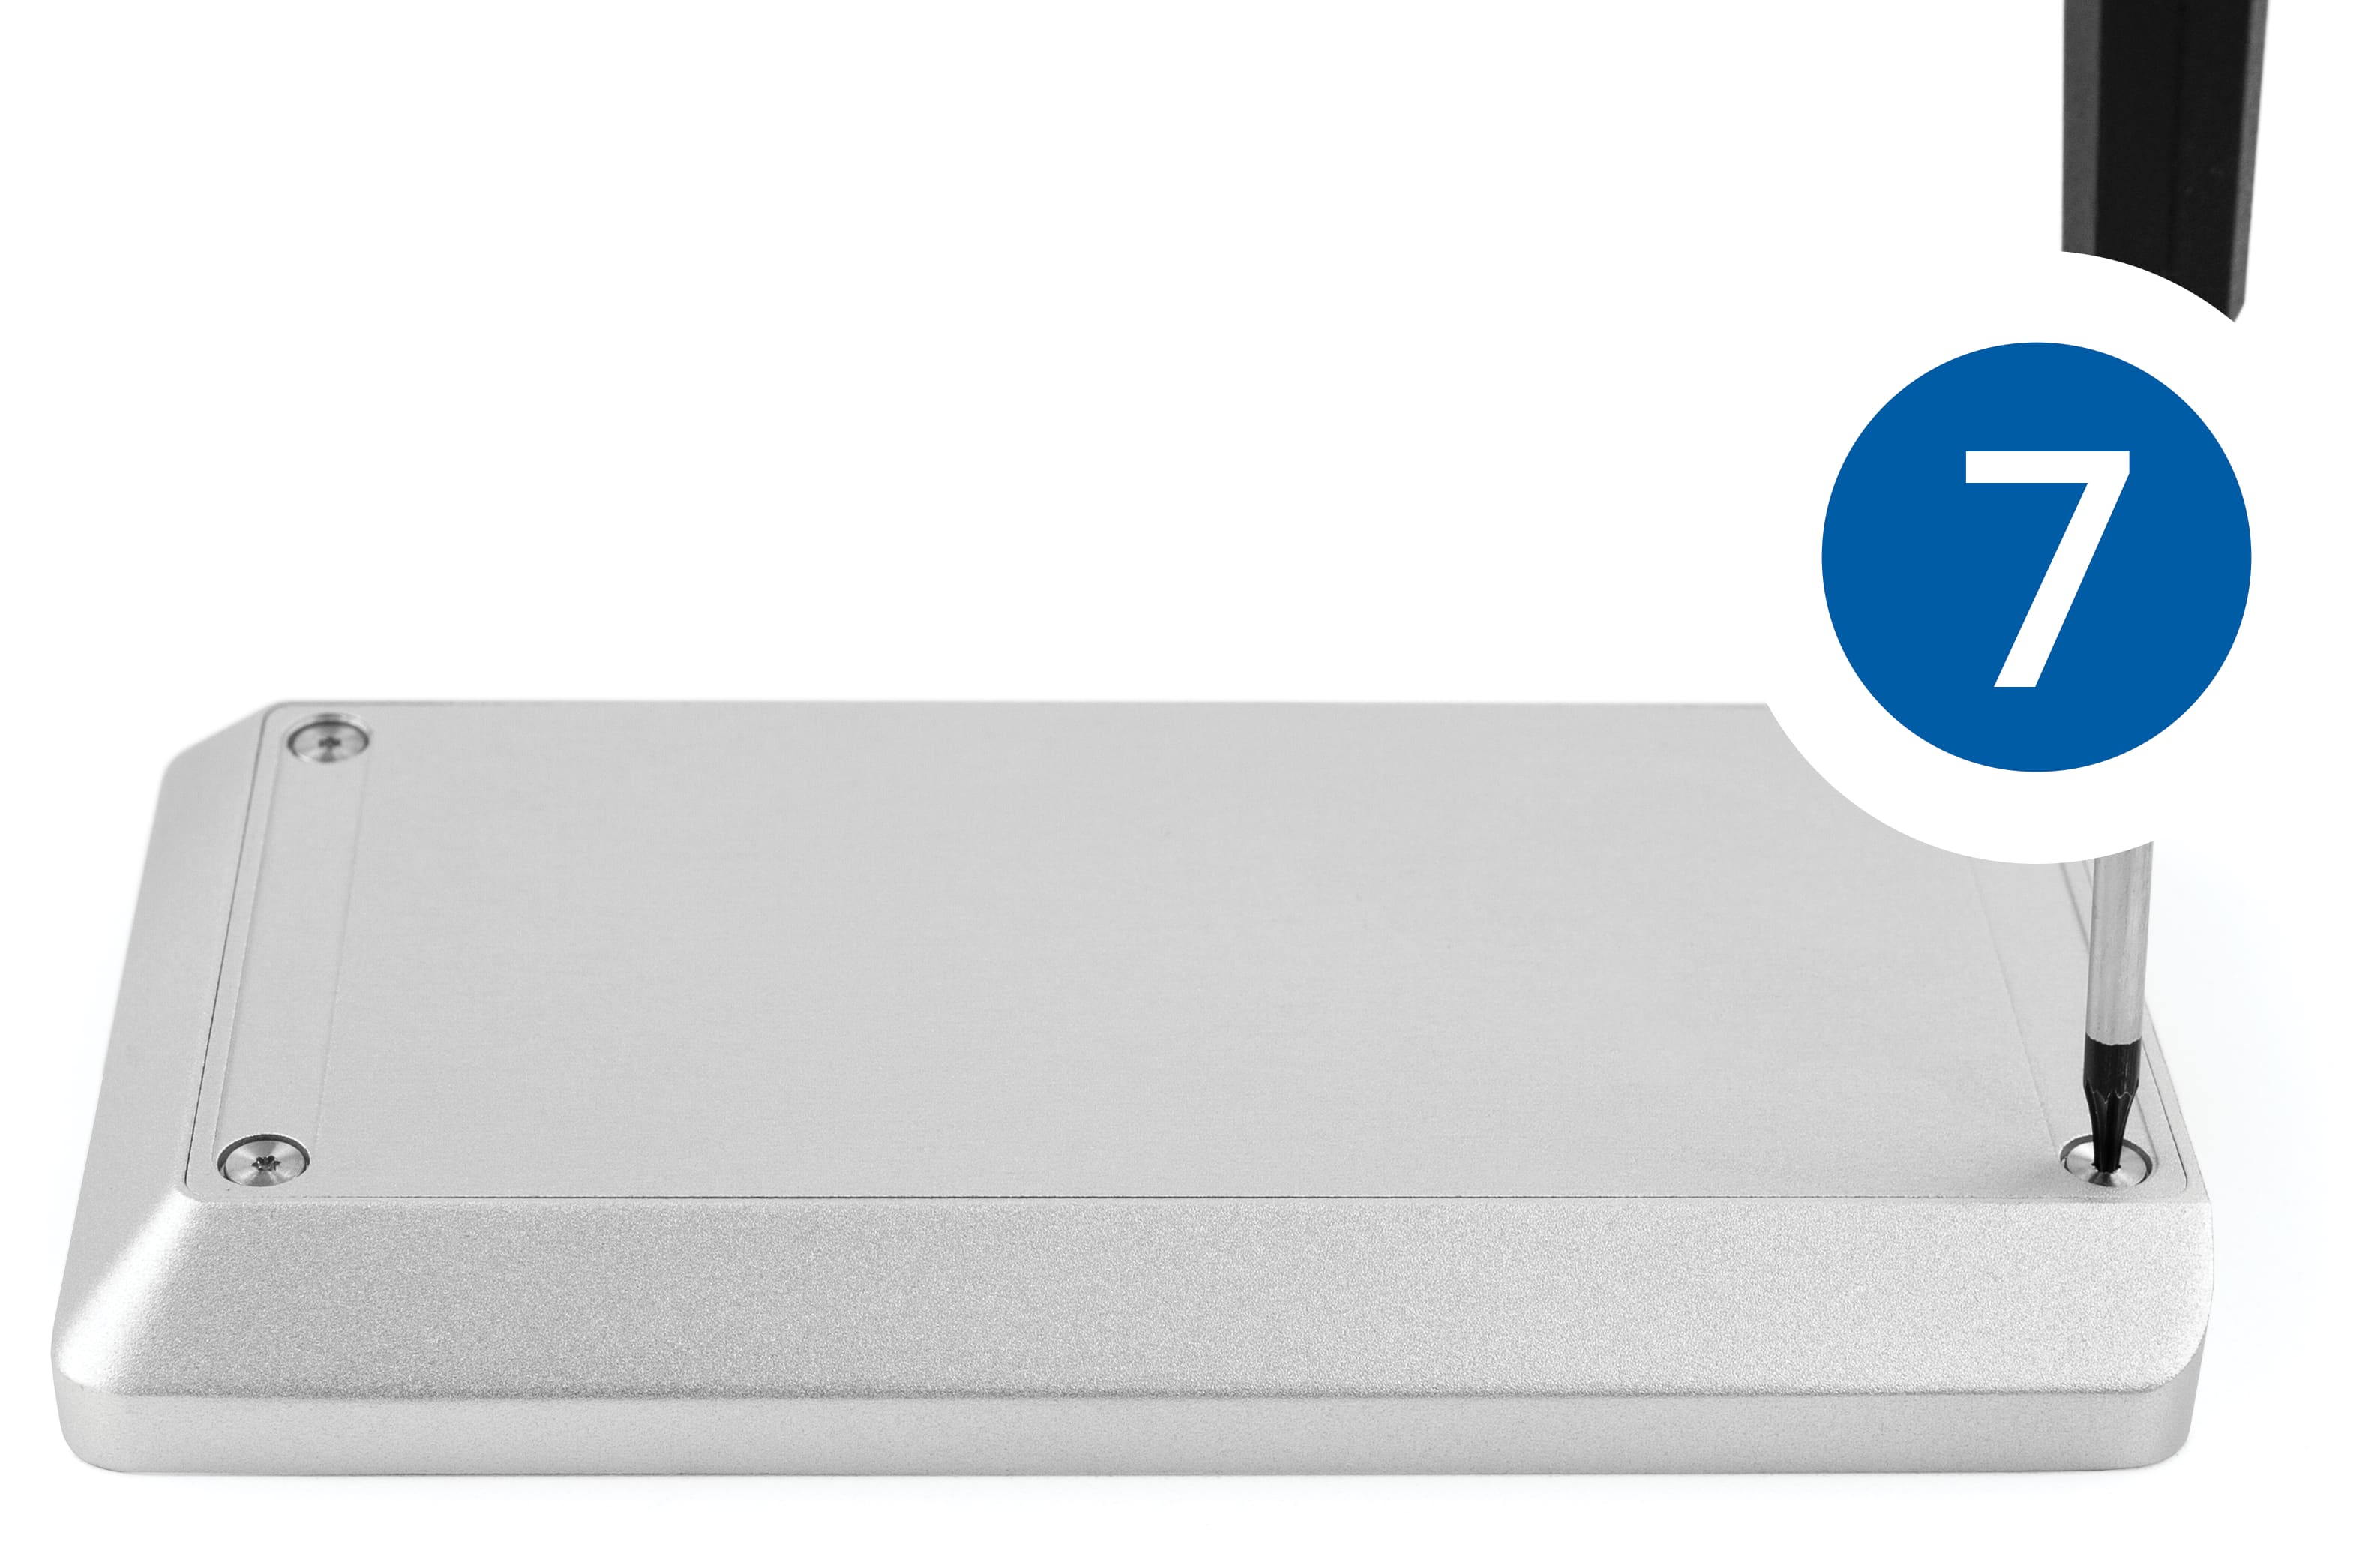
7. Using the two screws removed in Step 2, plus the two remaining screws in the packet, secure the bottom cover to the top portion of the device. The cover should sit completely flush at the end of this process.
If any edge or corner sits slightly above the others remove the screws, make sure the thermal pad is oriented correctly and then re-affix the screws.
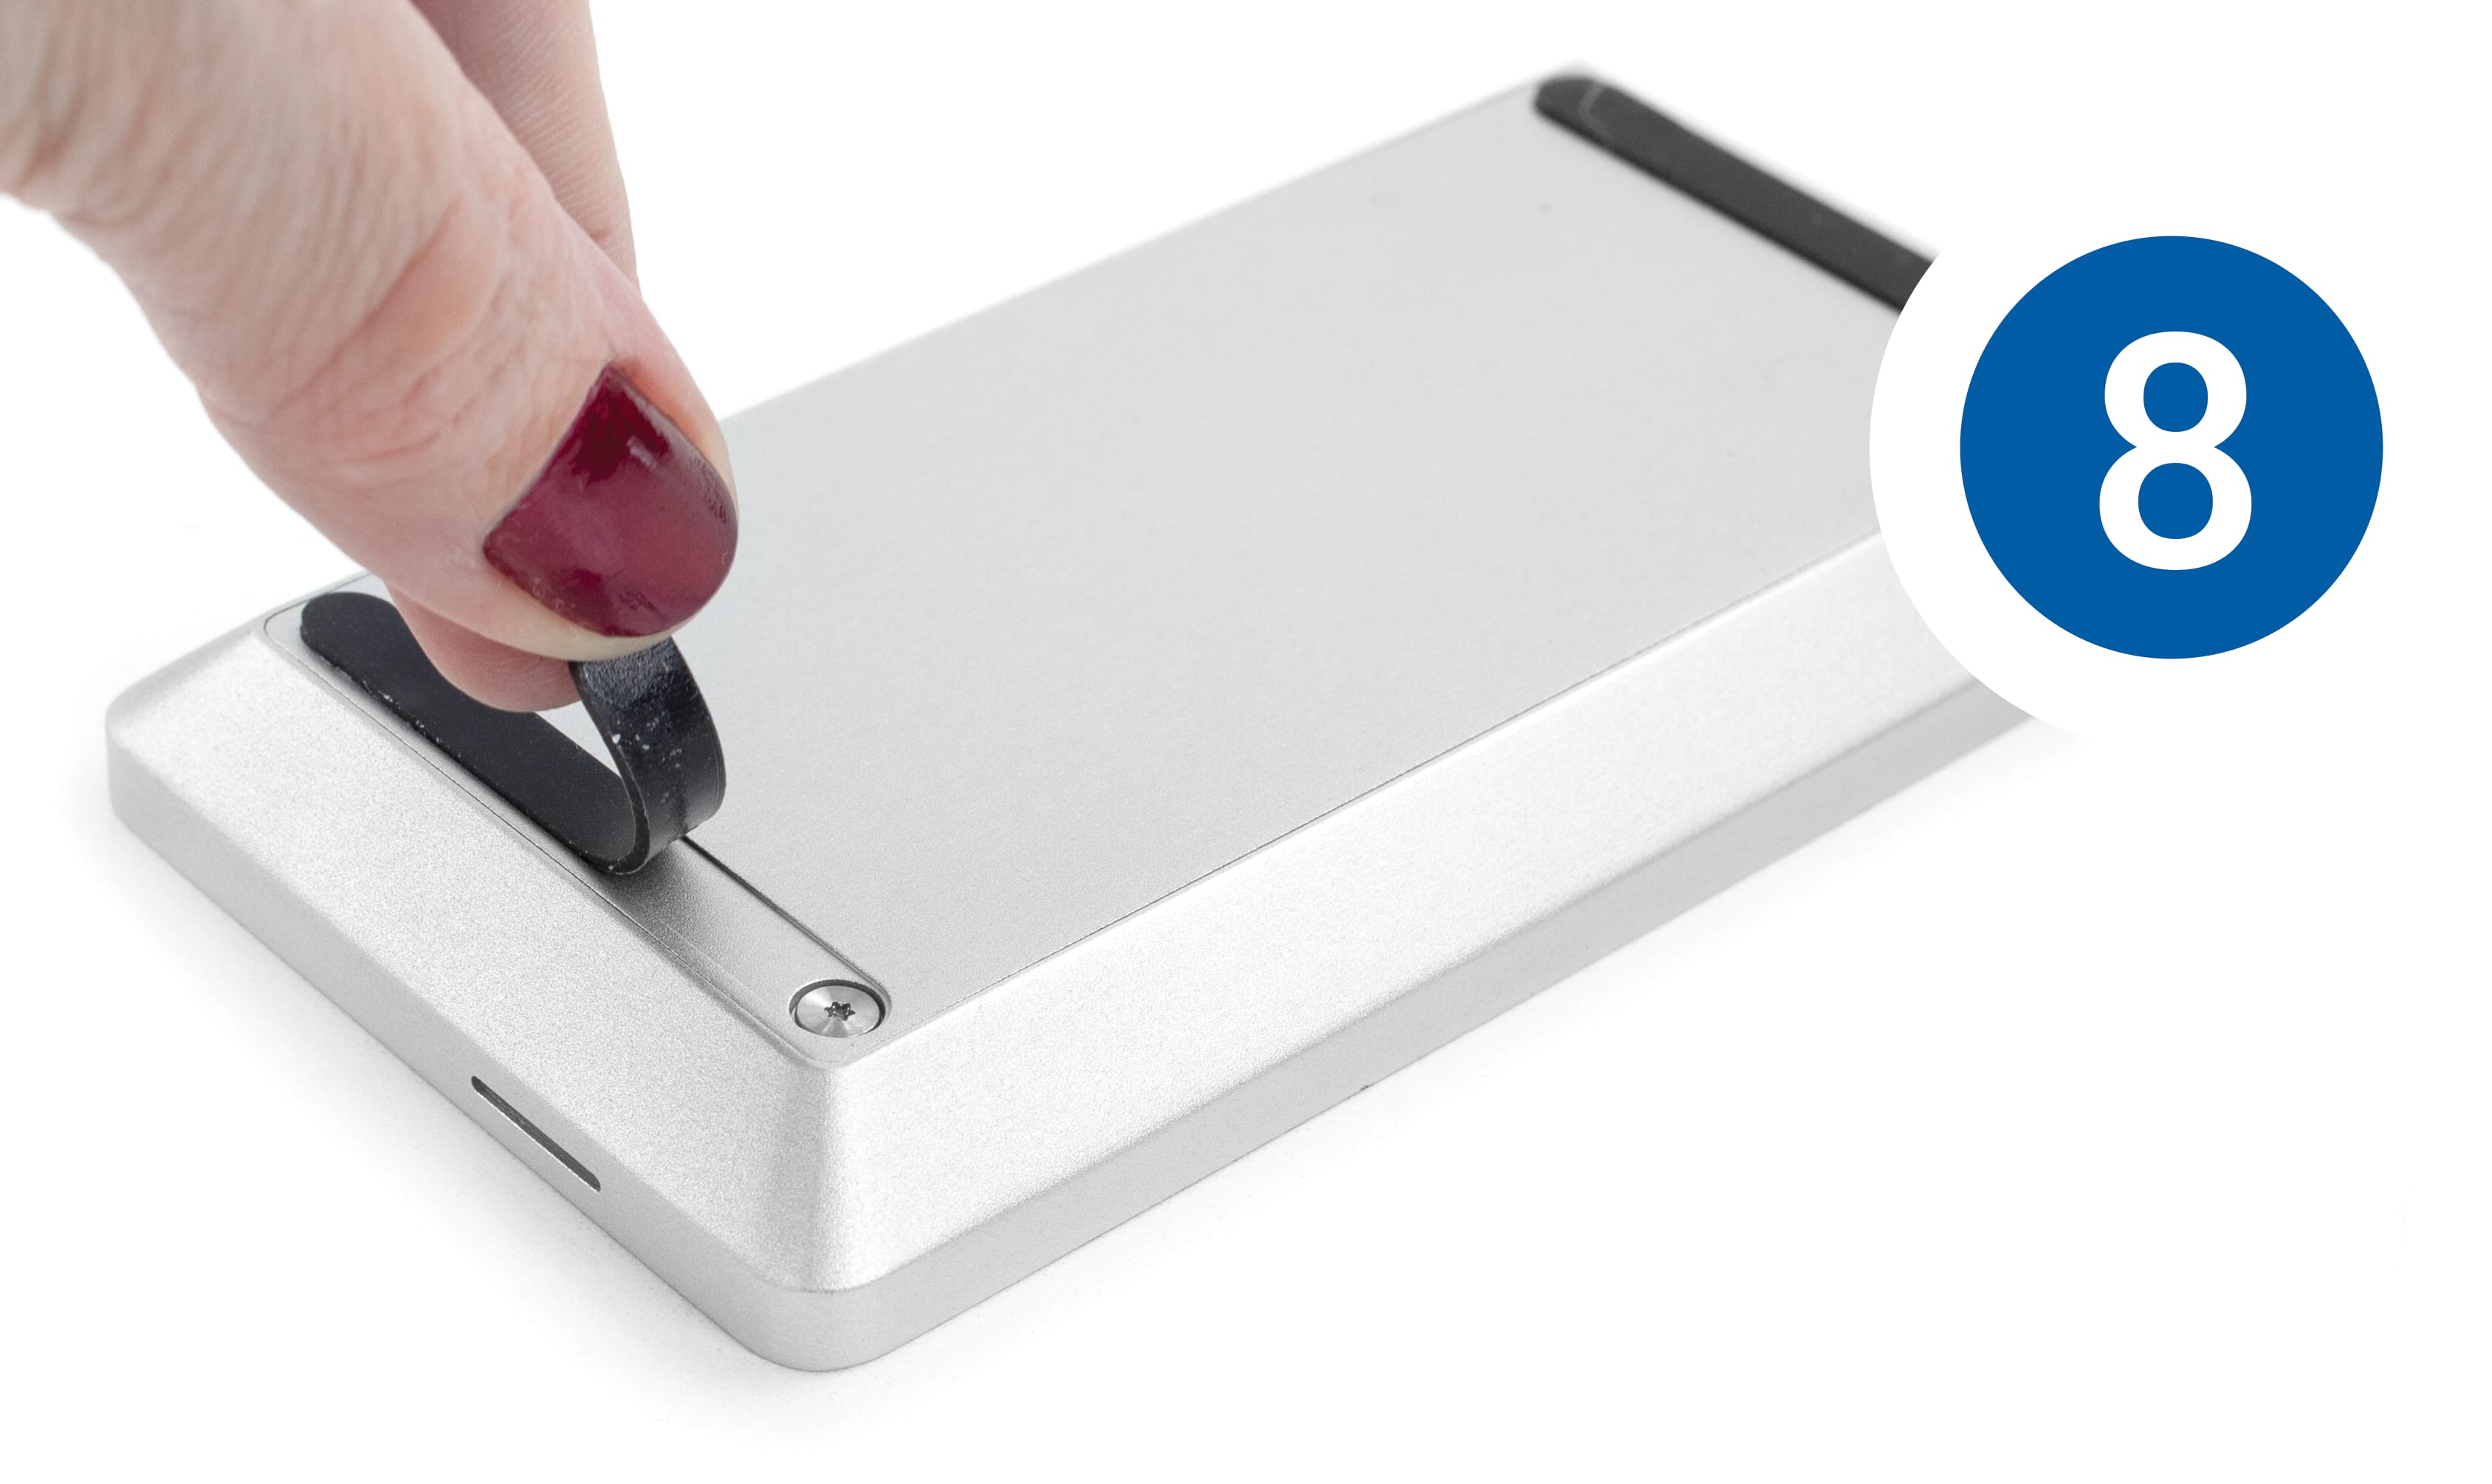
8. Last, take the two rubber feet, remove the adhesive strip from each, and place each over the cutouts on the bottom cover, as shown.
For tips on formatting your new drive please visit: here
2.3 Usage Notes
- With prolonged use, the drive case may be warm to the touch. This is normal.
Support Resources
3.1 Troubleshooting
Begin troubleshooting by verifying that the USB-C cable is properly plugged into the computer and the Envoy Pro EX. If the Envoy Pro EX is still not working properly, try connecting the cable to a different USB-C port, and also using a different USB-C cable if necessary. If problems persist, remove the SSD from the Envoy Pro EX, then re-connect the SSD to the Envoy Pro EX and try again.
3.2 About Data Backup
To ensure that your files are protected and to prevent data loss, we strongly suggest that you keep two copies of your data: one copy on your OWC Envoy Pro EX and a second copy on your internal drive or another storage medium, such as an optical backup, or on a second external storage unit. Any data loss or corruption while using the Envoy Pro EX is the sole responsibility of the user, and under no circumstances may OWC, its parent, partners, affiliates, officers, employees, or agents be held liable for loss of the use of data including compensation of any kind or recovery of the data.
Changes
The material in this document is for information purposes only and subject to change without notice. While reasonable efforts have been made in the preparation of this document to assure its accuracy, OWC, its parent, partners, affiliates, officers, employees, and agents assume no liability resulting from errors or omissions in this document, or from the use of the information contained herein. OWC reserves the right to make changes or revisions in the product design or the product manual without reservation and without obligation to notify any person of such revisions and changes.
FCC Statement
Warning! Modifications not authorized by the manufacturer may void the user’s authority to operate this device.
NOTE: This equipment has been tested and found to comply with the limits for a Class A digital device, pursuant to Part 15 of the FCC Rules. These limits are designed to provide reasonable protection against harmful interference when the equipment is operated in a commercial environment. This equipment generates, uses, and can radiate radio frequency energy and, if not installed and used in accordance with the instruction manual, may cause harmful interference with radio communications. Operation of this equipment in a residential area is likely to cause harmful interference, in which case the user will be required to correct the interference at his own expense.
Warranty
The Envoy Pro EX with USB-C has a 3 Year OWC Limited Warranty if it was bundled with a drive. OWC Envoy Pro EX with USB-C enclosures that do not ship with a drive have a 1 Year OWC Limited Warranty. For up-to-date product and warranty information, please visit the product web page.
Copyrights And Trademarks
No part of this publication may be reproduced, stored in a retrieval system, or transmitted in any form or by any means, electronic, mechanical, photocopying, recording or otherwise, without the prior written consent of OWC.
© 2022 Other World Computing, Inc. All rights reserved. OWC, OWC Envoy, and the OWC logo are trademarks of New Concepts Development Corporation, registered in the U.S. and/or other countries. Mac and macOS are trademarks of Apple Inc. Thunderbolt and the Thunderbolt logo are trademarks of Intel Corporation or its subsidiaries in the U.S. and/or other countries. All other marks may be the trademark or registered trademark property of their owners.
Free Support Chat
Our free award-winning support team is ready to answer all of your questions. Technical support is available Monday - Friday: 9AM - 6PM. Customer Support & Sales is available Monday - Friday: 9AM - 6PM. Support is unavailable on U.S. Federal holidays. Talk to a human today.


 1-800-275-4576