 1-800-275-4576
PRAM Battery For PowerBook G4
Installation Guide

Attention: Observe Precautions For Handling Electrostatic Sensitive Devices
While performing the replacement of the PRAM battery, be sure to observe static safe conditions. Do not walk around, hold all components by their edges, and do not touch the connector contacts. Detailed information about static safe conditions can be found in your PowerBook owner’s manual, in the section about “upgrading your computer”
Before getting started, you will need the following:
- A well lit clean work space approximately 3’x2’
- A soft cloth or rubber mat to place the PowerBook on while working on it
- A #1 Phillips Screwdriver
Tips:
You may want to place the computer on a soft cloth or a rubber mat to keep it from sliding around while you perform this upgrade. A mouse pad works well, just be sure to not scratch your PowerBook.
Take a few moments and align all of the components and tools you will need to perform this upgrade so that you don’t have to move around much while doing the upgrade. You will find that if you don’t have to reach very far for an item, it will allow you to concentrate more.

Before beginning, make certain your PowerBook is shut down and the battery is removed.
You cannot perform this upgrade if the computer is in sleep mode.
Step 1
Open and detach the keyboard. If you need assistance performing this task, it is covered in your owner’s manual. A PDF and video of the process are also available at Apple’s tech support site: http://docs.info.apple.com/article.html?artnum=95131
Step 2
In some instances, there will be a dust cover attached to the optical drive. This is located near the lower right of where the keyboard was. If it is not there, you can skip this step. If it is there, you will need to remove it. Simply get under it with your fingernail and slowly peel back.
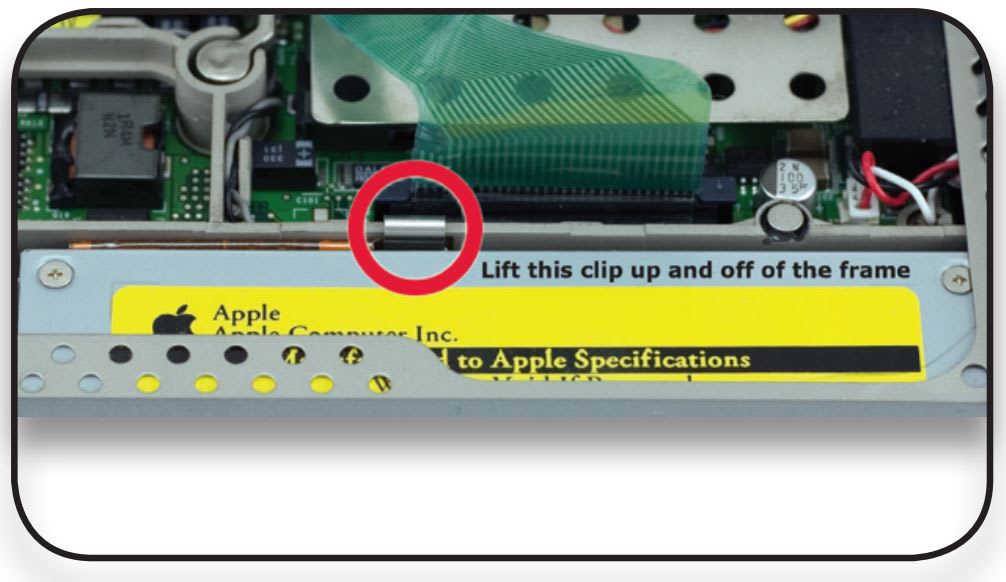
Step 3
There is a small silver clip that holds a cable to the frame that needs to be removed to take the drive out in future steps. Gently lift up on the clip, and it will slide off. You will need to reinstall this clip after reassembling your computer
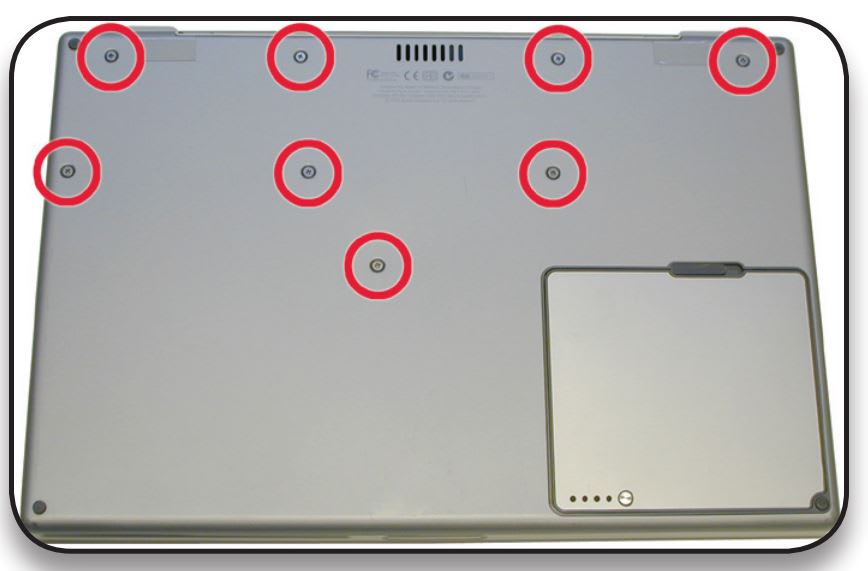
Step 4
Turn the laptop over and remove the eight Phillips screws holding the bottom cover to the frame.
Once the screws are out, you should be able to remove the bottom cover. It is recommended to start loosening at the corner where the battery sits.
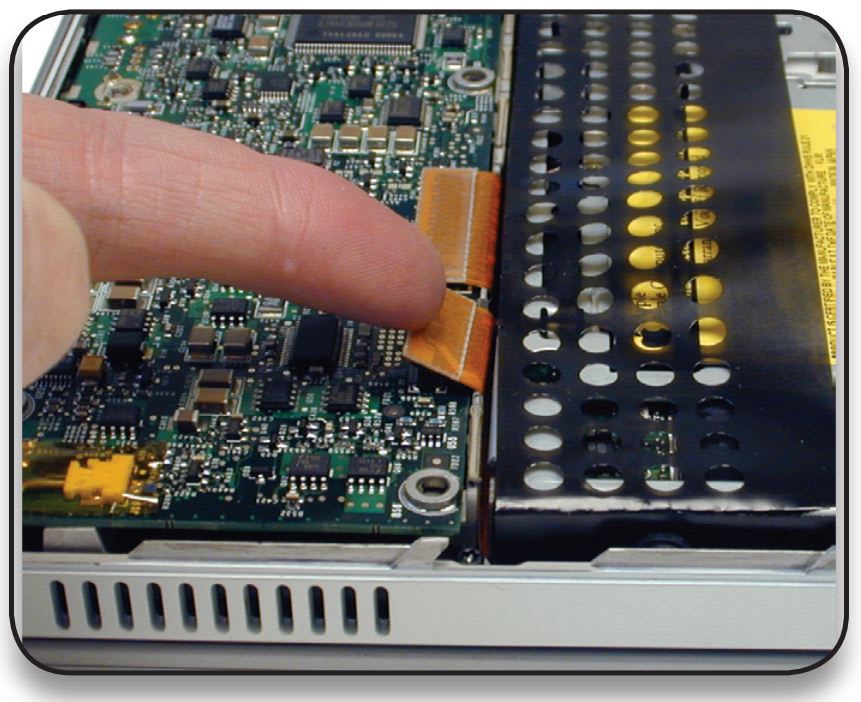
Step 5
Once the bottom cover is removed, detach the ribbon cable connecting the optical drive to the logic board. It is the one nearest to the outside of the PowerBook. You should be able to detach it by simply lifting up on it with your finger nail.
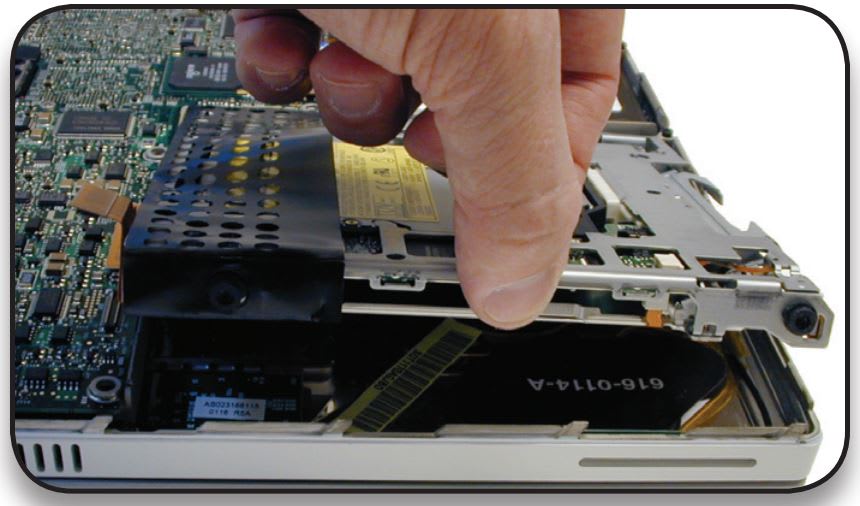
Step 6
After the ribbon cable has been detached, you can remove the drive. To accomplish this, simply lift up on the outside edge and pull the drive out.
Be careful to note the positioning of the grommets that are located near the four corners of the drive. They allow the drive to align with the slot in the frame, so that discs may be inserted and ejected smoothly.
Step 7
Underneath the drive, you will see the battery and PMU board.
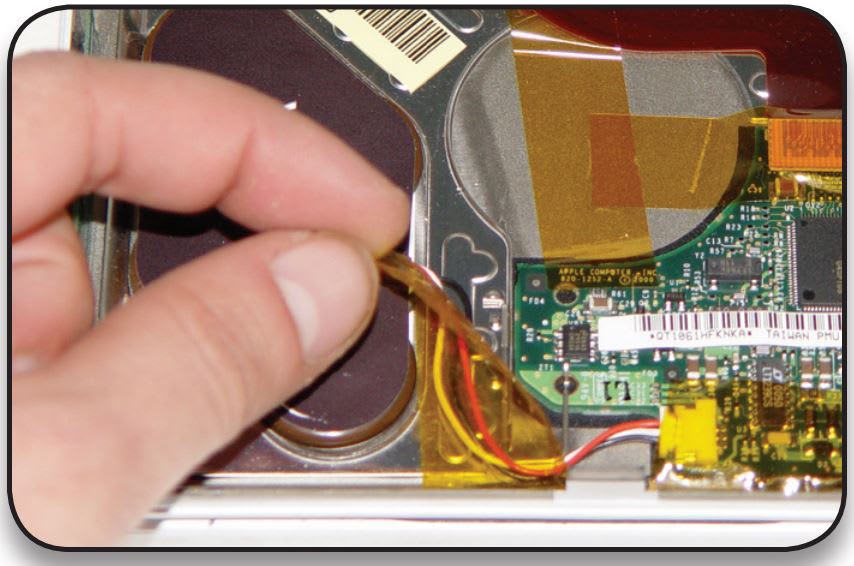
Carefully peel away the tape, allowing you access to the battery cable.
Save the tape, so that you can use it to hold the cable from the new battery.
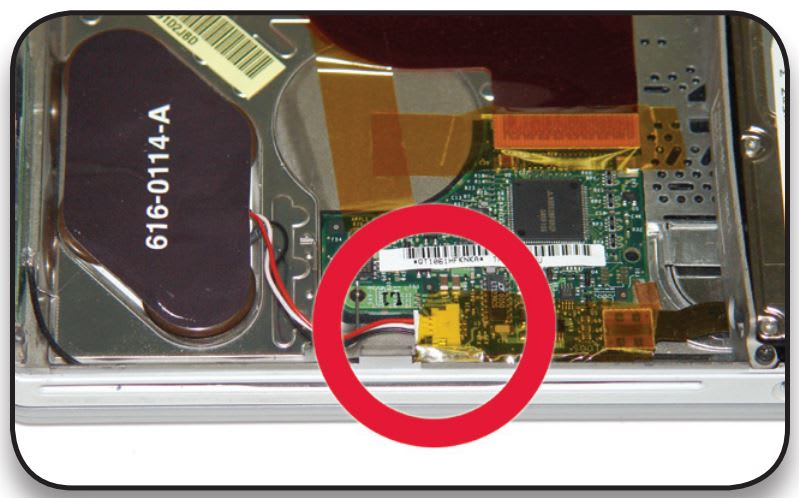
Step 8
Detach the battery from the connector on the PMU board.
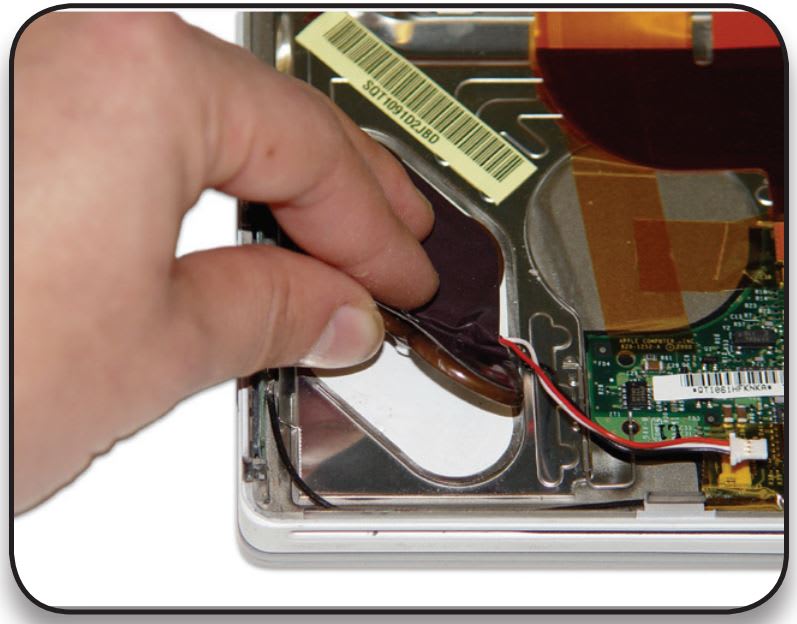
Step 9
Pry up the battery so that it is removed from the inner top case. This battery is attached very securely, so you may need to find something to help pry it up.
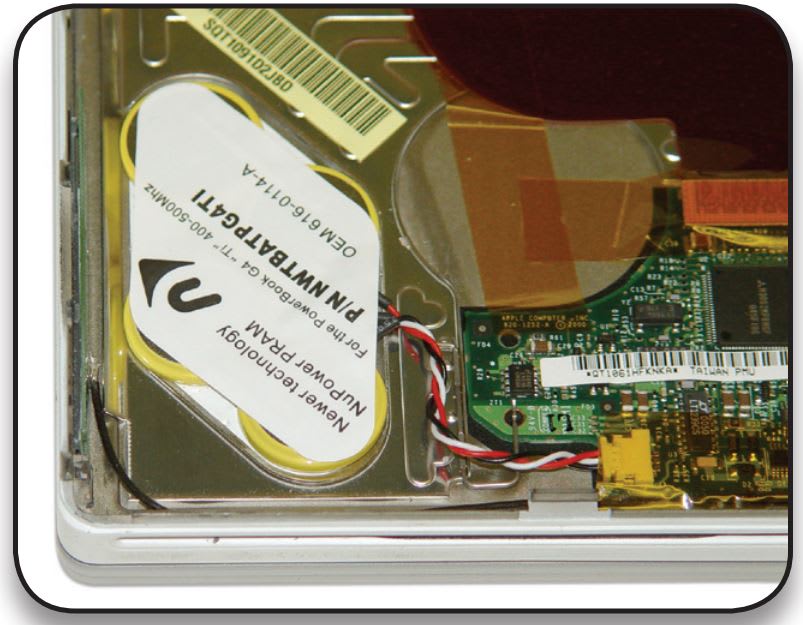
Step 10
You can now place the new battery where the old one was. When positioning the replacement backup battery on the inner top case, make sure the battery fits within the ridged battery area of the inner top case, and the backup battery cable faces the PMU card, as shown.
Step 11
You can now reassemble your computer, simply reversing the disassembly steps you just performed. Once your computer has been reassembled, it is recommended that you leave it charge for approximately 48 hours in order to allow maximum capacity.
Please note that when you restart your computer, your Date & Time, along with a number of other settings, may need to be reset.
Free Support Chat
Our free award-winning support team is ready to answer all of your questions. Technical support is available Monday - Friday: 9AM - 6PM. Customer Support & Sales is available Monday - Friday: 9AM - 6PM. Support is unavailable on U.S. Federal holidays. Talk to a human today.