 1-800-275-4576
Windows OWC Archive Pro Ethernet Initial Setup
Support Article
Initial setup of the OWC Archive Pro Ethernet requires a one time completion of this guide. Connecting the OWC Archive Pro Ethernet after initial setup is simple and accomplished with a few steps.
1.1 Device Power and Connection
1. Plug the power cable into the OWC Archive Pro Ethernet power port located in the rear. Connect the other end into a power outlet. Toggle the power switch to the ON position. The device fans will begin audibly spinning.
- Using an uninterruptible power supply (UPS) is recommended to help protect from data loss due to electrical anomalies.
2. Connect a qualified Cat-6 or greater ethernet cable to either 10GbE RJ45 SFP+ Data Port or 1GbE RJ45 Management Port located on the rear of the OWC Archive Pro Ethernet. Connect the other end of the ethernet cable into a system's onboard network port or ethernet adapter.
- Network switches and routers are not recommended initially during setup due to potential conflicts with IP address variations.
- The factory installed 10GBase-T SFP+ to RJ45 optic module can be removed and replaced with 10GBase-LR SFP+ | 10GBase-SR SFP+ optic modules or SFP+ DAC cable (not included). Please visit Section 3.2 "SFP+ iSCSI Module Removal" of the OWC Archive Pro Ethernet Support Manual for instructions.
1.2 Static IP Windows Network Setup
Initial device setup requires editing the Windows network settings to create a Static IP connection.
- The OWC Archive Pro Ethernet is required to be connected through the Windows PC onboard network port or ethernet adapter. Network switches and routers are not recommended initially during setup due to potential conflicts with IP address variations.
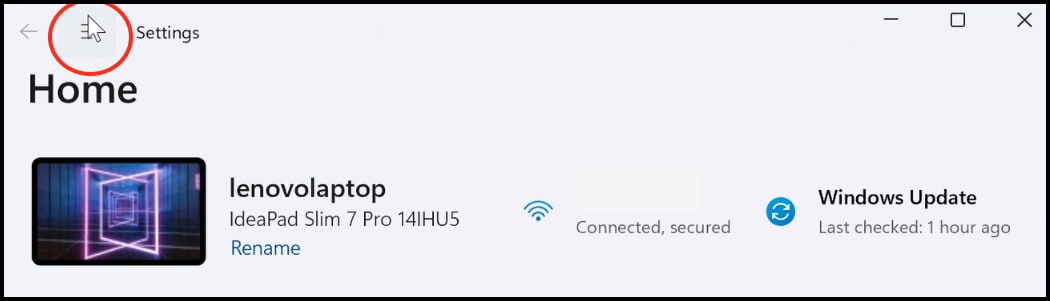
1. Access the Windows PC Settings. Expand additional options by selecting the three lines located in the top left.
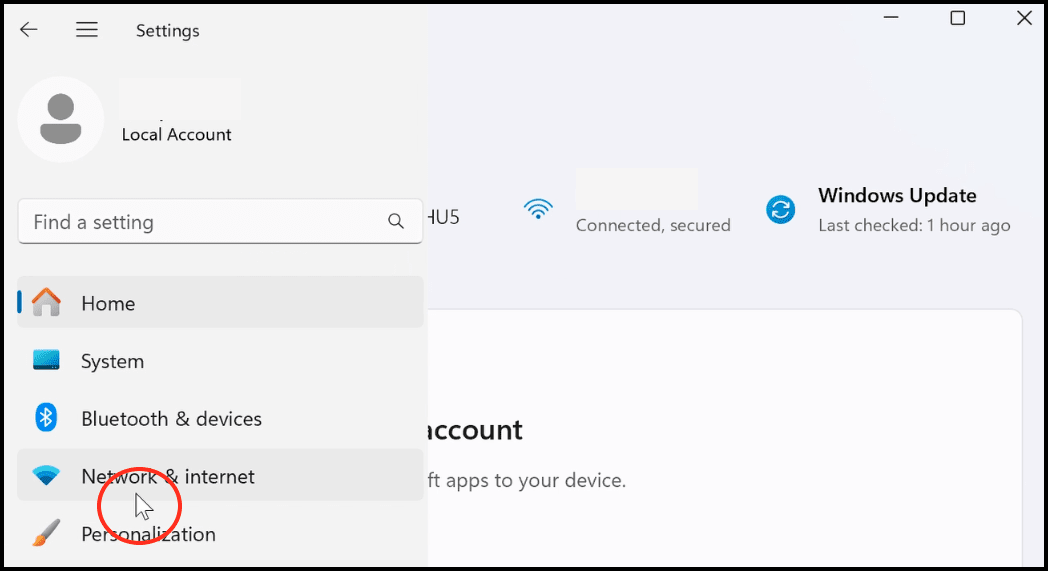
2. Select "Network & internet".
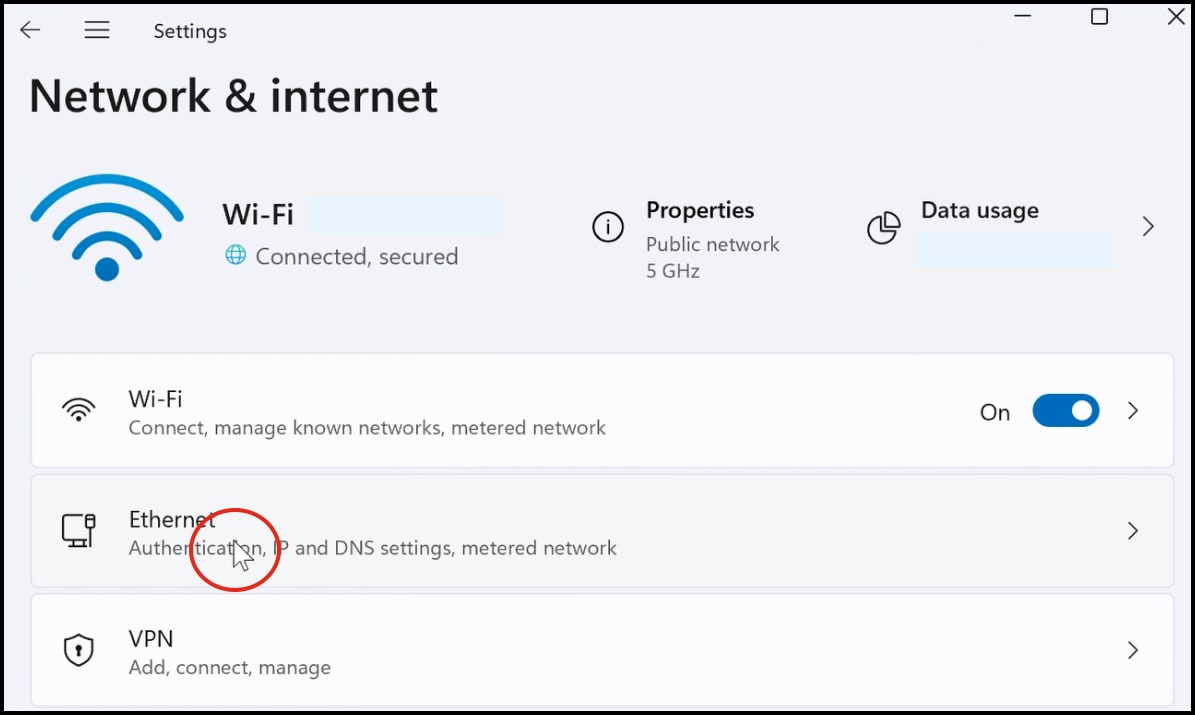
3. Select "Ethernet".
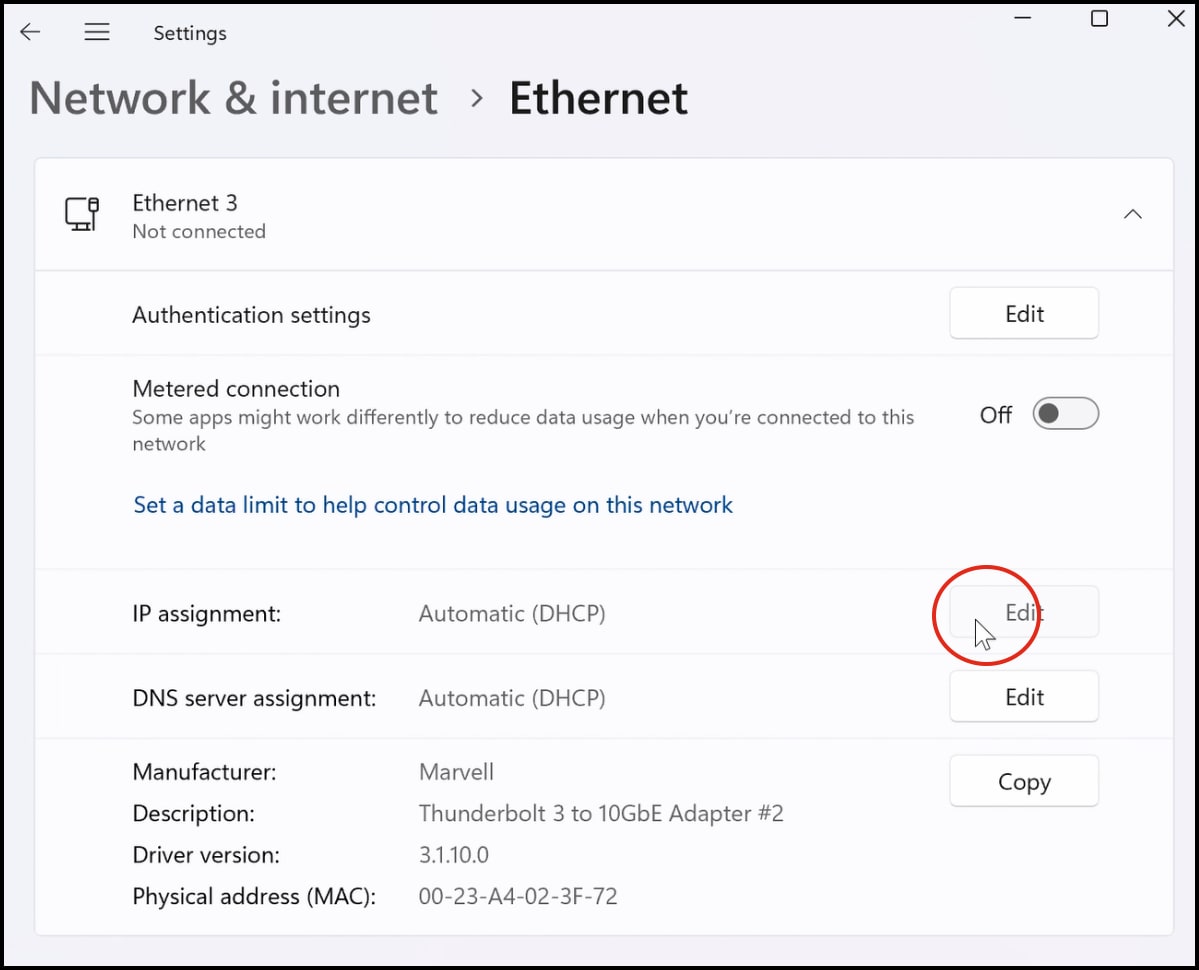
4. Locate the "IP assignment" of the network associated with the OWC Archive Pro Ethernet and select "Edit."
- Names of the adapters will vary bested on the connection type. Disconnecting and reconnecting the network cable will toggle the connection helping to ensure the proper network is selected.
- The following examples are of the OWC Archive Pro Ethernet connected through the 10GbE RJ45 SFP+ Data Port 1.
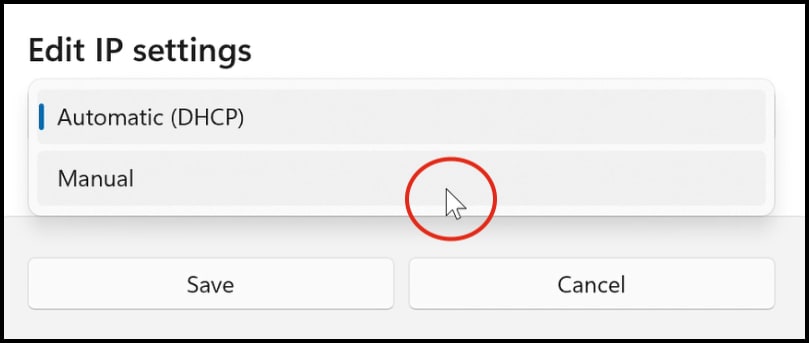
5. Change from "Automatic (DHCP)" to "Manual".
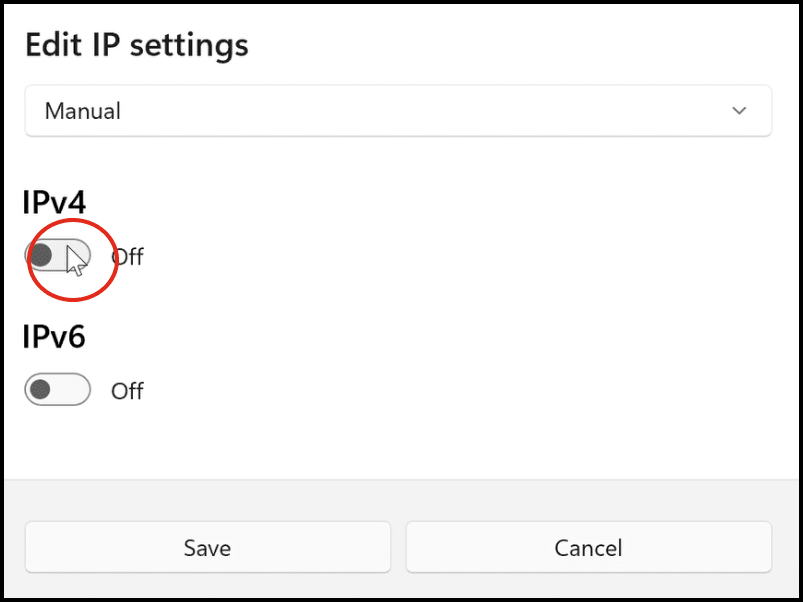
6. Select "IPv4" to toggle to the ON position.
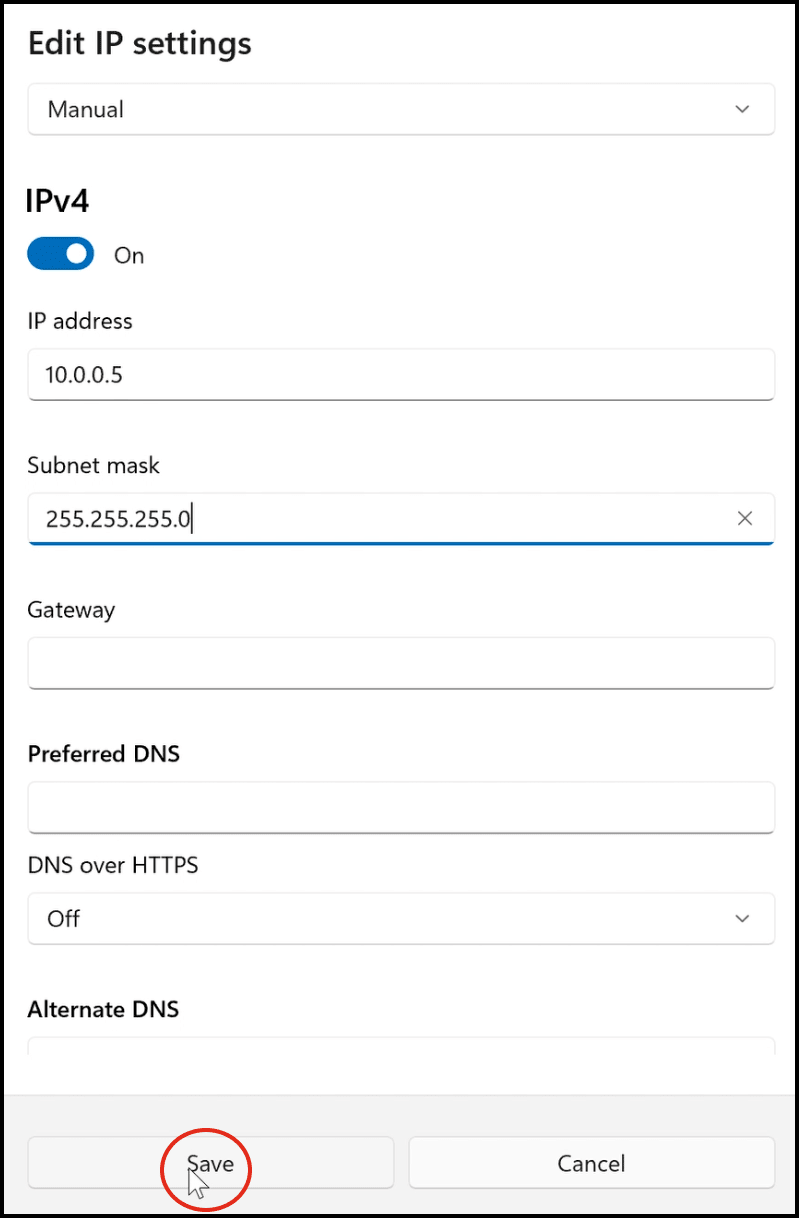
7. Configure using these settings based on the data or management port currently being used to connect the OWC Archive Pro Ethernet. Click "Save."
- The last number of the IP address can be set to anything except what is being used by the OWC Archive Pro Ethernet. The following configurations used '5.'
10GbE RJ45 SFP+ Data Port 1 Connection Windows Network Settings:
- Configure IPv4: Manually
- IP address: 10.0.0.5
- Subnet mask: 255.255.0.0
10GbE RJ45 SFP+ Data Port 2 Connection Windows Network Settings:
- Configure IPv4: Manually
- IP address: 172.16.0.5
- Subnet mask: 255.240.0.0
1GbE RJ45 Management Port Connection Windows Network Settings:
- Configure IPv4: Manually
- IP address: 192.168.0.5
- Subnet mask: 255.255.255.0
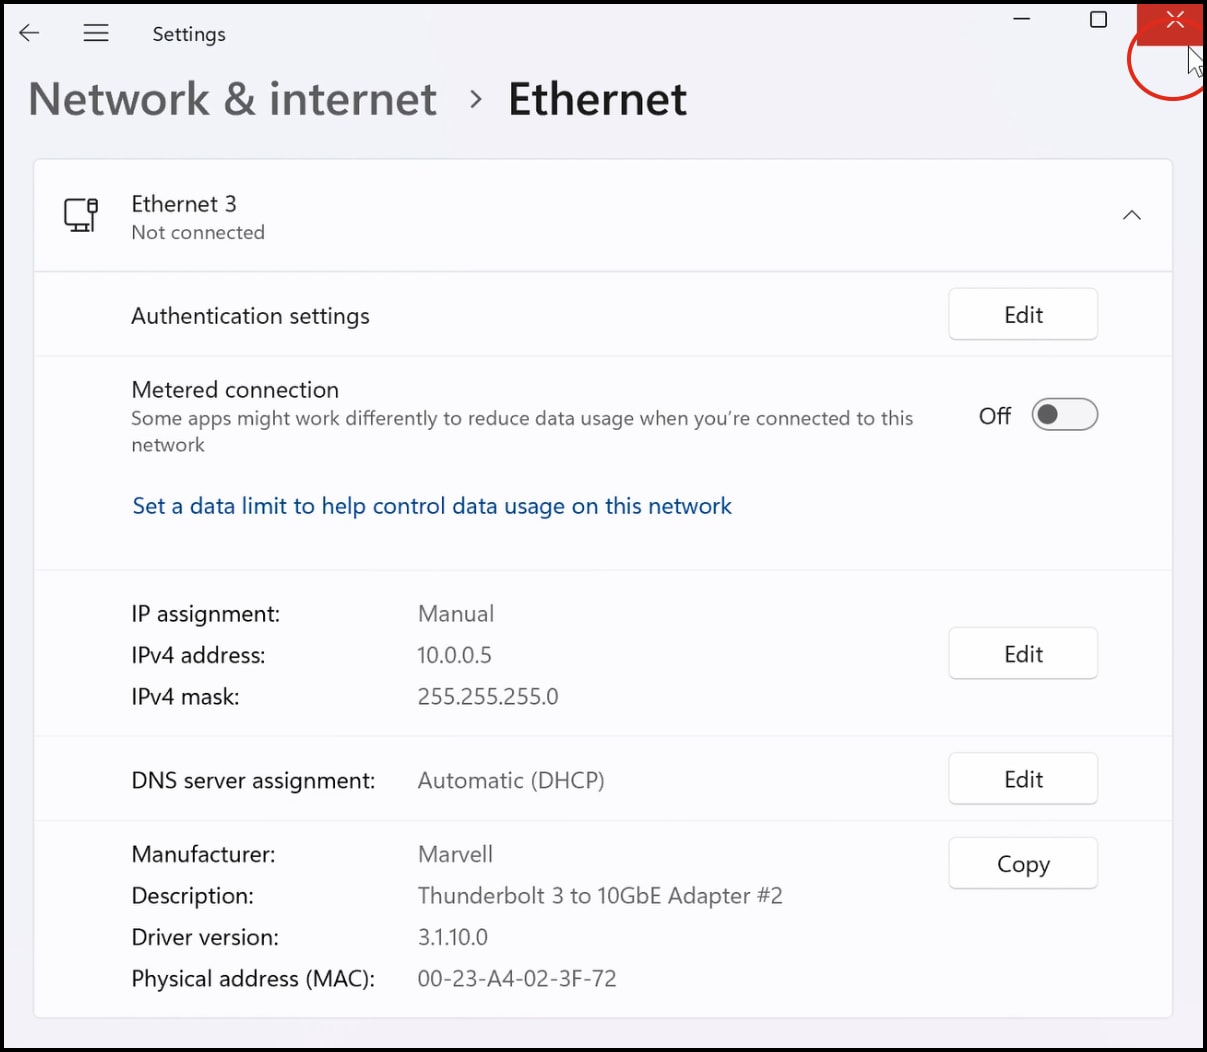
8. Close the window. This completes the Static IP Windows Network Setup.
1.3 Maximum Transmission Unit (MTU) Windows Setup
The 10GbE RJ45 SFP+ Data Ports of the OWC Archive Pro Ethernet have 'Jumbo (9000)' MTU set from the factory. This requires the editing of the Windows PC network settings.
- A mixture of devices configured for jumbo frames and standard frames on the same network can cause performance issues. The OWC Archive Pro Ethernet can have 'Jumbo (9000)' MTU edited if a device on the same network doesn't support 'Jumbo (9000)' MTU. Please see Step #4 in Section 1.6 "(Optional) ATTO Web Manager" for instructions to edit 'Jumbo (9000)' MTU on the OWC Archive Pro Ethernet.
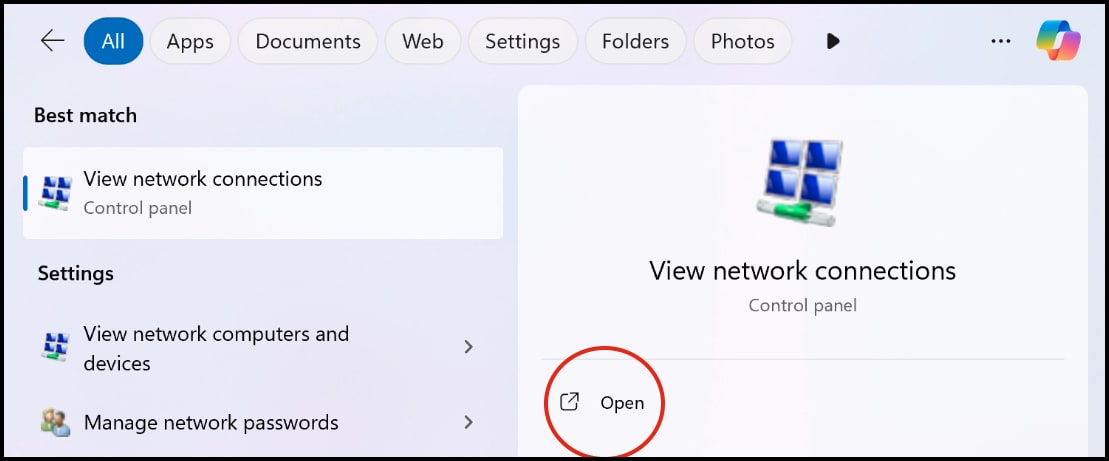
1. Search in the Windows Search Box "View Network Connections" and select "Open."
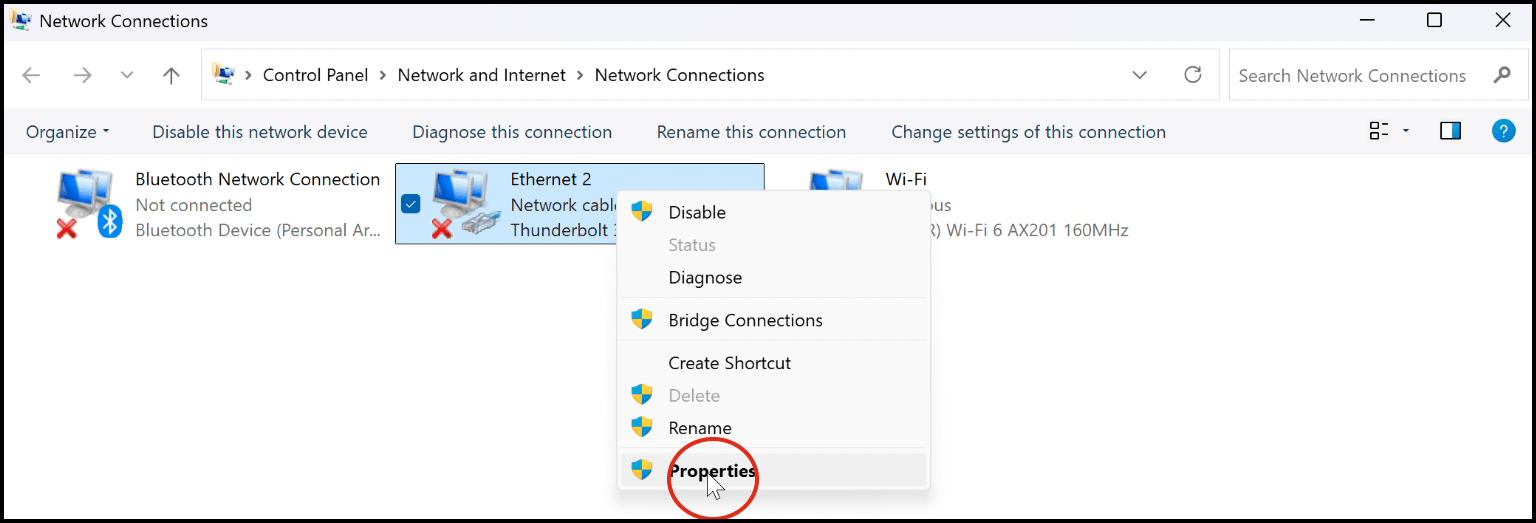
2. Locate and right-click the network associated with the OWC Archive Pro Ethernet and select "Properties".
- Names of the adapters will vary bested on the connection type. Disconnecting and reconnecting the network cable will toggle the connection helping to ensure the proper network is selected.
- The following examples are of the OWC Archive Pro Ethernet connected through the 10GbE RJ45 SFP+ Data Port 1.
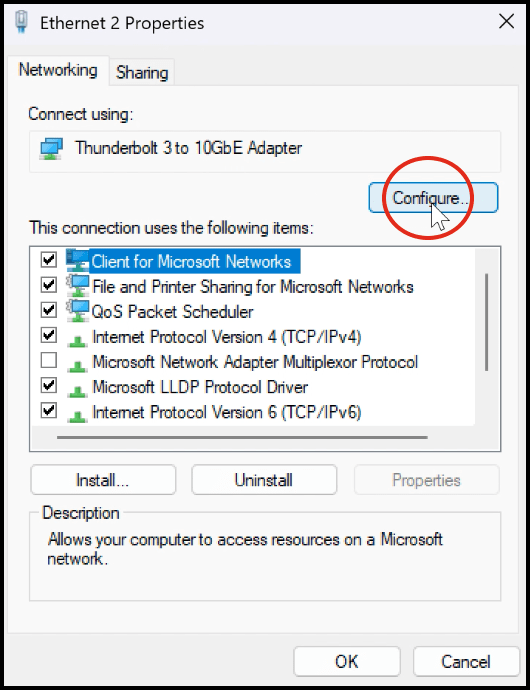
3. Select "Configure."
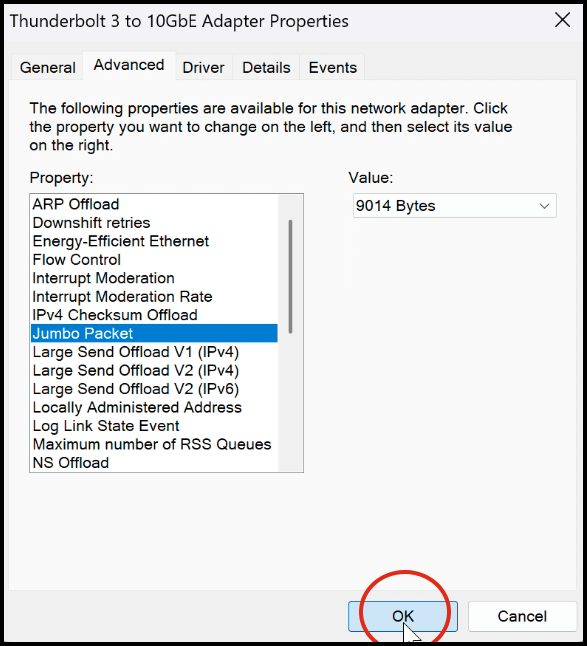
4. Select "Jumbo Packet" under the "Advanced" tab from the options listed under "Property". Select "Value" and change to "9014 Bytes".
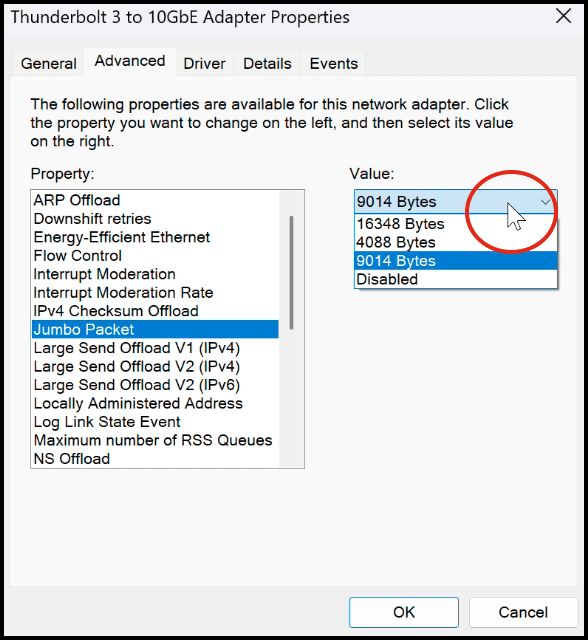
5. Select "OK". This completes the Maximum Transmission Unit (MTU) Windows Setup.
1.4 iSCSI Initiator Setup
1. Search in the Windows Search Box “iSCSI Initiator” and select "Open."

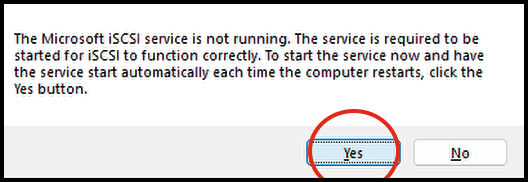
2. A one time message will appear when launching the service for the first time. Select "Yes."
- NOTE: CHAP configuration is supported to add an additional layer of security against unauthorized access. Configuration uses command line access over SSH and requires extensive networking knowledge. Please view Page 18 of the XstreamCORE 8100T User Manual for instructions. Please contact ATTO Technical Support for further assistance with CHAP configuration if needed.
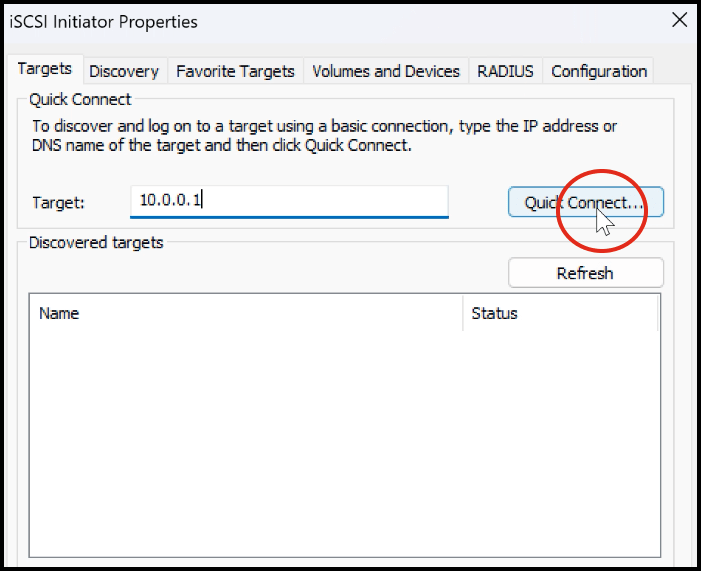
3. Enter into the “Target” field the IP address based on the data port currently being used to connect the OWC Archive Pro Ethernet, and select "Quick Connect."
- Use the modified IP address for the OWC Archive Pro Ethernet if changed in the ATTO Web Manager during Section 1.6 "(Optional) ATTO Web Manager Setup."
10GbE RJ45 SFP+ Data Port 1 Connection:
- Factory Default IP address: 10.0.0.1
10GbE RJ45 SFP+ Data Port 2 Connection:
- Factory Default IP address: 172.16.0.1
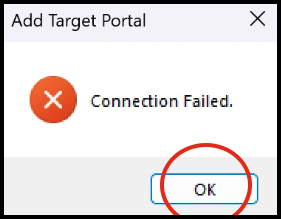
NOTE: Users may encounter an error when attempting to quick connect. Please visit Section 3.1 "Target Discovery Error" for troubleshooting instructions.
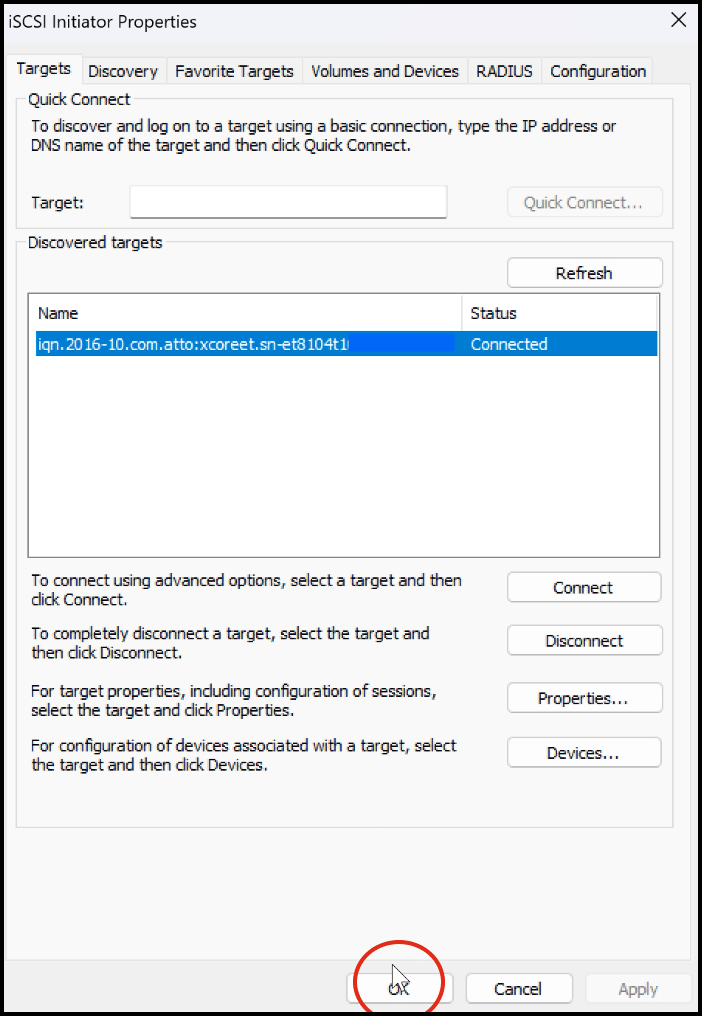
4. A Quick Connect window will appear showing the device to be connected. Select “Done."
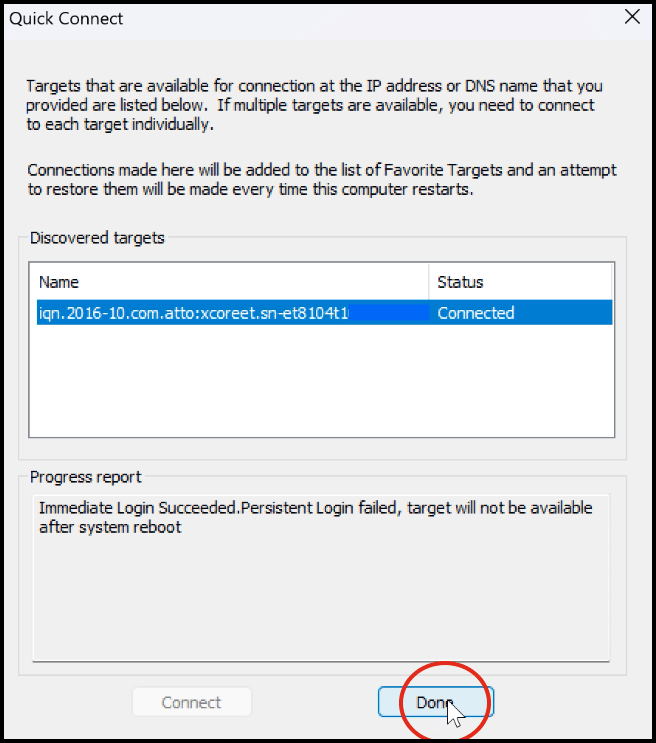
5. Select "OK". The OWC Archive Pro Ethernet is now visible and connected to the Windows PC.
1.5 Registry Editor Setup
iSCSI compatibility with LTFS requires registry modifications.
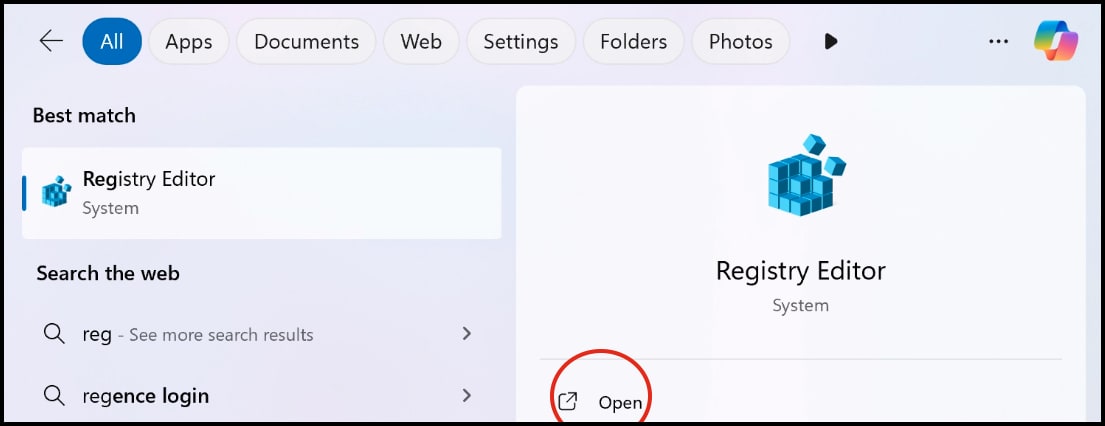
1. Search in the Windows Search Box "Registry Editor" and select "Open."
2. Select on the address bar field.

3. Insert the following line and press "Enter:"
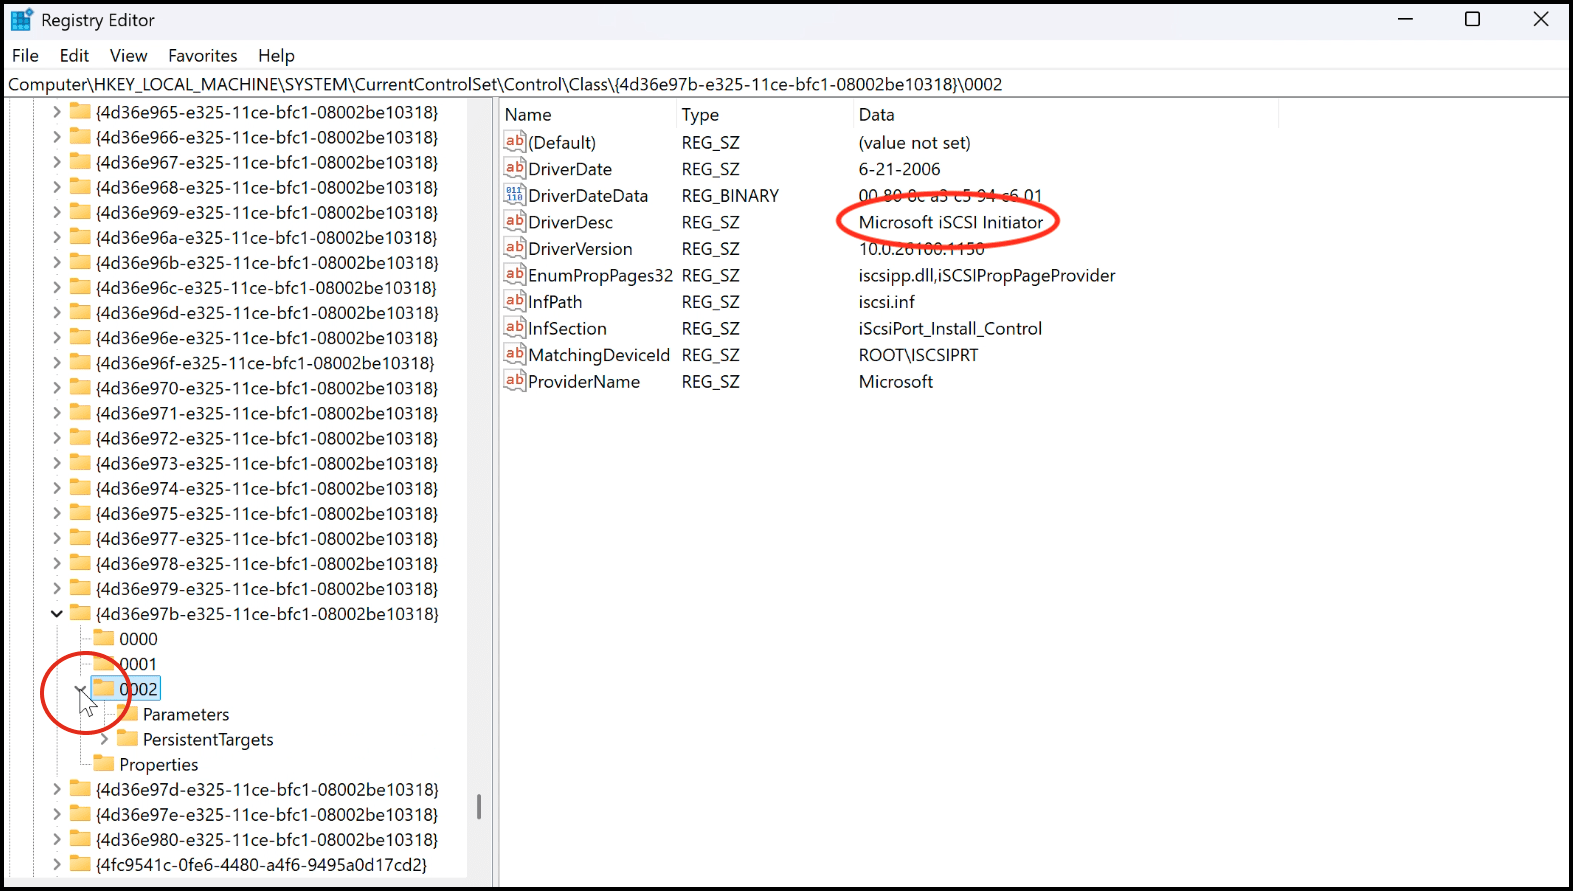
- Computer/HKEY_LOCAL_MACHINE\SYSTEM\CurrentControlSet\Control\Class\{4D36E97B-E325-11CE-BFC1-08002BE10318}

4. Registry Editor will display the expanded folder of the line entered in the left hand column. The expanded folder will display several numbered folders. One of the folders contains a Microsoft iSCSI Initiator. Select each numbered folder and review the details provided in the right hand pane to locate the Microsoft iSCSI Initiator. Select and expand the numbered folder once located.
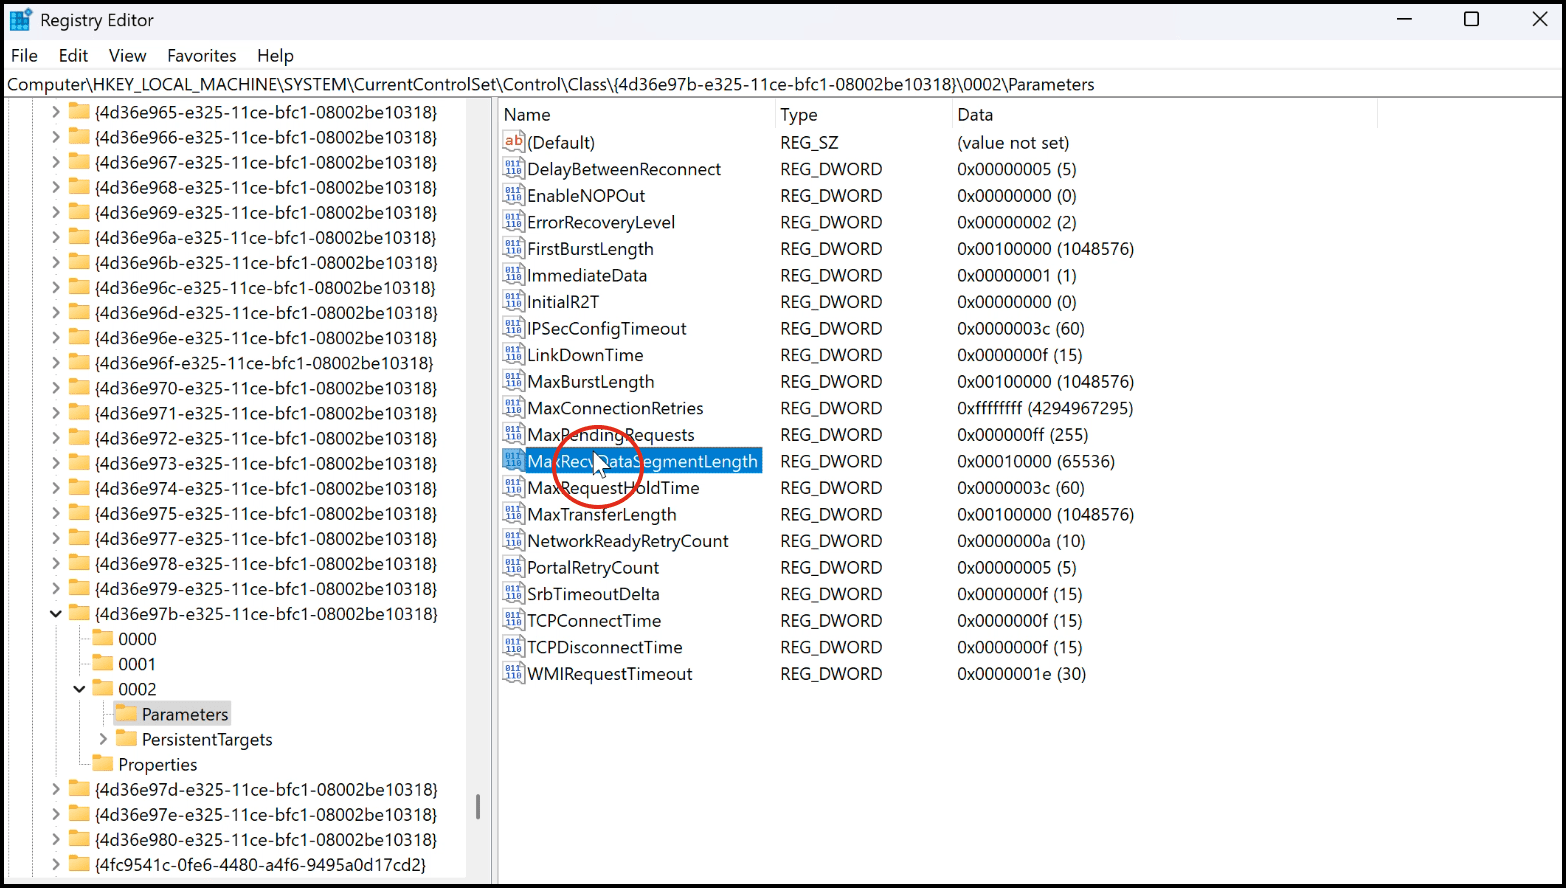
5. Select "Parameters."

6. Double click the following parameters in the right hand pane and change the "Value data" to the following values. The system will automatically add the initial digits.
- MaxTransferLength
- Value: 100000
- MaxBurstLength
- Value: 100000
- FirstBurstLength
- Value: 100000
- MaxRecvDataSegmentLength
- Value: 400000
- LinkDownTime
- Value: 00
- MaxRequestHoldTime
- Value: 00

7. This completes the Registry Editor Setup.
1.6 (Optional) ATTO Web Manager Setup
The ATTO Web Manager can be used to modify the OWC Archive Pro Ethernet IP address, maximum transmission unit (MTU), or setup a DHCP connection. Users who do not need to make these changes can move onto the next section.
1. Open a web browser of your choice and type in the address bar the IP address based on the data or management port currently being used to connect the OWC Archive Pro Ethernet. Press "Enter."
- A non-secure or non-private connection prompt may appear (Chrome). Click "show details" and click "visit the website". This prompt relates to local SSL certificates and is not a security concern.
10GbE RJ45 SFP+ Data Port 1 Connection:
- Factory Default IP address: 10.0.0.1
10GbE RJ45 SFP+ Data Port 2 Connection:
- Factory Default IP address: 172.16.0.1
1GbE RJ45 Management Port Connection:
- Factory Default IP address: 192.168.0.1
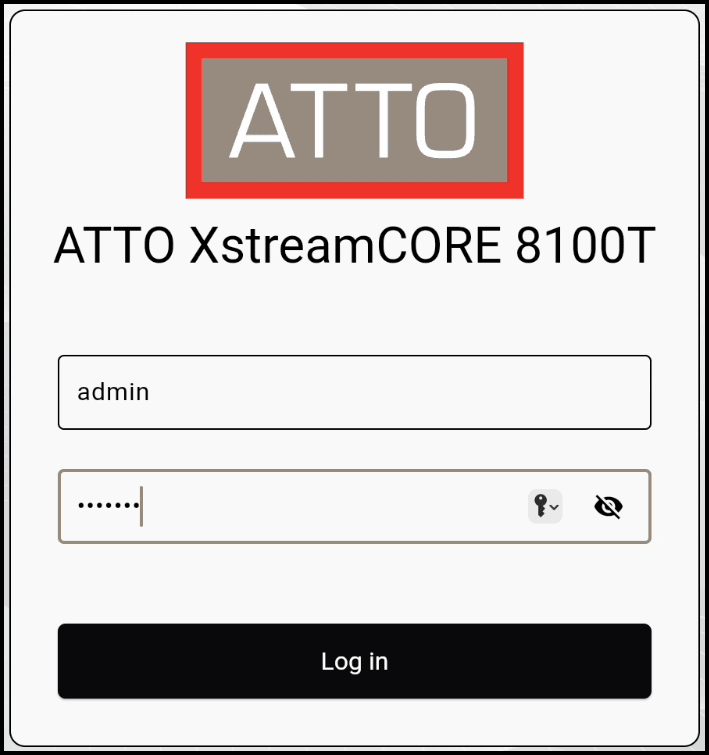
2. A login screen for ATTO XstreamCORE 8100T should appear. Enter the login credentials:
- Username: admin
- Password: ATt + serial number located on bottom of device
- Example: A device serial number of 1234567 would result in the ATTO Web Manager password being ATt1234567
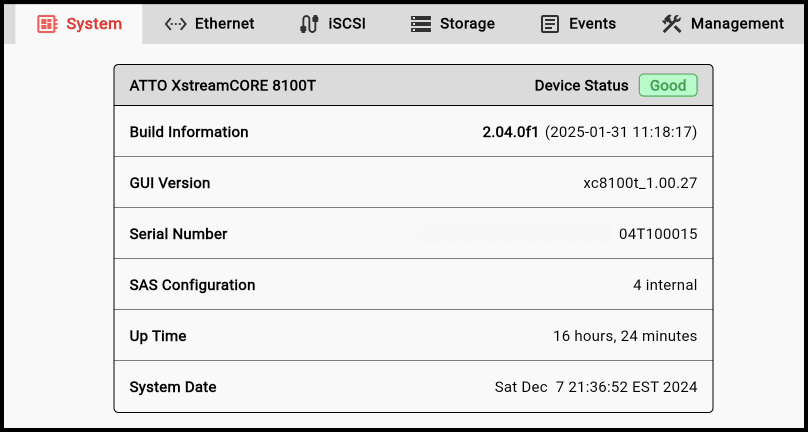
3. The ATTO XstreamCORE 8100T dashboard will appear. By default the 'System' section will be highlighted displaying device information.
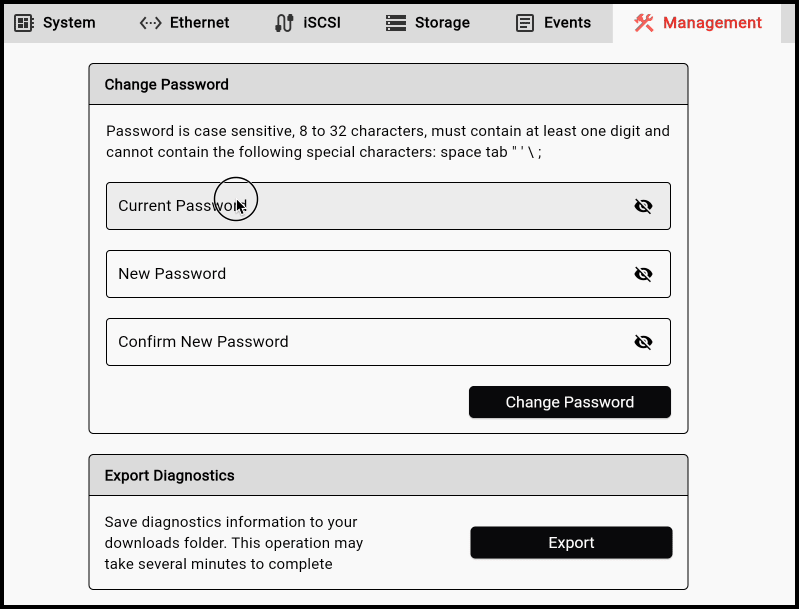
4. OWC recommends changing the factory default password for the OWC Archive Pro Ethernet. Select the "Management" section. Complete the fields provided under "Reset Password" and select "Change Password."
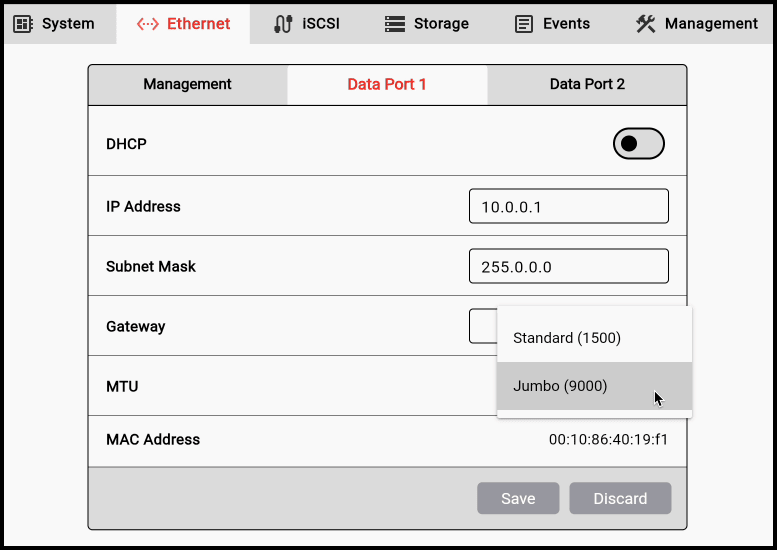
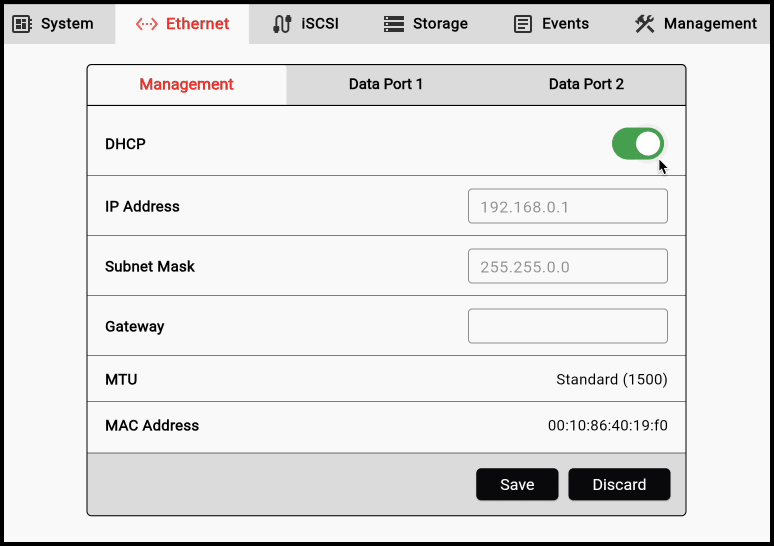
5. Select the 'Ethernet' category. Users will now have access to edit the OWC Archive Pro Ethernet default network settings for the 10GbE RJ45 SFP+ Data Ports and 1GbE RJ45 Management Port.
- The IP Address and Subnet Mask can be edited by clicking and typing in the field. Select "Save" after making any changes.
- The Mac Network Settings may need to be updated if changes were made to the OWC Archive Pro Ethernet. See above Section 1.2 "Static IP Mac Network Setup" for updating instructions.
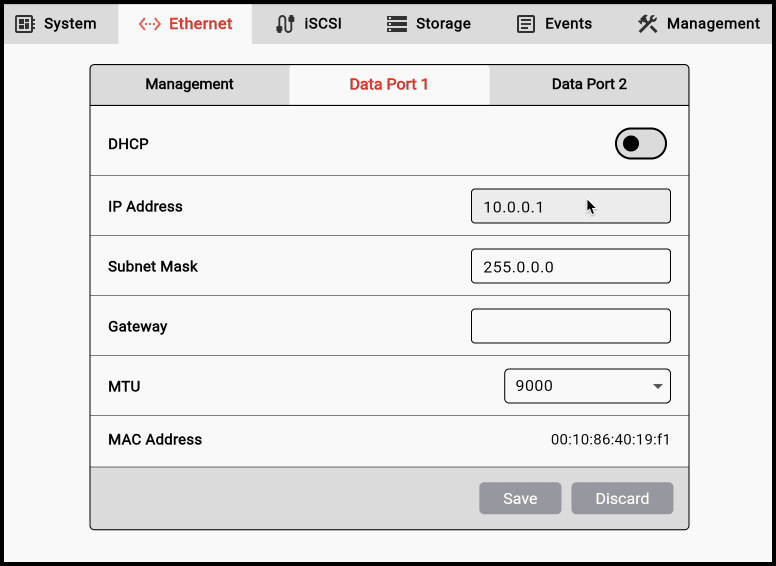
- Maximum transmission unit (MTU) can be edited by clicking the field and selecting between 'Standard (1500)' or 'Jumbo (9000)'. Click "Save" after making any changes.
- NOTE: The 1GbE RJ45 Management Port does not support 'Jumbo (9000)' MTU.
- An optional DHCP connection can be created by toggling on the button. Click "Save" after making any changes.
6. This completes the (Optional) ATTO Web Manager Setup.
1.7 Hedge Canister Drivers
1. Obtaining a LTO Interface software such as Hedge Canister is needed to acquire additional drivers (IBM ICU, Macfuse, and IBM LTFS).
- NOTE: Hedge Canister is included with the OWC 10G Archive Pro.
2. Register the copy of Hedge Canister by visiting go.owc.com/canister. Complete the step-by-step instructions presented.
- The serial number is provided on an insert card that came with the OWC Archive Pro. If the serial number is misplaced, please contact OWC Support.
- Please visit Hedge Canister support for additional details
3. LTO-9 tape requires an initializing process before use. Please consult the support guide "LTO-9 Tape Initialization".
4. This completes the Windows OWC Archive Pro Ethernet Initial Setup.
Connection Management
2.1 Disconnecting the Device
1. Search in the Windows Search Box “iSCSI Initiator” and select "Open."
- The OWC Archive Pro Ethernet can also be disconnected by restarting or powering off the Mac.
2. Select the OWC Archive Pro Ethernet and select "Disconnect."
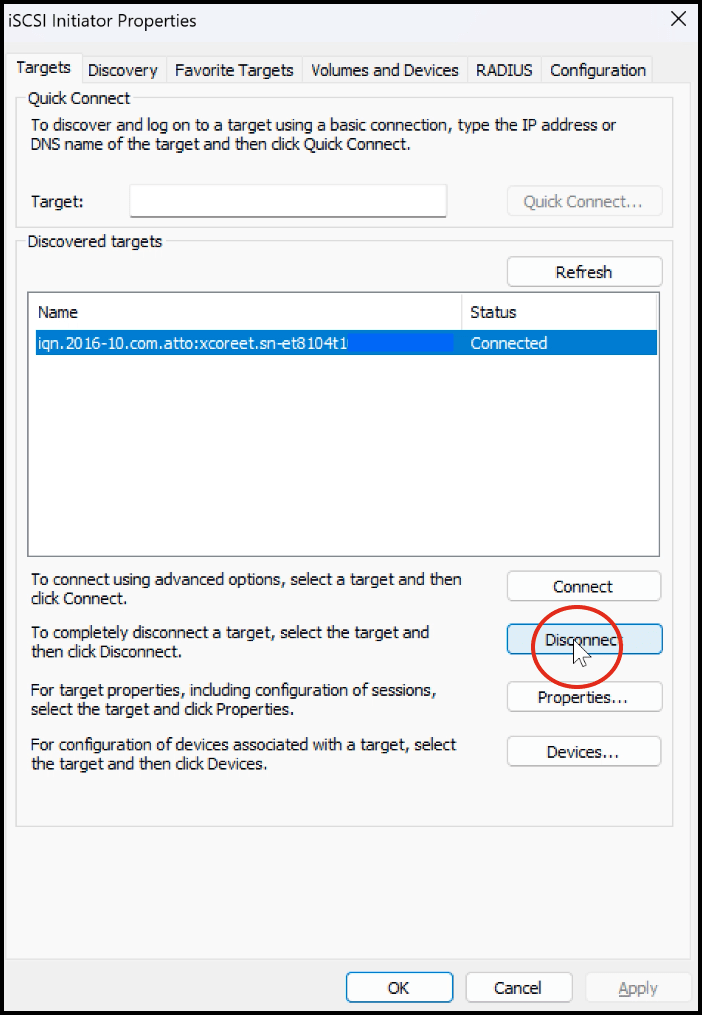
3. The OWC Archive Pro Ethernet is no longer connected to the Windows PC.
2.2 Reconnecting the Device
1. Search in the Windows Search Box “iSCSI Initiator” and select "Open."
2. Select the OWC Archive Pro Ethernet and select "Connect."

3. The OWC Archive Pro Ethernet is now connected to the Windows PC.
Troubleshooting
3.1 iSCSI Initiator Quick Connect Error
Users may encounter an error when attempting to quick connect the OWC Archive Pro Ethernet during Step #3 in Section 2.5 "iSCSI Initiator Setup." This simply may be caused by the OWC Archive Pro Ethernet not being fully turned on. The device takes 5 minutes to fully turn up. Please proceed if the OWC Archive Pro Ethernet is fully turned on and the error is still being encountered.
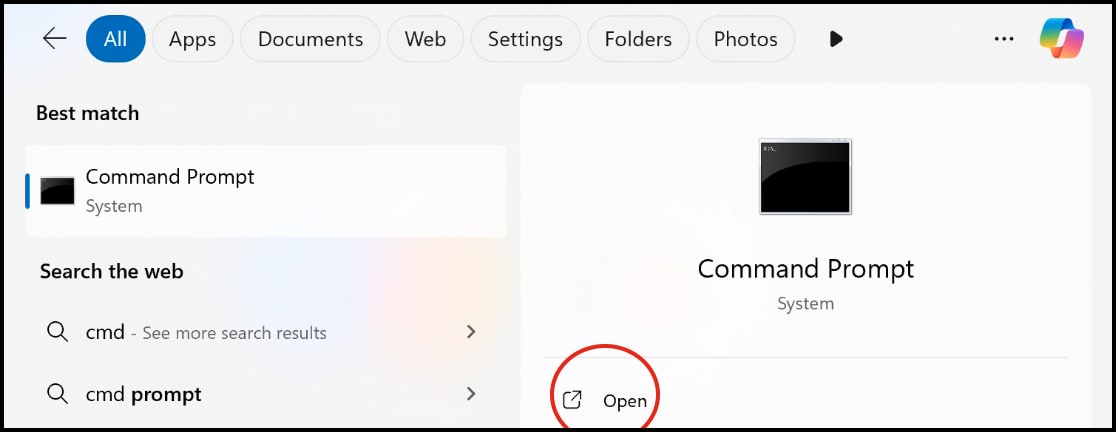
1. Search in the Windows Search Box "Command Prompt" and select "Open."
2. Enter the following command line: ping 10.0.0.5
- The command line will send a message to the OWC Archive Pro Ethernet to detect the device. Ping the IP address based on the data port currently being used to connect the OWC Archive Pro Ethernet. Press "Enter."
- NOTE: Use the modified IP address for the OWC Archive Pro Ethernet if changed in the ATTO Web Manager during Section 1.3 "(Optional) ATTO Web Manager Setup."
10GbE RJ45 SFP+ Data Port 1 Network Settings:
- Factory Default IP address: 10.0.0.1
10GbE RJ45 SFP+ Data Port 2 Network Settings:
- Factory Default IP address: 172.16.0.1

3. If the command locates the OWC Archive Pro Ethernet, the quick connect error could be caused by using a different IP address than associated with the port used to connect the device. Double check which port is being used to connect the OWC Archive Pro Ethernet and use the associated factory default IP address. NOTE: Use the modified IP address for the OWC Archive Pro Ethernet if changed in the ATTO Web Manager during Section 1.3 "(Optional) ATTO Web Manager Setup."
4. If the command does not locate the OWC Archive Pro Ethernet, the request will time out. This could be caused by incorrect credentials used to set up the Static IP Mac network. Revisit Section 1.2 "Static IP Mac Network Setup" and review the instructions. Double check which port is being used to connect the OWC Archive Pro Ethernet and use the associated factory default IP address. NOTE: Use the modified IP address for the OWC Archive Pro Ethernet if changed in the ATTO Web Manager during Section 1.3 "(Optional) ATTO Web Manager Setup."

Free Support Chat
Our free award-winning support team is ready to answer all of your questions. Technical support is available Monday - Friday: 9AM - 6PM. Customer Support & Sales is available Monday - Friday: 9AM - 6PM. Support is unavailable on U.S. Federal holidays. Talk to a human today.