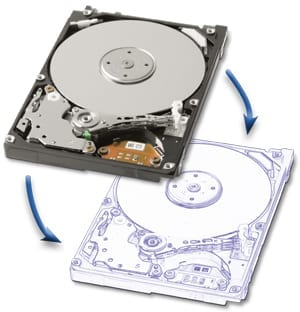
 Cloning… it’s a time-honored way of transferring all your system files from one drive to another and ending up with a bootable copy identical to the original. It’s great for performing backups and makes transferring your system to a new drive a snap…
Well… maybe not that second one anymore…
Cloning can bring over stuff you don’t want.
One of the infrequently-mentioned additions to Lion was “MobileBackups,” which is is effectively internally-saved Time Machine backups. When your Mac laptop isn’t connected to your Time Machine drive, it still keeps track of changes and saves them to a hidden folder on your hard drive. If you need more space in the “visible” portion of the drive, the OS deletes the older backups. Then, when you reconnect, it transfers the data over and deletes it from your internal drive.
The problem is that it doesn’t always work that way.
Recently, one of our staffers tried cloning over a notebook to a new drive. After removing the iTunes and iPhoto libraries, the drive reported 53GB of data to transfer. The problem is that the actual clone brought over 184GB of data! And he’s not the only one this has happened to; there have been numerous reports of people doing the same thing and having similar results – even after connecting to their Time Machine drive.
Even if you’re not running Lion or later, there are still a lot of files on your hard drive that you don’t need. These are things like preference files for apps you’ve deleted, the apps themselves, and miscellaneous cache files. Installing a new drive is the perfect opportunity to get rid of many of these files.
Unfortunately, cloning doesn’t easily let you remove these files. Some cloning apps, like Carbon Copy Cloner, can let you pick and choose certain directories and/or automatically skip other unneeded ones, but that’s not a universal feature. There are also apps that reputedly can clear many of these files out, or you can always go in there manually. However, both methods usually wind up missing many of these files. So you wind up bringing a lot of files over that you don’t have to.
If you’re cloning to a smaller drive than your original (sometimes this happens when switching to a solid-state drive from a platter-based one) this extra data being brought over could result in some (more relevant) data not being copied.
It can also leave important stuff behind.
What’s more, there’s something that definitely doesn’t get transferred over in a basic clone: the Lion Recovery Partition. This is something we brought up last August, and it’s still relevant now. If you’re using Carbon Copy Cloner to clone, there is an option to make a copy of the recovery disk, and it seems to work quite well for an emergency. However, if you’re using any other method to clone your drive, the only reliable way to create a new recovery partition is through a fresh installation.
What’s cloning good for, then?
Cloning makes an exact snapshot of a volume at a point in time. That makes it a great way to produce a bootable backup for use in an emergency if your drive goes down. Personally, I’ve got Carbon Copy Cloner set to run twice daily on my main drive, so that if something happens, I have a backup and continue forward with relatively little data loss.
In OS X versions prior to Tiger, cloning also the only way to reliably bring your data over from a previous installation. And if your installer discs don’t mount or are missing, it’s your only option. If that’s the case, you’ll want to use Carbon Copy Cloner, simply for its handling of the Recovery Partition (among other Lion-specific issues) as well as being able to intelligently skip many unnecessary files.
So what’s the preferred transfer method for 10.4 and later?
When installing a new boot drive in your machine, we generally recommend the “Install and Migrate” method, where you install a fresh copy of OS X on your new drive and use Migration Assistant to bring over all your applications and user data. We have a printable, detailed walkthrough available, but here’s the basic rundown of the steps for most installations:
1. Choose the correct drive to install in your computer.
Nothing will put the brakes on an installation like trying to install the wrong drive. Make sure you double- and triple-check your computer model (you can do that in System Profiler) and use MyOWC to help you pick out what you need. If you’re still not 100% sure, go ahead and get in touch with one of our sales or tech representatives – they’ll be happy to help you get what you need.
2. Make sure you have a way to transfer your data.
In order to transfer your data, you’ll need to have both your original drive and your new drive connected at the same time. For most computers, you can use a standard external enclosure for the same-sized drive as you’re installing. In some instances, though (most notably with MacBook Airs), you’ll need a special enclosure for the specialized drive inside.
3. Boot to your Installer.
For OS X 10.6 or earlier, boot to your installation disc. For those running OS X 10.7 or later, you’ll want to boot to the Recovery Partition by holding down Command-R at startup.
4. Format your new drive.
The easiest way to do this is to temporarily put the new drive in your external enclosure and hook it up to your computer via USB or FireWire.
Use Disk Utility to first format the new drive; in all versions of OS X you can find Disk Utility in the Utilities menu at the top; in 10.7, it’s also in the main list in the center of the screen. When formatting, make sure you choose “Mac OS Extended (Journaled); this is the required format for later versions of OS X, and the recommended format for all versions of OS X installations.
5. Install OS X on your new drive.
Once you’ve formatted your drive, follow the onscreen instructions to install OS X on the new drive.
6.Transfer Your Data.
Once OS X has installed and restarted, go through the setup process. Continue through the onscreen prompts until it gets to the point where it asks if you’d like to import user data from another system. Select the option to transfer your User information from another volume and click the “Continue” button.
The next screen will list the things you can transfer. Select any Users you want to bring over to your new drive, as well as any applications and network settings.
Once you have selected the items you would like to bring over, click the “Transfer” button. Once Migration Assistant finishes, you may continue the rest of the setup, and continue booting to your new drive.
7. Run Software Update.
There may be updates available for the OS version you just installed. Once your computer has reached the Desktop, go to the Apple menu and select “Software Update…” and run all the updaters that are available. Restart if necessary and repeat the process until there are no more updaters to install.
8. Double-check your files.
Run all your apps and go through your files to make sure everything is working and nothing is missing. You may have to re-authorize some apps or, in very rare cases, reinstall the application altogether. Make sure everything is as you want it before continuing.
9. Install your new drive.
This one is fairly self-explanatory. If you need help installing, be sure to check out our extensive library of installation videos for step-by-step instructions.
10. You’re Done!
Once you’ve installed the new drive with the new system on it, you’re ready to go. You can now put your original drive in that external enclosure and either erase it and use it for other purposes or save it for posterity.





Does this process FileVault encrypt the hard drive before starting the data transfer OR after it’s all transferred?
This is important because SSD’s use wear levelling and I don’t want remnants of unencrypted data.
I find your post informative because before this I haven’t read such type of problems with cloning. I like your point of leaving recovery partition behind while cloning. Actually I don’t experience such type of issues with Stellar Drive cloning application. It makes bootable clone of your drive and Recovery HD too.
I plan on upgrading my HDD this weekend from a 250GB with OS X 10.5.8 on my Macbook 5,1 – late ’08 non-pro uni-body to a 1TB with Lion. I was planning on doing a fresh install of Lion on the new HDD while connected as an external from the install disk as it’s in my Macbook and migrating the data from my old/current drive via this method with CCC. I am planning on selectively copying certain files from my current drive to the new drive. I’m wondering between several factors
1, the recovery partition on 10.7
2, the prospect of corrupting of certain files/programs when migrating data from one version of OS X to another in this manner and
3, if it’s even possible for me to install Lion under these conditions.
There should be no problem running 10.7 on your MacBook; I was running 10.8 on my MacBook Pro from the same release and had no issues on that front.
As for transferring data – if you’re bringing things over from your original drive, you’d probably be better served with using Migration Assistant, which runs as part of the OS installation, there’s no need to run CCC separately. As this is one of the things MA is designed for, corruption on the part of Migration Assistant should not be a problem, though due to the way some apps work their registration, you may have to re-register them; Adobe products are notorious for this.
Unfortunately, Migration Assistant doesn’t really let you get down to the individual file layer; you can select/deselect individual user folders and individual applications, but not, say, everything but the Movies folder in a certain account. Depending on your particular needs, it may be easiest just to delete that which you don’t want after the migration is complete.
Hi Chris,
Thanks for your input! I write this now after taking your advice. Lion installed fine on my new drive (from OWC) and recognized my 8GB RAM upgrade just fine. I used MA and seems to have worked well so far.
The developers of both CCC and SD have advised that their software has been updated to work properly in both Lion and Mountain Lion. I’ll suggest “Chris S.” at OWC verify this and update this webpage as appropriate.
Thanks!
I typically install the new drive in the computer and place the old one in the external enclosure first. After that the process is the same. I feel like it is always best to place your new HD in your Mac before formatting and then installing OS X onto the drive.
Great article. Thanks. But it is much better to update the newly installed Mac OS X BEFORE using the Migration Assistant for obvious reasons (among them, a possible Migration Assistant update that fixes a serious bug of the previously installed one; that has happened in the past several times!!!).
Practical examples where Migration Assistant is updated with OS X update:
Apple releases Mountain Lion OS X 10.8.1 with iMessage, Migration Assistant fixes
http://www.appleinsider.com/articles/12/08/23/apple_releases_mountain_lion_os_x_1081_with_imessage_migration_assistant_fixes.html
Resolve an issue that may cause Migration Assistant to unexpectedly quit
So, you see, if you try to transfer your data BEFORE updating OS X, you may encounter this problem. Updating BEFORE using Migration Asistant assures the best possible experience.
Now, you may update accordingly your blog and PDF document. Thanks.
Does this also apply to the shirt-pocket.com app SuperDuper!
yes… in the versions we’ve tested (including the latest demo of SuperDuper), the only app that handled the Recovery Partition and left unnecessary files behind was Carbon Copy Cloner.
However, we still maintain the best way is via the Reinstall/Recover method outlined in the article.