![]() It can happen to anyone. One minute you’re sitting at an outside café, you get distracted, and the next minute you notice your iPhone or MacBook is gone. Or you’re walking in a crowd when someone bumps up against you…and your iPhone is lifted from your pocket. What do you do when that prized possession that is your link to the world is stolen or lost? That’s what we’re here to talk about today.
It can happen to anyone. One minute you’re sitting at an outside café, you get distracted, and the next minute you notice your iPhone or MacBook is gone. Or you’re walking in a crowd when someone bumps up against you…and your iPhone is lifted from your pocket. What do you do when that prized possession that is your link to the world is stolen or lost? That’s what we’re here to talk about today.
Regardless of the mechanism of loss — theft of a Mac or iPad from a hotel room or table, or just not remembering to pick up your iPhone from a table or chair — there are a few steps that you should take immediately to ensure that your personal information is secured. Before you even leave your home or office with your new device for the first time, you should take several steps to prepare for losing it:
1) Make sure that you have a passcode/password set or have Touch ID in place.
If you don’t have a passcode set on your iPhone or use Touch ID, you’re asking for someone to steal your personal information if you lose the phone or have it stolen. One of the first steps anyone should take when setting up a new iPhone is to set a passcode and set up Touch ID if your phone is equipped with it.
Passcode or Password:
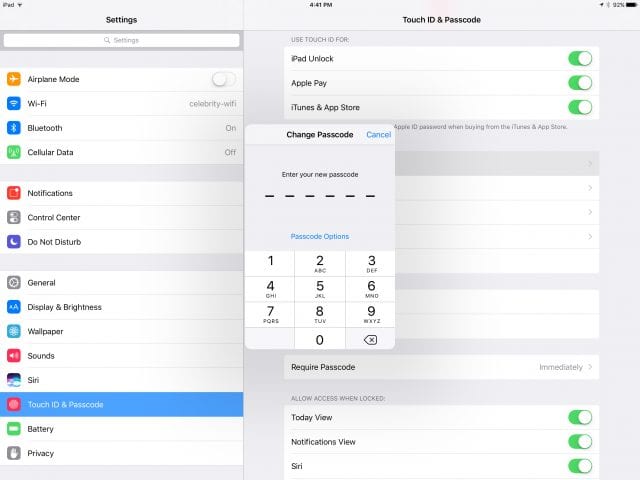
Setting up a passcode is simple if you bypassed that step when you originally configured the phone. Launch the Settings app, then tap on Touch ID & Passcode (or just Passcode if your iPhone or iPad doesn’t support Touch ID fingerprint authentication). Note that you can set up Touch ID on a 2016 MacBook Pro with Touch Bar. On a Mac, just be sure to set up macOS to require a password or Touch ID whenever you reboot the device or wake it from sleep.

As you can see in the image at right, the commands for Passcode on iOS let you require a passcode immediately, change a passcode if you already have one, or turn the passcode off. The recommendation from Apple is to always require a passcode of 4 to 6 digits immediately. This way, if your iPhone is nabbed just after it gone to sleep, the finder/thief will need to enter the passcode to do anything with it.
Related: Get physical security for your iPhone with NuGuard KX
One of the other important settings is not visible in the screenshot, but is usually at the bottom of the Touch ID & Passcode screen — it’s titled “Erase Data” and it will totally erase everything from your iPhone if someone enters the passcode incorrectly 10 times. Turn on “Erase Data” and use a non-sequential passcode (i.e., not 1234, 2345, 1111, 2222, etc…) and you’ll have a good chance of making the iPhone useless to anyone but yourself if it is stolen or lost.
Back to the passcode. You have several choices that can be seen below — a numeric passcode of any length (for example, a phone number you remember from your youth or your SSN), a four digit passcode, or an alphanumeric (letters and numbers) passcode. Maybe it’s just me, but I find anything longer than a 4-number passcode too slow to enter. My suggestion? If your iPhone allows Touch ID use your fingerprints to unlock it with a 4-number passcode for backup.

Touch ID:
The most secure way to lock your iPhone is with your fingerprints using Touch ID. You’ll know if your iPhone is capable of using Touch ID if the Home button is surrounded by a metal ring. Go to Settings > Touch ID & Passcode to begin setting it up.
Touch ID can be used for iPhone Unlock, Apple Pay, and iTunes & App Store, or any combination of those three. iPhone owners are prompted to set up at least one fingerprint when setting up the new phone; if you want to add more fingers (I use the thumbs and index fingers on both hands), use Add A Fingerprint to be prompted through the process of capturing the fingerprint. You can then give each fingerprint a name — for example, left thumb — by tapping the right arrow once you’ve created a fingerprint. You’ll see a default name like “Finger 5” that can then be replaced with “Middle Right Finger” or a similar tag.
By the way…your fingerprints are only saved on your iPhone, iPad or Mac, no where else. When you use Touch ID to unlock your phone, the fingerprint is compared to one that has been captured, encrypted, and then placed into the device’s “secure enclave” before passing an unlock token back to the phone. Touch ID checks for a live finger, so nobody will be able to use your dead body or severed hand to unlock the phone or Mac…
2) Make sure that Find My iPhone/iPad/Mac is enabled
New Apple device owners sometimes wonder whether they really need to sign up for an iCloud account. One feature alone makes the answer to that question a resounding “Yes!”, and that is Find My iPhone/Find My iPad/Find My Mac.
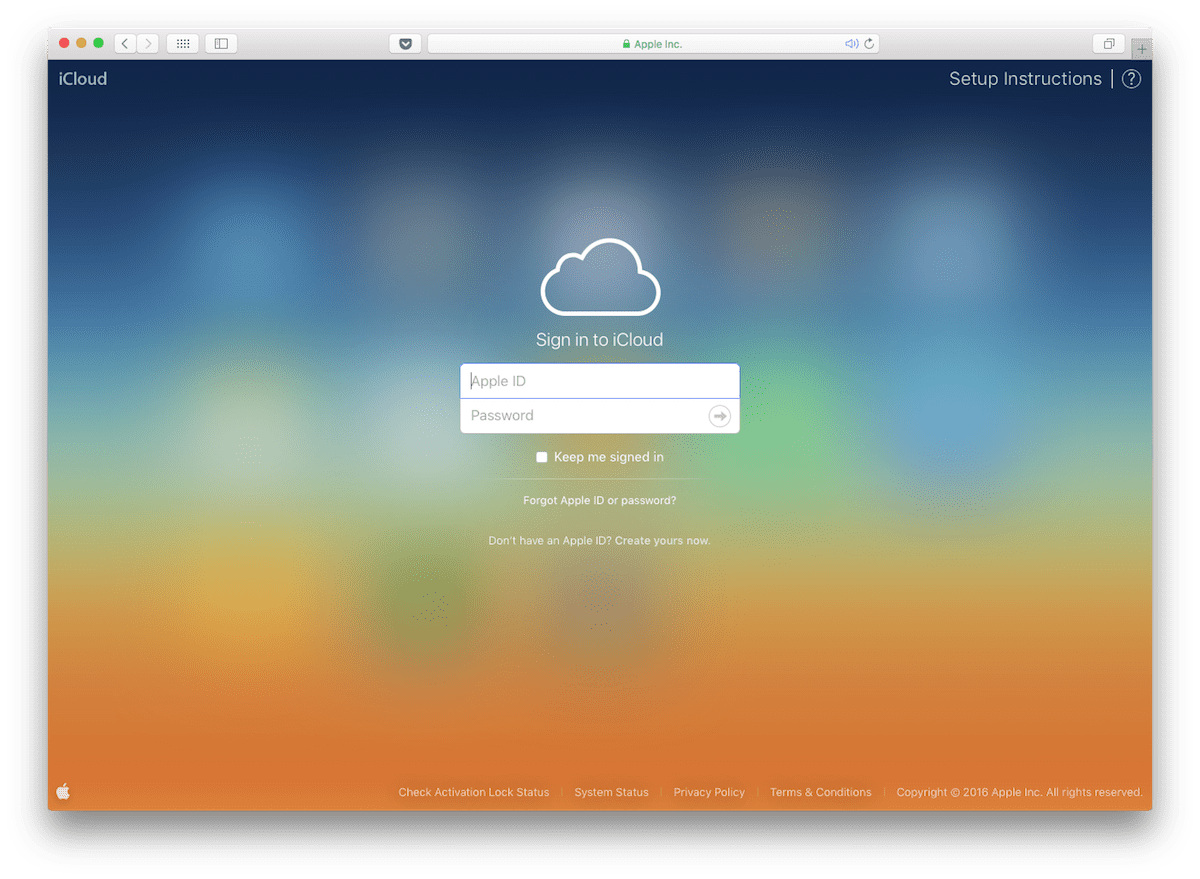
Find My iPhone (or iPad or Mac) allows anyone with an iPhone, iPad, Mac or even a Windows PC to pinpoint the current or last known location of an iPhone. On the iPhone or iPad, fire up the “Find iPhone/iPad” app and log into iCloud, and you’ll see the location of any device that has been connected to that iCloud account. On a Mac or Windows PC, point your web browser to iCloud.com, log in, and tap the “Find My iPhone” button to see those locations.
If your iPhone, iPod or Mac has been stolen or you’ve been robbed of it, do not use Find My iPhone as a way to hunt down and apprehend the thieves. Instead, provide that information to law enforcement officers and let them do their jobs.

You can do some very useful things with Find My iPhone: I’ve just sailed away from George Town, Grand Cayman, and as you can see in the image above that my iPad Pro is nearby (actually sitting in front of me…), while other devices are back home in Denver. Tap on any device indicated by a pointer and you can see a map of the most recently updated location as well as some handy buttons (see image below for an iPad screenshot):

If you think that iPhone is just under a seat cushion somewhere, then tap on Play Sound and it will make a noise — even if you have muted it! See the button marked Lost Mode? Tap on it, and it will come up with a screen similar to the one seen at right
You’ll be able to lock the iPhone and even leave a message for anyone who happens to find it (“Please call my home number at 303-555-1212 to return my phone. Thanks!”). You’ll be able to see where it is at any moment, including the last second before the battery is completely drained.
The last thing you can do if you’re not sure you’ll ever get that iPhone back (or even if you do have hope — as long as you also have a backup!) is to erase it. Tap the Erase iPhone/iPad button to wipe the device completely of any personal information or apps on it.
3) Call the iPhone
If you’re sure that the iPhone was just lost and not stolen, just see if you can call your own number from another phone. Ask anyone who answers if they just found the phone and offer to give ’em a few bucks if they’ll meet you somewhere (don’t go by yourself!) to affect the return. Even safer? Ask if they’ll return the phone to the front desk of a hotel.
4) Call the Police
Quite a few years ago while 4-wheeling in the Colorado Rockies I got out of my vehicle to check the clearance between a high rock and the bottom of my SUV and — unbeknownst to me at the time — lost a cell phone. Once I realized that it was somewhere on a dirt road up in the mountains and had probably been run over by another vehicle, I used my wife’s phone to call my cellular carrier. They suggested that I report the loss to the local police department for insurance purposes.
That’s always a good idea — you’ll have a police report to give to your cellular company or insurance company to prove the loss, and in the case of a robbery or pickpocket, you can also let the cops in on the current location of your device using Find My iPhone.
5) Make Sure You Have Loss Coverage
One other thing you can do ahead of time is make sure that you have some sort of coverage for your iPhone. Some insurance companies will sell you a “rider” to a homeowner’s or renter’s insurance policy that covers mobile devices.
While AppleCare+ will replace or repair an iPhone that has been damaged or is not working, it does not cover theft or accidental loss. The cost of replacing your iPhone will most likely be more than insurance to cover the device, so see whether you can get that insurance rider from your regular insurance company.
6) Don’t Lose Your iPhone, iPad or Mac In The First Place
That’s easier said than done. That cell phone I lost (pre-iPhone) was on a belt clip and popped off without me being aware of it. I also lost an iPhone (pre-Find My iPhone) one time while getting off of an airplane, when it slid out of a pocket onto the airplane seat without me knowing.
While moving around a lot, consider putting your phone into a pocket with a zipper or button to keep it from popping out unnoticed. Or if you have a bag or purse, put it into a secured pocket to keep it from “walking away”. There are some iPhone cases available that include cables to connect to a belt or bag, and they’re yet another way to keep that iPhone from departing.
Have a MacBook in a case? When you’re in a hurry it’s sometimes easy to walk off without remembering to pick up that device. Consider one of the many Bluetooth tags available nowadays that will alert you if you’ve walked away from a bag. Often you’ll get a beep or other notification on your iPhone or Apple Watch before you’ve walked 30-40 feet away.
Any other hints? We’d like to hear them. If you’ve had a loss (or near loss) experience with an iPhone (or iPad), how did you get it back? Your experiences can help other readers of The Rocket Yard.


Disable both Control Center and Siri on the lock screen! Otherwise, the thief can immediately put it in Airplane Mode and you lose all chance of tracking it.
I recently lost an iPhone and it never showed up on Find My iPhone. Apple Support would probably have to have the last word on this, but it appears that if WiFi is turned off, as well as cell data and/or the iPhone is in Battery Saver mode, the iPhone isn’t communicating its location unless these settings are changed back to “on.”
Since whoever may have picked up the phone couldn’t log in (I always used Touch ID), I may have inadvertently made it impossible to recover the device using Find My iPhone. I think some data service(s) have to be turned on for the location tracking to work. No?
Years ago, I used to put stuff in pants pockets and invariably stuff disappeared. People make fun of me for using a fanny pack (“so old school”), but I’ve never lost a phone since keeping phone behind a fanny pack zipper.