If you’ve been working with the Mac’s Photos app (or even the older iPhoto or Aperture apps) for any length of time, there’s a good chance you have multiple image libraries to help you organize your pictures.
In the past, I’ve used Aperture to store my business-related images, and iPhoto to keep my personal pictures organized. When Photos came along, I set it up to work with either library.
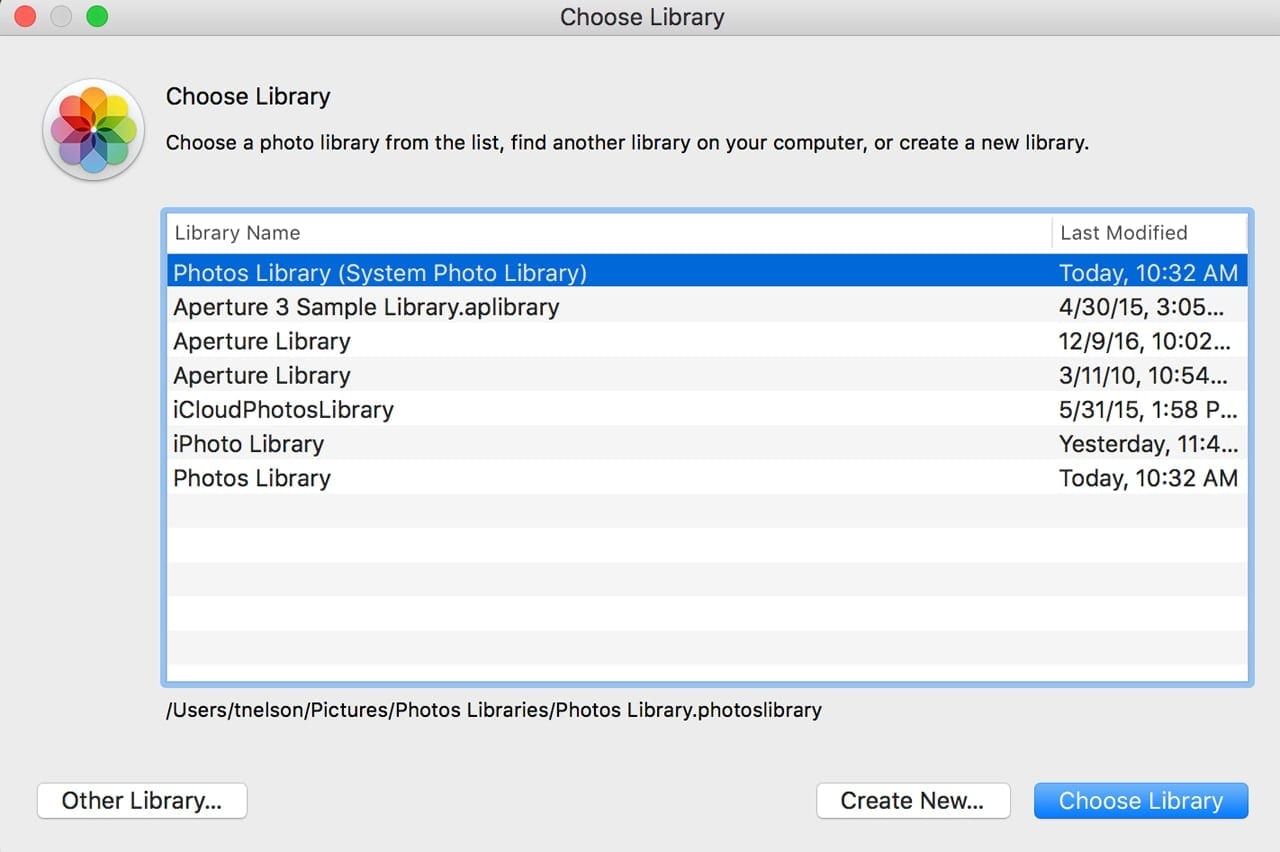
If you’ve done this, too, then you know you must hold down the option key when you launch Photos to choose which Photos Library you want to use, unless you’re lucky enough to have the target library open right off the bat (and that never happens).
Performing a switcheroo every time gets old pretty quickly, so I decided the best thing to do would be to merge the two libraries into one on my Mac. Note: This tip works for macOS High Sierra and Mojave.
Merge Using iCloud Photo Library
In this article, we’re going to look at the various methods available in the hope that at least one of them will meet your needs when it comes to merging image libraries, or even just moving a few images around from one library to another. We’ll start with the iCloud Photo Library.
Pro:
- Able to merge image libraries while retaining all metadata, such as recognized faces, events, albums, and projects.
- Retains both the master image and any current edits, allowing you to undo edits, or continue to perform new edits without altering the master.
Con:
- Requires enough iCloud storage space to hold both the main library as well as the one you intend to merge.
- All photos in both libraries must be uploaded to iCloud.
- The iCloud photo library may sync to any device you have that uses the same iCloud account. This could cause overage in cellular data plans if an iPad or iPhone is being synced.
- Extremely slow. The upload and download from iCloud Photo Library isn’t particularly fast. A large photo library could take a week or more for the process to complete.
To start the process, you must decide which Photo library you wish to be your main library. This is the library that will eventually contain all the merged photos. In the instructions that follow, when you see the term main library, it’s this library that is the focus of the instructions.
1) Launch Photos while holding down the option key.
2) The Choose Library dialog box will appear. Select the library you wish to use as your main library from the list, and then click the Choose Library button.
3) In the Photos app, select Preferences from the Photos menu.
4) Select the General tab.
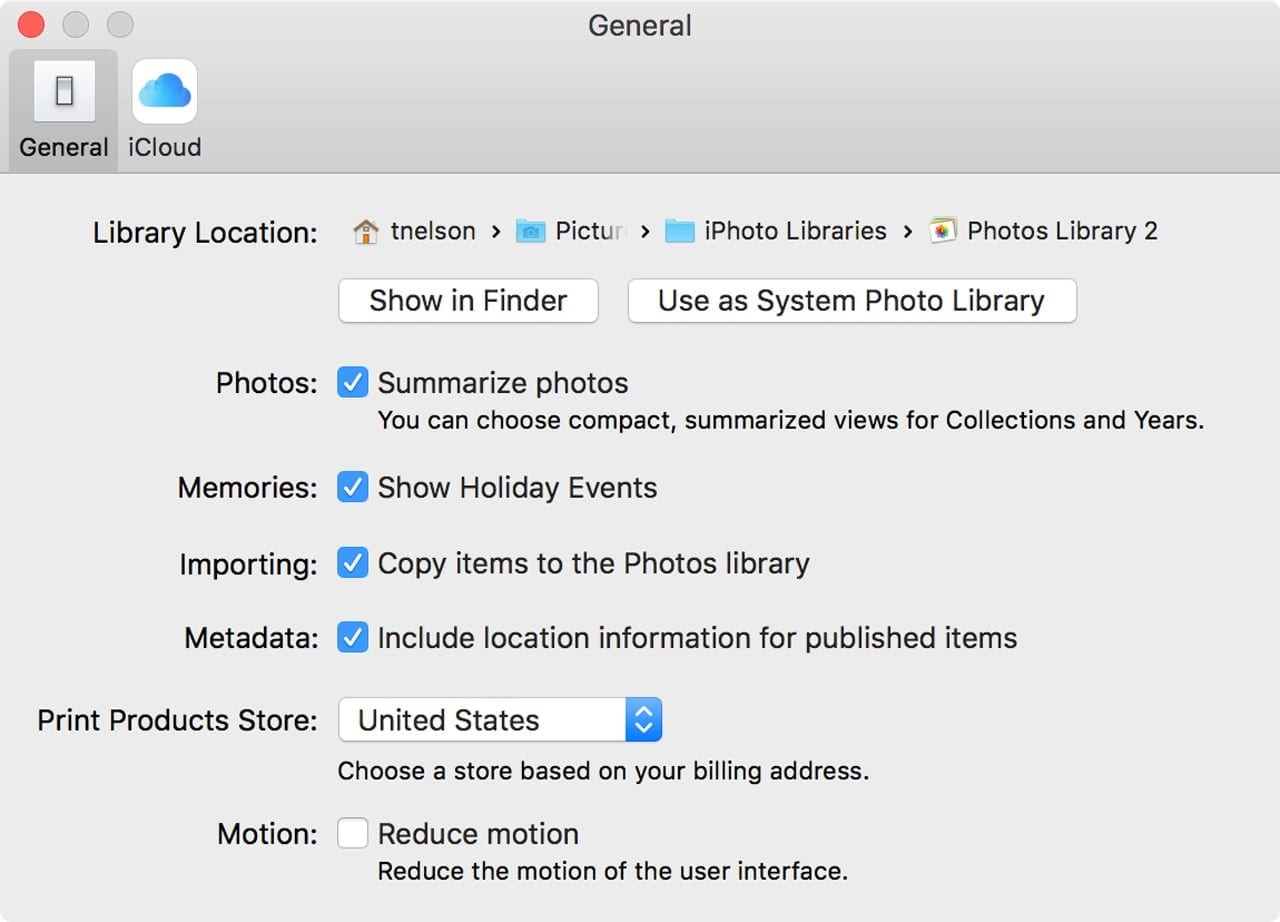
5) The main library needs to be the System Photo Library. If needed, click the Use as System Photo Library button. If it’s already the System Photo Library, the button will be dimmed.
6) Select the iCloud tab.
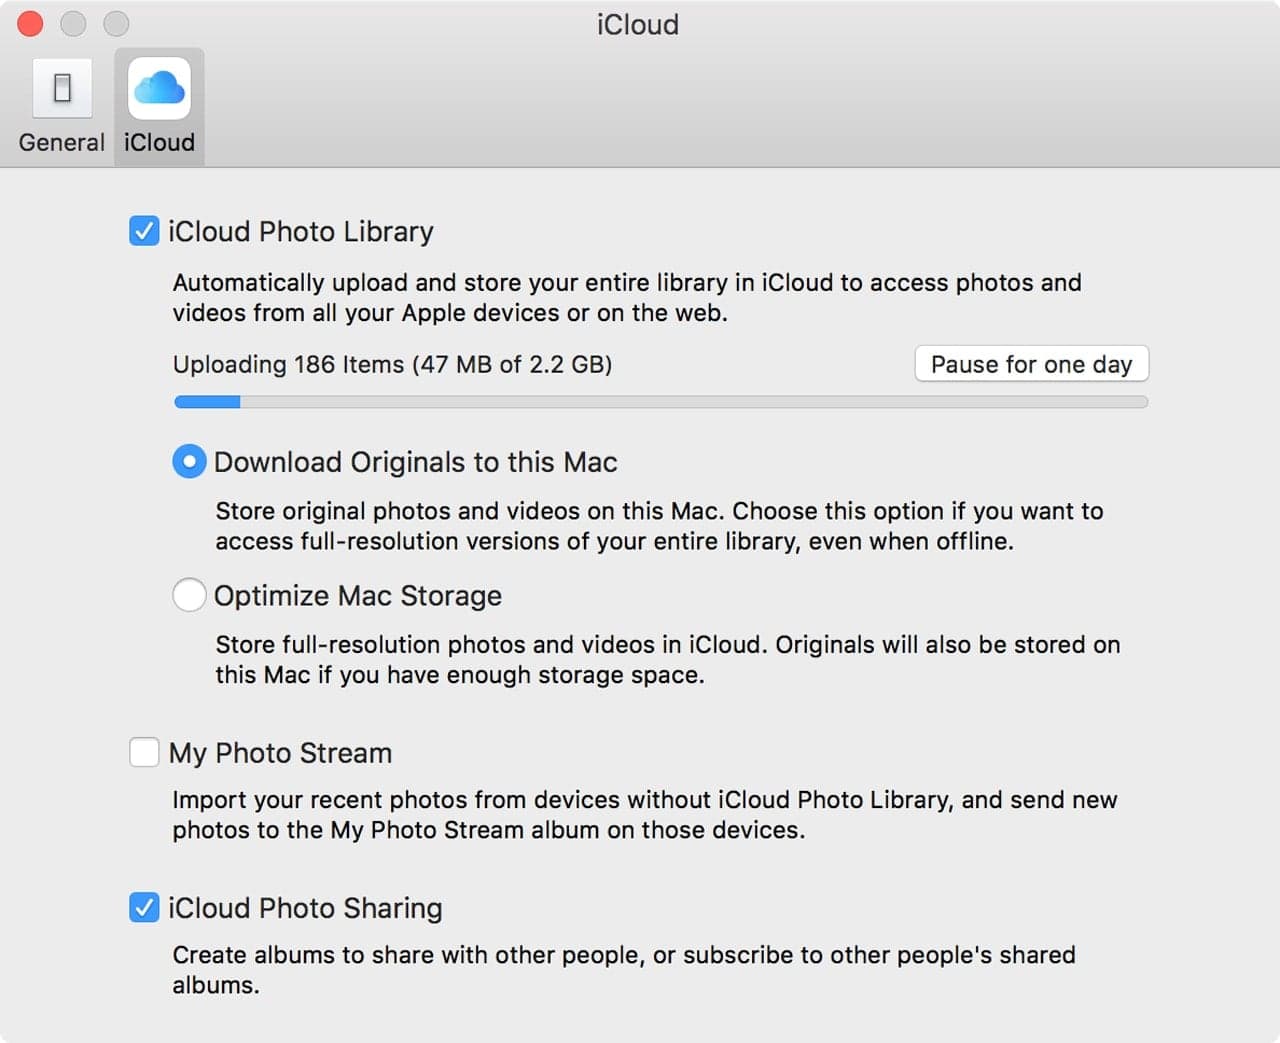
7) Place a checkmark in the iCloud Photo Library box.
8) Make sure the option to Download Originals to this Mac is selected.
9) Photos will start the upload process to iCloud. An estimate of the number of images and the amount of space they will need will be displayed.
10) Once the process is complete, you can quit the Photos app.
Merging Additional Image Libraries:
1) To merge additional libraries, launch Photos while holding down the option key, and then select the next library you wish to merge with the main library.
2) Follow steps 3 through 10, above.
3) Repeat for each image library you wish to merge with the main Photos library.
Accessing the iCloud Photo Library With All the Merged Images:
At this point, the iCloud Photo Library contains all of the images from the libraries you’ve merged together. The last step is to open Photos with the main library and sync all of the iCloud images back to your Mac.
1) Launch Photos while holding down the option key.
2) Select the main library from the list of available image libraries.
3) In Preferences, select the General tab. Make sure the library is the System Photo Library.
4) In Preferences, select the iCloud tab. Place a checkmark in the iCloud Photo Library box.
5) Make sure Download Originals to this Mac is selected.
6) iCloud will begin downloading all of the originals you had previously uploaded to iCloud’s Photo Library.
7) Once again, this process can take quite a while, but when it’s completed, you’ll have merged all of your image libraries into a single Photos library.
At this point you can either leave iCloud Photo Library enabled in the Photos preferences, or turn the function off, depending on whether you wish to keep your Photos Library synced with other Macs, iPads, and iPhones.
Merge Using Export/Import
Another way to merge Photos Libraries is with the Export/Import functions.
Pro:
- Relatively fast.
- Can export and import both the masters and any edits.
Con:
- Metadata is lost during the transfer.
- May require a large amount of free disc space to hold the exported images temporarily.
Export Images:
1) Launch Photos while holding down the option key.
2) Select the photo library you wish to export images from, and then click the Choose Library button.
3) In the Photos app, select the images you wish to export. If you wish to export all, you can choose Select All from the Edit menu.
4) Select Export, Unmodified Originals for the amount of photos.
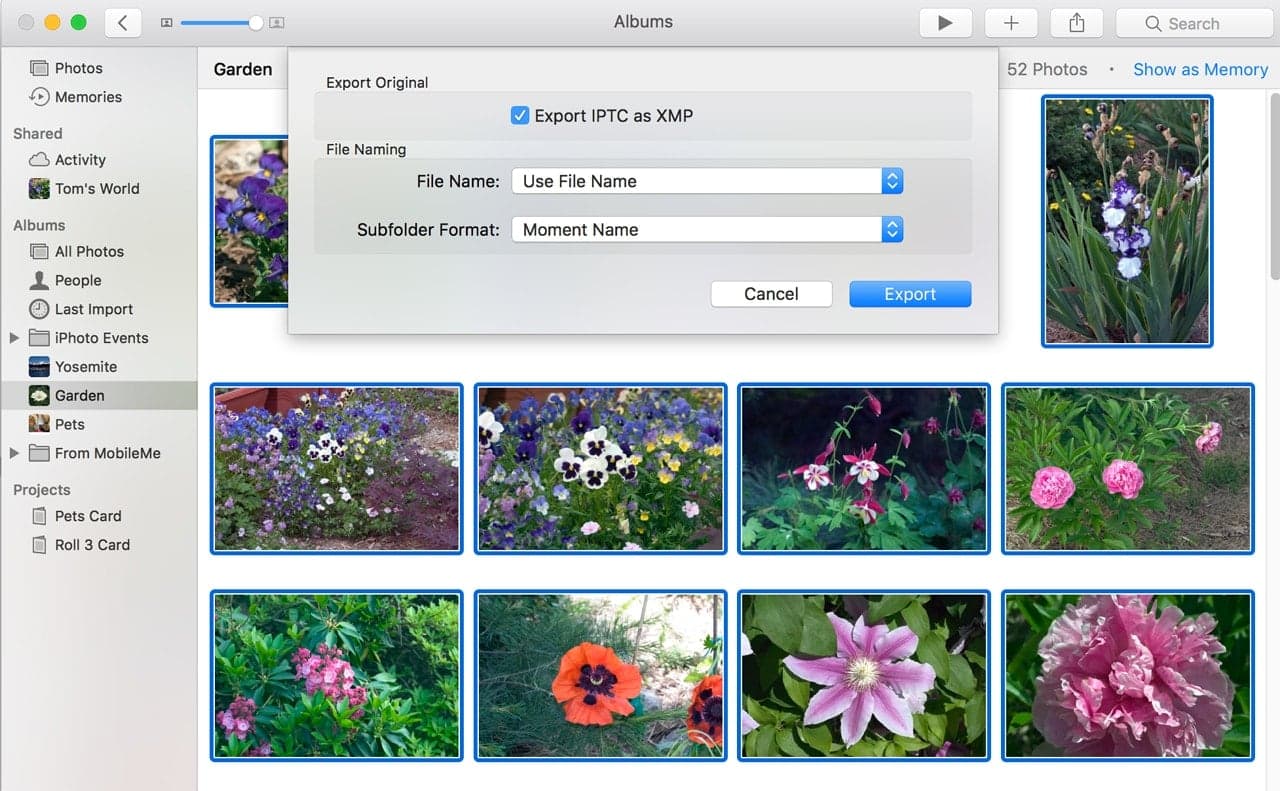
5) In the dialog box that opens, use the dropdown menus to select the file name format to use, as well as the subfolder naming (if needed) to use. You should also put a checkmark next to the Export IPTC as XMP option.
6) Click the Export button.
7) In the dialog box that opens, select a location on your Mac to export the files to. I highly recommend creating a folder to export them to, such as Photos Export.
8) When the export process is finished, quit Photos.
Import Images:
1) Launch Photos while holding down the option key.
2) Select the Photos library that you want to import the images into.
3) Click the Choose Library button.
4) In the Photos app, select Import from the File menu.
5) In the dialog box that opens, browse to the folder that contains the images you exported previously.
6) Select the folder, and then click the Review for Import button.
7) The images will be displayed in the Photos app. You can select specific images to import, or you can import all of the images. Click the appropriate import button.
8) The images will be imported into the currently open Photos library.
9) Repeat the export/import process for each image library you wish to merge.
Merge Using Terminal
The Terminal app offers a surprisingly simple method of merging Photos libraries.
Pro:
- Allows you to view the content of two or more Photos libraries at the same time.
- You can drag and drop images between the open libraries.
Con:
- Doesn’t retain image metadata.
![]() This simple method of merging images makes use of the Mac’s ability to open multiple copies of the Photos app. This is accomplished by opening the first instance of Photos using the normal method, and any subsequent instances of Photos using Terminal.
This simple method of merging images makes use of the Mac’s ability to open multiple copies of the Photos app. This is accomplished by opening the first instance of Photos using the normal method, and any subsequent instances of Photos using Terminal.
1) Launch Photos while holding down the option key.
2) Select the image library you wish to copy images to, and then click the Choose Library button.
3) Launch Terminal, located at /Applications/Utilities.
4) At the Terminal prompt enter the following: open -n -a Photos
5) Once you’ve entered the line in Terminal, hold down the option key, and then press return or enter on the keyboard.
6) From the window that opens, select the Photos image library you wish to copy one or more images from, and then click the Choose Library button.
7) A second instance of Photos will open. Warning: Sometimes the second copy of Photos will open directly on top of the first, obscuring the fact that two instances of Photos are open.
8) Arrange the two Photos windows so that both can be seen.
9) Drag the images from the second instance of Photos to the first.
10) Repeat the process as needed.
Warning: Opening more than a few copies of Photos can severely deplete available memory and slow your Mac down. It’s best to have just two copies open at any one time.
Use the Finder to Merge Photos Libraries
Last but not least, you can use the Finder to merge Photos libraries.
Pro:
- Ensures the master images are copied.
- Easier than opening multiple libraries within the Photos app.
- Can help reduce the number of duplicate images added to your library.
Con:
- Will likely lose most metadata, such as organization information, including Albums, Events, and Projects.
This method uses the Finder to locate the library folder that contains an alternative image library you wish to merge with your Photos main library. Photos libraries are usually located in the Pictures folder of your Home folder. The pathname should be ~/Pictures/Photos Libraries. The various image libraries you’ve created will be within the Photos Libraries folder. You should see items such as Photos Library and iCloud Photo Library, plus any additional libraries you’ve created.
The Finder merge method will work with other image libraries, such as those from iPhoto, located at ~/Pictures/iPhoto Libraries, and Aperture, located at ~/Pictures/Aperture Libraries. The instructions below assume you’re merging an alternate Photos library, but you can also merge iPhoto and Aperture libraries, just substitute the appropriate library locations.
1) Launch Photos, located in your /Applications folder.
2) Open a Finder window and browse to the Photos Library folder located at ~/Pictures/Photos Libraries.
3) Within the Photos Libraries folder, right-click (or control-click) the image library you wish to merge, then select Show Package Content from the dropdown menu.
4) In the new window you’ll find a folder named Masters.
5) Drag the Masters folder to the open Photos app and drop it onto the Photos window.
6) Photos will start importing the images. This can take quite a while, so be patient. If during the import Photos detects duplicate images, you’ll be given a “Don’t Import” option. If you don’t wish to keep answering the duplicate content messages, place a check mark in the “apply to all duplicates” box.
Once the import process is complete, you should check that the images are indeed within the main library. Once satisfied, you can delete the old library using the Finder.
Third-Party Apps for Library Management
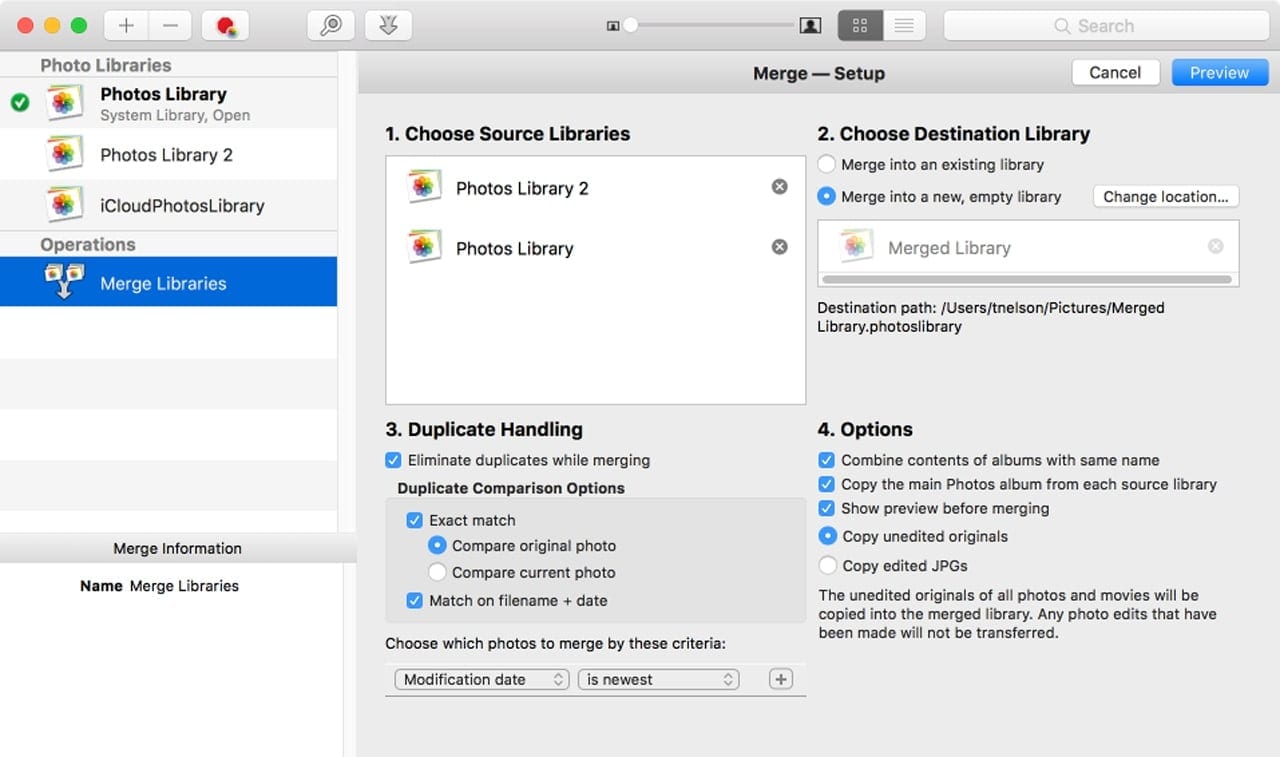
There are a number of third-party utility apps designed specifically to assist Mac users with merging and managing image libraries in Photos. One of the most popular is PowerPhotos.
PowerPhotos allows you to merge photo libraries without losing important metadata, such as Albums, Moments, and Events. In addition, PowerPhotos offers a number of ways to handle duplicates, including duplicate detection and how to choose between duplicates.
One of the main reasons I like PowerPhotos is that it can merge libraries while retaining most of the metadata that’s important to me. I don’t have to use up all my iCloud storage to do so, nor do I have to use additional storage space. And it goes without saying that PowerPhotos is much faster than syncing via iCloud.



All that is nice, but I am having a much bigger problem. Exporting in bulk, which is extremely important to me, and can do this from iPhoto.
Where can I find this type of lost functionality from iPhoto in the new macOS versions?
I am stuck on High Sierra solely because of this feature.
I’m presently using the finder method in Big Sur. 30,000 photos will take about a half hour and the only indication it is happening is a small circular progress icon at the top of the Photos window. The source folder is indeed now called originals. I’m a little worried, though, because it hasn’t asked me about duplicates yet and I hate duplicates.
Bad news is I now have a library with 60,000 photos. Did I say I hated duplicates?
Very useful article – Worth bookmarking for future reference! In the Finder method, the info about Masters folder needs updating. In Catalina and Big Sur, the Masters folder is now called Originals. Also, you are right that Masters (or Originals) folder stores the unedited versions of the photos – so you’ll lose not only the album structure but also all the edits. PowerPhotos looks like a good option for managing and merging multiple libraries. For getting photos and videos out of the Photos library and saving them in a folder structure on Mac, external HD or cloud storage, Photos Takeout (www.photostakeout.com) is quite neat. It can also keep the metadata intact. After exporting into folders, you could create a new merged Photos library. With some tinkering, you could also preserve albums.
Does merging multiple libraries using iCloud work in Mac OS Catalina 10.15.5?
Unfortunately the drag-and-drop method by launching 2 instances of Photos doesn’t seem to work- not on Catalina anyway.
The Finder method is tricky to say the least, as some versions of the Photos library dont even have the “Masters” folder. Instead there’s “Originals” folder with a bunch of numbered and lettered subfolders (1-9, a-z) that in turn contain actual photos (likely all taken by iPhone). However as is usual with Apple file storage everything design, the files are placed in the folders at random and not by dates or any other logical meta data criteria. The files names are also cryptic UUIDs and therefore completely un-usable- all very similar to how music files are stored on iPod and even iPhone.
I’m not even sure how Apple stays in business and sells these awfully designed apps and systems, but that’s a different story…
EXCELLENT article. I was totally confused on this subject after spending hours reading the Apple discussion groups on what to do with Aperture, iPhoto, and Photos.
Now, finally, its clear!
thank you, Richard
When trying the Merge using Terminal, step 9 (Drag the images from the second instance of Photos to the first) isn’t working for me. I use select all on the Photos, then drag them over to the other album, and nothing happens.
What I really want is a repeatable pattern that lets me do the following:
– Have a huge long-term library on an external drive, in my case going back to 2003 with 500GB of content. Expensive/impractical to have all this in iCloud OR on my laptop
– Have a small, short-term library on my MacBook and iPhone that I use day-to-day
– Occasionally merge the content of the short-term, synced library into the long-term, unsynced library, then remove them from short-term. E.g. once per year would let me keep the 200GB iCloud plan instead of 2TB.
– I also want this system to preserve the editability (so can’t use the normal export files system) and favorites/metadata of all my images (so nothing using USB import will do it).
I think I have a workable plan, but it’s convoluted, so if any of you have ideas or clarifications, please let me know!
### CONCEPT: TEMPORARY huge library on a secondary iCloud account, disabled and stored on external
Master plan
long-term Photos library lives on an external drive, with 500GB of images going back years
short-term Photos library lives in my /Photos/ folder on my macbook, with iCloud Photo Library turned on and linked with icloud-user-1 which is also on my phone
Create a second iCloud account icloud-user-2 and use it with a second Mac user, separate from the main one I normally use (icloud-user-1)
Back up my short-term Photos library from my MacBook to an external drive as short-term-backup
This is to give icloud-user-2 access to it and avoid anything going wrong with the official short-term library used by icloud-user-1
So now we have an external drive with two libraries we'll merge together short-term-backup and long-term
Switch mac users to icloud-user-2
Upgrade storage to 2TB for one month
I will downgrade it back to 5GB after merging, so the cost is just that payment once per year or so
Still using icloud-user-2, open the long-term Photos library.
Make long-term primary and turn on iCloud Photo Library
First time: This causes a huge, weeks-long sync of all the data to icloud-user-2
Other times: Confirm the images in the library are already synced and nothing is wrong
Disable iCloud Photo Library on long-term
Still with icloud-user-2, open up the short-term-backup library and make it primary
Turn on iCloud Photo Library for short-term-backup, with "download originals" disabled
This syncs all the new images in short-term-backup into icloud-user-2's Photo library, alongside the huge existing library from long-term (but shouldn't download down all the old images)
When finished, disable iCloud Photo Library on short-term-backup
Switch back to the long-term library with icloud-user-2, and make it primary again
Re-enable iCloud Photo Library on long-term library, with "download originals" enabled!
It should pull down all the new images uploaded from short-term-backup
Now we have long-term library with all of the photos from short-term-backup integrated
All the images are stored, both on iCloud and stored on the external drive where the library lives.
Disable iCloud Photo Library for long-term
Disable the storage plan (back to 5GB) for icloud-user-2
This will stops it from uploading any new images, but the files stay put and I have them on my local drive anyway.
Hopefully there are no problems as long as iCloud Photo Library is disabled
All this was happening in icloud-user-2
At any time I should be able to go back to icloud-user-1's mac account' where the short-term Photos library is active and syncing.
Log back in as icloud-user-1
Open the original short-term library, which should be syncing normally.
Delete the files that were merged into long-term to clear space and keep it a reasonable size.
after double-confirming they won't be lost
Result:
Full, offline backup of all long-term images on an external drive, with backup available in the cloud
Ongoing sync of recent images available on phone and laptop for reasonable storage fee
Once per year or so, pay for one month of expensive storage to merge the new photos into the long-term library, backing it up offline in the process.
Files retain all metadata.
The question is whether all that will work!? The link above implies it will, because it has the same properties as the plan to do a one-time merge, but doing it regularly could lead to unforeseen
problems.
You could look at PowerPhotos. You can copy pictures between libraries. It seem a little more straight forward that the plan above.
This article is Gold! Thank you for such a concise treatment
thank you. I was able to export/import 4,000+ “missing” images and stop crying
That Terminal trick is da bomb.
When I dragged and dropped the photos, nothing happened. Upon examination, it may have been because all those photos were already in the other library… though I would have expected the normal “duplicates” complaint instead of just failing.
Terminal method not working now (Jan 2019) in High Sierra. Get error “Cannot Import Items. These items cannot be added to your Photo Library because the file format is not supported by Photos.”
Thanks a lot!
The fatcat website says that PowerPhotos isn’t supported on Mojave. Have you tried it, and does it work?
If you use the PowerPhotos software does it create a third “new” merged library on my computer ? My hard drive has almost run out of memory in part because it contains an iPhoto Library (66GB) and a Photo Library (86GM). I believe most of the photos are dups but I’d like to merge them without losing the meta tags. In your opinion is PowerPhotos the way to go ?
When combining to libraries, you can either do a straight merge or PowerPhotos ask if you want to back up the destination library, first.
Thanks so much very useful
Great information. When using the finder method will I lose the date and gps coordinates of the photo?
I used method 1. I noticed in the final step when I went back to the library I selected as the primary library it was re-uploading that part of my collection. Now I have 35,000 duplicate photos. At least I didn’t lose anything…
In the cons for the export, terminal and finder methods you say metadata is lost. Does that include date and location? These are key to rebuilding into a consolidated library. Not too bothered about albums and projects. iCloud method seems slow and painful, especially with 20k photos! Thanks
I am trying to combine my four libraries. Each contains several albums named after years and events.
1 – I upload library 1 and see everything on iCloud
2 – I open library 2, check it “system library”, then check “download” originals.
At this point on iCloud all the albums of library 1 disappear and the albums of library 2 appear. The pictures of library 1 are there, but in the “all pictures” folder without albums.
Any suggestions?
Hello and thanks for all your work in putting this article together. I have two questions. 1. Do I need to convert my old iPhoto libraries into “Photos” format in order to combine them? 2. Is there a way to merge libraries WITHOUT using iCloud? Thanks again, Ronald
I upgraded my iPhoto libraries to Photos, and upgraded from iPhoto Library Manager to Power Photos … only to learn that, when now merging Photos libraries, you have to choose EITHER the original photos OR the edited photos … but not both. Show stopper. Wish I hadn’t upgraded.
Quick question about step 5 in the upload process of the icloud library method.
I am merging three libraries. Do I leave the main library as the system library for each upload? Or do I have to change it each time?
Based on reading the instructions I think I set the main library as the system library when I upload that library first and leave that first main as the system library when uploading libraries 2 and 3, but I want to confirm.
I did have the same question. There is only one main library that is the System Photo Library by default. Therefore step 5 seems unnecesarly.
I would start with the none-main libraries and end with the main. Further I wonder why “Download Originals to this Mac” in none-main libraries as at that point it’s only necesarly to upload. Only in the last library, the main one, download should be selected and than only when you want that.
When you have big libraries, as I have, make a new smal library and have a try. Don’t forget to make a backup, you’l never know.
Totally agree. I have 5 libraries (one on a 128GB Mac, 4 on a 500GB external drive) and these are my steps:
1- Make library on my mac the system library and upload all to iCloud.
2- Make the smallest library on the external drive the system library and upload to iCloud without downloading the originals.
3- Repeat 2 with the remaining Photo libraries on the external drive.
4- Make the Library on my Mac the system library again and avoid downloading the originals.
Now I have access to all my photos across: iPhone, iPad and all ma Macs.
I will only download the original photos when there is enough space on my Mac.
Excellent work
Thanks
BH
Great article! Apple migrates to new libraries over time, screwing things up occassionnaly during migration. I have now several Photos libraries where all the events are gone and basically every date is an event. Horrible.
Then the merge with the super-huge Aperture library occurred and now I have to re-think photo libraries.
But I also moved my DSLR photos to Lightroom, which has a much simpler to grasp archiving function, albeit without the ‘sexiness’ of Photos.
Basically I want Photos only for the sharing-with-friends and TV part, as Apple’s philosophy to throw your information out when moving to a new shiny app bothers me from an archiving perspective.
They just don’t think or care about iPhoto archives from 2001.
just my $0.02
Amen. I rue the day I started relying on Apple software to organize and archive my pictures that now number in the thousands. Migration left me with a horrible mess from which I will probably never recover.
The problem I see often is that people have both a newer Photos library and an older iPhoto library, which started out as duplicates of one another, but then the owner has been adding photos to either indiscriminately. Is there a third-party package that can work with the old format iPhoto library and move its contents (sans duplicates) to a new Photos library?
The really good way is to buy and use Power Photos. It does the job really well and saves a lot of time. I’m amazed that you haven’t included it. It is the follow up to iPhoto Library Manager and the developer is incredibly responsive and helpful.
Perhaps you didn’t read the entire article. Under the Third-Party Apps for Library Management section at the bottom of the article, Tom not only mentions PowerPhotos, but explains why he likes it.
Duh! I am having trouble believing I missed that. I guess my only response is that he wasted a lot of space describing rather complex and in some cases methods that leave things out when Power Photos does such a great job and is pretty inexpensive. I am a consultant and have cleaned up and merged a lot of iPhoto and Photos libraries for clients and I wouldn’t waste my time or their money on methods that give unsatisfactory results.
Hi Frank, if I turn off iCloud photos on my iPhone and delete a picture and turn it on again. Does the picture will be deleted on iCloud?
Since the server is the master the photo may just come back. That is the way all other iCloud services work so I suspect the same behavior will occur for your scenario.
If you still prefer to use iPhoto (as I do), then iPhoto Library Manager fatcatsoftware.com/iplm/ will do the trick for you!
…John