 For quite some time now, Time Machine has been the go-to backup app for most Mac users. It’s the heart of my personal backup system, and knowing I could recover my files quickly if my Mac’s drive ever failed keeps me feeling safe.
But what if it wasn’t just the drive that failed, but your Mac that gave up the ghost? Unless you’re willing to run down to a local Mac reseller and pick up whatever Mac is on the shelf, it would likely take you some time to select a new Mac and have it shipped to you (or to your local store). In the same vein, getting your Mac fixed could also turn out to be a long wait. In the meantime, how do you access the files you need right away?
There are a couple of ways to gain access to your Time Machine backup files, depending on the computer you’ll be using in the interim. If you have access to a Mac, the process is fairly simple. Just plug your Time Machine drive into the available Mac, option-click the Time Machine menu bar item, and select Browse Other Backup Disks.
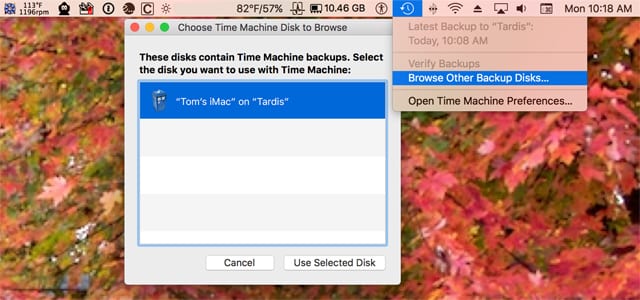
If your temporary computer is a Windows PC, the process is a bit more involved.
We’re going to take a look at the worst-case scenario, which is to have a Windows PC be the only option. And no, I don’t mean using a PC is the worst thing. It’s just that since there’s no version of Time Machine that runs on Windows, you have to be a bit creative to gain access to your backups.
Accessing Time Machine Backups From a Windows PC
We’re going to start this process with an assumption: your Time Machine backup was on an external drive that was connected to your Mac via one of the many flavors of USB. If instead you’re using a Thunderbolt external, check the enclosure to see if it has a USB port; many Thunderbolt enclosures support both USB and Thunderbolt.
Shut down your PC and then connect the Time Machine external to the PC via USB.
Turn on both the external drive and the PC.
How to Access an HFS+ File System From a PC
You’ll notice that nothing happens; that is to say, the Time Machine drive doesn’t appear on the PC. That’s because Windows is natively unable to access drives formatted using the Mac’s HFS+ file system. You can, however, use third-party apps that provide support for HFS+ such as:
- MacDrive: Mediafour’s MacDrive is an app that allows you to mount, read, and write to HFS+ drives on a Windows PC. MacDrive includes its own app for viewing Mac drives, but it also works in the background to allow Windows Explorer and other native Windows apps to access your Mac formatted drives.
HFS+ for Windows and MacDrive are commercial apps, though they do offer short-term demos that can be used to transfer a few of your most needed Mac files. They provide the best integration of the HFS+ file system for Windows, and they don’t require the installation of a Java Runtime Environment to work.
Once you select and install one of the file system utilities listed above, you’ll be able to mount your Time Machine drive on your Windows PC as if it were just another external drive.
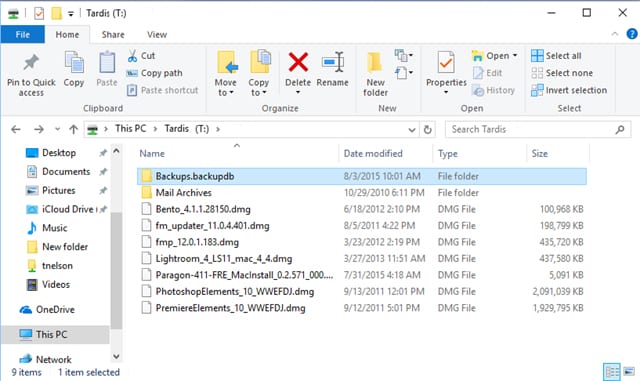
HFSExplorer uses its own HFSExplorer app that mimics the Windows Explorer app, with a few extra steps to manually load Mac external drives so they can be viewed in the app.
You can find details about using the HFSExplorer app and loading file systems from the HFSExplorer link, above.
Both HFS+ for Windows and MacDrive allow you to use Windows Explorer to access the Time Machine drive without any special steps needed; the Time Machine drive will be automatically mounted in Windows Explorer.
Recovering Files From Your Time Machine Backup
Once your Time Machine drive is mounted on your Windows PC, you’ll find the file organization fairly straightforward, letting you easily dive down through the folders to retrieve a needed document.
Starting at the top level of the Time Machine drive, open the Backups.backupdb folder.
Within the Backups.backupdb folder, you’ll find folders for each Mac that was using the drive for backups. For most of us, this will be a single folder with our Mac’s name; in my case, I have a single folder named Tom’s iMac. But you could see multiple folders if you were backing up multiple Macs to the same Time Machine drive.
Open the folder with your Mac’s name.
Depending on how large your backups are, it may take a little while for Windows to populate the Explorer window; so, be patient. Eventually you’ll see a collection of folders using the date and time as their names. There will also be one folder, actually a symbolic link (a folder with a small arrow in the bottom corner), named Latest.
Tip: Click on the Date Modified field in Windows Explorer to sort by date. When the chevron just above the words Date Modified is pointing down, the files and folders will be sorted with the newest on top.
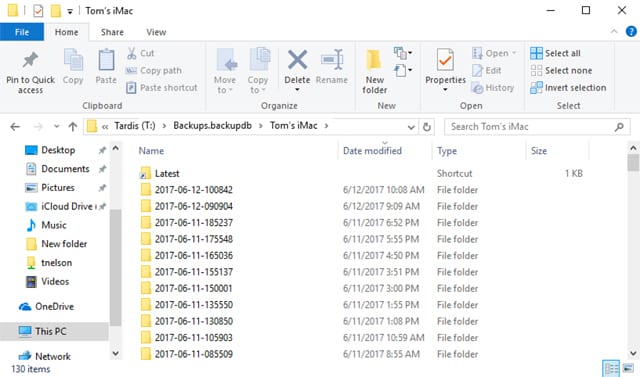
If you wish to access the current version of a backed up file, open the folder named Latest. If you’re using HFSExplorer, it may ask you if you want to follow symbolic links while extracting. Click the Yes button to ensure the complete file is copied when you perform an extraction with the app. Windows Explorer will correctly follow links without the need to have any preference set.
Tip: When you try to open the Latest shortcut, if you receive a message that a folder can’t be found, you can get around the issue by just opening the folder with the latest date. If you used the tip above to sort by date, the folder you wish to open will be at or near the top of the list. Just make sure it has the newest date and time stamp.
If you want to recover an older version of a file, you can do so selecting one of the folders named with a date and time stamp that corresponds to the time frame you’re looking for.
No matter which folder you open, the latest or an older folder, you’ll see one or more folders corresponding to the drives on your Mac you were backing up. In many cases, there will only be one; your startup drive, which is usually named Macintosh HD, though it could have any name, depending on how you customized your Mac.
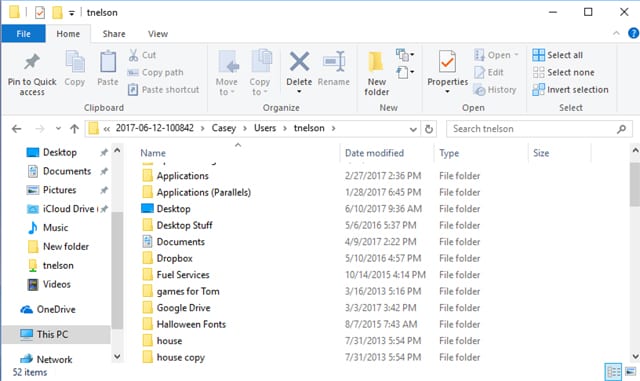
Open the startup drive folder.
You’ll see multiple files and folders that replicate the organization of your Mac’s startup drive. To find your documents, open the following folder:
Users, yourHomeFolder, where yourHomeFolder is the name of your user account on your Mac. For example, mine is Users/tnelson.
Here you’ll find all of the files and folders normally found in your Mac’s home folder. You can navigate from here to find specific files you need.
Using Your Mac Files on Your PC
If you’re using HFS+ for Windows, or MacDrive, you can work with the Mac files just as if they were native PC files. You can open them in various Windows apps and make use of their content. As an example, you should be able to open a Word file in Microsoft Word, a text file in any text editor, spreadsheets in spreadsheet apps; you get the idea. There will be some documents that have no equivalent app that will be able to open them in Windows. You can still move these files around and copy them to another device, such as a USB flash drive formatted with FAT32 or exFAT, which can be used on Macs, Windows, and Linux, where you can probably find an app that can work with them.
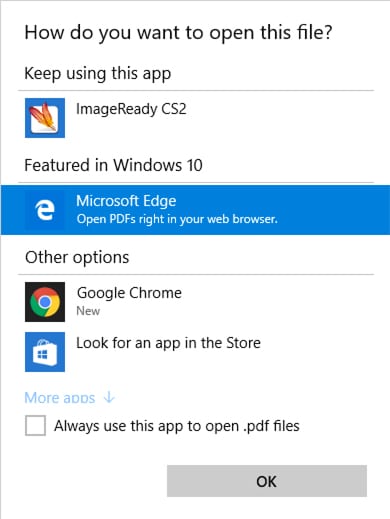
If you open a document in a Windows app and then save it, it will be saved in the native format of the app. So, that Mac Word document would become a Windows Word document. Saving the file to a drive formatted with NTFS will save the file in the NTFS format. You can save the file to the original Time Machine drive, but I don’t recommend saving it to any location within the Backups.backupdb folder. Instead, save the file to the top level of the Time Machine drive. Saving anywhere within the Backups.backupdb folder can lead to corruption of the Time Machine database.
If you’re using HFSExplorer to access your Time Machine documents, you must first extract the files you wish to work with to a Windows drive. Details on the extraction process are available in the link to HFSExplorer, above.
Moving Files Back to Your Mac
If you’ve decided to continue to use the PC, then you’re all set; simply copy the files you need from the Time Machine drive to your PC. If you ever need a file or two you forgot to copy, you can just reconnect the Time Machine backup, and repeat the process above.
If you’re only using the PC temporarily, you can make use of the Time Machine drive, and either HFS+ for Windows or MacDrive, to copy the document files you need back to the top level of the Time Machine drive. Unfortunately, HFSExplorer can’t write to HFS+ drives; it can only read their data.
Remember! Do not write any data to the Backups.backupdb folder on the Time Machine drive. Instead, just save the files to the top level of the drive.
Related article: How to Convert From PC to Mac Without Losing Your Data



Thank you, this worked perfectly! Great instructions
Same here. All files are zero-byte length. This article is completely useless.
Agreed same issue for me. Above post is useless.
I’ve installed HFS+ for Windows. The “Latest” folder does not appear as a folder, but as a file with a blank icon and is just 1 KB large. All other files in all other folders are 0 KB. Am I doing something wrong?
I’ve installed HFS+ for Windows. The “Latest” folder does not appear as a folder, but as a file with a blank icon and is just 1 KB large. All other files in all other folders are 0 KB. Am I doing something wrong?