 You made the decision to move from your Windows PC to a Mac. There are a lot of great reasons to make the jump, and one nagging problem that many switchers agonize over: how to transfer their PC data to their shiny new Macs and access the information without any issues.
For the most part, moving PC data to a Mac is a fairly easy process, with quite a few options available to get the job done. And that’s where this article comes in. We’re going to show you a few of the methods available to get your Mac set up with your PC data.
What Can Be Transferred and What Can’t?
Let’s start with the easier part of that question: what can’t be transferred, or more accurately, what can’t you use even if you manage to transfer it over. The answer is: applications. Windows apps that ran on your PC just won’t work on your Mac, not without using some form of virtualization software, such as Parallels, or emulation, such as CrossOver Mac, that can mimic a PC environment, or a complete install of Windows on the Mac (Boot Camp).
We’re not going to go into the options for running Windows on your Mac, but you can find out more by investigating the links above. What you can easily move to your Mac and make use of is most of your PC data files, the documents you have created, such as photos, music, videos, spreadsheets, and word processing documents, even all of the email messages you’ve collected over time. There will, of course, be a few file types that won’t have any equivalent on the Mac, and those documents may prove difficult to successfully make use of on your Mac. But for the most part, you should find that you can transfer and use most of your documents.
Many of the most popular Windows apps have Mac counterparts. For instance, while your Windows copy of Office can’t be used on the Mac, there’s a complete version of Office that Microsoft developed specifically for the Mac. The same holds true for many other popular apps. Check with the app manufacturer for an available Mac version. If you can’t find one, there’s likely a third-party app that can make use of the Windows files.
Apple Store: The Easiest Method
This is one of the easiest ways to get your PC data moved to your Mac. If you purchased your Mac from an Apple Store, they will offer you a free setup service that includes transferring documents from your Windows PC to your new Mac. You’ll need to schedule the service with the Apple Store, and then bring your PC (and your Mac, if you’ve already taken it home) to the store.

By the way, the folks at the Apple Store will be glad to help you haul your PC and Mac from the parking lot into the store; just let them know ahead of time that you would like assistance.
Once your Mac and PC are at the store, the technicians will connect them together and transfer whatever files you wish. They actually use a modified version of the Migration Assistant, as discussed in the next option.
Migration Assistant: The Do-It-Yourself Option
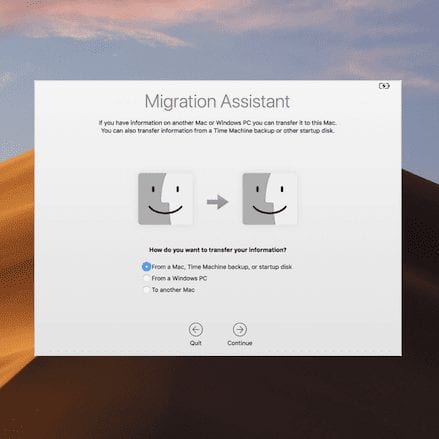
The Mac comes bundled with a specialized app just to assist you with moving your data from either your previously owned Mac or from your Windows PC to your new Mac. This app, Migration Assistant, is automatically made available when the setup assistant is run the first time you turn on your Mac.
But you can actually run Migration Assistant any time you need to. If you’re like us, and you click past the Migration Assistant option so you can start playing with your new Mac right away, you can still manually launch Migration Assistant at any time.
Migration Assistant can transfer the following Windows data:
System Settings: Language and location settings, your web browser’s home page, and any custom desktop picture you may be using will be transferred to your Mac.
iTunes: If you’re using iTunes for Windows, all of its content will be transferred to your Mac’s iTunes app. This includes any music, movies, and other iTunes content you may have.
Bookmarks: Browser bookmarks from popular browsers will be transferred to the Safari web browser. If you don’t wish to use Safari, you can always import Safari’s bookmark settings into the browser of your choice, so go ahead and let the import to Safari occur.
Mail: Migration Assistant can import data from most of the popular Microsoft Mail apps, including Outlook (including People and Appointments), Outlook Express, Windows Live Mail, and Windows Mail. If you’re using another mail client, with accounts that store the mail on the mail server (IMAP), you should be able to set up the mail account and let it download the stored mail for you.
Pictures: Migration Assistant will copy photos and other images it finds to your Mac, and save them to your home folder. You can then open the Mac Photos app and let it search for images to include in its library of images.
Other Files: Migration Assistant will also copy the following data: Files stored in the top-level folder of the currently logged-in PC user; non-system and app files located in the Windows or Program Files folders; top-level non-system and app files located in the top-level folder of the Windows system disk; and top-level folders located on locally attached disks on the PC.
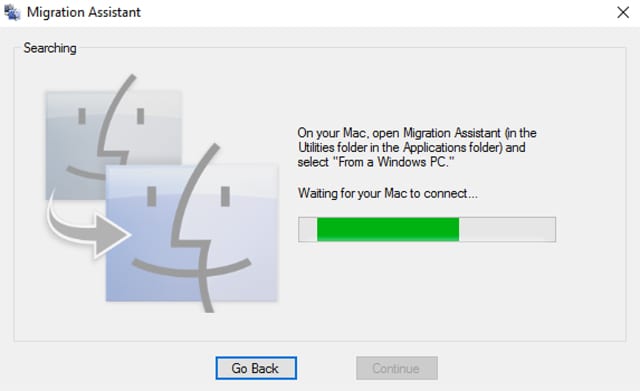
To make use of Migration Assistant, make sure your Mac and PC are on the same local network. Then, on your PC, download and install one of these two versions of the Windows Migration Assistant:
- Windows Migration Assistant for macOS Sierra and later
- Windows Migration Assistant for OS X El Capitan
Close all apps on both your Mac and PC.
Launch the Windows Migration Assistant on your PC.
In the Migration Assistant window that opens, click the Continue button.
You may see a warning about your PC being configured to install Windows updates automatically. If you see this warning, turn off automatic updates, and then click Continue.
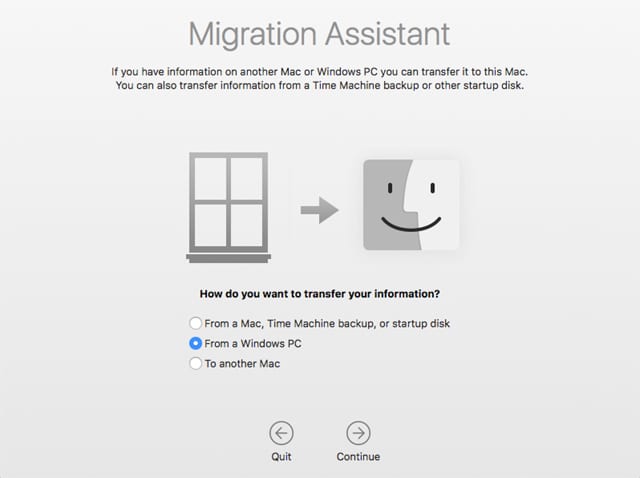
On your Mac, launch Migration Assistant, located at /Applications/Utilities.
In the Migration Assistant window, click the Continue button.
Select the option to transfer information from a Windows PC, and then click the Continue button.
The Migration Assistant running on your Mac will display all of the connected PCs on your local network that are currently running the Windows Migration Assistant. Select the appropriate PC, and then click Continue.
The Mac’s Migration Assistant will display a transfer code. Go to your PC and make sure the same code is displayed on the Windows PC. If so, click the Continue button on the Windows Migration Assistant.
Return to your Mac, where you’ll see a list of the items that can be transferred from the Windows PC to your Mac. Place a checkmark next to the items you wish to transfer, and then click the Continue button.
Migration Assistant will display a status bar, along with an estimate for how long the transfer will take.
Once the transfer is complete, you can click the Quit button on both the Mac and the PC.

Data that is transferred via Migration Assistant is copied to a new user account on your Mac; its name will match the user account name on the PC that was logged in at the time of the transfer. You may need to log out, and then log back in on your Mac using the new user account.
If you have more than one user account on your PC, you’ll need to repeat the process for each account.
iCloud for Windows
Another option for moving data between your PC and Mac is to take advantage of iCloud, a cloud-based service that’s included with your Mac. Apple also makes iCloud available for Windows users, provided they have an Apple ID.
If you haven’t yet created an Apple ID, you can do so at Apple’s website for managing Apple IDs.
iCloud lets you share data, including Photos, Mail, Contacts, Calendars, Tasks, and Bookmarks, between multiple devices. In addition, there’s a general-purpose iCloud Drive that you can use for any additional files you wish to share.
Once you’ve created your Apple ID, you can download iCloud for Windows on your PC.
You can find out more about iCloud and the many services it offers in the guide: Set up iCloud on all your devices. iCloud Drive includes 5 GB of free storage space; if you need more room, you can purchase additional space. You can check the latest pricing information at iCloud storage plans and pricing.
Use an External Drive
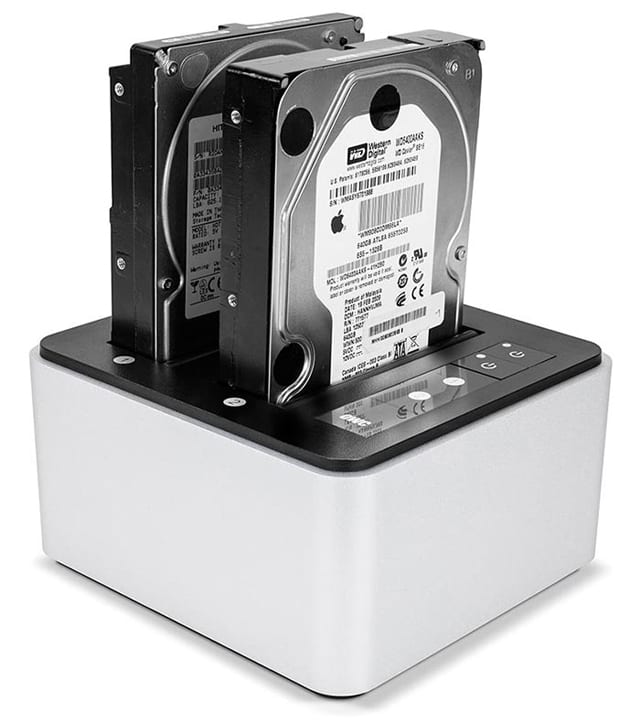
Although there are still many additional options for moving data from your PC to your Mac, the last one we will cover here is using an external drive or USB flash drive.
This approach has a lot going for it, including being one of the easiest. It also lets you create a backup or clone of your Windows data, which allows you to sell your PC and still access its data in the future.
We won’t go into the particulars about creating a clone of the PC’s drive, except to say there are quite a few Windows apps available that can accomplish the task. The only real caveat to this method is dealing with a quirk of the Mac.
The Mac’s native file system is able to read from NTSF formatted drives, but it can’t write to them. If you need to write data to an NTFS drive, you’ll need to install a utility on your Mac that allows full access to drives formatted with NTFS.
You can get around the issue entirely by formatting a drive or USB flash drive with one of the FAT variants, such as FAT32 or exFAT, which both the Mac and PC can understand.
Once you have an external drive in a common format, you can freely exchange data in either direction, between your Mac and PC, just by plugging the external drive into the appropriate computer as needed.




I have a question. Does the transferring of files mean that once it’s on the mac it’s no longer on your windows pc or is it just copying without taking???
This has been most helpful as I consider switching from a pc to a Mac
And how to import Eudora Mail of Mac into Apple Mail? The latter does not do it right for non-ASCII characters like accented ones.
You may be needing to write a post for how to go from a mac to a PC! I for one am getting furious with Apple lacks of hearing the voices of customers, unlike OWC!
Will finally Apple heard the voice of the customer! By releasing the 2018 Mac mini. The only problem is the $$$ Apple is picking out of our pockets. Ordered a new one, will be here Thursday, the 13th, and hoping that OWC will give me a fair price for the 2tb SSD Mac mini 2014 16gb baby that I will be sending away. ;(