Today’s the day: September 17, 2018. While this may be just like any other Monday, it’s also the day that the latest mobile operating system from Apple becomes available to the public. iOS 12 has many features built into it to make it more stable, efficient, powerful and secure. It’s been tested for three months by hundreds of thousands of developers and public beta testers, and iOS 12 is ready for prime time. In this Rocket Yard quick guide, you’ll see just how easy it is to upgrade to iOS 12.
Can My iPhone, iPad or iPod touch Be Updated to iOS 12?
Check the list:
iPhone
- iPhone XS
- iPhone XS Max
- iPhone XR
- iPhone X
- iPhone 8
- iPhone 8 Plus
- iPhone 7
- iPhone 7 Plus
- iPhone 6s
- iPhone 6s Plus
- iPhone 6
- iPhone 6 Plus
- iPhone SE
- iPhone 5s
iPad
- 12.9-inch iPad Pro 2nd generation
- 12.9-inch iPad Pro 1st generation
- 10.5-inch iPad Pro
- 9.7-inch iPad Pro
- iPad 6th generation
- iPad 5th generation
- iPad Air 2
- iPad Air
- iPad mini 4
- iPad mini 3
- iPad mini 2
iPod touch
- iPod touch 6th generation
Although Apple says that all of these devices can be updated to iOS 12, not all features work on all devices. You’ll also find that older devices run very slowly with the new operating system — I’ve been testing iOS 12 with an iPad mini 2, and it’s almost unusably slow.
How to Prepare for iOS 12
This part is easy! We’ve already published a quick guide to preparing your iOS device for iOS 12, and following these instructions can ensure that everything goes smoothly when you are ready to update.
Knowing When the Update is Available
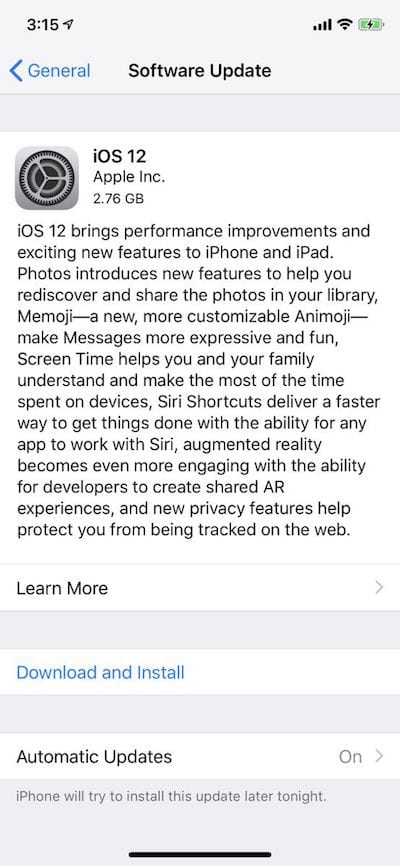
If you follow any social media, you’ll know almost immediately when iOS 12 is available because everyone will be talking about it. For those of you who don’t follow social media, it’s available to everyone now. Simply launch Settings, then navigate to General > Software Update. Your iOS device contacts Apple’s servers to determine if an update is available, and if it is, you’ll see something similar to the screenshot below:
Provided that you’ve prepared your iOS device for the update using our handy guide, you can just tap Download and Install to begin the process. Make sure that your iOS device is on a Wi-Fi network, that it’s plugged in, and that it has at least a 50% charge when starting to update.
Keep in mind that once the update becomes available, a lot of people will be trying to update at once. This means that the download process can take an unusually long amount of time to complete. Don’t despair and don’t worry — eventually you’ll have the files downloaded to your iOS device, and it will begin the update.
Make Sure You Know Your Apple ID and Password
One key thing to remember before starting the update: you will need to know your Apple ID and password. Many of us use these two key pieces of information every day so it’s not an issue, but if you rarely use your Apple ID and password, make sure you know what they are before you begin.
What if you forgot the password? Once again, don’t worry — just point your favorite web browser to this Apple support page for instructions on how to reset your Apple ID password. This page even has instructions on what to do if you forgot your Apple ID.
Updating Via iTunes and Your Mac
There is another way to update your iOS device, and that’s by plugging it into your Mac. You’ll need to have the latest version of iTunes (12.8.0.150 as of September 17, 2018) installed.
Use that USB to Lightning cable to connect the iOS device to your Mac and launch iTunes; you’ll need to wait for iTunes to recognize your device. That tiny iPhone icon outlined in red in the screenshot below shows that there is an iPhone attached:
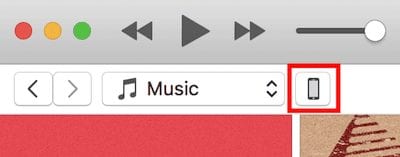
Next, click that icon to see information about your device and the current operating system version. See that Check for Update button outline in red in the screenshot below? Click it to see if the iOS 12 update is available for download and installation. If the update is available, simply follow the on-screen instructions to download the update from Apple’s servers and install it on your device.

Have Fun with iOS 12
I’ve enjoyed just a few of the features of iOS 12 during the beta tests and find it to be an update that I know I’m going to love on my production iPhone and iPad Pro. You, too, will find that some features — like the new Measure app, Screen Time, Siri Shortcuts and even Memoji — are going to be useful and fun.






iPad mini 4 is unusable slow after automatically updating to iOS 12. Can I go back? Or do something to fix it?
There may be an issue with Mac OS 10.13.6 over riding soft raid (even with safe guard enabled) in Thunder Bay external drives for time machine, etc.. the last 2 times iOS updated, it took over the volume in Thunder Bay… requiring a power disconnect to allow soft raid to rebuild the lost volume.. iOS used the volume to store the firmware and data for the iOS updates.. Mac OS couldn’t find the iPhone to sync it afterwards, so it had to be restored and re-synced to iTunes/back ups etc…
A temporary fix might be to disconnect the thunder bay drives from Mac OS before doing an iOS update…