Like many developers and tech writers, I wanted to start working with macOS 10.15 Catalina as soon as I could. A vacation and some oral surgery delayed my experimentation, but I decided to give the new OS a try in a Parallels Desktop virtual machine. This is usually a good way to try out a new operating system without the need to create a new boot drive or use a second test Mac, and I’ve done it with previous macOS versions. In this article, I’ll show you how to set up macOS 10.15 Catalina in Parallels Desktop, but first I’ll tell you why you might want to wait…
Why Wait?
Every time Apple comes out with a new version of macOS, the first thing bloggers and developers try to do is get the beta versions up and running. For bloggers, it’s a chance to test out the new capabilities of the OS, while it’s critical for Mac developers to test their software on the new version.
Usually, macOS beta versions run quite well — although slower than you’d expect — on a Mac set aside for running the beta software or off of a boot drive set up with the new OS. But for those of us who just have one Mac and don’t want to necessarily dedicate a spare disk drive to experimentation, Parallels Desktop is a very good way to test the new versions.
So why am I saying you might want to wait? macOS Catalina is definitely beta software, and since Parallels Desktop mimics a Mac in software, it is integrated very tightly with the operating system. In the past, it has sometimes taken a month or two for Parallels Desktop to support new beta operating systems fully. Right now, you can indeed load Catalina, but it will run slowly, you might need to make settings changes to access the internet, and there are issues with moving windows and icons.
Other than that, you can see what the new OS looks like, launch the new or revised Apple apps, or try out your apps to see how they work. Just be aware that this is not an optimum test of Catalina.
Still Want To Give It A Try? Here’s How:
I’m assuming that you already own a valid license for Parallels Desktop. If you don’t, you can pick up a copy from MacSales.com for $79.95 by clicking this link. Once Parallels Desktop is ready to roll, follow these instructions:
1 – Launch Parallels Desktop, then select File > New from the menu bar.
2 – In the Installation Assistant that appears, scroll Free Systems to the right until you find “Install macOS 10.14.5 Using the Recovery Partition”. We need to create an up-to-date Mojave VM before we can update it to Catalina.
3 – Click the Apple icon next to the Install title, then click Continue.
4 – A screen appears telling you that your computer must be connected to the Internet. If it is, just click Install and the Mojave installation begins. You’ll need to select the proper language for the installation, and then the macOS Utilities window appears on your screen. Select “Reinstall macOS”, then click Continue. Another window appears…click Continue on it as well, then agree to the license agreement after reading it completely (I’m kidding).
5 – At this point, you’ll be asked which disk you want to install macOS Mojave on — click your boot drive (most likely Macintosh HD) and then once again click Install. Now you wait while Mojave is installed in the VM.
6 – Finally you’ll get a chance to register and set up the Mac VM. Follow the simple instructions, enter your Apple ID, and so on to get the VM finalized.
7 – One important step! Be sure to install Parallels Tools. You’ll see a small yellow warning triangle in the upper right corner of the Parallels window — click on it to mount a virtual CD on the Mac desktop, which can then be double-clicked to run the Parallels Tools installer. The Mojave virtual machine needs to reboot to complete the installation.
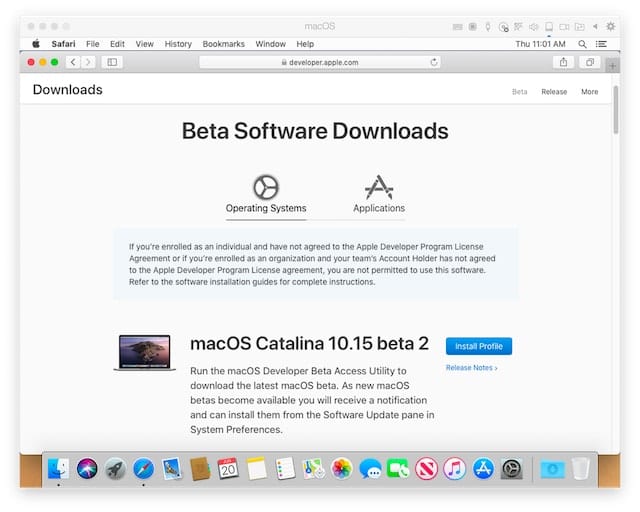
8 – Now that your Mojave installation is up and running and Parallels Tools is installed, it’s time to install Catalina. Launch Safari, point the browser to developer.apple.com and log in with your developer credentials.
9 – Once you’re logged in, click Downloads in the left sidebar. The following screen appears:

10 – Click “Install Profile” to download the macOS Developer Beta Access Utility. Once the disk image file is downloaded, open it to mount it, then double-click the package and follow the instructions to install the utility on the virtual machine.
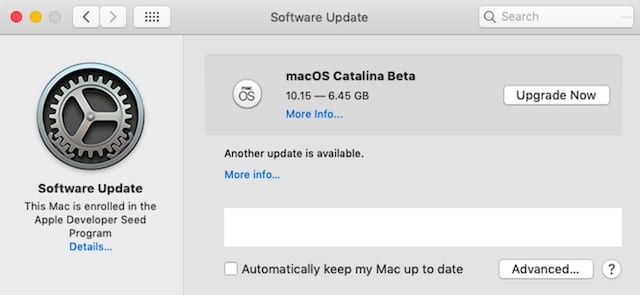
11 – System Preferences should launch automatically in the Software Update pane and you will see that a macOS Catalina Beta is available:
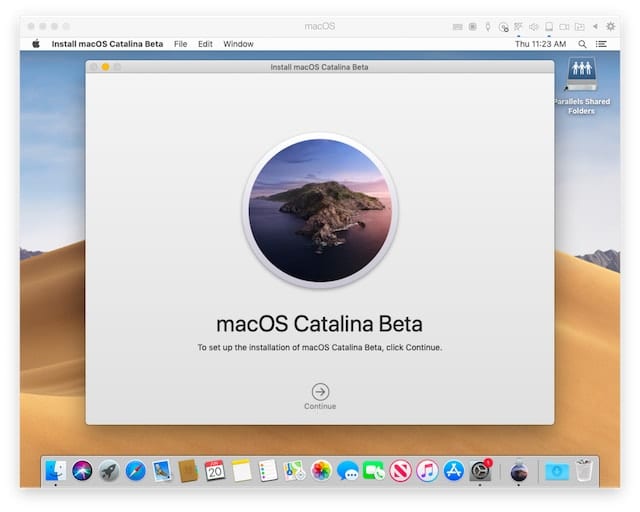
12 – Click “Upgrade Now” to begin the Catalina installation in the virtual machine. While you’re at it, you may wish to check the “Automatically keep my Mac up to date” box at the bottom of the Software Update pane. Once the installer has been downloaded, you’ll see the macOS Catalina Beta installer window (see screenshot below). Click “Continue” and follow the instructions to install the beta operating system.
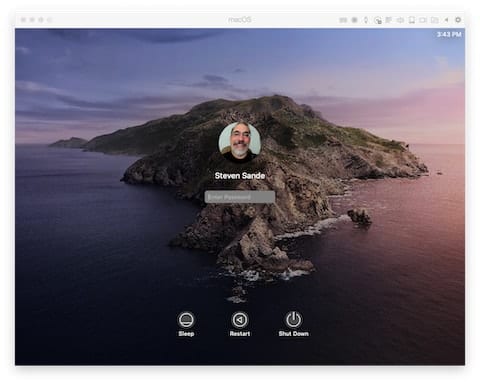
13 – Once the installation is done, you’ll need to start the virtual machine and then you’ll be greeted by the Catalina login screen:

14 – Log in and let Catalina spend some time optimizing your virtual machine. Note that both times I’ve installed a Catalina VM, the operating system asked me to submit a crash report to Apple…so something was going on during the first run of the OS.
That’s it! You now have a working, albeit slow, installation of Catalina to try out. You may find that your network connection isn’t working properly during the first run, in which case switching Parallels from the recommended Shared Network to a Bridged Network using your default adapter will bring things back to life.
As mentioned at the beginning of this article, you’ll also find that you cannot move windows more than a few pixels one way or another, and file and folder icons can be opened, but not dragged. Should you use this article to set up Catalina as a virtual machine in Parallels Desktop, be sure to bookmark it as we will update the post as bugs are worked out.


Hi Steve,
This is a wonderful article.
I had tried to install Catalina as VM in Parallels. These were the steps I did:
1. Installed High Sierra in VM.
2. Upgraded to Mojave
3. Upgraded to Catalina
Installation failed when I didn’t follow those steps.
Now, when Catalina was successfully installed, my network connections disappeared and I couldn’t add Ethernet. I did know what happen but when I asked Parallel, they couldn’t fix the issue.
I am sharing with you and your readers because I thought I was going to be successful in the installation after the long process but I wasn’t.
Finding your article gave me hope. Is your Catalina as Guest OS connected to the network? Did you have any problems in the Ethernet? How is your connection configured?
Thank you very much for your help.
Cheers,
Reign
Parallel’s workaround for the unable-to-drag issue is to configure your mouse as “Optimize for Games”. It’s inconvenient, because it traps the mouse until you hold down Control-Option, but it works. I find it more convenient to run full screen, and then four-finger swipe to go to a different screen.
I also find I must toggle my internet connection to a different one (and back) every time I restart the Catalina VM, or I can’t get online at all. It’s as you mention, but it doesn’t just fix itself after the first time.
Altogether Catalina works fine, but Parallels has some minor issues that make it a nuisance to use. I’d definitely be using this more if the bugs were cleaned up.
Window movement issue is a Parallels problem. Set Mouse to “Optimize for games”
See https://kb.parallels.com/en/124705
Only VMware Fusion handle properly controlling laboratory machines via USB. Parallels Desktop crashes all the time, losing all expensive experimental data.
How about an article on moving your existing OS to Parallels prior to installing the new one? I don’t know about anyone else, but I have some 32 bit stuff that won’t run under Catalina, so I’ll need to have a version of Mojave to host the obsolete (but still needed) applications.
I’m not sure why you’d want to. Catalina running in Parallels Desktop won’t affect your regular operating system. Unless, of course, you don’t have enough RAM to support a VM.
Eventually, I’d want to run Catalina as primary, and Mojave as ‘virtualized’. It would be very helpful for someone to check this out as part of the Catalina beta.
Might be useful for people to know that I have a machine (old Mac Pro 5,1) that won’t run Catalina native, but it works OK in Parallels, with the limitations mentioned in the article.
What I want to know is how to convert a virtual machine from Parallels into a hard drive image I can clone on my Mac, as I understand that then you can make Catalina run native…