The Apple Maps app has been included with the Mac OS since the release of OS X Mavericks. The Maps app provides mapping services that include directions, turn-by-turn navigation, transit time for car, public transit, and walking, 3D modeling of terrain and buildings, trip planning, Flyover, traffic, and quite a few other features.
While the Maps app for the Mac is a powerful mapping tool, it really shines when paired with an iPhone or iPad as a navigation aid. You can even make use of an Apple Watch to guide you to your destination.
Maps History
The Maps app hasn’t always been a hit; some would go so far as to say the original implementation was a flop, with so many errors in the underlying map base that it wasn’t uncommon to hear about people being directed onto farms, or into fields or lakes as part of a route to get from here to there.
Over the years, Apple has been making improvements to the Maps app, adding features and correcting underlying problems with the map base. Eventually, Apple came to the conclusion that mapping was more than a feature needed for Apple devices; it was a core technology needed for the future of Apple.
In 2018, Apple announced that it was rebuilding Maps from the ground up, using mapping data that it was generating from Apple mapping vehicles, as well as crowd-sourced location data gathered from participating iOS users.
Apple has already started rolling out the new mapping data, incorporating it into current versions of Maps, and slowly replacing the mapping data provided by third-party sources, such as TomTom.
Using Maps
We’re going to take a look at a few of the features found in the Maps app for the Mac, specifically for versions included with macOS Sierra and later, with an emphasis on Maps 2.1, which was released with macOS Mojave.
Maps has many uses, including looking up locations, making travel plans, and getting directions. The Maps search bar is likely to be where your trip begins.
If you haven’t already done so, launch Maps, located in the /Applications folder, or click on the Maps icon in the Dock.
Search:Maps includes a search bar located front and center at the top of the Maps window. Click in the search bar and enter the location you’re interested in. You can try searching on addresses, business names, parks, schools, street names, cities, states, and countries.
As you enter the search criteria, Maps will generate search suggestions. You can select from suggestions as a shortcut to entering a full name.
If the search query returns a result (and it usually will), Maps will display the location and drop a red pin, indicating its exact location on the map.
Favorites: Over time you’ll likely build up a number of locations you keep returning to. You can make returning to these locations easier by adding them to your list of Favorites.
- Add to Favorites: Favorites are added from within the information card associated with a red pin or a pin you drop on the map. Click or tap the information icon in the banner next to a pin. If no banner is visible, try clicking or tapping the pin to make it visible. Once the information card is displayed, select the Favorites button to add the location to your list of favorites.
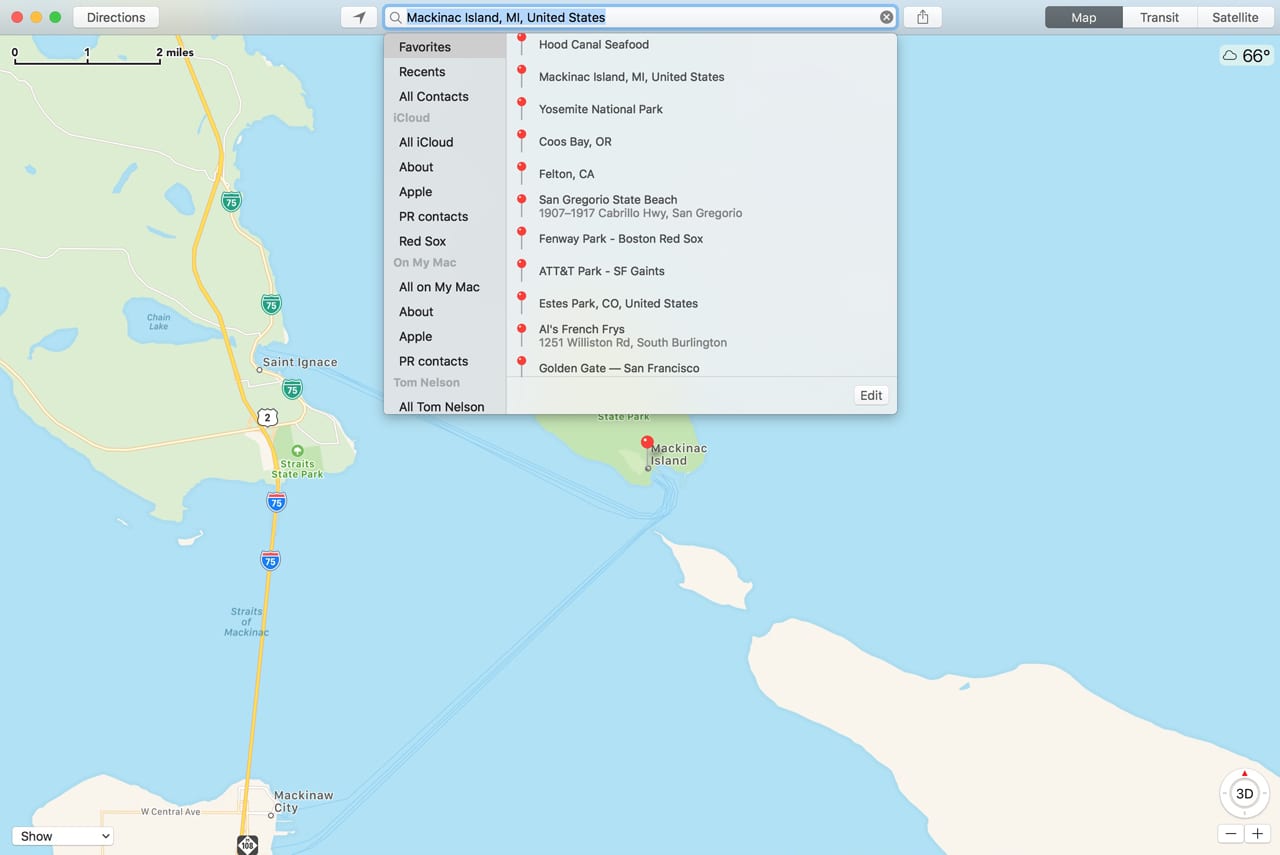
- Accessing Favorites: In the search bar, click or tap the magnifying glass. From the dropdown suggestion list, select Favorites. A list of your favorite locations will be displayed.
- Deleting or Editing Favorites: Bring the list of Favorites up using the instructions above. At the bottom of the list, click the Edit button. You can delete a Favorite by clicking or tapping the remove (X) icon to the far right of the favorite’s name. You can edit a favorite’s name by clicking or tapping its name and then entering a new name. Click the Done button when finished.
Pins: Pins are used to mark a location and are helpful for getting directions to a location, or as marking points of interest on a route. Pins you add are purple in color, while location pins generated from the search bar or favorites list are red. You can only have one purple pin in a map at a time. Pins you add are temporary, and will be deleted when you quit the Maps app. To make a pin available to use later on, add the location as a favorite.
- Add a Pin: Place the cursor at the location where you wish to add a pin. Right-click or control-click and select Drop Pin from the popup menu.
- Remove Purple Pin: Place the cursor over the purple pin and right-click or control-click. Select Remove Pin from the popup menu.
Directions: Getting directions to and from a place are one of the most often used Maps features. Maps offers a number of useful direction options. To access directions, it’s best if you start with the map oriented on one of the start or end points, but this isn’t a requirement.
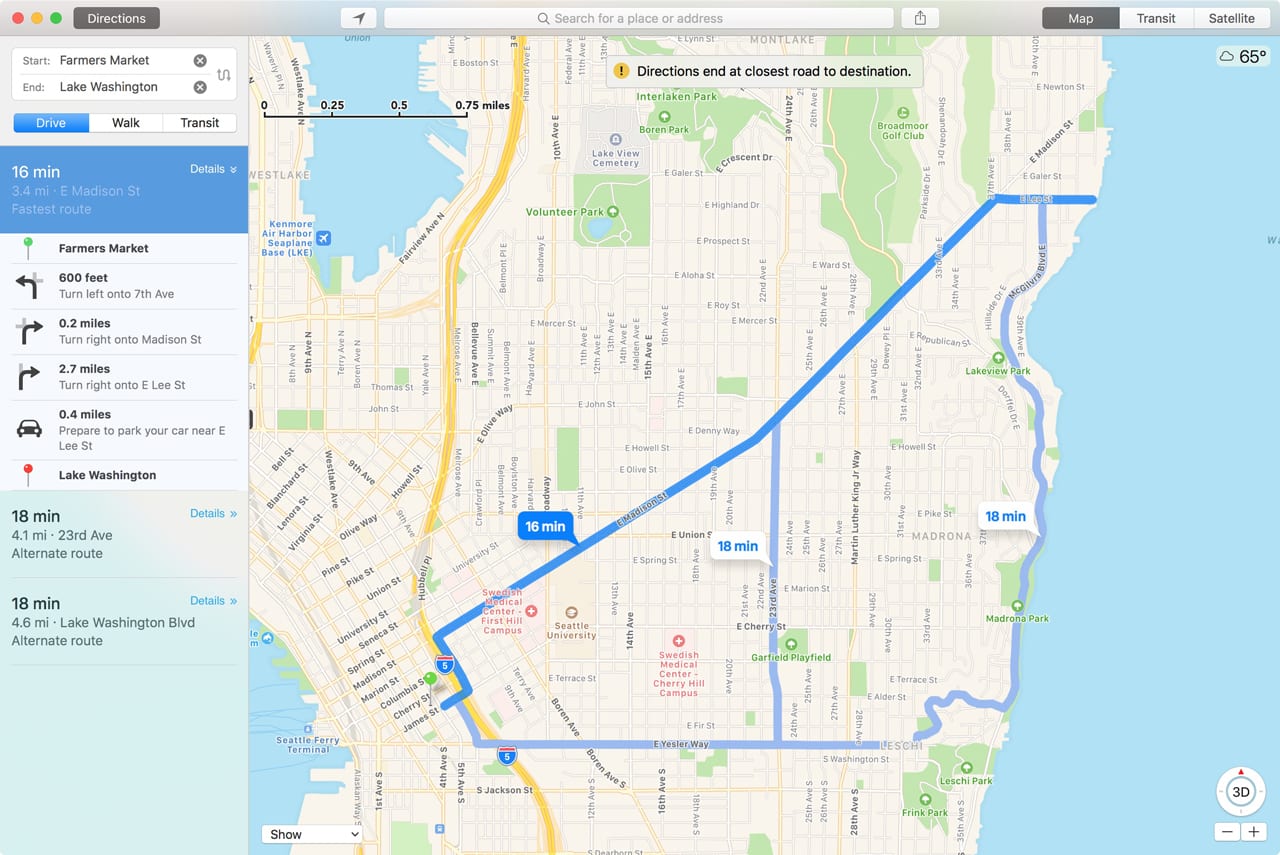
- Select the Directions button in the Maps toolbar or in your Mac’s Touch Bar (if so equipped). If a location pin is currently showing, it will be used as the end point of the directions. If you would like to use a dropped (purple) pin as the end point, select the purple pin’s information banner and choose Directions.
- Your current location as determined from
the Mac’s location service (if enabled) will be used as the start of the directions. - You can change both the start and endpoints by typing in new locations. When you manually enter a start or
end point , the text field takes on the same characteristics as the search bar, making suggestions and giving you access to your favorites and recent searches. - You can choose to have the directions tailored to driving, walking, or taking public transit by selecting the appropriate button.
- One or more directions will be listed in the Directions sidebar, each with a time estimate and distance traveled. You can see turn-by-turn instructions for each route by selecting the Details button to the right of each set of directions.
- Clicking or tapping each step in the directions will highlight that point on the map.
- Directions Options: You can tailor the directions to avoid tolls or highways, as well as change public transit options, by using the View, Driving Options or Transit Options menu.
Sending Directions and Maps to another device: Once you have one or more sets of directions you can send them to your iOS device. You must be signed in to both devices with the same iCloud account for the transfer to work.
In the Maps app, select the Share button from the toolbar or select Share from the File menu.
A list of sharing options, including a list of available iOS devices, will be displayed. Select the appropriate device from the list.
The turn-by-turn directions will be sent to your selected iOS device.
You can also save directions as a PDF by choosing File, Export as PDF.
Viewing Options
Maps offers a number of different viewing options, including the usual road map view, transits that highlight public transit routes, and satellite for that distant bird’s eye view. The views are controlled by buttons placed in the toolbar, as well as menu items in the View menu:
- Map: This view presents a standard map layout similar to what you would find in an old-fashioned printed road map you might pick up at the corner gas station. You can scroll, zoom in, zoom out, and rotate. We’ll tell you more about how to move around in the map a bit later.
- Transit: This map viewing option highlights public transit, including bus, subway, light rail, commuter trains, and ferries.
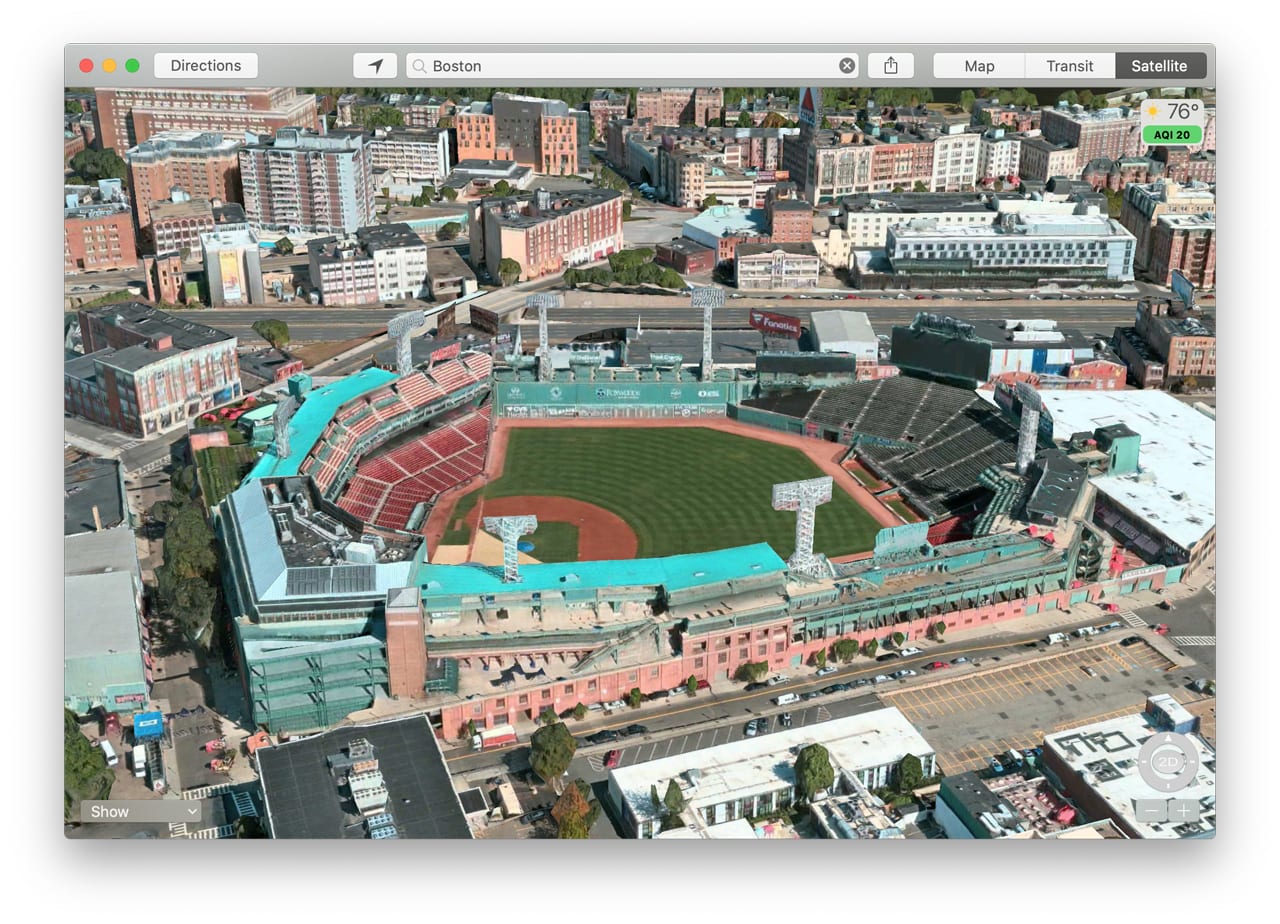
- Satellite: The map is overlaid with satellite imagery allowing you to zoom in for close-up detail of an area, such as the Red Sox dugout at Fenway Park in Boston. Or zoom back to take in an overview of the area.
You can enable additional viewing options using the Show dropdown menu, located in the bottom left corner of the map window.
Maps 2.0 (pre-macOS Mojave) Show options:
- Show Traffic: This viewing option will color code roadways by traffic congestion. Orange indicates a slowdown, red is stop-and-go traffic, a red marker indicates a traffic incident, which can be accidents, roadwork, detours, etc. Click on the incident marker to get more information.
- Show 3D Map: You can also click the 3D button in the bottom right corner of the map. When selected, 3D models of buildings, terrain, and features will be displayed on the map. You may need to zoom in to see the 3D details.
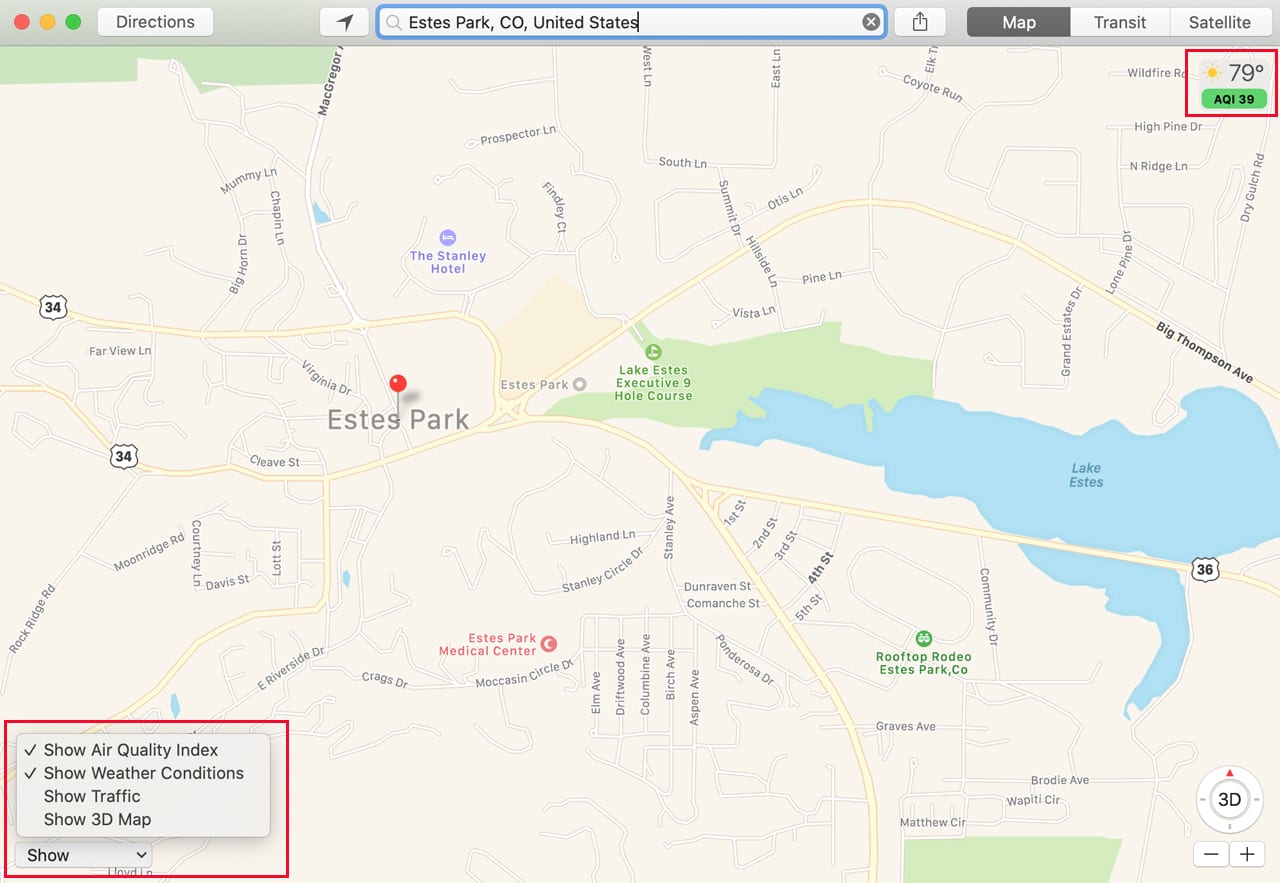
Maps 2.1 (macOS Mojave and later) adds three additional Show options:
- Show Labels: Another way to show or hide labels.
- Show Air Quality: Displays Air Quality index for the current location displayed in the map.
- Show Weather Conditions: Displays current temperature and weather conditions for the city, area, or selected landmark visible on the current map.
Flyover: Flyover is a recorded aerial view of a location making use of Maps 3D models and overlaid satellite images to produce the flyover. Flyover is available for a limited number of locations.
Flyover is a great way to experience a new location or to preview a route you’ll be taking. Besides the premade flyovers, Maps can generate an equivalent interactive 3D view that allows you to explore an area from above, with the ability to zoom, pan, tilt, and rotate.
To use the premade flyovers, enter one of the flyover locations in the search bar from the list linked above. For a quick example, try the following:
Set the View to Satellite.
Use the Show options menu to select Show 3D Map
Enter Boston, San Francisco, or even Yosemite National Park in the search bar.
Wait for the location to finish loading. You should see a banner at the bottom of the window saying “3D Flyover Tour of xxxx.” Click or tap the Start button within the banner.
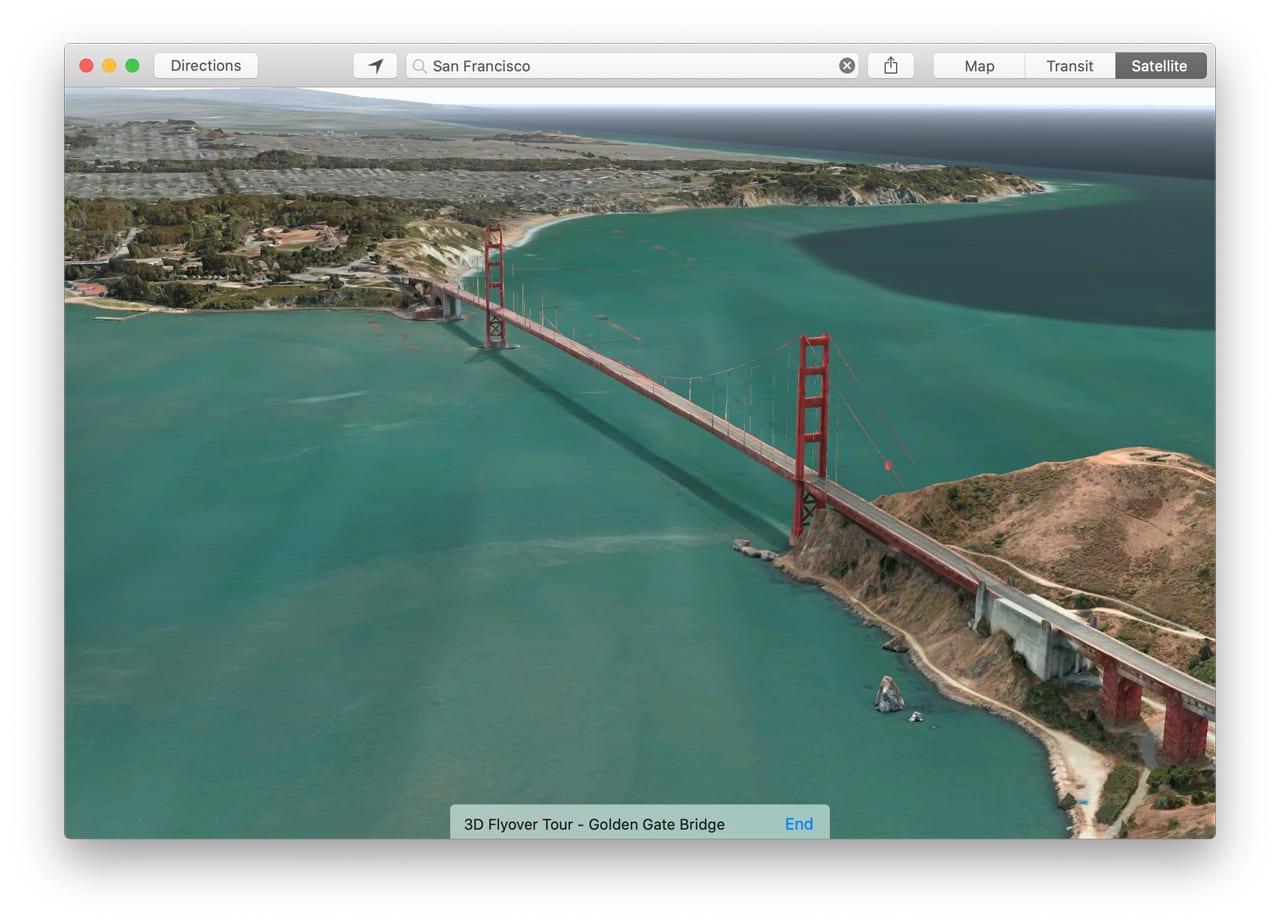
If you don’t see the Flyover banner, try selecting the info panel associated with the red pin that was placed on the map. Within the info panel should be an option to start the Flyover view. Remember, not every location has premade flyovers.
If you would like to create your own flyover, make sure you have the view set to Satellite, Show 3D Map. Next, use the following keyboard shortcuts to control the view:
- Tilt: Hold down the option key and move the pointer up to increase tilt, or down to decrease tilt.
- Rotate: Hold down the option key and move the pointer horizontally to rotate the view.
- Zoom: Hold down the shift key and scroll to zoom in or zoom out.
- Drag: Move the map in the direction you drag.
Maps for the Mac can be a handy tool for planning trips or just exploring new places. With Apple focusing on remaking Maps with an all-new set of base maps, as well as bringing new features to macOS Catalina and iOS 13, Maps may be shaking off its old reputation as an also-ran and becoming a go-to navigation app.





I do not like using any Google products (Google is EVIL)! But, in Google Maps I’m able to add stops along my route. I gather that I can’t add stops while using the Mojave Map app along my app?
If possible, how is it done?
Apple Maps still needs a lot of work if it is to be used for travel planning as opposed to finding your way about.
There are a number of apps that specialize in travel and route planning, you may find one of those being a good choice.
Tom
My main issue with Apple Maps is that it doesn’t know about bikeways and singletrack trails. However Google maps doesn’t either (it has a bicycle commute time option, but doesn’t know about optimal bike paths).