macOS Catalina is usually installed as an upgrade over an existing version of the Mac OS. But you can also perform a clean install, which places a pristine version of macOS Catalina on a drive of your choice.
A clean install of macOS Catalina may be a good choice if you’re experiencing frequent issues, such as beachballs, apps taking a long time to launch, or that quit unexpectedly. A clean install ensures that there are no old, possibly corrupt files within the operating system.
The downside to a clean install is that not only is the system a new, fresh copy, but your user data is new as well; or a better way to put it: all your data is gone, erased. It’s like the day you turned on your Mac for the first time.
You can restore your user data to a clean install but if you’re going to the effort of wiping your startup drive, you’ve probably been having some type of issue that could come back if you restore from the old data. So, starting from scratch may be the better choice.
The Clean Install Process
We’re going to look at two types of clean installs: installing on the current startup drive and installing on a drive that isn’t the startup and doesn’t contain an operating system.
The two methods are similar, though the first, installing on a startup drive, requires a number of extra steps including creating a bootable installer and erasing all data from the startup drive.
The second method has fewer steps, and erasing the target drive is optional, as long as it doesn’t contain any version of the Mac OS. If it does have an OS on it, you’ll need to erase the drive first to ensure a clean installation.
I’ve organized this guide into four sections:
- Notes and Information
- Clean Install on Non Startup Drives
- Clean Install on Startup Drives
- Post Install: Configure macOS Catalina
You should read through the Notes and Information sections, and then pick which of the two types of clean installs you with to perform. Once you finish the install, jump ahead to Post Install: Configure macOS Catalina.
Notes and Information
Backup: Let’s start with the obvious: Before you embark on any upgrade to your Mac, make sure you have one or more current backups available. Always plan on the worst-case event, and have a recovery plan to get you back up and running in the fastest time. I usually recommend having a current Time Machine backup as well as a current clone of the startup drive. You can use a number of different cloning apps, including:
Any of the above apps can create a clone of your startup drive.
APFS: The drive you’re targeting for the installation of macOS Catalina will be converted from its current formatting to the newer APFS (APple File System).
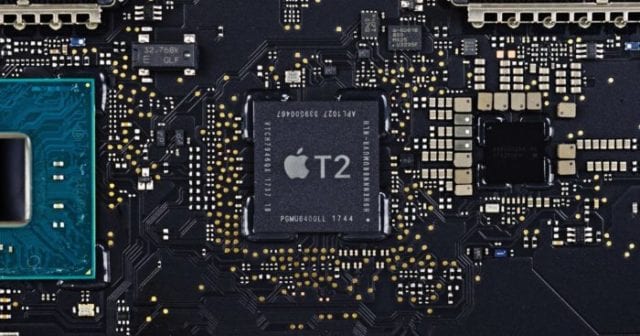
T2-equipped Macs: Booting from an external drive, including USB flash drives, requires an additional step if your Mac is equipped with a T2 security chip. Found in some recent Macs, this controller adds an additional security layer that, in its default configuration, prevents your Mac from booting from any external source.

If you’re planning to boot from the USB flash drive that contains the macOS Catalina installer, or you’re planning to install Catalina on an external drive, you need to first enable the T2 security chip option for allowing booting from an external device. To do so, follow these steps:
Start or restart your Mac while holding down the Command + R keys to boot into Recovery mode.
Once the Recovery mode’s Utilities window appears, select the Startup Security Utility from the Utilities menu.
Select the option to Allow booting from external media.
You can now shut down or restart your Mac to continue with the clean install process.
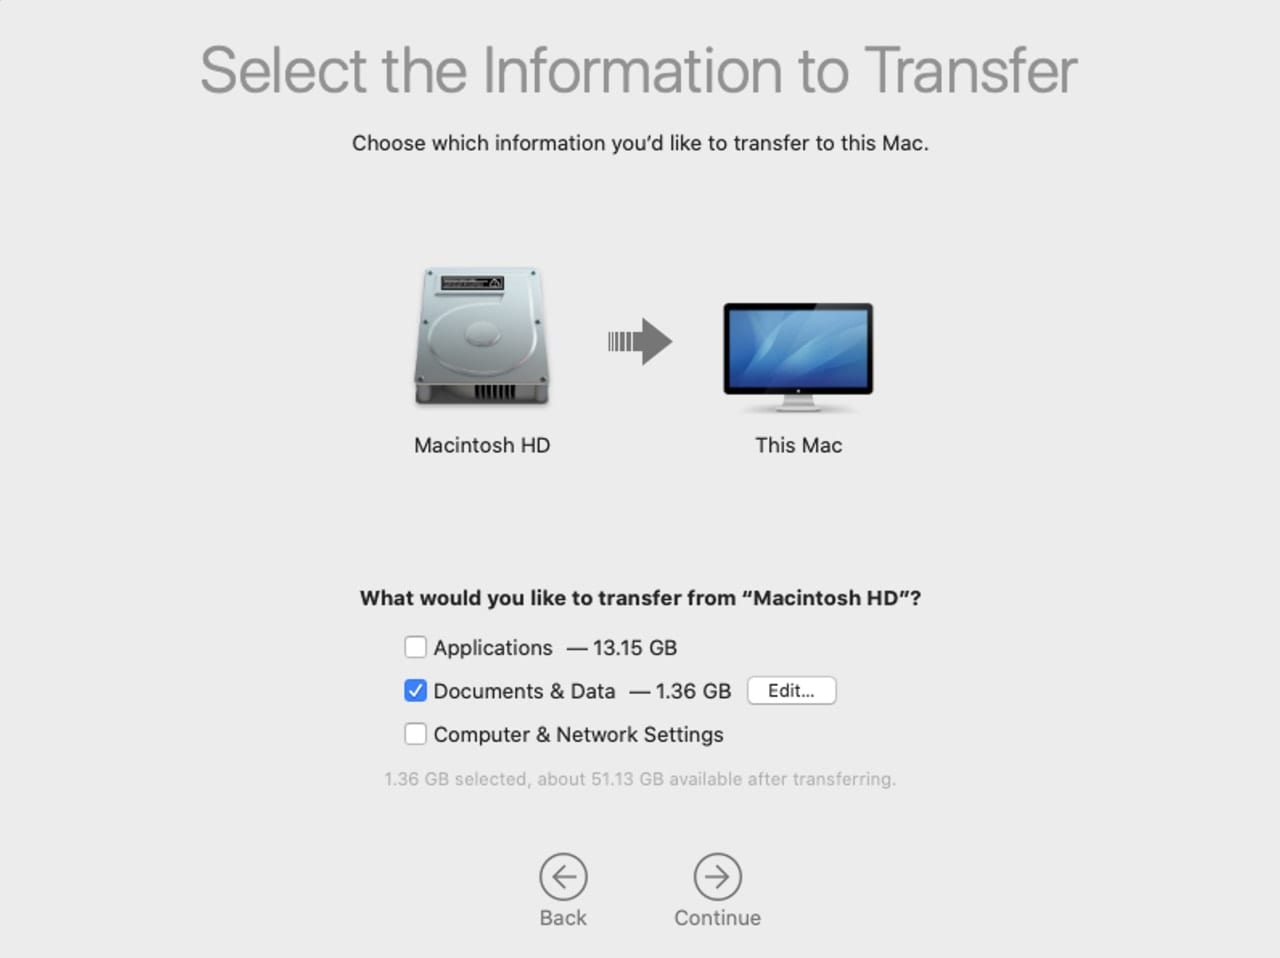
Restoring User Data: You can use the Migration Assistant to restore information from a Time Machine backup, a clone of the original drive, or from another Mac.
How to Download the macOS Catalina Installer: The installer is available from Apple as a developer’s beta or a public beta, or in its final released form from the Mac App Store (macOS High Sierra and earlier) or the Software Update preference pane (macOS Mojave and later).
The installer is downloaded and installed in the /Applications folder. It usually automatically starts up after the download completes. Be sure to quit the installer app at that point. Do not continue with the installation process until you read and understand the process outlined below.
Clean Install on Non-Startup Drive
This is the easiest of the clean install options. Use this method when the target for the macOS Catalina installation isn’t the current startup drive, such as an external drive or partition you will use to house the Catalina operating system independent of your current Mac’s startup volume.
If you need to erase the target drive (optional), you can do so now using Disk Utility.
Close all open apps.
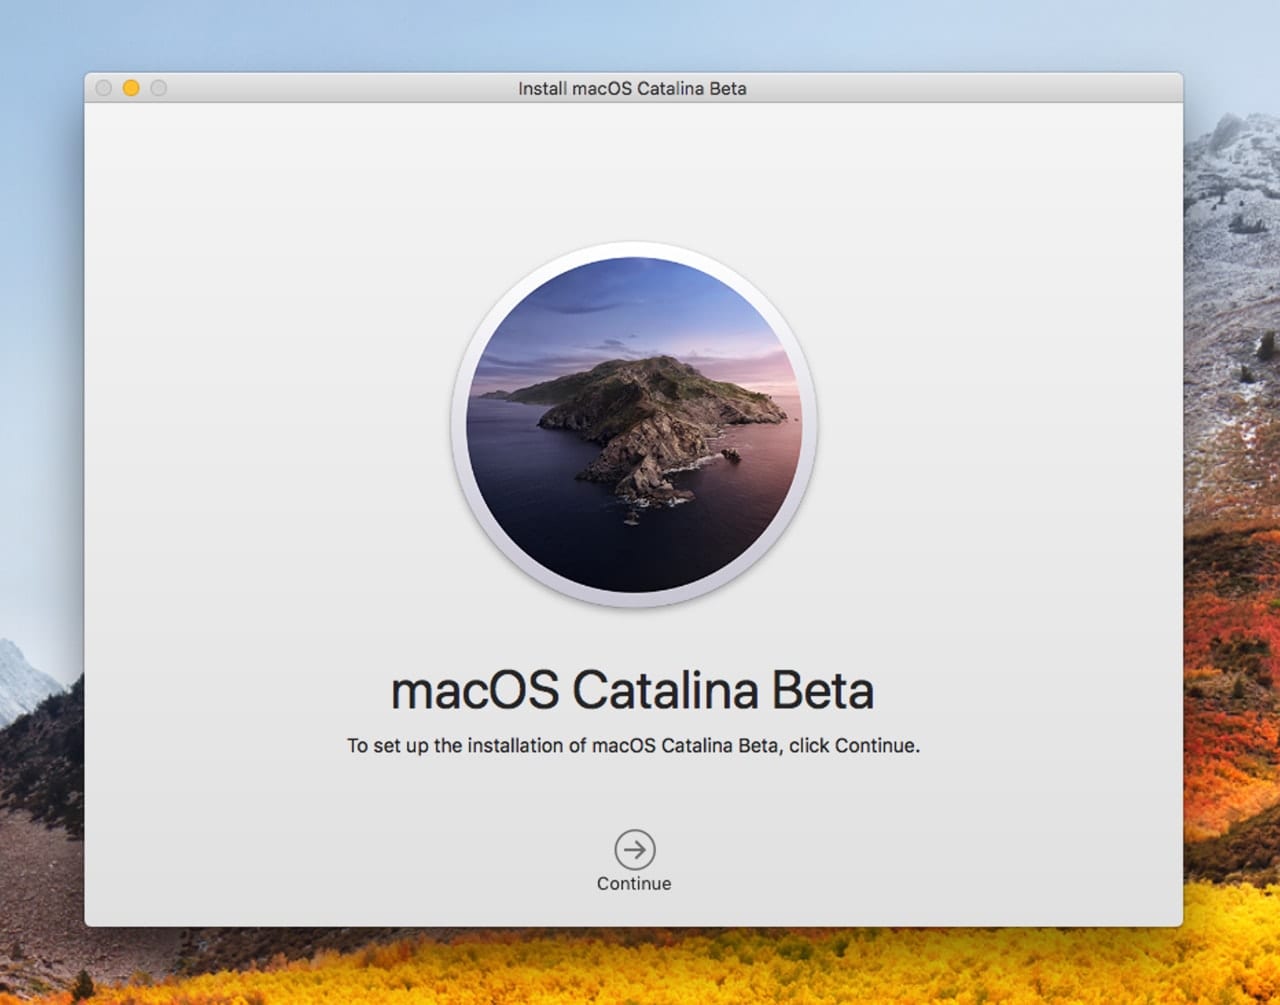
Launch the macOS Catalina installer app located in the /Applications folder. It will have a name similar to: Install macOS Catalina.
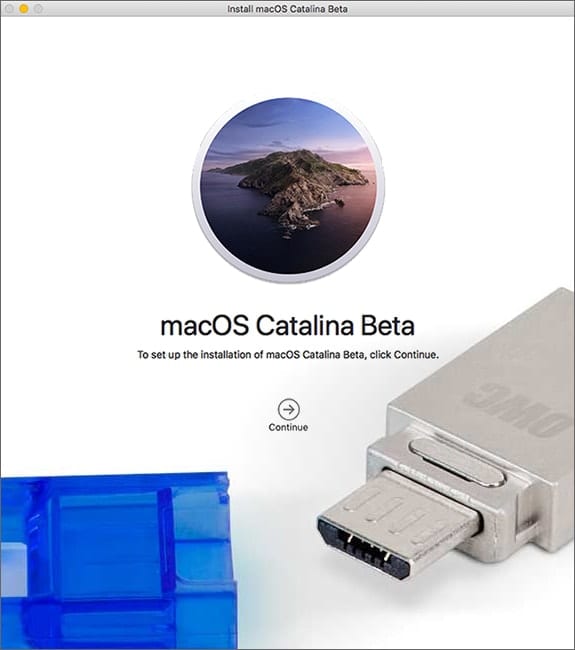
The installer will open. Click or tap the Continue button.
The software license terms will be displayed. Select the Agree button.
A sheet will drop down asking if you really and truly agree. Click or tap the Agree button.
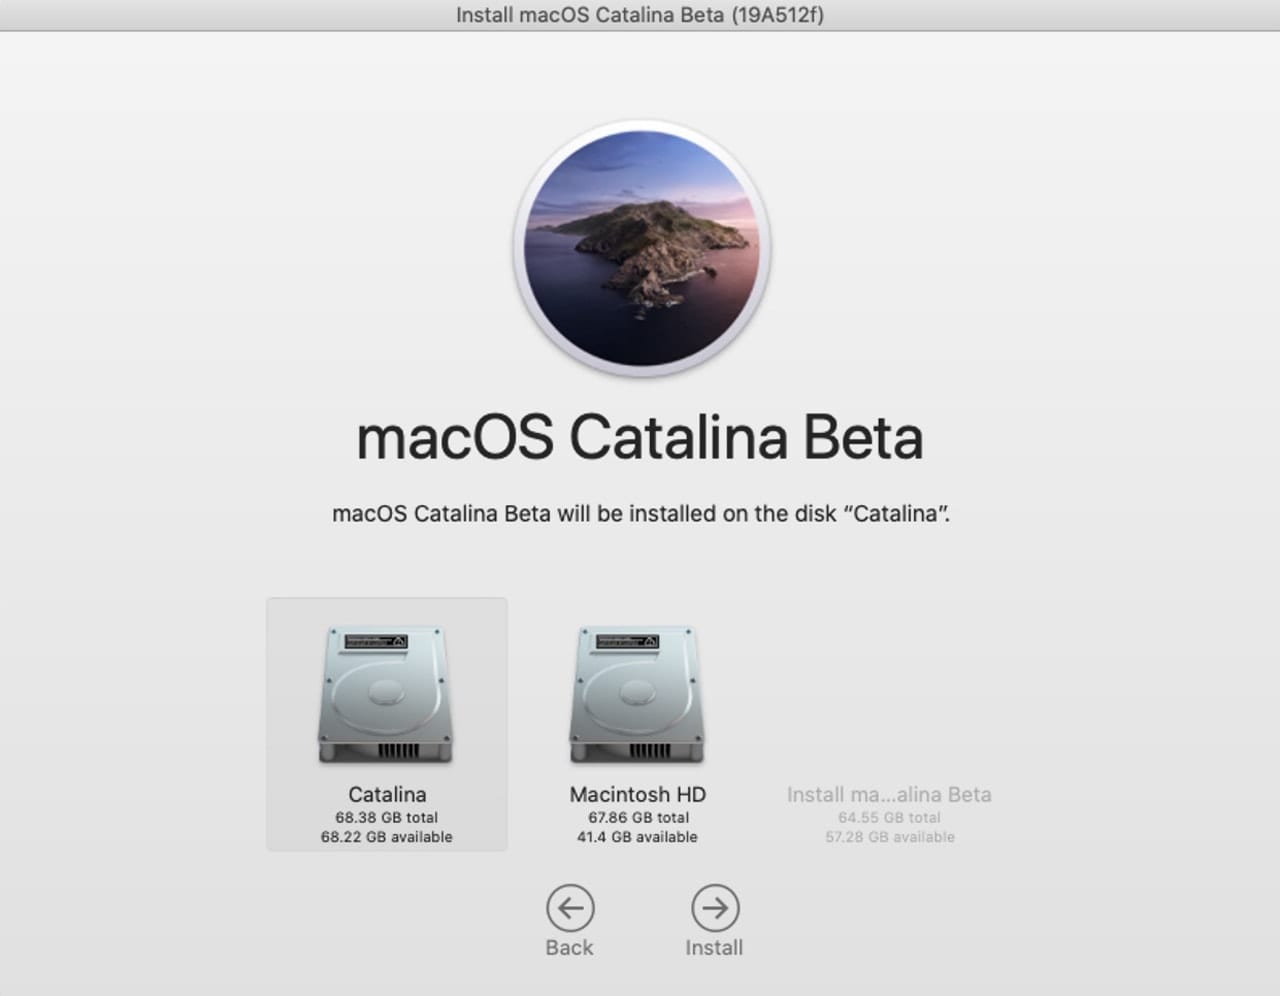
The installer will display the current startup drive as the target for the installation. Do not click the Install button; instead, click the Show All Disks button.
The installer will list the disks currently attached to your Mac that Catalina can be installed on. Select the icon for the disk you wish to be the target of the install, then click or tap the Install button.
A dialog box may open, asking you to log in as an administrator to allow the macOS Catalina installer app to add a helper tool. Enter your admin password and click the Add Helper button.
The installer will copy any needed files to the target drive. This will take a few minutes, after which your Mac will restart.
After the restart, you’ll see the Apple logo and a status bar indicating the amount of time remaining for the installation of Catalina.
Once the install completes, your Mac will restart.
Jump to the Post Install: Configuring macOS Catalina section, below.
Clean Install on the Mac’s Current Startup Drive
This type of installation of Catalina requires a few additional steps because you can’t perform a clean install on the drive you’re booted from, since the clean install process requires the target drive to be erased.
You can get around this predicament by booting from another device, such as another drive with a Mac operating system, or from a bootable USB flash drive that contains the Catalina installer.
In this guide, we’ll assume you’re using a bootable USB flash drive that contains the Catalina installer. If you don’t have the bootable flash drive yet, you can find instructions on how to create one in the guide:
How to Create a Bootable macOS Catalina Installer
Once you finish making the bootable flash drive, come on back and continue from here.
With the bootable flash drive you just created connected to your Mac, restart your Mac and hold down the option key.
Continue to hold down the option key till you see the Mac’s boot manager displaying icons for each device you can start up from.
Use the arrow keys to select the USB flash drive, and then press return to start up from the flash drive.
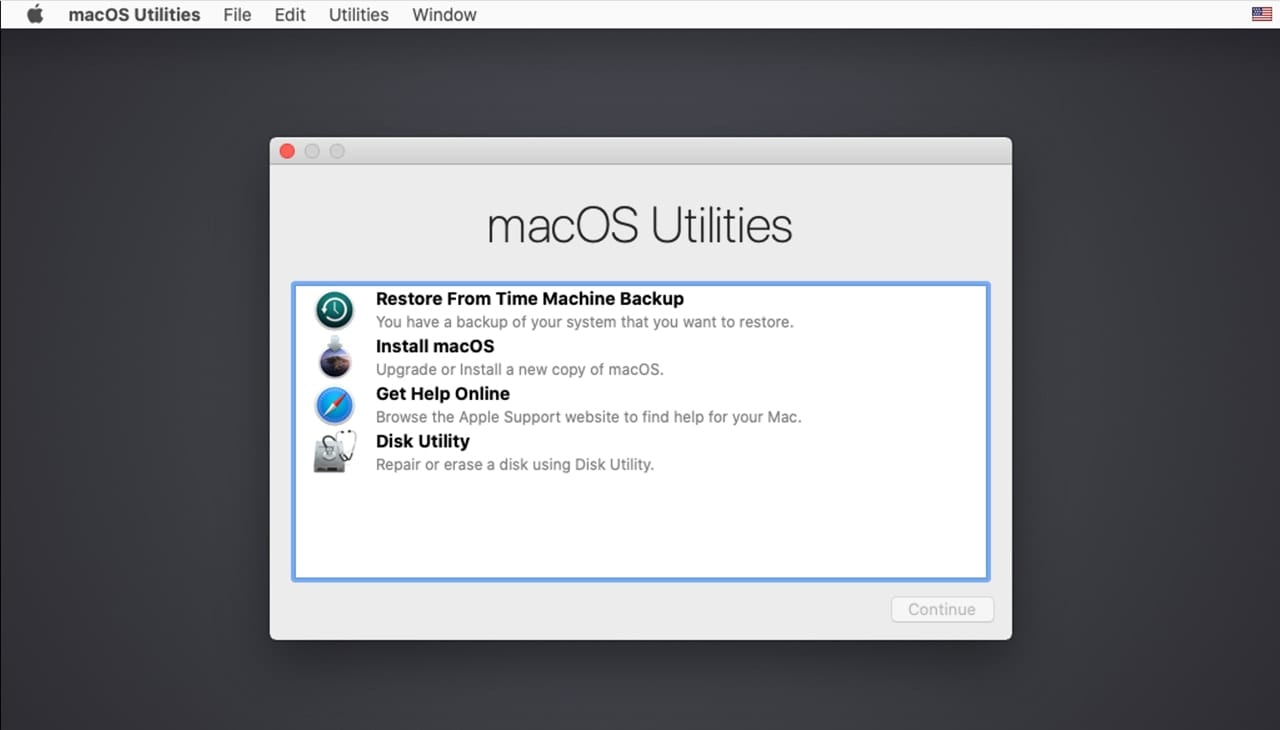
Your Mac may take longer than usual to start from the USB flash drive, but eventually you’ll see the macOS Utilities window.
Select Disk Utility from the macOS Utilities window, then click or tap the Continue button.
In the Disk Utility window, select the drive you wish to perform the clean install on.
Warning: The selected drive and all the data it contains will be erased in the next step.
From the Disk Utility toolbar, select the Erase tool.
Give the drive a name, I’ve chosen Catalina since I have other drives containing various operating systems. After you name the drive, click the Erase button.
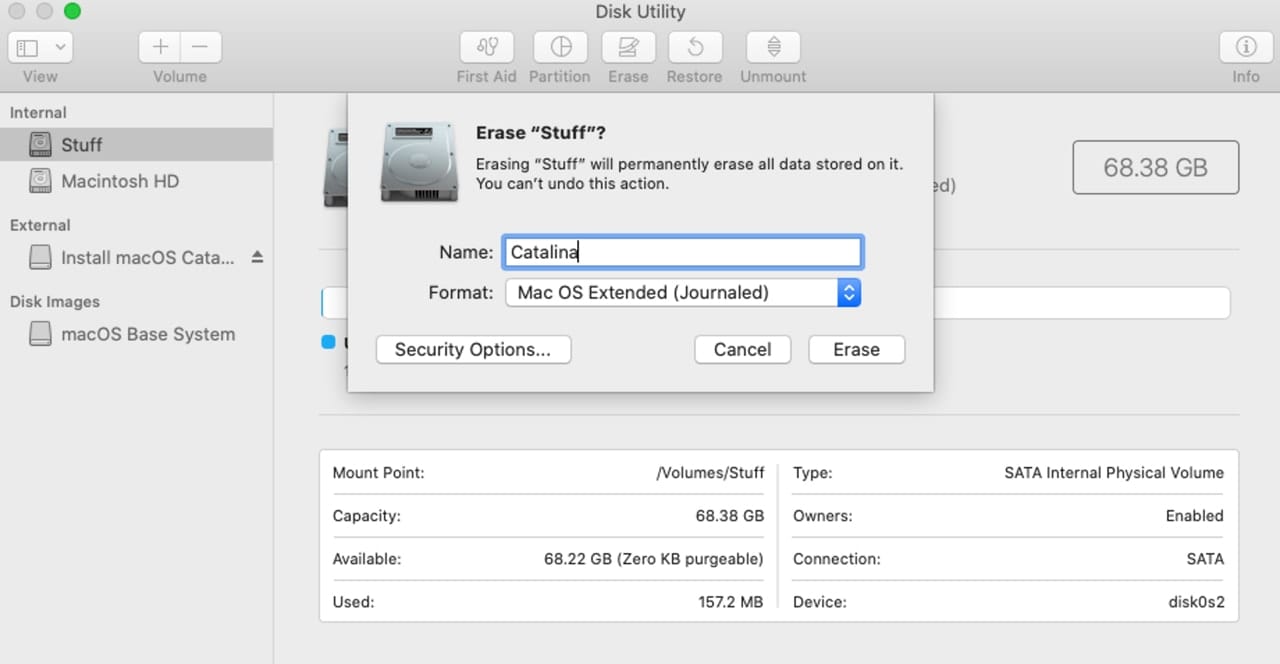
When the erase process is complete, click the Done button.
Select Quit Disk Utility from the Disk Utility menu.
You’ll be returned to the macOS Utilities window.
Select Install macOS, then click the Continue button.
After a few moments the macOS Catalina installer will start up.
Click or tap the Continue button to proceed with the installation of macOS Catalina.
The license terms will be displayed. Click the Agree button.
A sheet will open, asking if you’re sure you really, really agree with the license terms. Click the Agree button.
The installer should display the drives you can use as the target for the installation. If you only see a single drive, you may need to click the Show All Disks text. Once the disks are displayed, select the drive you wish to install macOS Catalina on, then click the Install button.
Installation of macOS Catalina will begin, with the needed files copied to the selected startup drive. This can take a few minutes. Once all the needed files are copied over, your Mac will restart.
After the restart, you should see the Apple logo and a status bar indicating the amount of time remaining for the installation of Catalina. Don’t believe the estimated time; it can take more time or less time, but it never takes the estimated amount of time.
Once the install completes, your Mac will restart.
Proceed to the next section.
Post Install: Configuring macOS Catalina
Because this is a clean install, Catalina has no previous preferences to fall back on, so you’ll need to set up the Mac the way it was the first time you turned it on.
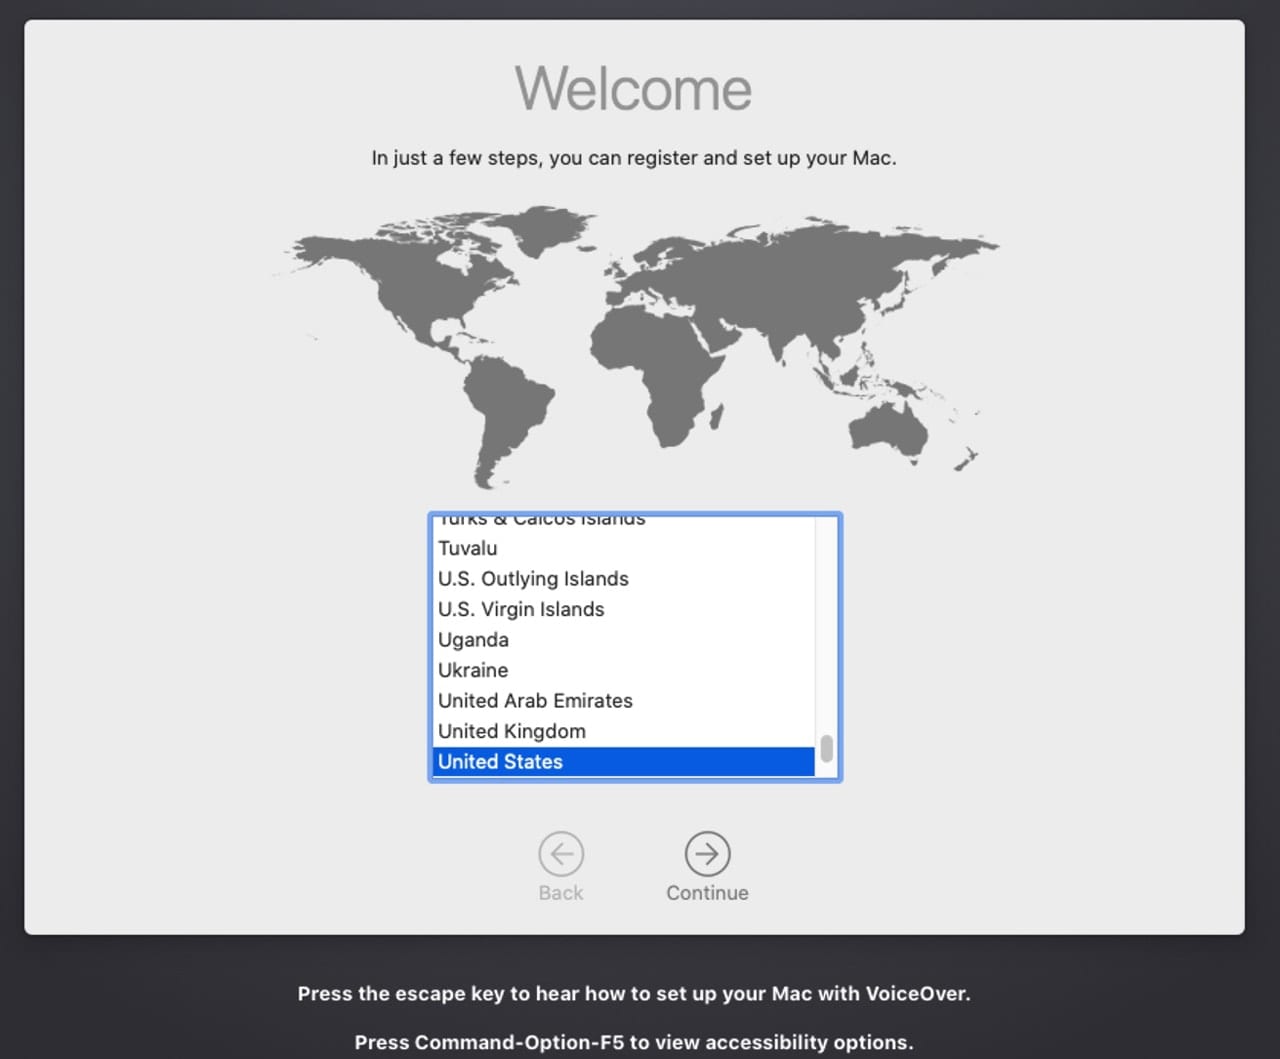
Your Mac will display the Welcome screen, where you can select the country where you’re using your Mac. Once you make a selection, click the Continue button.
The Data & Privacy screen will appear, providing information about how and when Apple collects personal information. You can find details about Apple’s privacy polices by clicking the Learn More text. Otherwise, click the Continue button.
Next up is the option to transfer information to this Mac from another Mac, a Time Machine Backup or a drive on this Mac that contains a bootable macOS. You can also transfer data from a Windows PC, or you can choose not to transfer data at this time. In this example, I’m going to choose Don’t transfer any information now. I prefer to get the Mac set up and working the way I like, and then use the Migration Assistant app, included with the macOS, to transfer any needed data. Make your selection and click the Continue button.
The macOS would like to know your AppleID so that iCloud, iTunes, iMessages, Facetime, and other apps that make use of your AppleID can be configured. You don’t have to supply an AppleID at this time, but you may need to later if you make use of any of the those services and apps. To bypass the AppleID entry, click the Set Up Later text; otherwise, enter your AppleID and click the Continue button.
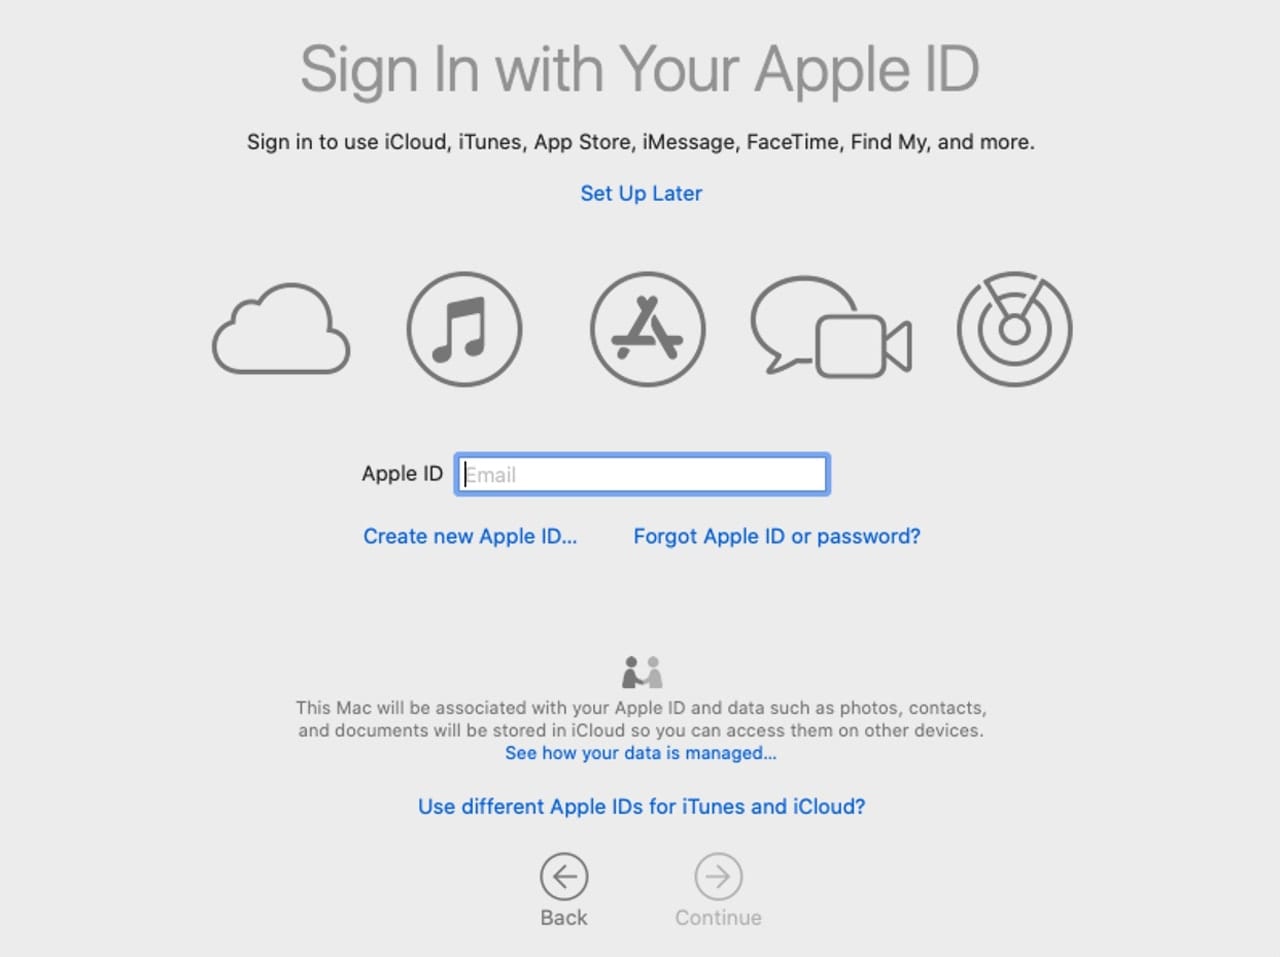
Next you’ll be asked for your AppleID password. Enter the information and click the Continue button.
If you have two-factor authentication enabled, you’ll be asked to enter the verification code sent to you. Enter the code and the Mac will verify the data and continue on to the next phase of installation.
Terms & Conditions for the use of the macOS software as well as the use of Game Center will be made available. If you agree to the terms, click the Agree button.
A sheet will drop down asking if you’re sure you want to agree to these terms. Click the Agree button.
You’ll then be asked to create a computer account. The account you create will be the administrator account. You can set up additional accounts later on.
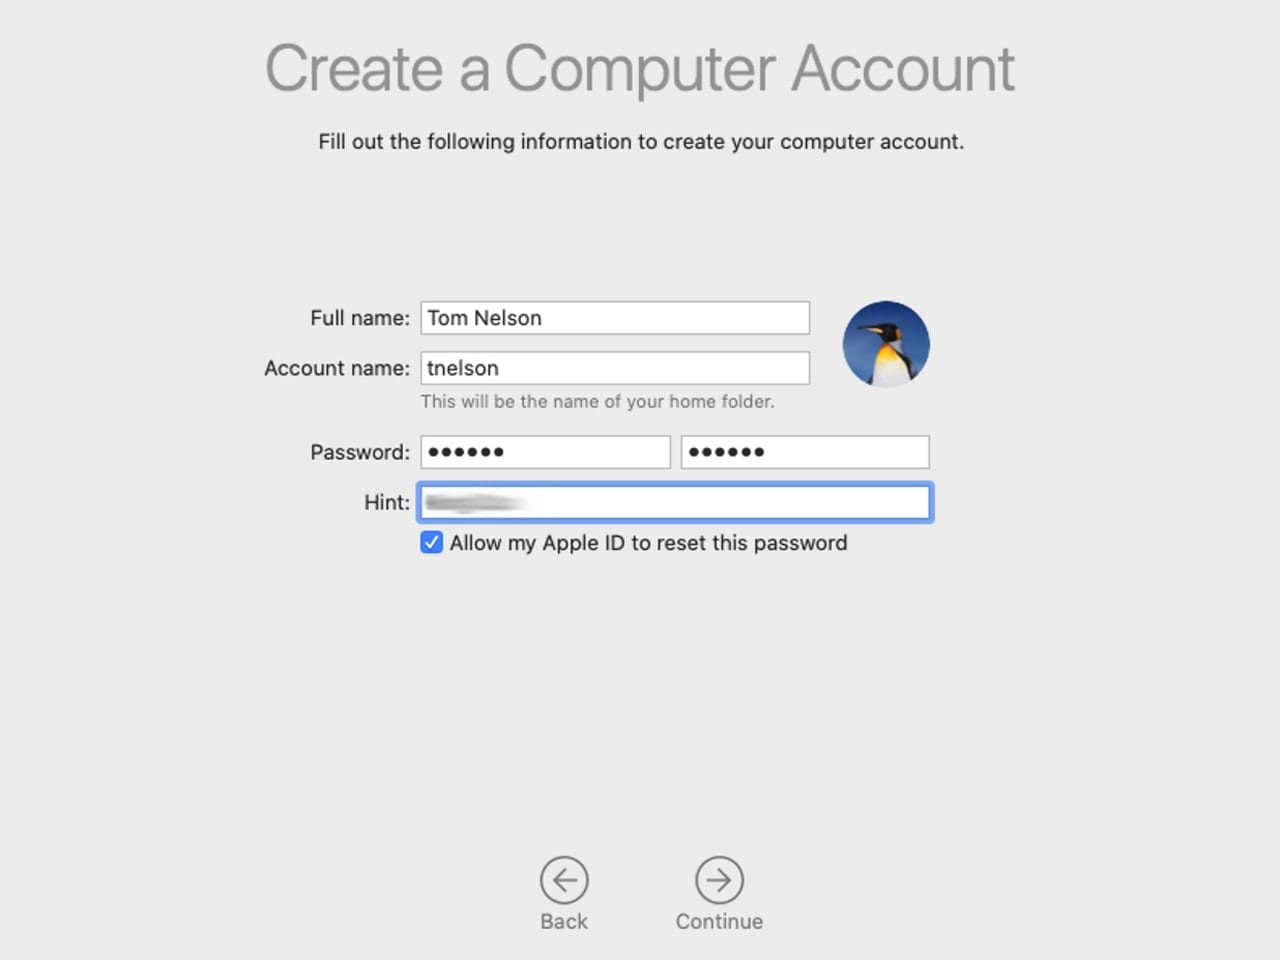
Enter the full name of the administrator account:
Enter the account name: This used to be called the Short Name and was usually a contraction of the full name without any spaces or punctuation. You can enter any name you wish, but I suggest a short name without any spaces, such as your first initial and last name.
Enter a password for the administrator account, and then reenter it to verify the password.
Enter a Hint to be used should you ever forget the password. Do not enter the password itself as a hint, but something meaningful that will help jog your memory.
If you entered your AppleID in an earlier step, you’ll see a checkbox with the text Allow my Apple ID to reset this password. If you select this option and ever forget your password, you’ll be offered the option to enter your AppleID information to start a password reset process.
Enter all the required information, then click Continue.
The OS will create the administrator user account.
The Express Setup option will display, which configures Siri to be enabled, allow Maps and Find My Mac to use location services, and allow Apple to gather analytic usage data from the Mac. You can change these settings later, or click the Customize Settings text to make changes now. When you’re ready, click the Continue button.
Screen Time setup options will be displayed. You can find out more about Screen Time in the guide: macOS Catalina Features: Using Screen Time. Click the Continue button when ready.
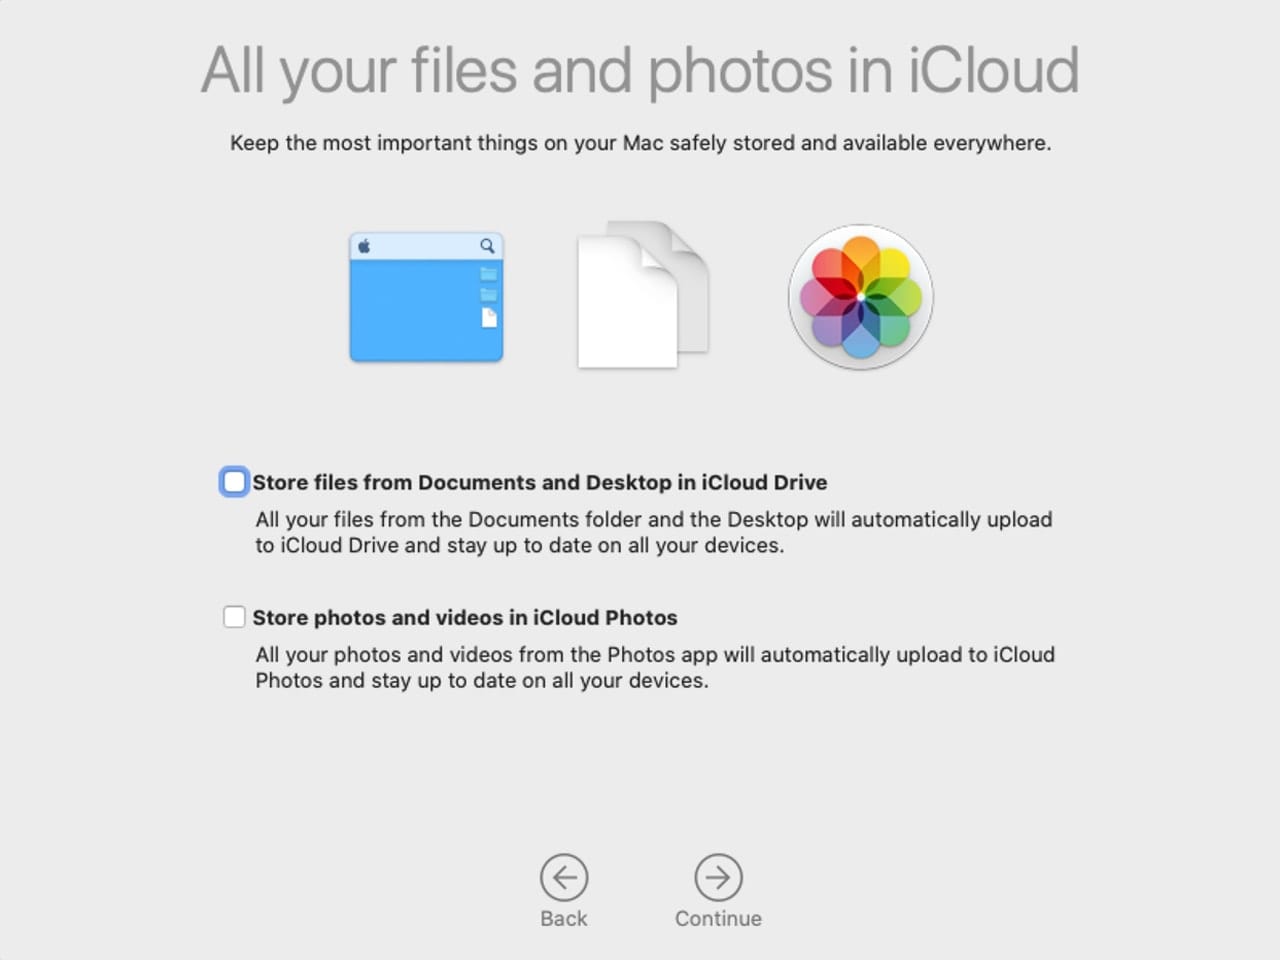
If you supplied your AppleID in an earlier step, you’ll be able to configure iCloud storage options; you can choose to store all the files from your Documents and Desktop folders in iCloud, as well as store your photos and videos from the Photos app in iCloud. This allows you to access the files from any Apple device you may use. Make your selections and click Continue.
Choose your Theme: macOS Catalina supports Light mode, Dark mode, and Auto, which will change between Light and Dark modes depending on the time of day. Make your choice and click the Continue button.
The setup of macOS Catalina is complete and the desktop should now appear.
You’re ready to start using macOS Catalina. Spend a bit of time and discover what’s new.
Let us know how you like Catalina, as well as any issues you may encounter.


What do you do when it says RecoveryOS has no access to change startup utility? Its using internet recovery instead, which won’t let you use the startup utility. This Mac came with piss poor Catalina, so I USB boot replaced it with Mojave, which was extremely painstaking. I guess it did something with the recovery partition?
Thanks for an excellent and thorough guide. This was very helpful!
After formatting with APFS I have two “partitions”: SSD and SSD – Data. Is there any benefit to installing Catalina on one or the other?
Found it: It’s Data. After waiting for a while I figured I’d give SSD a shot and if things didn’t work, I’d just reformat. But in trying I got an error that I could not use SSD — so question answered.
I may have spoken too soon: The page about the “read-only system volume” said that Catalina should reside there, but the installer would not let me install Catalina there. I got a message something like “this is part of an incomplete volume and you can’t install here”. Something like that.
Installing on SSD-Data works. I wonder if this is because it’s not an upgrade: I created a bootable thumb drive and formatted my SSD from there. Anyway, things are working but that doesn’t mean I would not prefer to have the OS on the read-only SSD. I have to leave now and attack it more tomorrow.
After reading your great article and the excellent comments, I am trying to determine best/safest practices for installing a new OS on the internal startup drive (especially Catalina). Since Catalina has major implications such as iTunes replacement, it seems the safest approach would be the following:
Clone current OS to backup external drive #1.
Installing Catalina on a newly formatted external drive #2
Configure Catalina with migrated user data and setup/verify apps
Erase internal startup drive
Clone drive #2 to internal startup drive
Am I missing anything or is there a better approach?
How I got around the ‘problem’ is that because I use Parallels Desktop, I’ve created a VM which will happily accept 32bit software (mine’s Yosemite as it caters for other legacy software).
Works a treat and is available when I want it. Catalina seems to work fine too.
A very nice guide, and for the most part, a straight upgrade works. However, clean install to default as a new/sale of your Mac doesn’t quite work the same.
Catalina creates a previous owner profile with Applications, System and Library etc. But it creates it with your boot HD name and ‘-Data’. You can verify this with ‘Disk Utility’…
Confirmed on the full release …
Jim
A word of CAUTION – – – If you are performing a clean install of Catalina (erasing your drive before installing Catalina) you will NOT be able to carry over your ITUNES DATABASE! Catalina uses a new Music App instead, and its Library database has a different structure than the old ITUNES LIBRARY DATABASE. If you upgrade to Catalina from an existing OS, the database is converted automatically during the process, and the new Music App works perfectly, just like iTunes, with all your playlists, star ratings, etc. BUT, if you have performed a clean install of Catalina and then try to copy in your Music folder contents, with the iTunes Library database, you will hit a dead end! Catalina will NOT be able to read it or recognize it! I do not know of any way to convert the iTunes database to the Music database without letting the OS do it automatically when upgrading from an older OS.
THEREFORE, you really need two laptops to do it right!
Step 1: Backup all your data to an external drive.
Step 2: Erase Computer 1 and perform a clean install of Catalina
Step 3: Delete Music Folder contents of Computer 2.
Step 4: Copy Music folder contents from the external drive to Computer 2.
Step 5: Upgrade Computer 2 to Catalina from previous OS.
Step 6: Copy contents of the new Music folder back to external drive.
Step 7: Copy contents of Music drive back to Computer 1 (that has the clean install of Catalina).
If anyone knows a different/better way to accomplish this, please let me know. But that is what I did and it worked like a charm. Just requires patience and 2 computers that you are willing to have running on Catalina. Phew!
You are right! It’s a mess. Once I learned the structure and location of the files for Music, TV and Podcasts, I erased the drive again and reinstalled the OS. I then copied the Movies, etc into the TV directory, and the Music into the Music media folder. I then open each app and had it import those files. I am glad I had two complete backups!
Isn’t easier to do a regular upgrade on the machine beforehand, do an additional backup and after that proceed the clean install? Therefore the music library should be upgraded properly and could be restored through the backup.
This way you won’t need two machines do get the job done.
Or do I miss something?
Any advice is very welcome. I’m still stuck at 10.14.6.
Ostensibly you could simply do an upgrade in order to avoid the iTunes issues, but then if you still wanted a clean install, do that after you’ve already upgraded, right?
Thank for a thorough review and step-by-step instructions. The hardest part for me was making sure I signed out of apps that needed that. (Microsoft Office 365, Adobe Creative Cloud, Capture One). Then, how to remember what apps I had that were not downloaded directly from the App Store. Having a duplicate of the Macintosh HD drive using SuperDuper saved all my previous downloads and apps for reference. I also did a screen shot of panes of my Applications folder and saved them.
The only issue I still have is after reinstalling many of the apps, I need to figure out where previous scripts and preferences are stored.
As an aside, Catalina will not show Library as a View option in Finder. I did see on your web site an option: once Library is opened using the Option, create an alias.
Thank you again!
This is undoubtedly the best advice on the processes and techniques I have seen on updating a Mac operating system.
Along with that, it’s the best way I’ve seen of creating a bootable USB drive.
I will be merging all the pdfs produced in Safari and keeping these as a reference.
Thank you
Thanks Brian, it is great to know we can be of help!
Thank you for such a complete review. After reading this and the recent post about creating a bootable thumb drive, I plan to do a clean install when Catalina is released. I am concerned about the various programs that will require deactivation and reactivation to work after erasing everything and reinstalling. Is there a list? I suspect it includes several programs that allow limited installs. Is there, perhaps, a directory in Library/Application Support or ~User/Library that can be saved and copied to get reinstalled programs to work?
I have had mixed sucess with being able to move apps from one install to another and have them continue to work. With some apps the licensing system is ver lax and just coping the various places where the app installed components is good enough. In other cases the apps are much more restrictive and you will need to reactivate the license system.
Over the years I’ve just decided the best course is to keep all my license information in a safe place so I can reactivate when needed. If you have apps with limit on where they can be installed, make sure you deactivate the app before you do the clean install.
And don’t forget the app manufacturer can usually help should you run into a problem with an app after a clean install.
And last but not least, make sure you have a working backup before you start the clean install. You may find an app you need just won’t work with the new OS and you will need to go back to your previous version.
Tom
I didn’t read the article thoroughly but wanted to point out (in case the article didn’t mention it) that reverting back to an earlier version of macOS after installing Catalina is not a trivial matter. It took several hours on the phone with Apple to accomplish it.
Never run a Beta on your production or only machine. That is why this article talked about installing it on an external drive.
Easy!