


Starting with macOS Catalina, Screen Time is making the transition from an iOS app to the Mac. Screen Time can monitor app and device usage. Mac users can think of it as similar to the old Parental Controls used to restrict and monitor Mac usage for children.
Screen Time does a lot more than just limit access, though. It provides daily and weekly reports you can use to see just how you’re using your Mac, as well as any of your iOS devices. That’s right; you can use Screen Time to monitor and set limits for other devices you use, or that other family members use.
Screen Time replaces Managed Accounts and Parental Controls on the Mac, though when I looked at the beta of Catalina, I didn’t see any way to transfer Managed Accounts or Parental Control settings to Screen Time. It’s very early in the beta process, though.
Here’s an overview of an early beta of Screen Time and what it can do for you.
Screen Time
Screen Time is both a monitor that can build usage reports for each user account, reporting how much time is spent with various apps, and a way to limit app usage, and limit communications, either in general or from specific contacts. It’s also capable of enforcing some much-needed downtime, ensuring that users spend some time away from their Mac, iPhone, or iPad, doing other things.
All of the Screen Time settings on the Mac are controlled via a preference pane. This includes creating limits, as well as viewing usage reports. In order for Screen Time to do its thing, the app needs to be enabled.
Turning Screen Time On or Off
Launch System Preferences by clicking the System Preferences icon in the Dock, or selecting System Preferences from the Apple menu.
Select the Screen Time preference pane in the System Preferences window.
If this is the first time you’re accessing the Screen Time preference pane, you may see a list of Screen Time features. Click the Continue button.
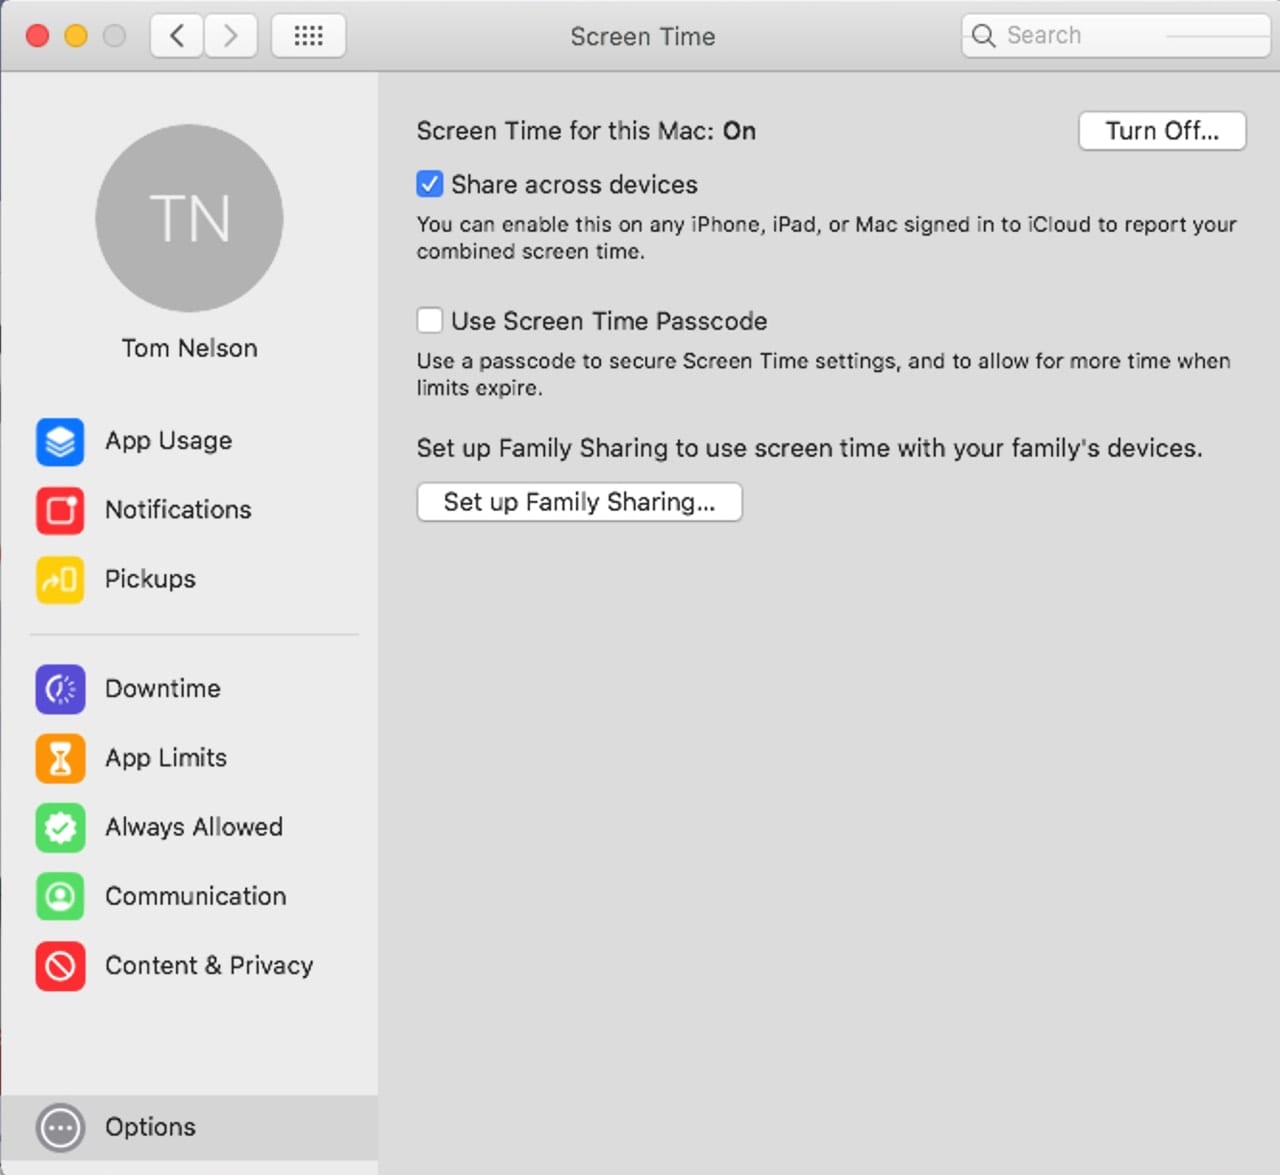
Click or tap the Options button near the bottom left corner.
Click or tap the Turn On button to enable Screen Time for your Mac, or the Turn Off button to disable the service.
Screen Time Across All Your Devices
Screen Time works across all of your Mac and iOS devices, allowing you to monitor how much time you’re spending with apps, social media, entertainment, or other services, no matter which device you’re using. Screen Time reports are shared via iCloud, and require that you be signed in with the same Apple account on each device.
To enable Screen Time across devices, return to the Screen Time Options screen and place a checkmark in the Share Across Devices box.
Don’t forget you need to be logged into the same iCloud account for sharing.
Password Protect Screen Time
Screen Time settings can be password protected, preventing anyone who doesn’t know the password from making changes. This can be helpful for those using Screen Time to monitor and control usage for their children. The password can also be used to extend the time an app may be used. This is a very handy feature when the time limit on an app is up, but you need a few more minutes to complete a task.
From Screen Time’s Options screen, place a checkmark in the Use Screen Time Passcode box.
A sheet will drop down asking for a four-digit passcode to be entered. Supply a passcode. You’ll be asked to reenter the passcode. Once it’s reentered, the passcode will be saved.
Viewing Screen Time Reports
Screen Time reports are available via the Screen Time preference pane, and allow you to view daily and weekly reports.
Open the Screen Time preference pane.
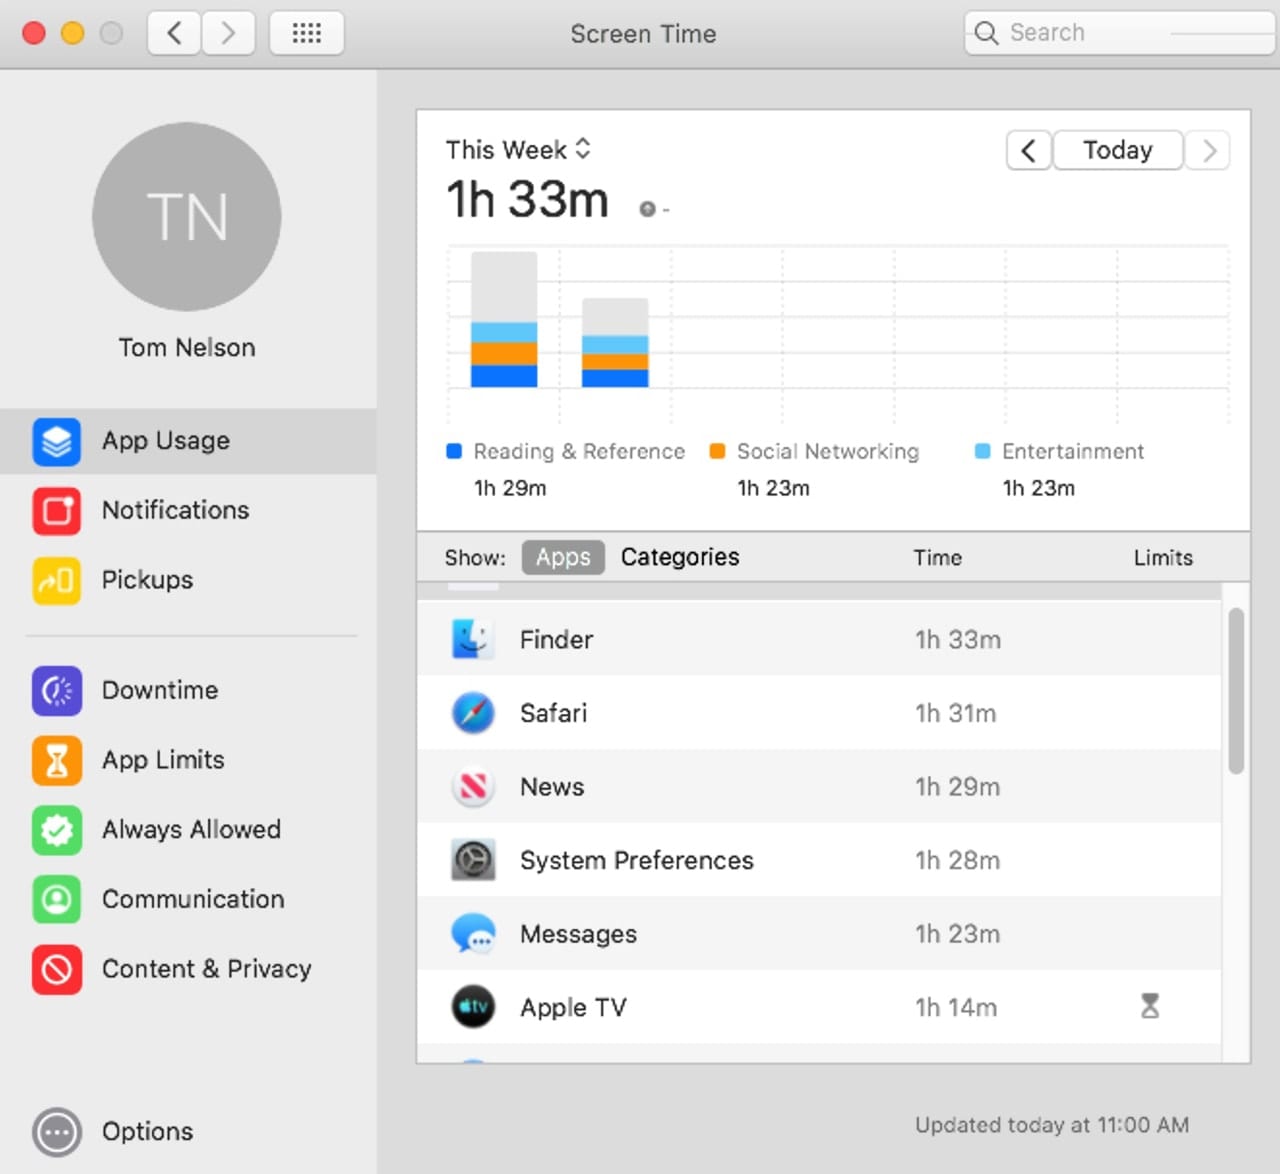
App Usage: In the left-hand sidebar, select App Usage.
The central part of the Screen Time preference pane will display a graph showing app usage over seven days. Each day in the graph can be selected to display the reports for that day. Each day’s reports can be shown by app name or by category, such as productivity or entertainment.
Reports display the amount of time used for each app or category, as well as any limits that have been set.
Notifications: From the left-hand sidebar, select Notifications.
Notification reports tell you how often you’re receiving notifications from apps and services. While being notified of new mail or new web site content can be helpful, it’s also easy to be inundated by too many notifications. If you’re feeling a bit overwhelmed, use the Notification report to discover how many notifications you’re receiving and which apps are sending them to you.
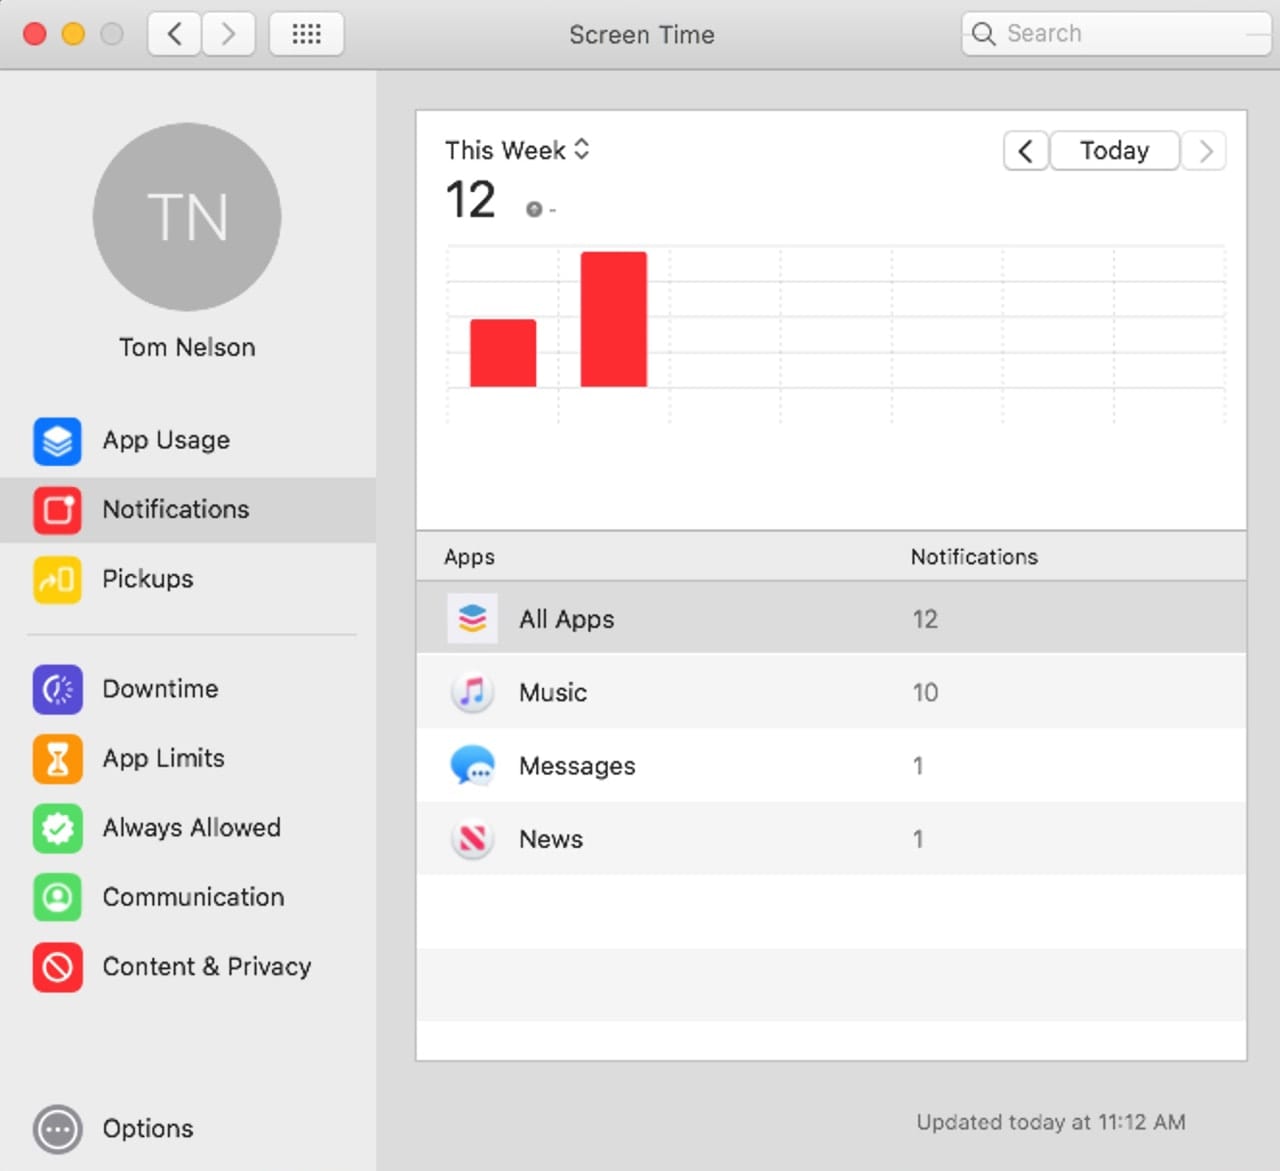
Screen Time will show a graph displaying the number of notifications you receive by the week or day. You can highlight individual days to see the number of notifications by app or service.
Pickups: From the left-hand sidebar, select Pickups.
Pickups are primarily used to view how many times you have picked up your iOS device. In order to see the pickups report, you need to be sharing Screen Time data (see Screen Time Across All Your Devices, above).
There may be a Mac equivalent to Pickups since there are occasional Pickups being reported in the beta. As best I can tell, sometimes when you switch between apps a pickup is counted, but it may just be a beta bug.
Setting Screen Time Limits
Screen Time supports configuring a number of different types of limits including creating a schedule for when apps can be used, explicit content restrictions, downloads, purchases, communications, and more.
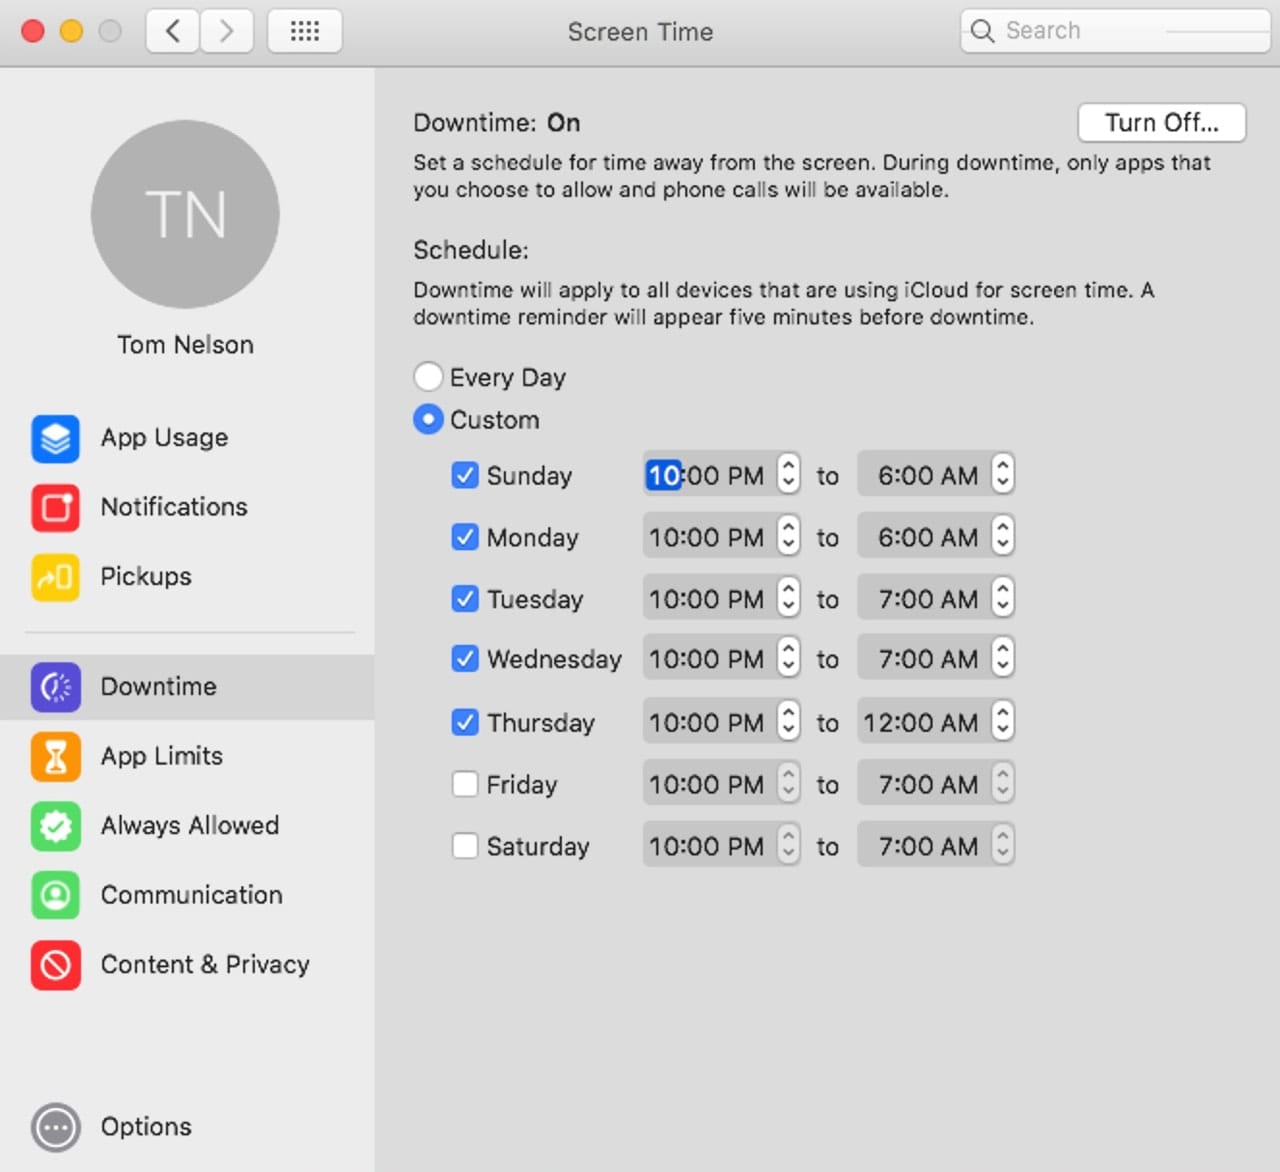
Downtime: In the Screen Time sidebar, select Downtime.
When Downtime is scheduled, only apps you have approved will be allowed to run. You can use Downtime to restrict app usage.
Click or tap the On button to enable Downtime and schedules.
You can select a schedule that runs every day, or create a custom schedule. To use an every day schedule, one that doesn’t change from day to day, click the Every Day radio button.
Use the start time and end time fields to enter a schedule. This defines when downtime is enforced.
If you would like to have the downtime vary from day to day, select the Custom radio button. A weeklong schedule will be displayed, allowing you to set the downtime on a day-by-day basis. You can also turn Downtime off for specific days, such as the weekend.
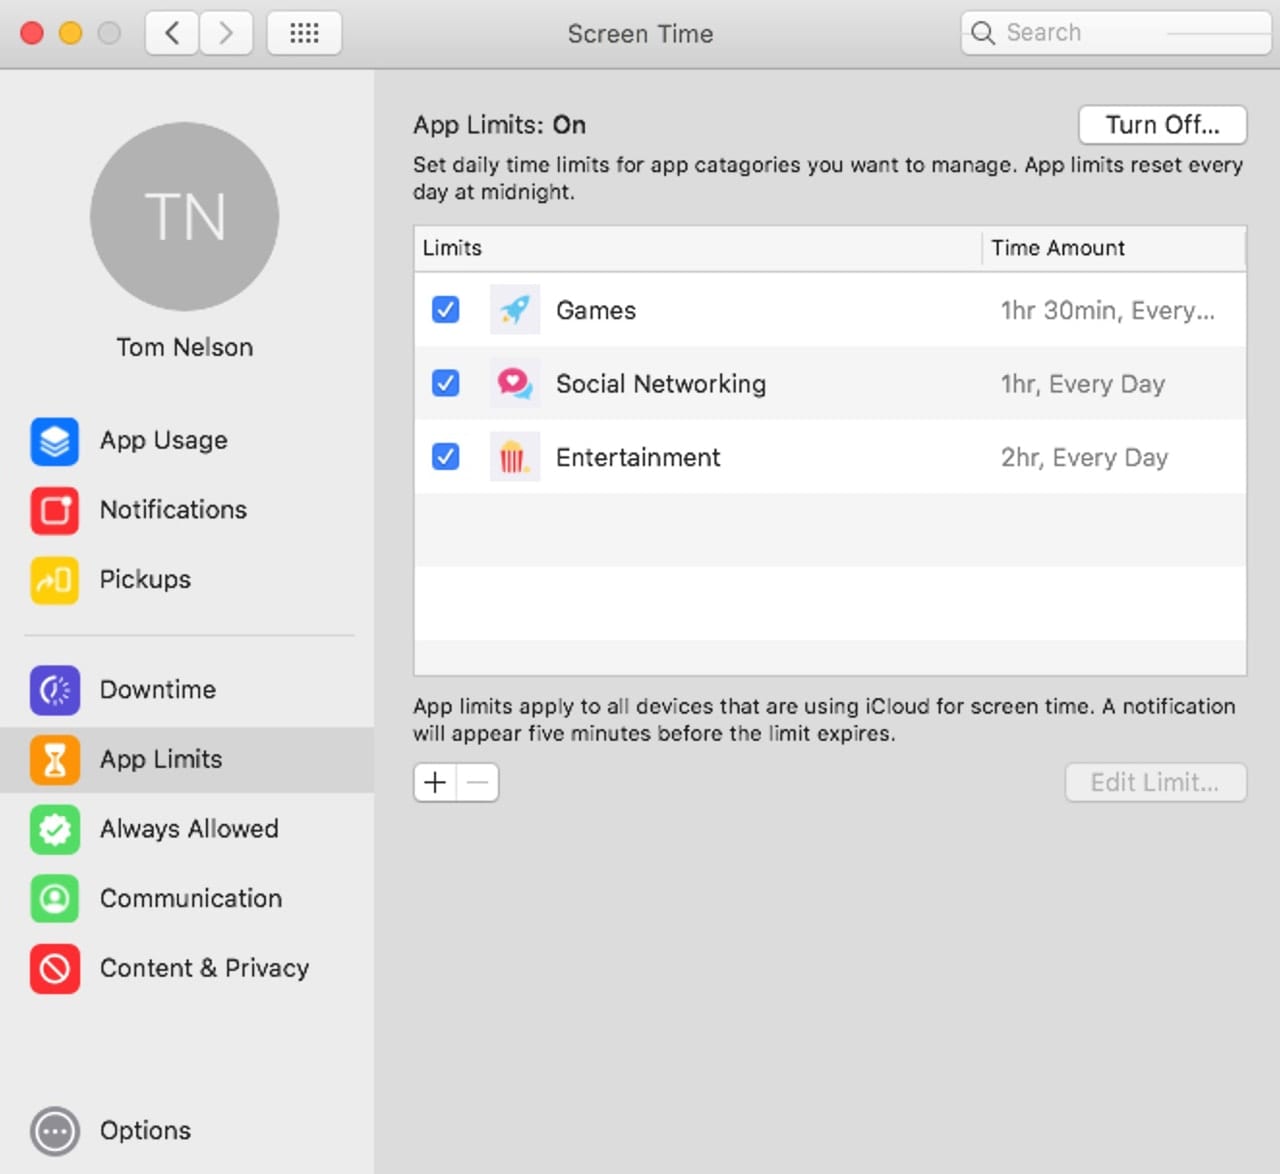
App Limits: In the Screen Time sidebar, select App Limits.
You can limit how much time an app can be used for; you can select by category as well as by app.
Click or tap the Turn On button to enable app limits, or Turn Off to disable limits.
To add an app, category, or website to the list of items that will have time limits, click or tap the plus (+) button.
A list of app categories will be displayed.
To add all apps in a category, place a checkmark next to the category name.
To add specific apps, use the chevron next to a category’s selection box to expand the view of the apps in the category. With the category expanded, you can select individual apps by placing a checkmark next to the app’s name.
To add websites, scroll down and expand the Websites category.
You will see a list of websites you may have recently visited. You can add one or more of the recently visited websites to the list by placing a checkmark next to the website’s name.
To add a website, click or tap the Add Website button. Enter the website’s URL.
You can set the amount of time each app, category, and website may be used by setting the schedule at the bottom of the window. You can set a schedule for every day, or click the Custom button to create a weeklong schedule.
Click the Done button once you have made all your selections.
Always Allowed: In the Screen Time sidebar, select the Always Allowed item.
As noted above, you can place restrictions on specific apps, categories, and websites. Likewise, you can also specifically allow certain apps to always be available, even if there are other restrictions placed upon them. You can also specify to allow any communications using an iPhone, FaceTime, Messages, and AirDrop during downtime, or only with specific contacts.
Use the radio button to allow communications with Everyone, or Specific Contacts.
If you choose Specific Contacts, you can review, add, or remove contacts from the approved list by clicking the Edit List button.
To enable specific apps to always be available, place a checkmark next to the app’s name in the Allow Apps list.
Communication: Select Communication from the Screen Time sidebar.
You can specify who can contact the user during allowed screen time, as well as during downtime. These communication limits only apply to the iPhone, FaceTime, Messages, and AirDrop.
During allowed screen time, you can use the radio button to allow Everyone, or Contacts Only to communicate with the user.
If you select Contacts Only, you can also select if any contact is allowed to invite the user into a group.
You can also allow some communication with the user during downtime by using the Everyone or Specific Contacts radio button near the bottom of the screen. If you select Specific Contacts, use the Edit List button to review, add, or delete a contact.
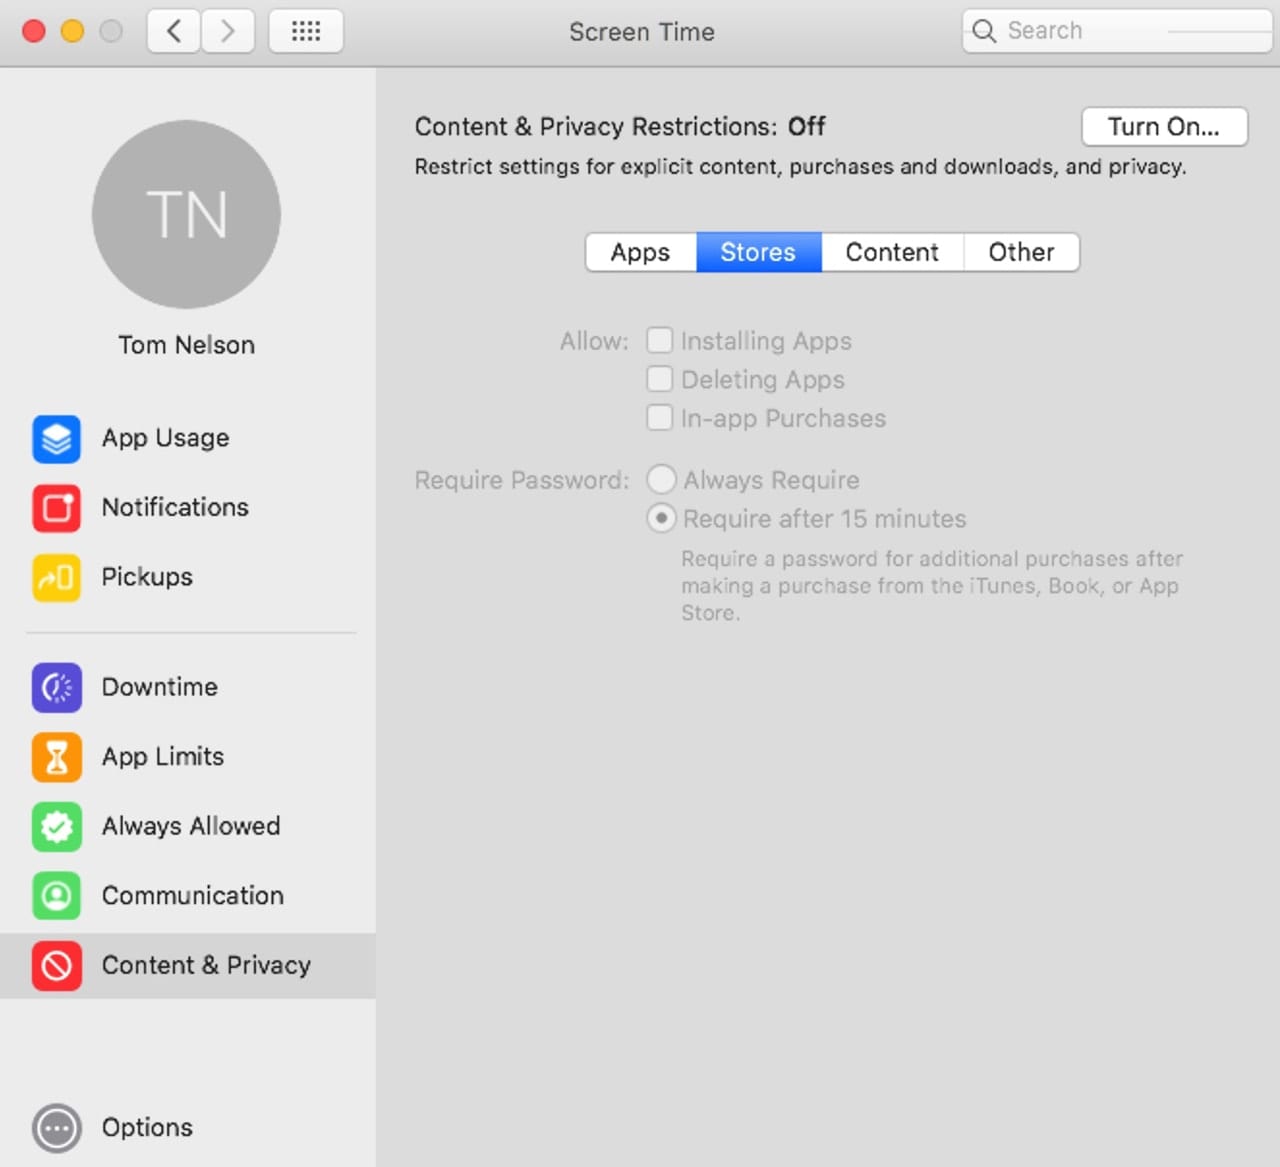
Content & Privacy: Select the Content & Privacy category in the Screen Time sidebar.
The last category allows you to set restrictions on explicit content, purchases, downloading, and privacy.
Use the Turn On button to enable content and privacy restrictions.
There are four categories: Apps, Stores, Content, and Other.
Apps: Select the Apps tab.
You can specify if you want an app to be available in the user’s iOS home screen. Apps not selected are not removed, just hidden.
Place a checkmark next to the Allowed Apps:
- Safari
- FaceTime Camera
- Siri & Dictation Wallet
- AirDrop
- CarPlay
- iTunes Store
- Book Store
- Podcasts
- News
- Screen Recording
Stores: Select the Stores tab.
The Stores category allows you to allow or limit the user’s ability to:
- Install Apps
- Delete Apps
- Make in-app Purchases
You can also set password requirements for making purchases to Always Required, or Required after 15 minutes.
Content: Select the Content tab.
The content restriction system uses rating criteria for specific countries. Use the dropdown menu to choose the country.
You can set restrictions for:
- Apps up to
- Movie ratings up to
- TV Show ratings up to
Use the dropdown menu for each item to set the rating.
You can also prevent access to the following by placing a checkmark in the appropriate box:
- Explicit Books
- Explicit Music, Podcasts, and News
- Music Profiles & Posts
- Web Content
- Explicit Language in Siri
- Web Search Content in Siri
- Multiplayer Games in Game Center
- Adding Friends in Game Center.
If you place a checkmark in Web Content, you can choose to Limit Adult Websites or Allow Website Only. Use the Customize button to create a list of allowed and restricted websites.
Other: Select the Other tab.
The Other category is a catchall that lets you select which actions the user is allowed to make:
- Passcode Changes
- Account Changes
- Cellular Data Changes
- Volume Limits
- Do Not Disturb While Driving
- TV Provider
- Background App Activities.
Screen Time for All
This is our first look at Screen Time in macOS Catalina, which brings Screen Time services to your Mac. At this early point in the beta, Screen Time appears pretty similar across devices. I expect Screen Time to add a few new features to better support the Mac’s multiuser environment. At the moment, using Screen Time for multiple users is a bit cumbersome.
Have you used Screen Time? And will you be using the Mac version?


question: with web content filtering is that just safari or does it work with chrome? also can it track browser history even if on private or incognito mode?