One of the biggest changes to Apple over the past ten years has been the move to subscription services. Whether you’re a subscriber to Apple Music, iCloud Drive, Apple News+, Apple TV+, Apple Arcade, or have subscriptions that are related to individual apps, we’ll show you where to go to keep those subscriptions under control from any of your devices.
On The Mac
Using macOS Catalina, go to the App Store app and click the button at the bottom of the left sidebar that represents you (see screenshot below).
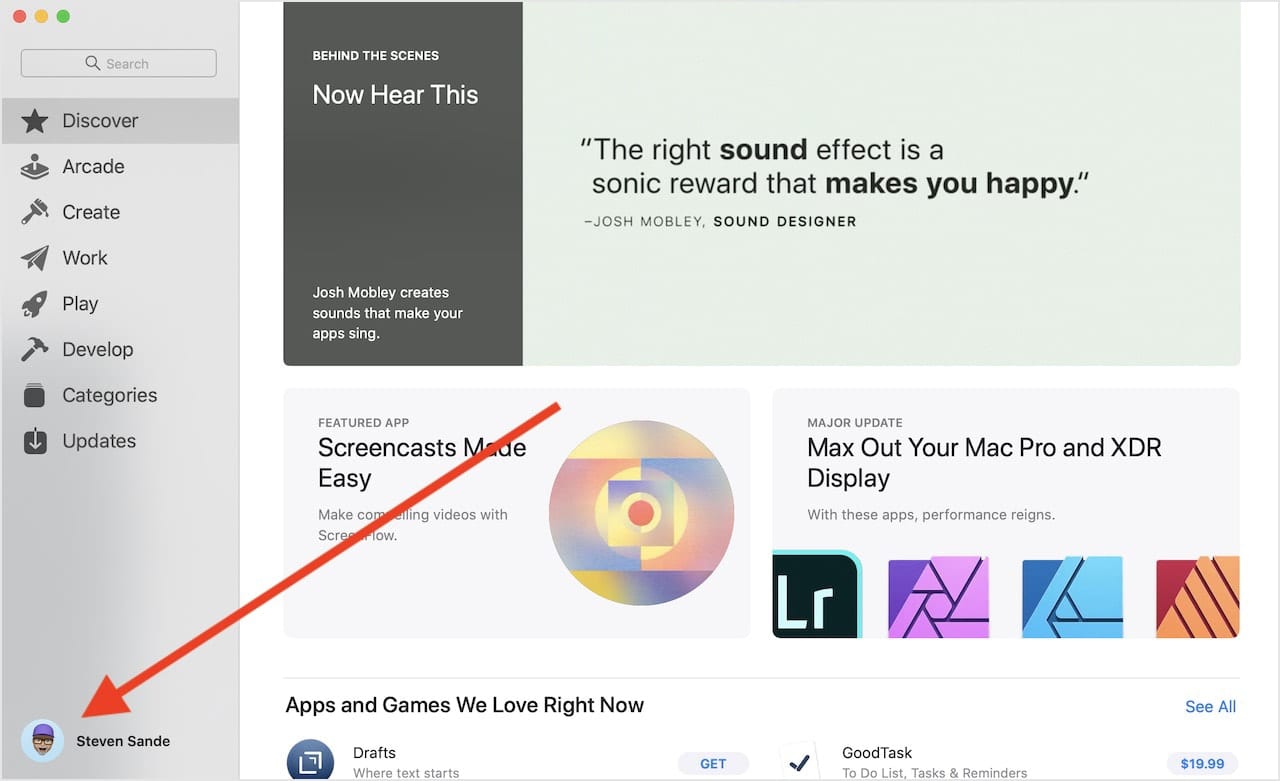
This takes you to a page showing apps you’ve purchased. At the top of this page is a button to “View Information”. Click it, and you are asked to enter your Apple ID and password. This step can take a little while, but your patience will be rewarded with a screen with information about your account, including how you pay for purchases. Scroll down, and you’ll see a section marked “Manage”. One of the Manage links is to the right of the word “Subscriptions” and a number denoting how many subscriptions you’ve had on that Apple ID (see screenshot below).
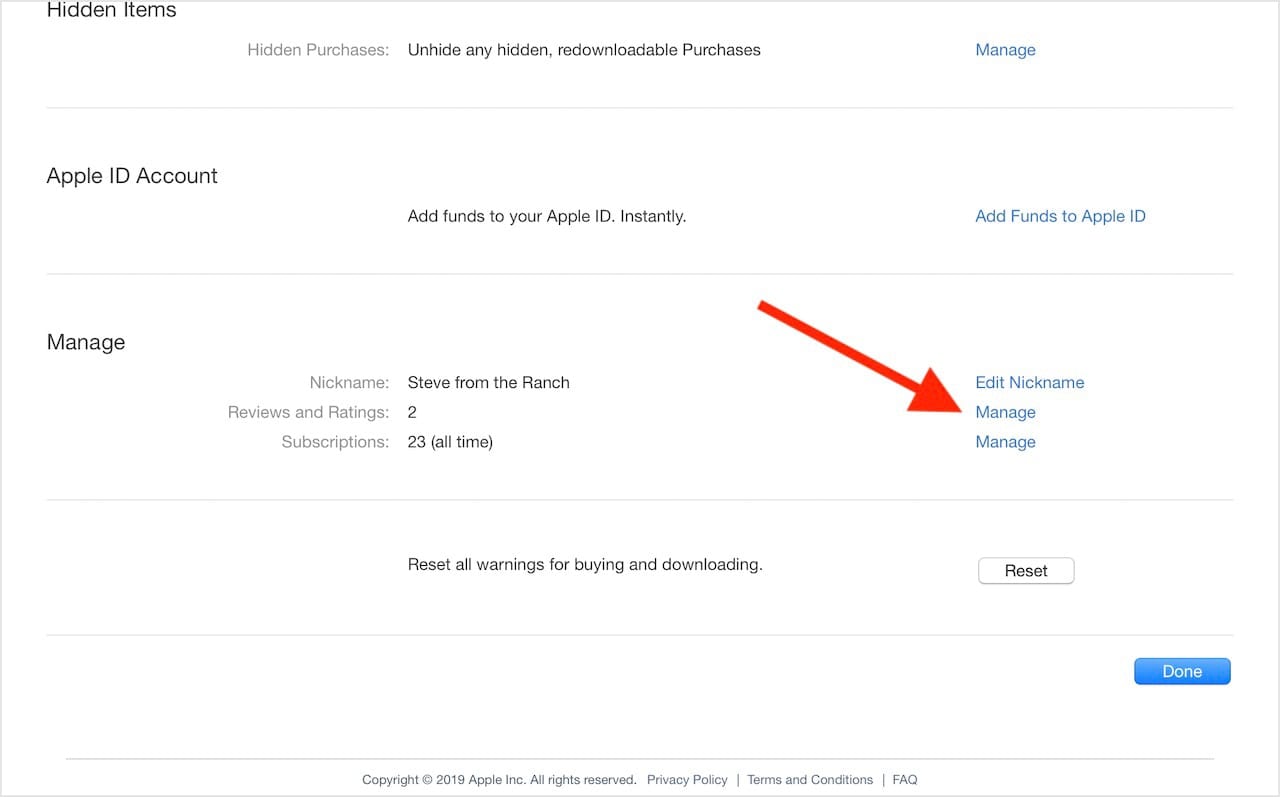
Click that Manage link, and a page appears that lists all active and expired subscriptions (see screenshot below). You’ll see subscriptions for apps, Apple Music, Apple TV channels, and so on.
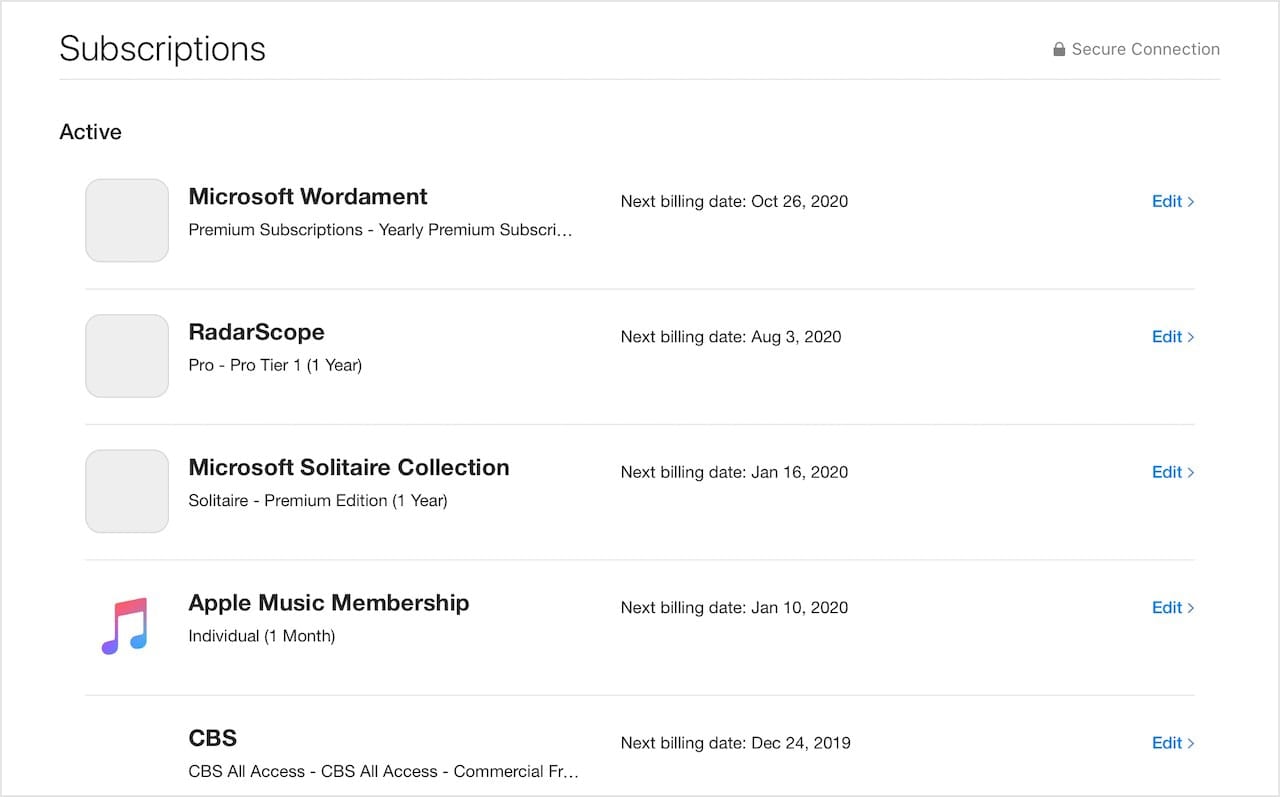
If a subscription is active, the next billing date is listed. Should you decide that you no longer want the subscription or wish to change to a different level or duration, click the Edit link on the right side of the subscription listing to see additional information.
When you’ve completed making changes or viewing your subscriptions, just click the Done button on the various pages to get back to the main App Store window, at which time you can quit the app.
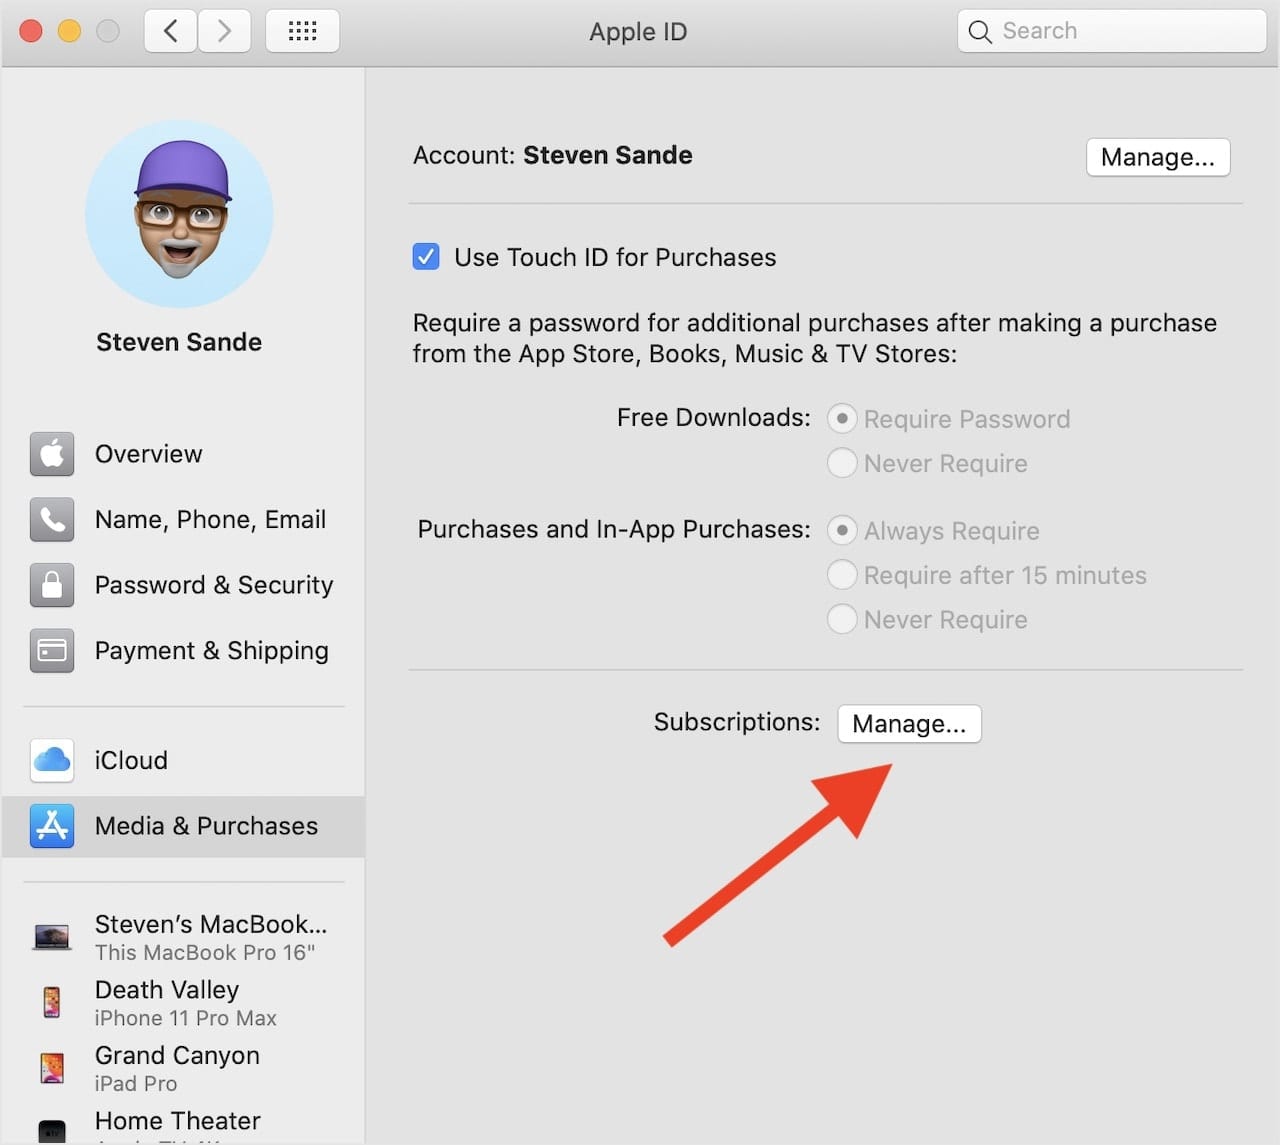
Another method to see your subscriptions is to launch System Preferences, then click on Apple ID. Below your name and Apple ID email in the left sidebar is a button for Media & Purchases. Click that to see settings for making purchases on the Mac (see image below). Next to the word Subscriptions is a “Manage…” button. Click that, and System Preferences launches the App Store’s
One thing we haven’t seen yet is the iCloud Storage subscription, which is also found under System Preferences > Apple ID. Click the iCloud button on the Apple ID pane, and below the list of Apps on this Mac using iCloud is a chart showing how much iCloud Storage you’ve purchased, how much storage is used, and a “Manage…” button.
Click the “Manage…” button and a list of all storage used by apps and your devices appears. You can delete the space used by apps you no longer own by clicking on the app name, then clicking the “Delete all Files…” button.
Finally, there’s a “Change Storage Plan…”
iOS and iPadOS Devices
On the iPhone, iPod touch, and iPad you’ll need to start by launching the App Store app. As with the Mac App Store, you want to tap on the button for you. In this screenshot from an iPhone, it’s in the top right corner:

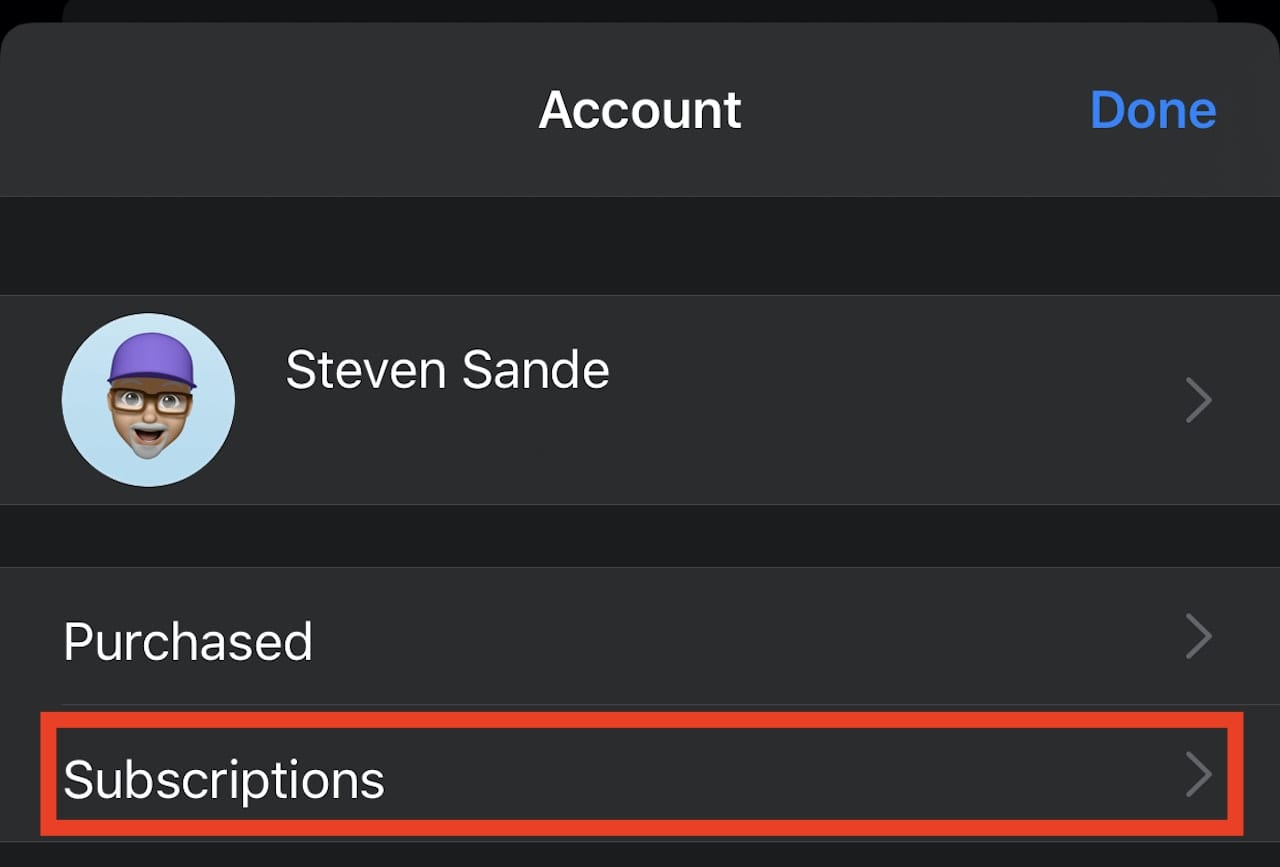
Once you’ve tapped that button, there’s an account page with buttons for both Purchases and Subscriptions (see screenshot below). Tap on Subscriptions and the same lists of active and expired subscriptions that appeared on the Mac shows up here as well. Rather than an “Edit” button to click to manage the subscription, you simply tap on the button indicating the subscription. As before, you have the opportunity to change to a different subscription option (if available), cancel your subscription, or even renew a subscription you canceled.
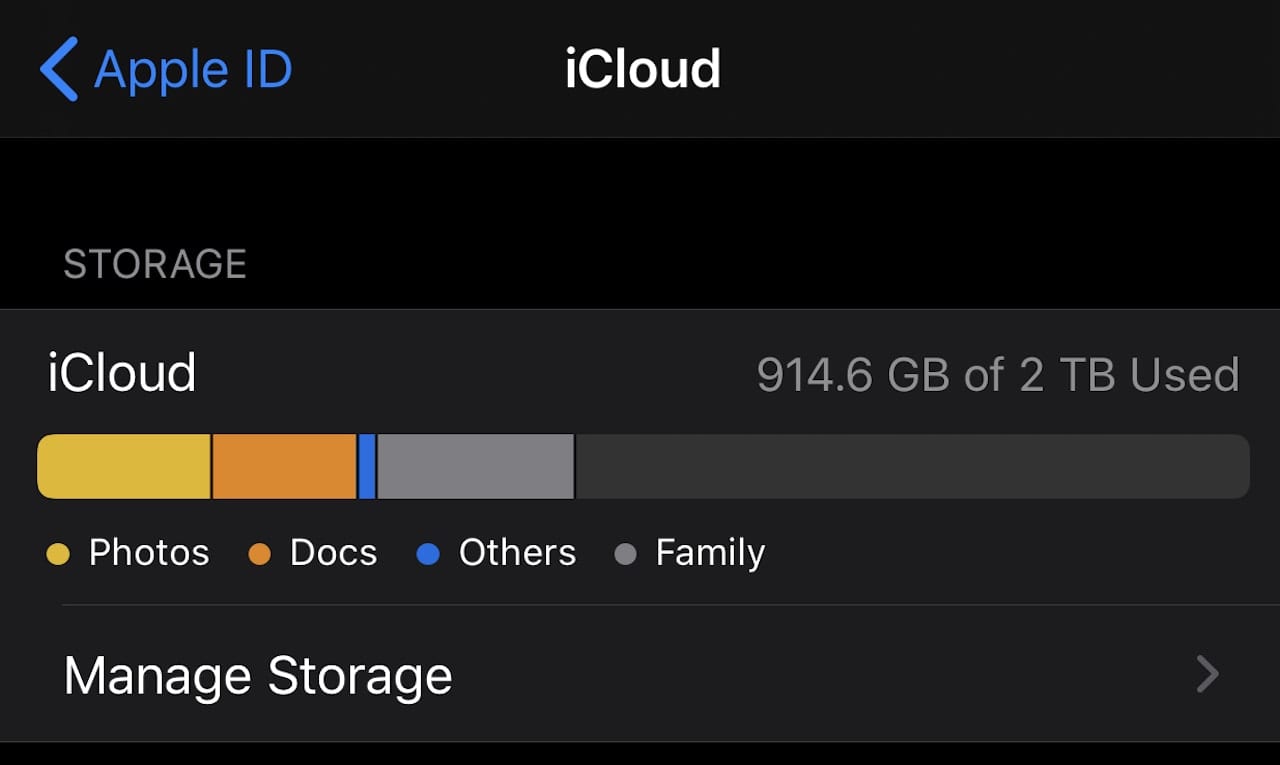
Your iCloud storage subscription is found in a slightly different location. Launch Settings and then tap your Apple ID at the top (it should show your name and any items that you use that Apple ID for). On the Apple ID screen
To do that, tap the iCloud button. At the top of the screen is the familiar bar chart showing how much cloud storage you have and how it is being used, as well as a button marked Manage Storage (see image below). Tap that button, and there’s a button marked “Change Storage Plan” if you need to cancel, increase, or decrease the amount of iCloud storage.
As with the Mac, each app using iCloud storage has a button below that can be tapped to delete all documents and data associated with an app. The screenshot below shows that I am currently using about one gigabyte (1,024 MB) of storage for the Pixelmator Pro app. I can tap that “Delete Documents & Data” button to delete all of the app data, but I will not be able to recover it.

It’s a Good Idea to Check Your Subscriptions
By the way, it’s a good idea to check your subscriptions on a regular basis. While I was doing research for this article, I found a duplicate subscription to CBS All Access that was costing me $7.99 a month! Fortunately, I was able to cancel the duplicate. Who knows? Perhaps you’ll also find a duplicate subscription or one you didn’t know you still had…but are still paying for.





Stupid default, when deleting Cloud data it also erases your “real” copies on your physical devices. Not at all what people would want to do!