Your Mac can be an energy hog, using up precious power even when you’re not actively working, and sending out heat as a byproduct of being on, even when just idling along.
That may seem a little on the extreme side, and to a certain extent, it is. But by making some adjustments in the Energy Saver preference pane, you can better tune your Mac to run at peak performance, save energy, reduce potential data loss when power fails, and extend the runtime and battery life of portable Macs.
In this Rocket Yard guide, we will explore the Energy Saver preference pane and see how you can customize energy performance.
Energy Saver Preference Pane
Describing the Energy Saver preference pane can be a bit difficult; the version you have may be very different from the one I have. The differences can be attributed to a number of reasons, but the three main causes are:
- The version of the Mac OS you are using
- If you are using a desktop Mac or a portable Mac
- If you have a UPS (Uninterruptable Power Supply) connected to your Mac
We will attempt to explore them all, but if your Energy Saver preference pane doesn’t match up to our description, it should be reasonably close, and you should be able to follow along in our guide.
Energy Saver Settings
The Energy Saver preference pane comes in four basic configurations:
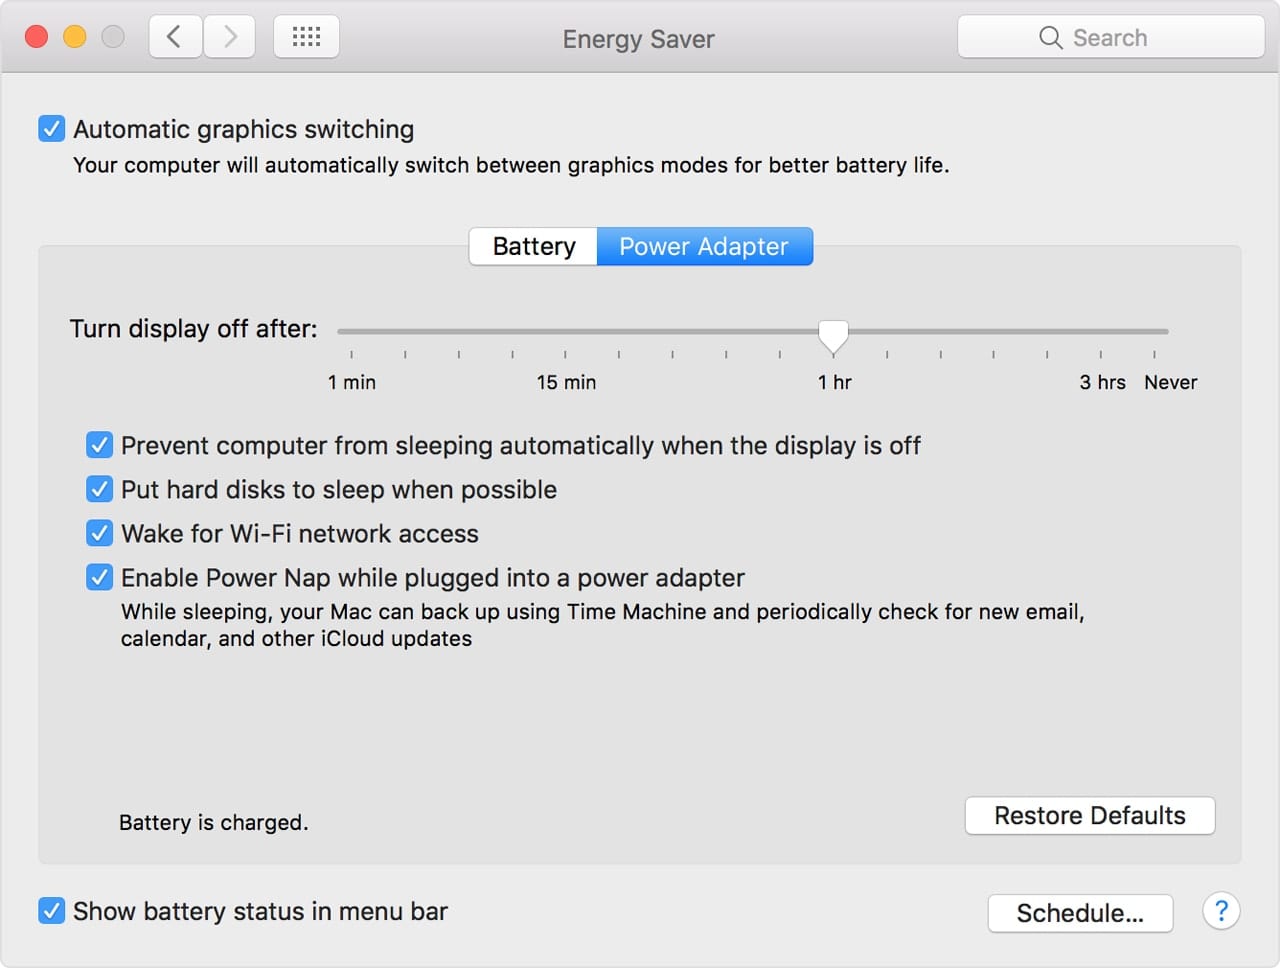
MacBooks: The Energy Saver provides a single slider for adjusting the time until the display is turned off. In addition, there are two tabs: one for when the MacBook is powered by its internal battery, and the other for when the MacBook is powered by an external power adapter. You can adjust the settings for each power source independently by selecting the appropriate tab.
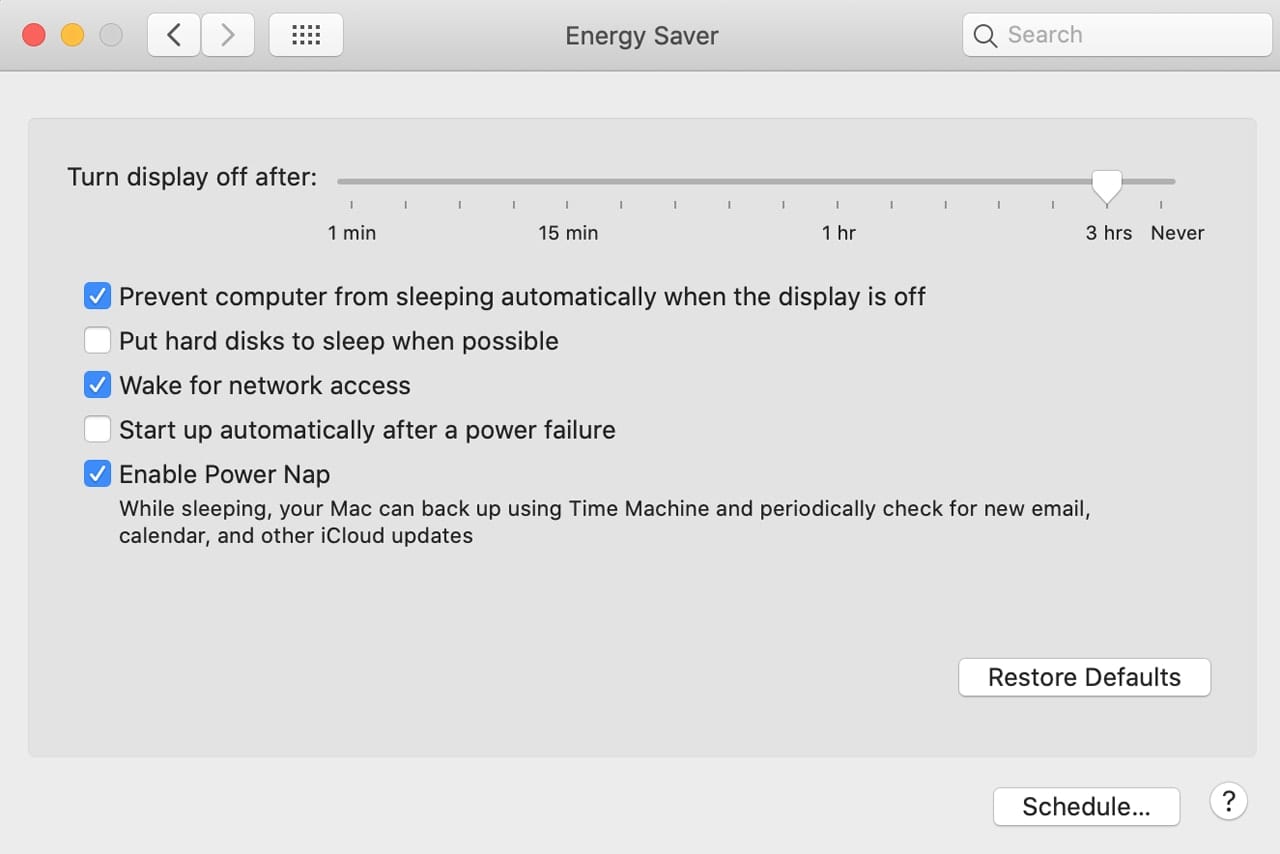
Desktop Macs: There’s a single slider to adjust when the display is turned off, and only a single set of settings. Unlike MacBooks, there is no option to select a power source to which to apply the settings.
Servers and Some Desktop Macs: There can be a second slider for specifying, independent of the display, when the computer should sleep. This can allow you to turn the display off at a specified time, while leaving the computer active for a longer time, or set the Mac to never turn off. This is handy when running a server, or when the Mac is used for rendering.
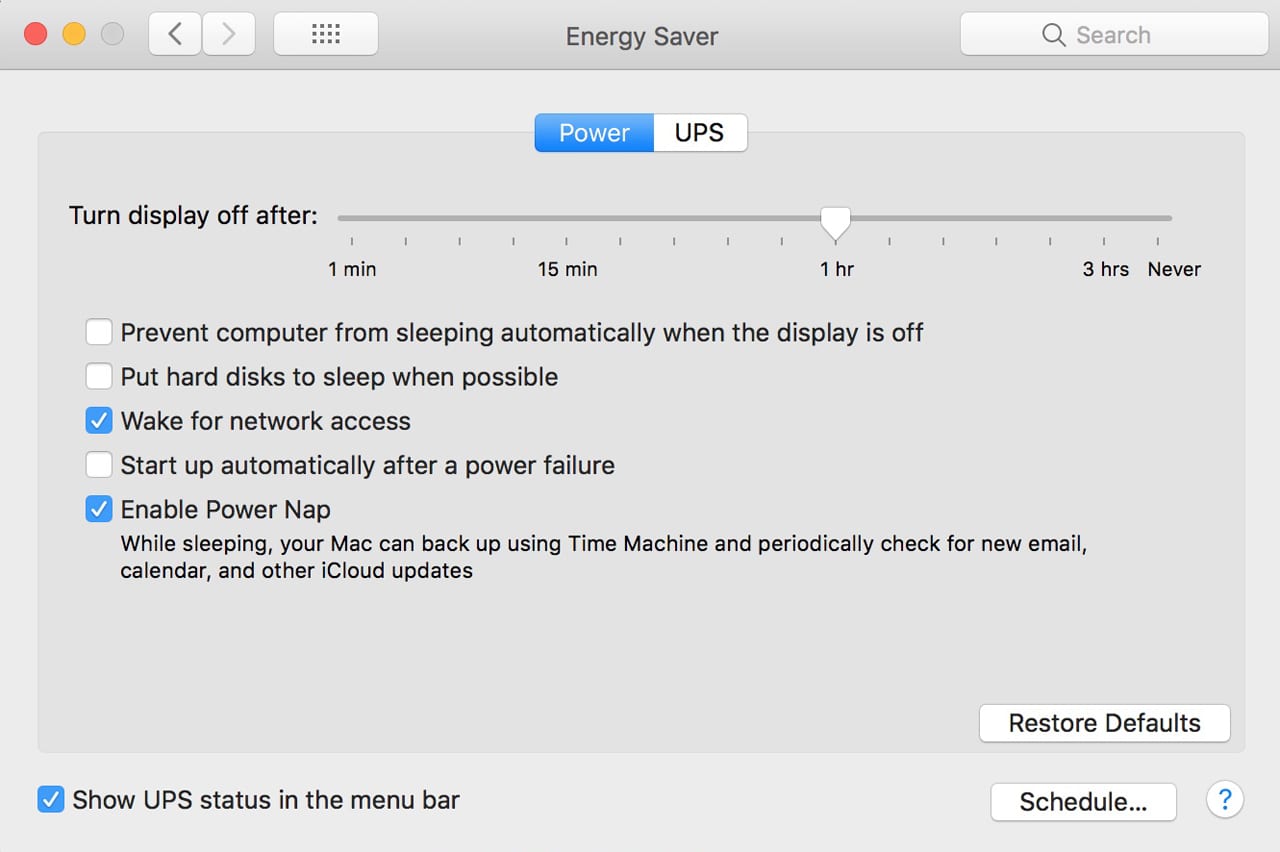
UPS Connected Macs: If you have a desktop Mac with a UPS connected, you may see two tabs, similar to the MacBook. One tab is for setting Energy Saver options for when the Mac is running off the main power; the other is for setting UPS options, such as how quickly to shut down when a power failure occurs.
Energy Saver Options
To access the options, launch System Preferences by clicking on its icon in the Dock or selecting System Preferences from the Apple menu.
In the System Preferences window that opens, select the Energy Saver preference pane.
Some of the Energy Saver options listed here may pertain to specific hardware. If you don’t have that hardware installed, you won’t see the options:
Automatic graphics switching: Some Macs, especially MacBook models, may contain more than one set of graphics hardware. Usually there’s a graphics chip integrated with the processor set, and a separate higher-performance graphics chip that uses more energy. Selecting this option will automatically switch between graphics systems, depending on the power source or the charge level of the battery. Using this option can extend the runtime of your Mac when running on the battery.
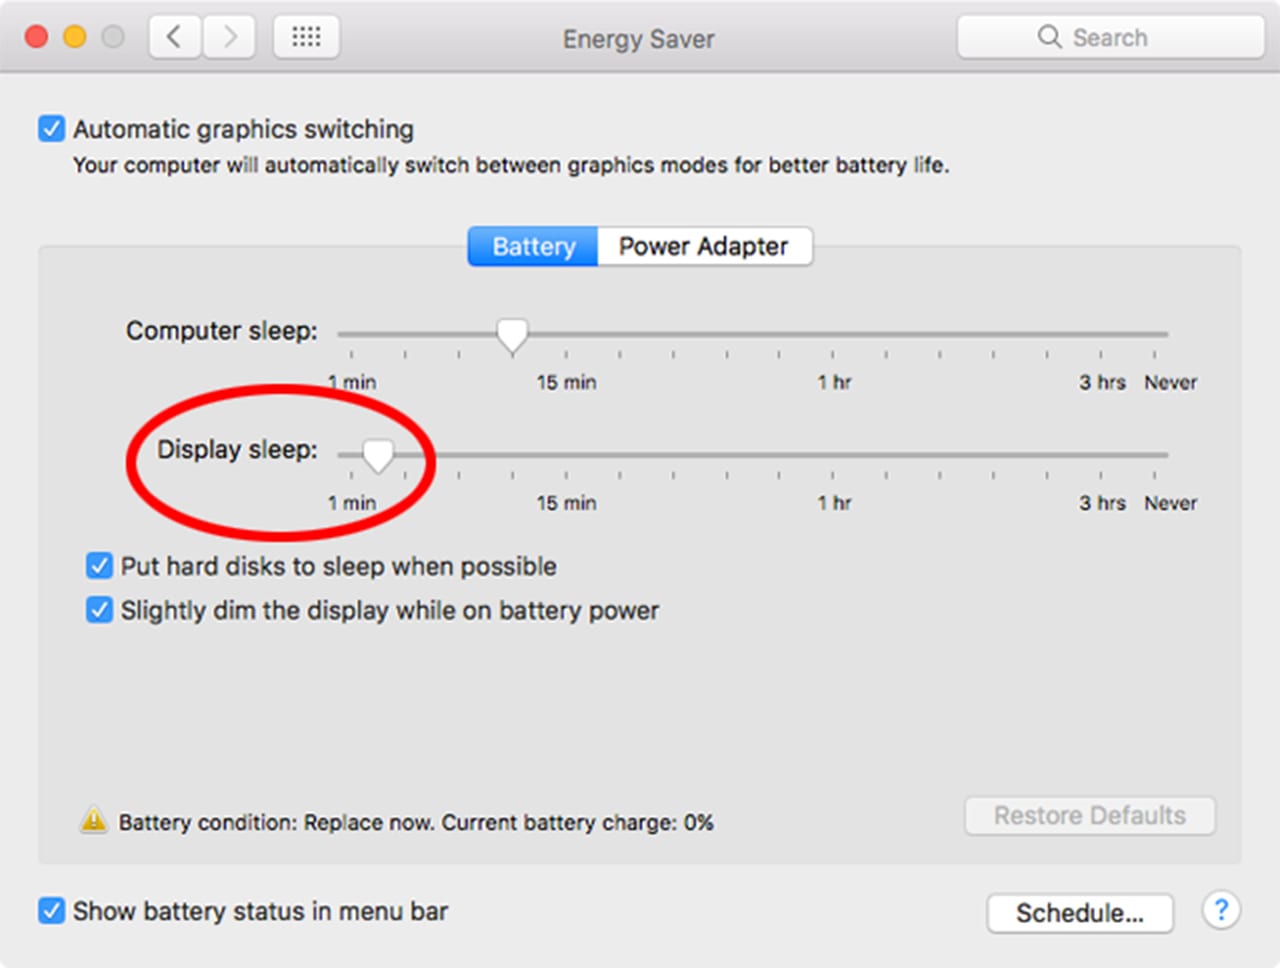
Computer sleep, Display sleep, or Turn display off: These sliders are used to set the time interval before the display or your Mac enters sleep mode or the display is turned off. When running on battery, it’s a good idea to maximize battery runtime by putting the display to sleep quicker.
Put hard disks to sleep when possible: This option spins down hard disks when they’re inactive. This can save battery life by removing the power draw of the hard drives. It can also cause a delay when data is needed and the drives have to spin back up. This setting does not affect SSDs. If you’re able to change out your hard drives with an SSD, you can increase overall performance and help maximize battery runtime, and you won’t need to wait for an SSD to spin up.
Wake for network access: If others use your Mac on your network, such as for sharing a printer or iTunes library, this option will allow your Mac to wake up when someone on the network needs to use these resources.
Enable Power Nap: Allows your Mac to perform certain functions, such as checking for emails, calendar updates, and iCloud syncing, even when your Mac is asleep.
Allow power button to put computer to sleep: The power button normally allows you to turn off the power to your Mac. When this option is selected, a single tap on the power button will put your Mac to sleep. A long press will still turn the power off.
Prevent computer from sleeping automatically when the display is off: If your Energy Saver preference pane uses a single slider to turn off the display, that same time setting is used for putting your Mac to sleep. By selecting this option, your Mac will stay awake even when the display has turned off or gone to sleep.
Start up automatically after a power failure: Automatically restarts your Mac when power has been restored after a power failure. Unless you have a specific need, such as the Mac has shared resources used by others, it’s probably a good idea to leave the Mac turned off until you’re sure the power is back on and stable. Where we live, power outages are usually accompanied by the power coming back, and then going back off. For me, it’s best not to have the computer automatically turning on and off with each power incident.
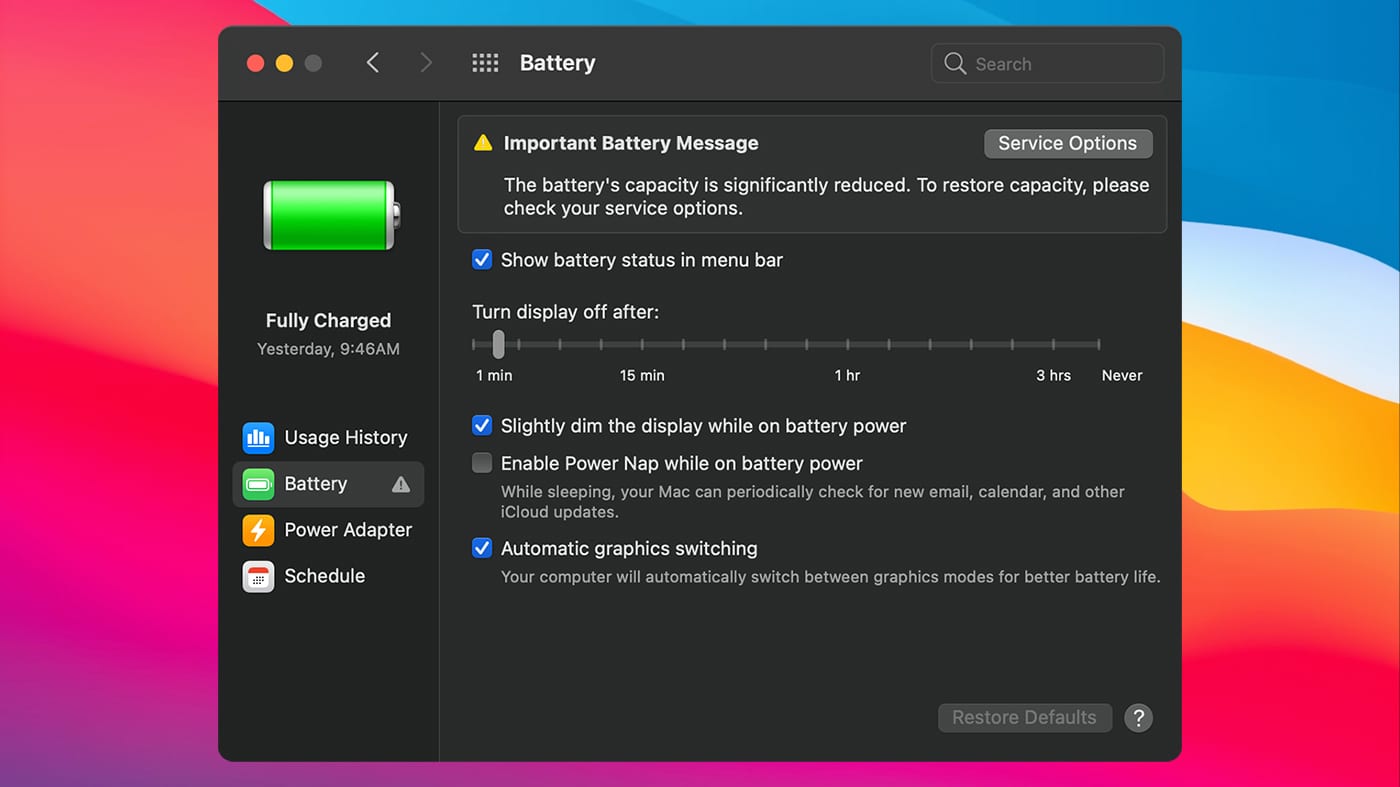
Show battery status in menu bar: If you have a MacBook, this option will show a battery icon in the menu bar. The icon shows if the Mac is connected to a power supply, if the battery is charging, and the battery charge level.
Startup and Sleep Schedule
At the bottom of the Energy Saver preference pane is the Schedule button. Clicking on the Schedule button will cause a sheet to drop down, where you can set a specific time for your Mac to start up as well as a time for your Mac to shut down, restart, or sleep.
Setting up a schedule can be helpful when there are predictable times when you’re using your Mac or when you finish using your Mac. With a schedule, you can pick a time for your Mac to automatically start up, such as when you arrive at work. This will give you time to put a few things away and grab some coffee from your workplace coffee bar; by the time you get back to your desk, your Mac is ready for you to get to work.
Combine this with some workflow automation or login items, and your Mac may be working for you before you ever sit down.
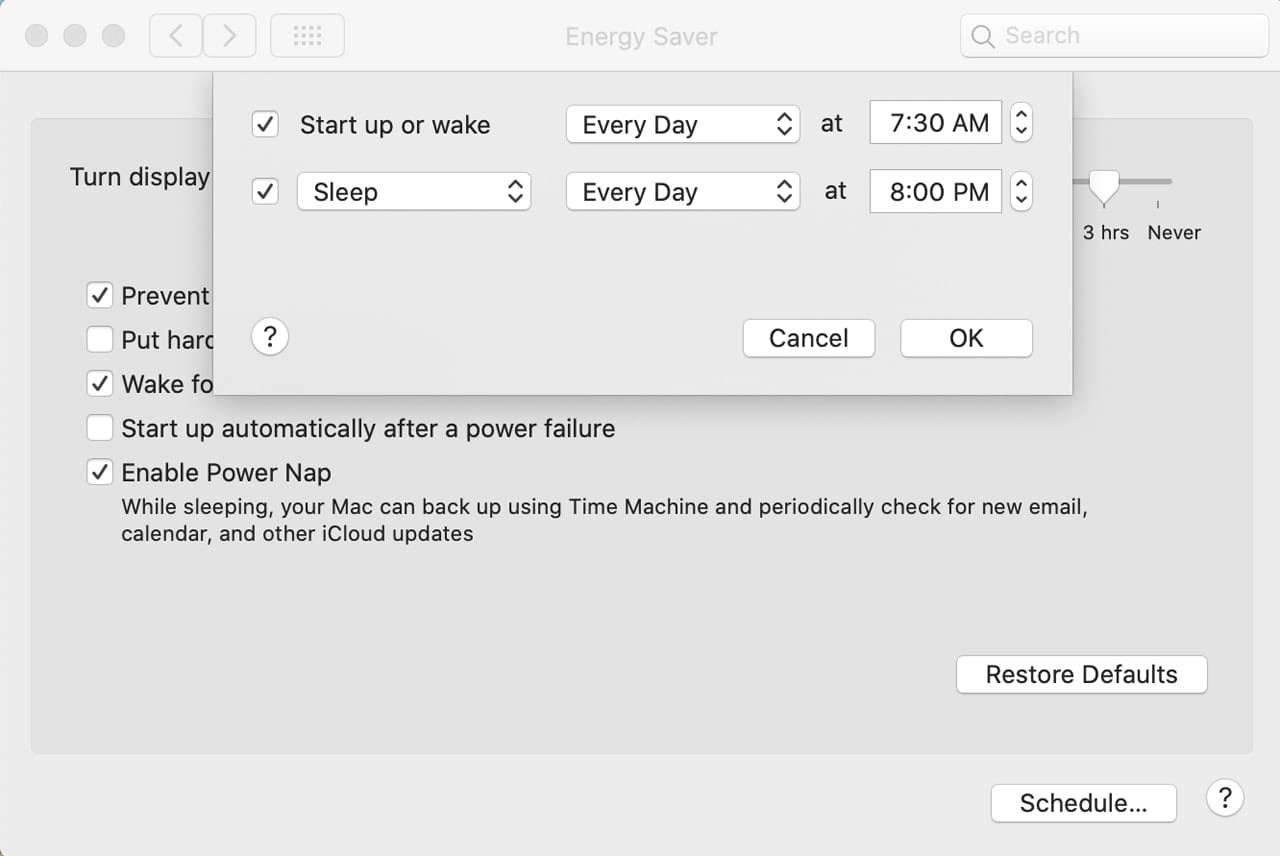
To set a schedule, click the Schedule button.
A sheet will drop down to allow you to enter a schedule.
If you want your Mac to turn on or wake up at a specific time, place a checkmark in the box labeled Start up or Wake.
Use the dropdown menu to choose how often this should occur. You can pick Every Day, Weekdays, or Weekends, as well as only on a specific day.
Set the time when your Mac will start up or wake up.
If you want to specify when your Mac should quit for the day, place a checkmark next to the dropdown menu that says Sleep. You can also use the dropdown menu to select Sleep, Restart, or Shut Down.
Use the next dropdown menu to choose how often the event should reoccur.
Finally, choose a specific time.
When you’re done, click the OK button.
UPS
If you have a UPS connected to your desktop Mac you’ll see tabs for Power and UPS. The Power tab allows you to set the options listed above for when your Mac is running off of normal power.
The UPS tab is used to set options related to how your Mac will shut down after a power outage occurs.
Select the UPS tab.
Turn display off after: Use the slider to adjust how long to leave the display on when your Mac is running from the UPS’s battery. You may want to set this to turn the display off quickly to reduce the load on the UPS battery and extend its runtime.
Show UPS status in the menu bar: Select this option to have the UPS status appear in the menu bar as a battery icon. The menu bar item can display the time remaining on UPS battery, and which power source is being used.
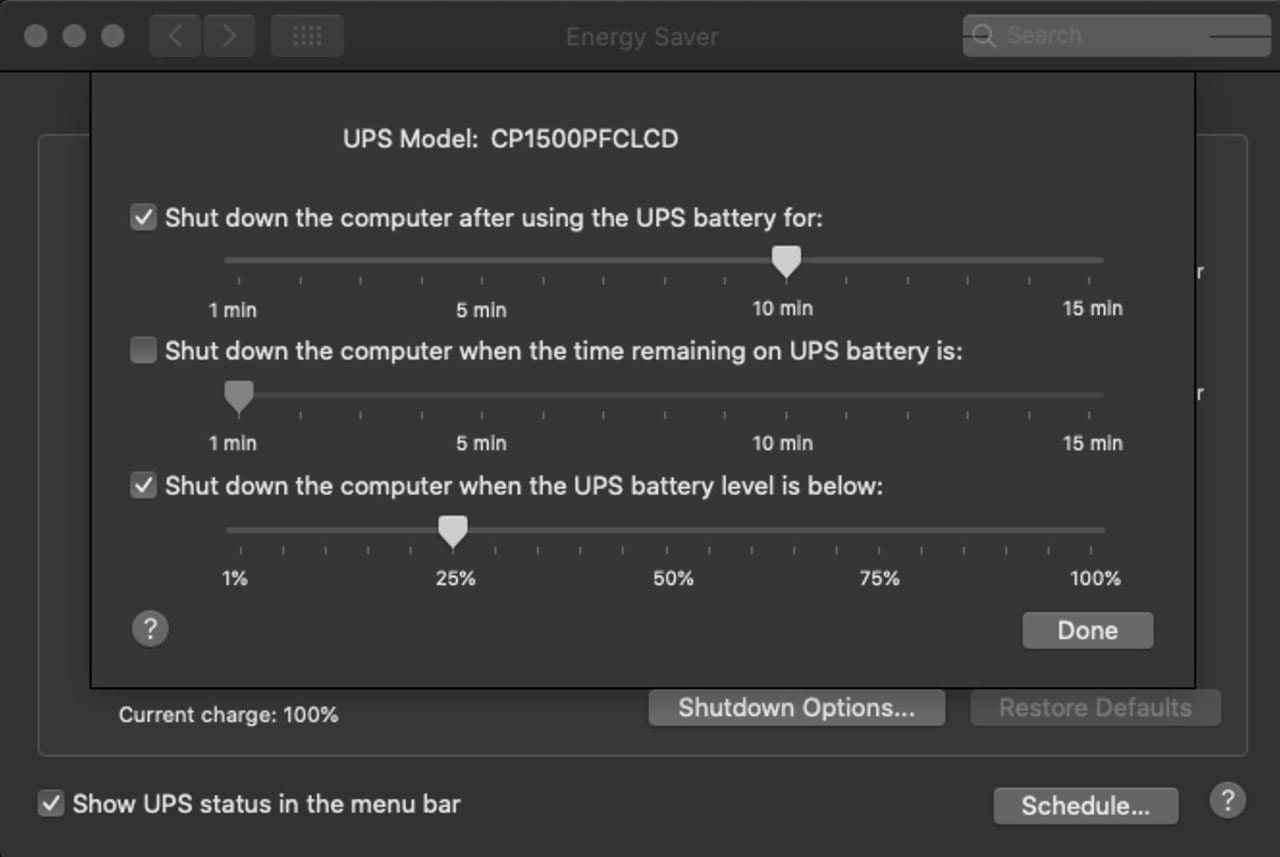
The main feature of the UPS tab is configuring the Mac’s shutdown options. Click the Shutdown Options button.
A sheet will drop down, listing the shutdown options.
Shutdown options determine what criteria are used to determine when your Mac should turn off after a power outage. The options are:
Shut down the computer after using the UPS battery for: Use the slider to select the amount of time to wait before shutting down.
Shut down the computer when the time remaining on the UPS battery is: Use the slider to select the amount of runtime remaining on the UPS battery.
Shut down the computer when the UPS battery level is below: This slider represents the amount of remaining battery life by percentage.
Tip: You can select more than one of the items, such as shutting down the computer after 10 minutes, as well as selecting shut down when the UPS battery is below 25%. In that case, you could continue to use the computer for 10 minutes unless the battery level falls below 25%, at which point your Mac will start the shutdown process.
Make your selections and click the Done button.
Note: Some UPS manufacturers include their own software for managing the UPS. Depending on the software, you may have very different UPS options available to you.
Be an Energy Star
By using the Energy Saver preference pane, you can manage your Mac’s energy use and allow your Mac to work longer on a single battery charge, reduce overall energy consumption, or maximize performance for your specific workflow.
Take the Energy Saver preference out for a spin, and remember, there’s a handy Restore Defaults button should you wish to return the settings to the factory defaults. Do you have any tips for using the Energy Saver preference pane? Let us know below.


Is there a way to reset the USB ports when the Mac does not see the UPS connected via USB in “Apple – System Preferences – Energy Saver” after a cold boot?
I mean, other than turning off the Mac and the UPS, disconnecting the UPS from the mains, connecting it back and turning it on and the Mac, which fixed the issue in macOS 10.12.6 (16G2136) Sierra. Thanks!
I have not seen the exact issue as you describe, but some general tips would be:
Connect the UPS directly to your Mac, avoid using a USB hub if possible.
Unplug the USB cable to the UPS, then plug it back in.
Restart the Mac with the UPS cable disconnected, then make the connection after the Mac has started back up.
Tom
Thanks. I have tried all that to no avail. I think that the UPS gets stuck somehow, requiring not only to turn it off, but also to unplug it from the mains. But I wonder if there is other way to fix it, perhaps resetting the USB port, if that is possible.
The usual method for reseting the USB ports is to perform an SMC reset:
https://blog.macsales.com/35820-add-these-steps-to-your-toolbox-when-troubleshooting-issues-on-a-mac/
Of course performing an SMC reset requires you to shutdown your Mac, but you may as well give it a try to see if it helps.
Tom
Thanks. Yes, I tried that to no avail. The only method that has worked so far is turning off the Mac and the UPS, disconnecting the UPS from the mains (this step is essential), connecting it back and turning it on and the Mac. So, it seems that the UPS gets stuck, requiring not only to turn it off with its power button, but also disconnecting it from the mains.
Had issues accessing and running UNIX commands on enterprise networked IMac computers via Apple Remote Desktop. Un-checked ‘Enable Power Nap’ and all is well. I also never let the HDs sleep-makes them harder, if not impossible, to wake.
Tom-I’d like to know what settings you normally use.
The settings I usually use are:
Wake for network access
Enable Power Nap
And one one of my Macs:
Prevent computer from sleeping when display is off.
Tom
How does the Mac know if you have a UPS?
Many UPSs can be connected to your Mac via a USB port. Once connected your Mac reads the USB port and discovers the connected UPS.
The macOS can perform basic UPS monitoring and control, or if available you can install the UPS manufacturers software which will usually have additional capabilities beyond the Mac’s basic monitoring software.
Tom