Recently I’ve noticed a number of software developers taking advantage of macOS Catalina users who previously used iTunes to back up their iPhones and iPads. How are they taking advantage of these folks? By charging up to $100 for apps that essentially perform a function that is built into Catalina. In this article, I’ll show you just how easy it is to use the Finder in macOS Catalina to back up an iPhone.
Make the iPhone or iPad Appear In The Finder
The first step is to make sure that your iPhone or iPad appear in the Finder. Fortunately, my fellow blogger, Dennis Sellers, wrote up instructions on how to do that in this Rocket Yard article.
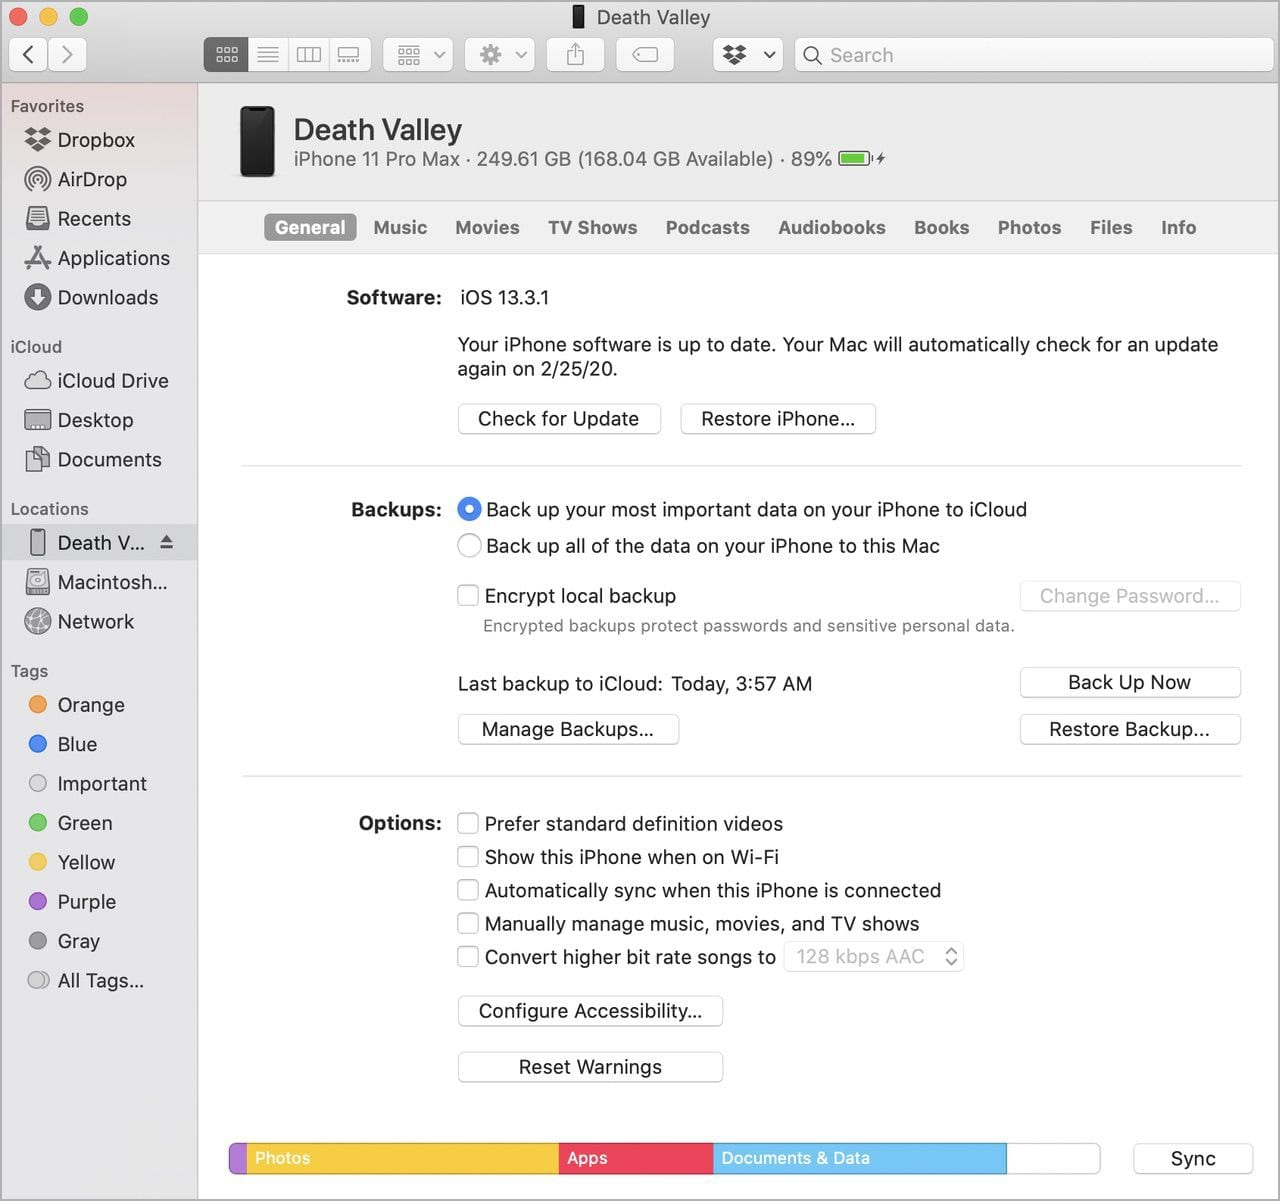
Once you can see your connected iPhone or iPad listed in the Finder, click on it and you’ll see something similar to this:
The Finder View of Your iPhone or iPad
In the screenshot above, you can see that there’s actually quite a bit of information that appears: the current version of iOS or iPadOS running on your device, the ability to check for updates, a way to restore an iPhone to factory settings, a section about backups, and a list of settings options. There’s also a convenient bar chart showing how the memory on your device is being used, and a way to configure iOS/iPadOS accessibility options from the Mac.
In most ways, this user interface is similar to what used to appear in iTunes when an iPhone or iPad was plugged in. Of course, with the move to the Music app in macOS Catalina, iTunes was deprecated and the iPhone/iPad sync functions relegated to the Finder.
iPhone and iPad Backups
Since this article is focused on backing up iPhones and iPads, let’s take a closer look at the section of the Finder window that is used to perform that function:

You can see that this iPhone user is currently using iCloud to back up data on the iPhone, but there are reasons that others may prefer to back up to a Mac.
First, backing up to a Mac ensures that all of the data currently on the iPhone or iPad is backed up. As you’ll note, only “your most important data” is backed up during an iCloud backup. That data is sufficient to restore your mobile device from iCloud should you need to reload it or you’re moving to a newer device, but you’ll find that there are items that must reload from the cloud — Photos (if you’re using iCloud Photos) and Music (if you’re an Apple Music or iCloud Music user). Restoring that media can take a lot of time, and it may be faster to restore from a local backup.
Next, iCloud has a cost associated with it. I make frequent use of iCloud Photos and iCloud Drive, so I spend $9.99 per month for 2TB of cloud storage. Some people may balk at paying near $120 a year for that storage, so iCloud backups of their mobile devices may be out of the question.
Finally, you may just want to have multiple backups of your devices…just in case. Having both an iCloud backup and a local backup on a Mac ensures that you’ll be able to restore an iPhone or iPad at all times, even when Internet access is slow, expensive or nonexistent.
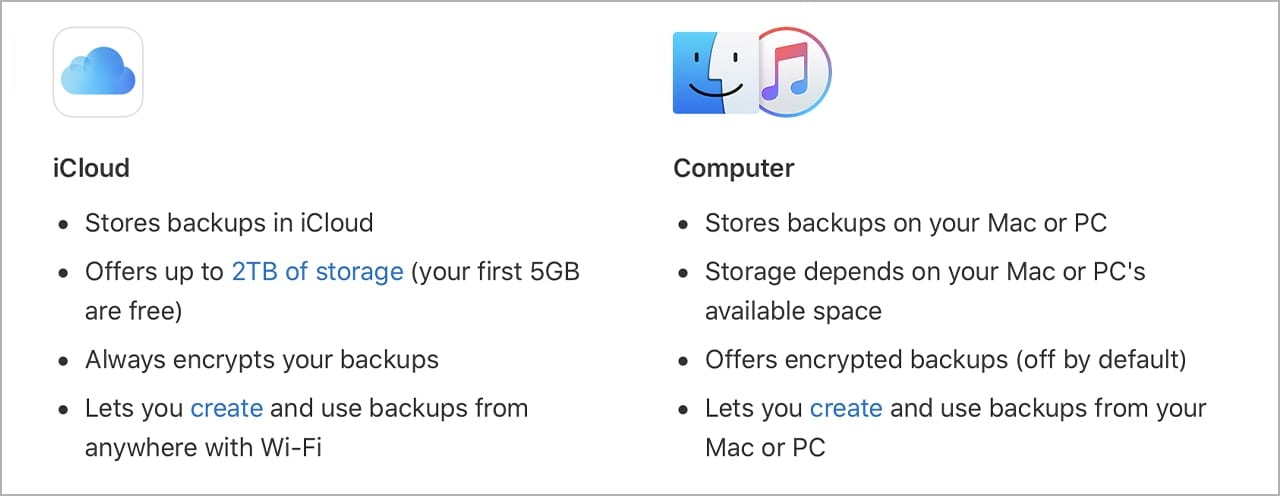
This handy graphic from Apple illustrates most of the differences between iCloud and local backups:
To make an unencrypted backup of your device, click “Back up all of the data on your iPhone/iPad to this Mac”, then click the Back Up Now button.
To ensure that any personal data on your mobile device is protected if your Mac is lost or stolen, it’s a good idea to check Encrypt local backup. Doing so password protects your backup file so that a thief or hacker can’t get to your iPhone or iPad information.
Apple recommends encrypting the local backup on your Mac, and displays the following dialog when a user tries to make an unencrypted backup:

Clicking Encrypt Backups displays another dialog that asks for a password that will be used to “unlock” your backup.
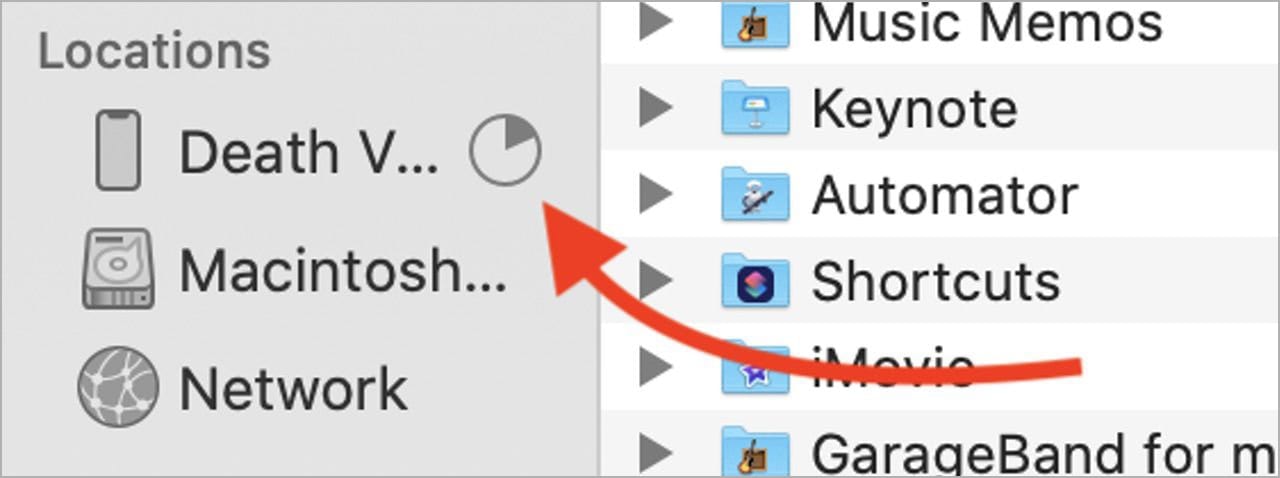
Backing up your iPhone or iPad to a Mac for the first time can take a while, particularly if your device has a lot of storage that is in use. While the backup process is underway, a progress “clock” indicates how far along the backup is:
Where Are Backups Stored On The Mac?
The backups are saved to a Backup folder. If you wish to make a copy in a different folder, external drive or network drive, that’s acceptable. However, the Backup folder should never be moved to an alternate location.
Likewise, you don’t want to edit, relocated, rename, or extract content from the backup files. The backup files are usually stored in a format that’s unreadable; they’re great for restoring data, but you probably don’t want to try to read the data.
The Backup folder can be viewed by invoking Spotlight by clicking the magnifying glass (🔍) icon in the menu bar or pressing Command (⌘) – Space Bar, then copying and pasting the following path into the search field:
~/Library/Application Support/MobileSync/Backup/Inside the Backup folder will be one folder for each backup made:

Managing and Restoring Local Backups
Eventually, you might want to delete old local backups, as they can take up a surprising amount of space on your Mac. For example, my iPhone backup took up nearly 87GB of storage! To do so, connect your Mac to your iPhone or iPad, then open a Finder window and click on your device in the sidebar.
To see what backups are available and delete older backups, click the Manage Backups button. A window listing the backups appears:
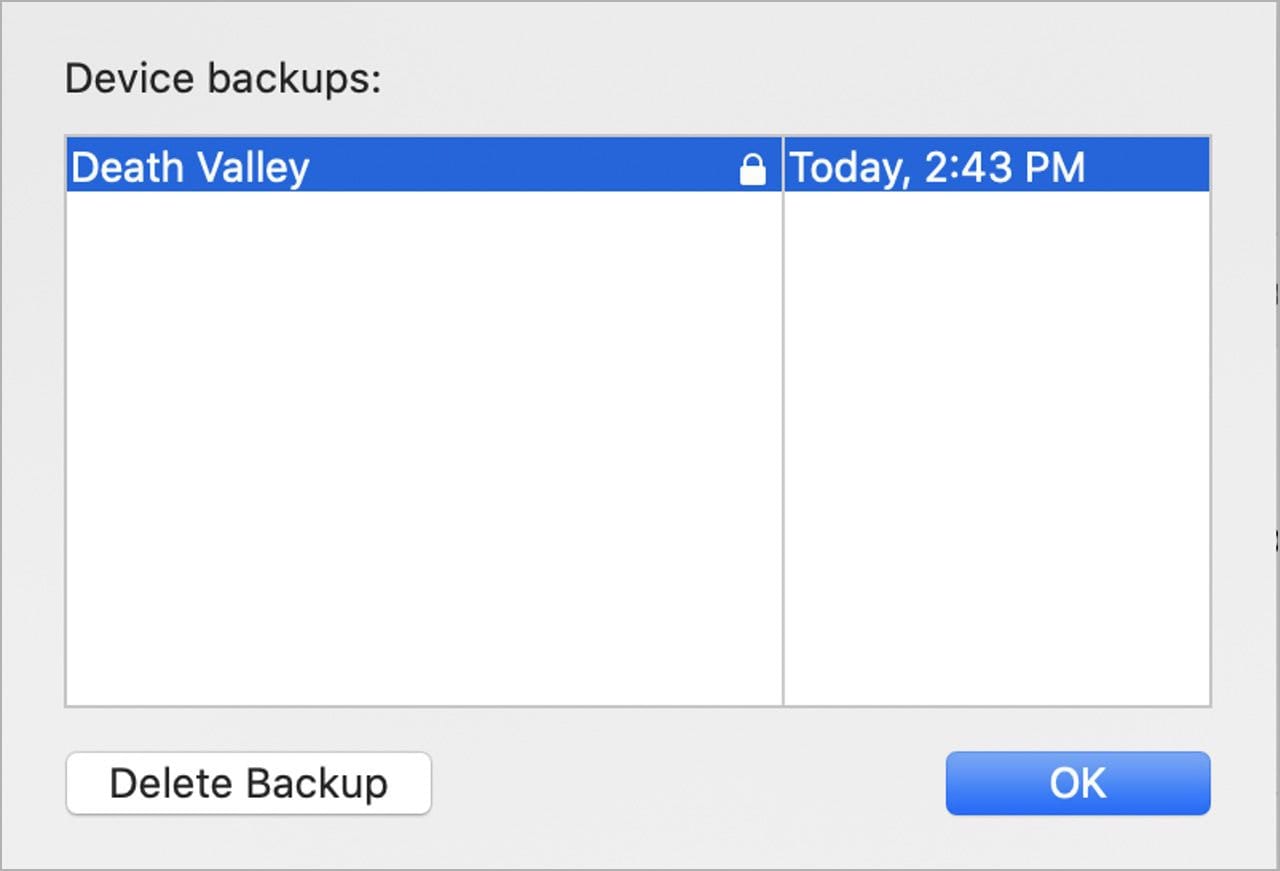
There’s only one backup in the screenshot above, but if you had been doing local backups regularly you would have a list of devices and the time and date of each backup. Click a single backup or Command (⌘) – click several backups to select them, then click the Delete Backup button to remove them permanently.
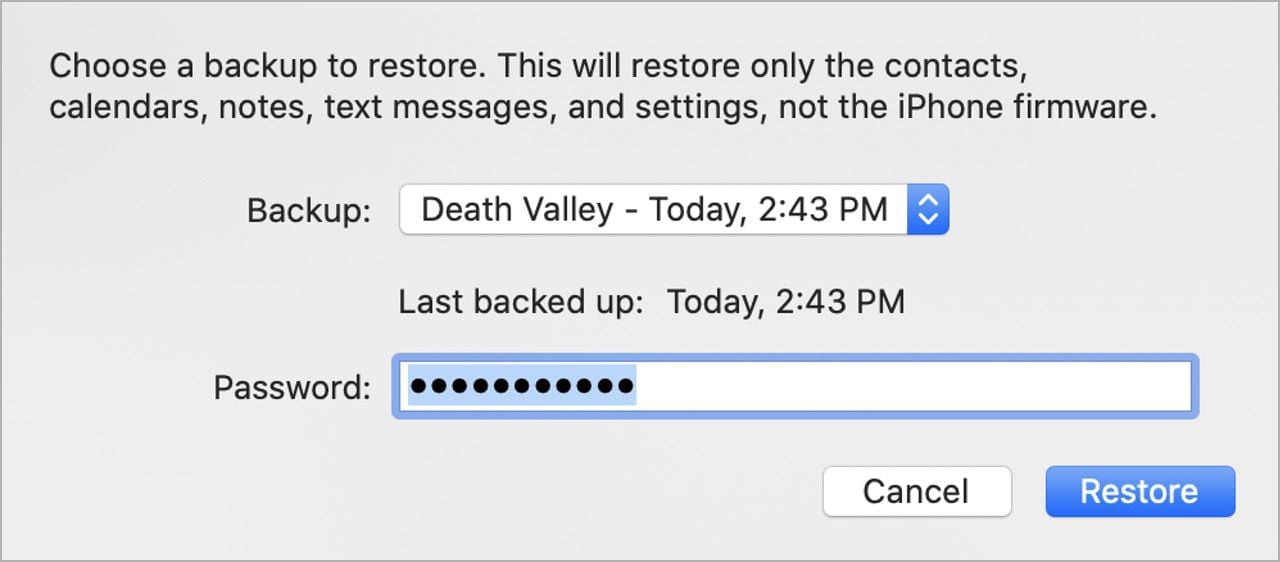
To restore a backup to your mobile device from a Mac, click the Restore Backup… button in the Finder window. A dialog appears with a pop-up list of all of the backups currently stored on your Mac for that device (see screenshot below). Select one and enter the encryption password if you chose to encrypt your backups. Finally, click Restore. Note that this process will completely overwrite all information on the device with the exception of the firmware.
Where backups really help is during the setup of a new device. During both iOS and iPadOS device setups, the following screen appears at one point asking how you wish to move data and apps to the new device:
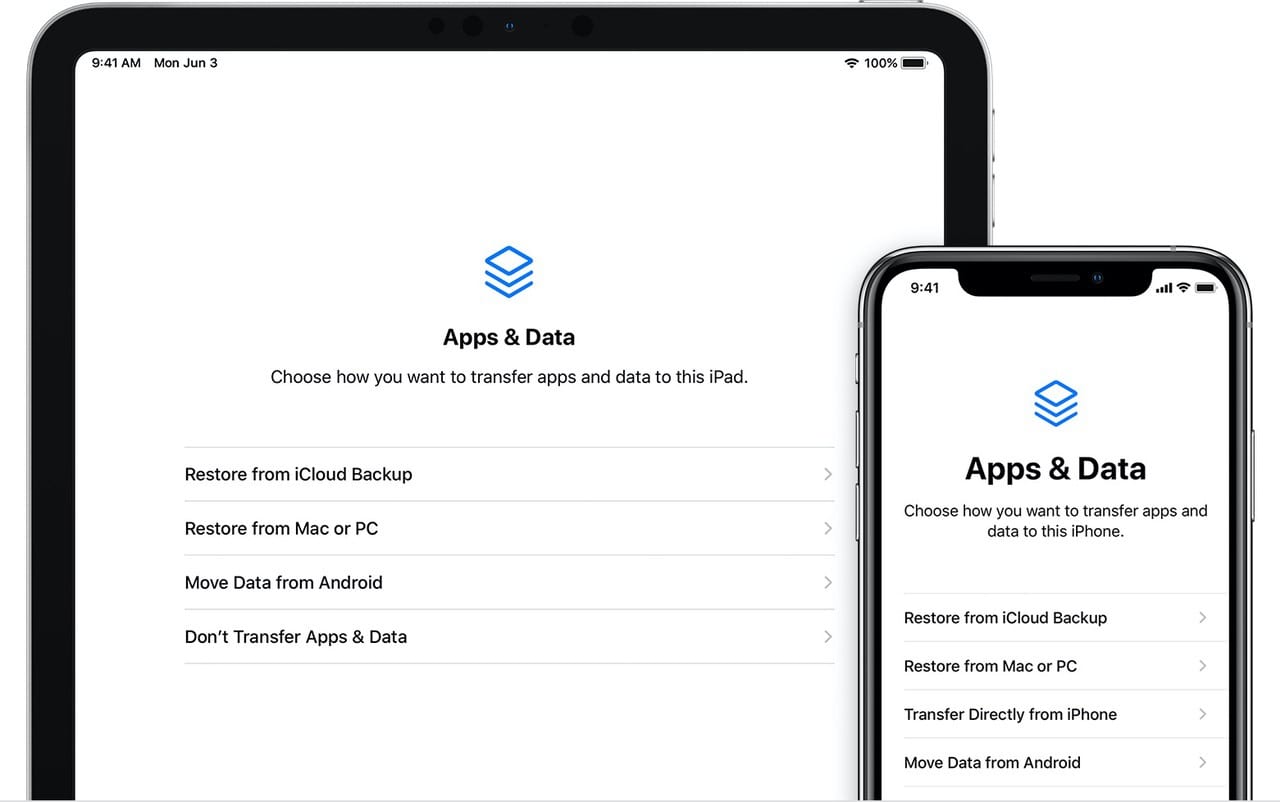
For those who are doing iCloud backups, the choice is obvious — restore from iCloud Backup. When a local backup has been done to a computer, selecting “Restore from Mac or PC” while the device is connected to the computer displays a list of all available backups. Selecting one of those backups restores the data and apps from a previous device to the new iPhone or iPad.
No third-party Mac apps are required to back up or restore your iPhone or iPad, regardless of what the developers of these various apps tell you. They also tout using their expensive apps to solve problems with your devices that can be resolved by following Apple’s instructions on placing a device into recovery mode or just restoring the device. Doing an occasional local backup of your iPhone or iPad to your Mac is a good way to keep your device protected and ready for any restore situation.



I don’t find a Manage Back-ups in button in my Finder side bar. Can you show me what that button looks like? I’m struggling to restore a new iPhone from my back-up
I will soon be getting my first iPhone, from Comcast. It is an iPhone 8+, which will presumably have the latest version of the iPhone OS installed. I am currently running Mojave, which still includes iTunes. Will the iPhone OS recognize iTunes in Mojave? I’m looking forward to loading my music collection on to the iPhone. It will be a 64GB device and I have 32GB of music and music videos. I’m not interested in updating to Catalina at the present time; I have too many 32bit apps, including a number from Adobe. If there is an issue with this, the obvious solution would be to downgrade the iPhone OS, if that is possible. Your advice on this would be appreciated.
This is all well and good, and thanks for such an informative article, but I haven’t updated to Catalina because I have all my music Playlists on iTunes and I still use my iPods as my go-to for playing music. How would I do this through Catalina? And I also refuse to pay even more money for the cloud. I have external hard drives for backup.
Thanks, but the first link to Dennis Sellers’ article is broken!
Thanks for catching that, it has been fixed!
Got page not found: Fortunately, my fellow blogger, Dennis Sellers, wrote up instructions on how to do that in this Rocket Yard article.
We’ve had a few who noticed this and it has been fixed. It’s nice to know our readers pay attention and care enough to report!