

I’ll be the first to admit it: my eyes aren’t quite as sharp as they used to be. Sometimes I really struggle to read the small print on menus, boxes, and forms. Fortunately, there’s a handy accessibility tool on iPhone and iPad that can help out. Magnifier is a powerful utility that acts as a digital magnifying glass. Let’s take a look at this accessibility assistant from Apple.
Revealing the Magnifier App
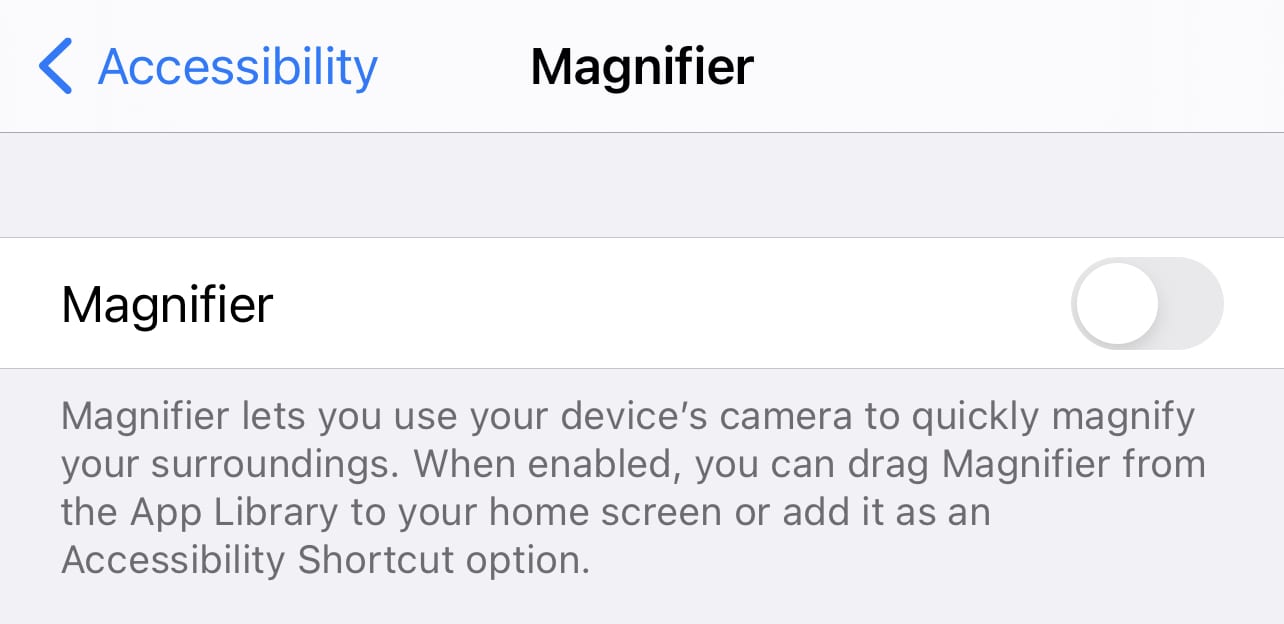
If you look for the Magnifier app on your iPhone or iPad, you won’t find it. It’s an accessibility option and isn’t revealed until you enable it in Settings.
- Launch Settings
- Scroll down to Accessibility and tap it
- Under Vision, tap Magnifier, then tap the Magnifier button to enable the app (the button turns green)
Launching Magnifier
Now that you have unhidden the Magnifier app, you can launch it and start using it. As with most things Apple, there are several ways to do this:
- Find the Magnifier app (see app icon at right) and tap it
- Ask Siri to “Launch Magnifier”
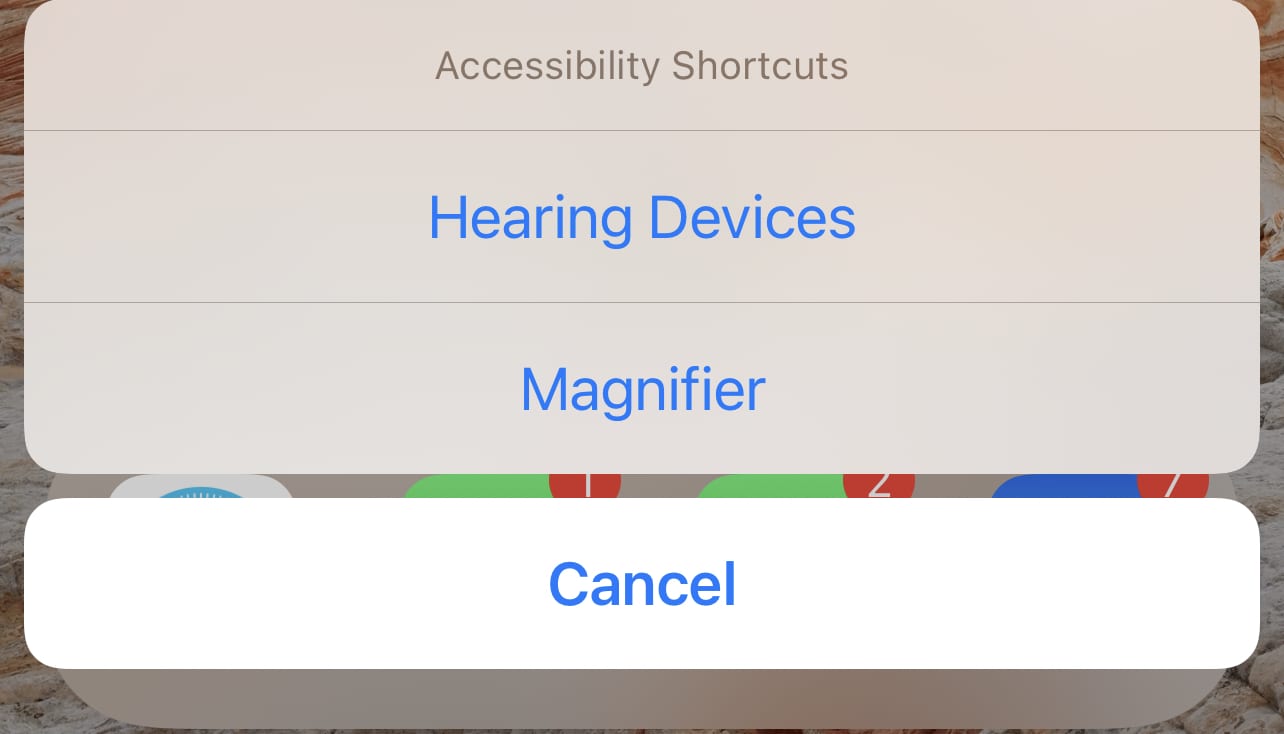
- Triple-tap the power/sleep button
Note that the third option may display a dialog with a choice of accessibility options. For example, I have hearing aids so my iPhone asked if I wanted to access Hearing Devices or Magnifier (see screenshot below).
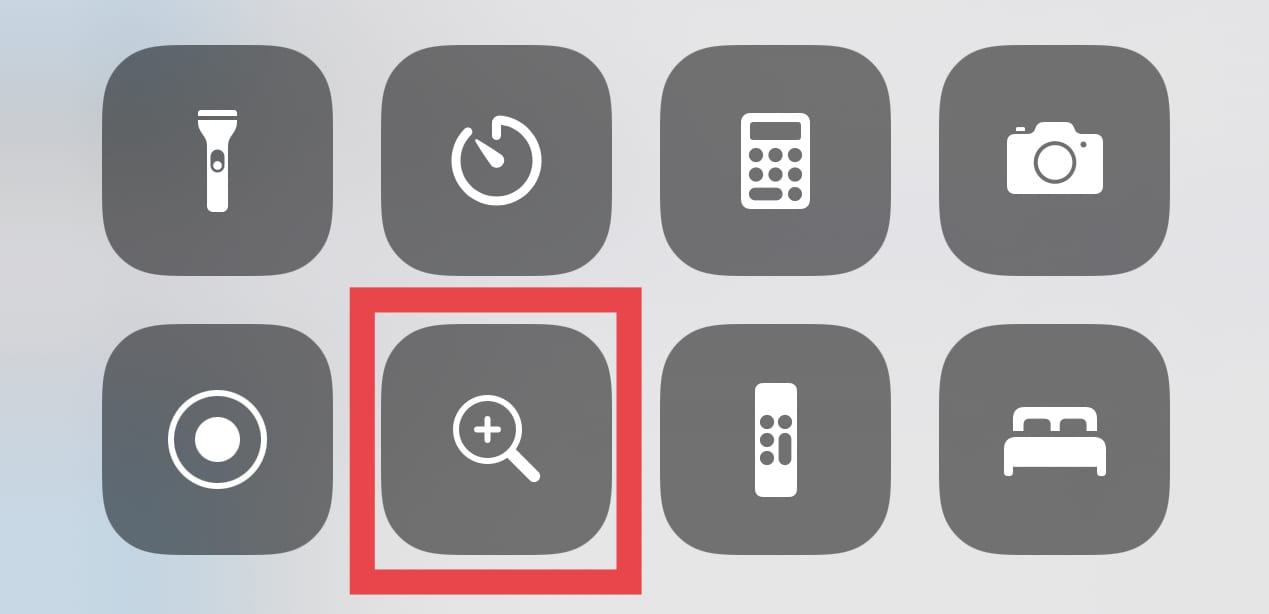
You can also add the Magnifier to Control Center, where it is displayed as a small magnifying glass icon with a plus sign ( + ) in it. To add it to Control Center:
- Launch Settings
- Scroll down to Control Center
- Find the control for Magnifier. It may be listed under “Included Controls” if it is already in Control Center. If not, look below under “More Controls” and tap Magnifier to add it to the controls.
Using Magnifier
Once Magnifier is launched, you see whatever the iPhone or iPad rear camera is looking at as well as a set of controls. Let’s go through these controls (seen below) one by one:
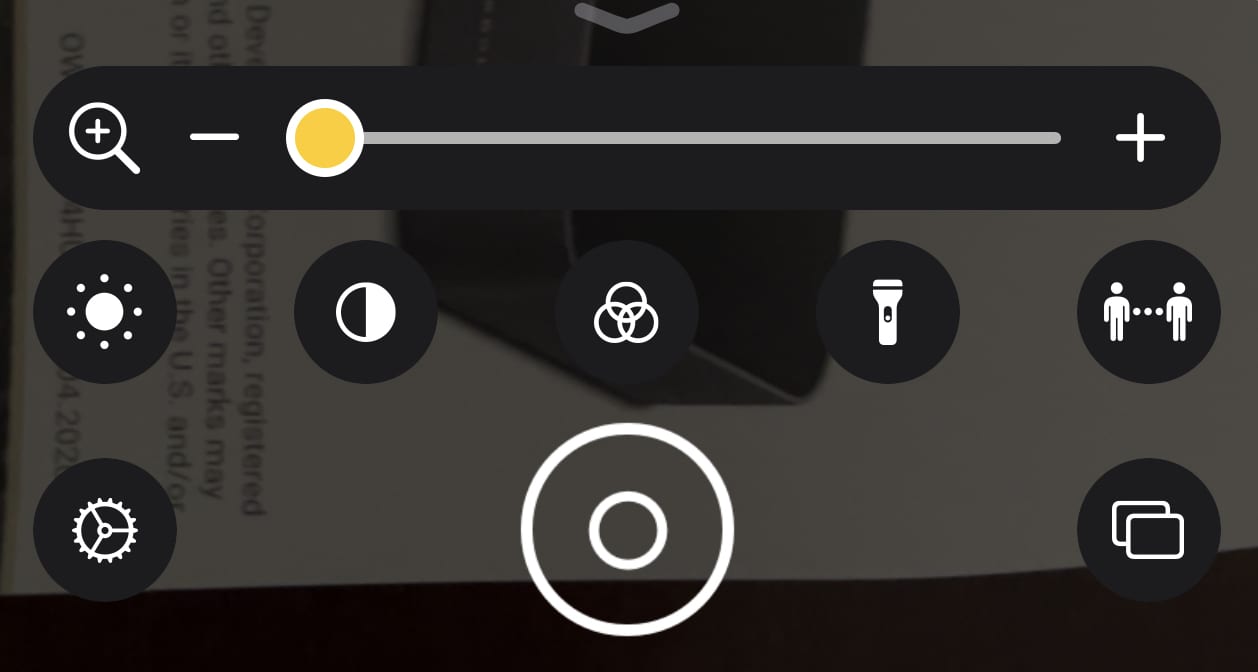
The slider with the yellow dot seen at the top of the screenshot is the zoom control. Sliding it right towards + increases magnification, sliding it back toward – decreases magnification.
The Middle Row of Controls
In the next row from left to right, we find:
Brightness: displays another slider that makes the image brighter or darker. When the slider is moved left or right, the brightness button turns yellow. To bring the brightness back to default (center), just tap on the center tick mark. Tap the button again to make the slider disappear.
Contrast: increases or decreases contrast with a slider. Less contrast reduces the difference between black and white, more contrast increases that difference. Most people find higher contrast text easier to read.
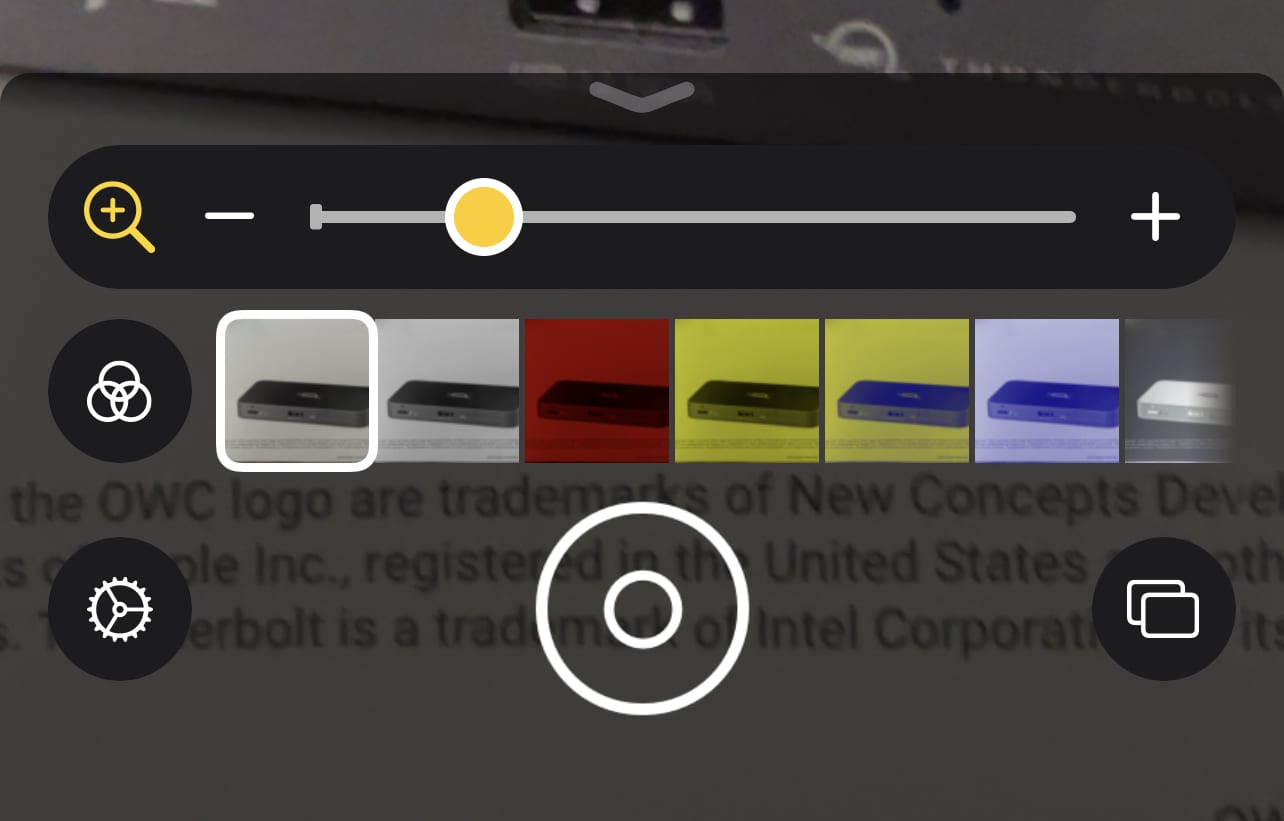
Filter: The next button displays an array of color filters that can be applied to the magnified image (see image aboveO. Various eye ailments can make it easier for someone to read text that is inverted (white letters on black background, for example) or another color. The available filters include:
- No filter
- Grayscale
- Red on black
- Yellow on black
- Yellow on blue
- White on blue
- Inverted
- Inverted grayscale
- Black on red
- Black on yellow
- Blue on yellow
- Blue on white
Flashlight: The flashlight button turns on the rear flash while magnifying an image, making it easier to read or see items in darkened rooms
People Detection: For those with really poor eyesight, it is useful to know when someone is nearby. People detection can be enabled in Magnifier to identify people in the vicinity and even tell you how far away they are.
The Bottom Row of Controls
At the bottom of the Magnifier controls we find the familiar “Settings” gear button on the left. That’s used to change the controls if you’d like — you may never use filters or people detection, so they can be eliminated.
Filters that are never used can be turned off, and there is an entire set of controls for people detection.
People Detection Settings
People detection can use metric or English units to define how far away a person is, and if you’re using sounds (it makes a continued beeping noise when someone is near), the pitch of the sound can go up when a person is within a pre-set range.
Speech can be used to announced how close a person is, or haptic vibrations of the phone.
Capture Images
The “target” button in the middle of the bottom row of controls snaps pictures of the magnified image. This is useful, for example, if you want to take images of items on a menu for future reference during a meal. By default, the images are not stored in your Photos library; they’re just available while you’re in the Magnifier app. They can be shared in the usual manner through AirDrop, Messages, Mail, and other means.
Even if you have perfect eyesight, the Magnifier app can be useful! It’s worth enabling for those times when you wish you had a magnifying glass with you.
I find it discouraging that there are a lot of similar apps in the App Store. Many users may buy an app unnecessarily when there’s a free one available in iOS and iPadOS. Be sure to keep this free, built-in utility in mind for friends and relatives with compromised eyesight.


Best Quality Screen Magnifier
Steve,
My wife and I are seniors and we need the help of magnifiers especially on the small print of device chargers and other everyday products.
I have been tagging (write their data on masking tape) my devices
like device chargers their output data are (current and voltage).
You made our lives a lot easier.
Thank you very much for this much needed article.
D’Oh! ♂️
I got the Weekly digest for Rocket Yard, on January 25, 2021 this morning and had it open, but hadn’t gone through it yet. Suddenly my non-Apple Bluetooth mouse began misbehaving, the second one to start going bad in the past 24 hours. (Was there a solar mass ejection or something yesterday?) I’d bought a Magic Mouse 2 from OWC back in August, but hadn’t used it since then, and suddenly remembered I had it and realized I’d better charge it because (a) it hadn’t been recharged yet, and (b) now I needed it. Searching for information online about how to charge and use it (never having had one before), I ran into a page explaining how to find its serial number. I figured I might need that, so that became step one (turned out later I didn’t need it, at least for now anyway – it’s been that kind of day). I found where serial number was supposed to be on the underside, but the type was so incredibly tiny, and so very low contrast, I could barely figure out where in the text the 17-character serial number was, let alone make out any of it.
Then I remembered my iPhone had magnifying glass. Unfortunately, with the Magic Mouse’s silver-colored underside, it had problems with light and reflections but I eventually managed to get it in sharp focus. Now came the tricky part — getting a screenshot. Not one screenshot I took came out well enough to read the serial number. Between all the four-letter words I kept uttering, I kept wishing it had a simple way to take a picture of what it was seeing, in stead of me trying desperately (and failing miserably) to hold it still long enough to take a normal screen shot. I eventually gave up, grabbed a pen and paper, and slowly copied the serial number down three digits at a time. It took a while.
If only I had read this article beforehand and realized that’s what the “target” icon was for. So I tried using the Magnify Glass app’s “target” button to take a shot of my Magic Mouse’s serial number just now. Ugh…. Piece of cake.
This was a great suggestion! Thank you very much. It’s going to make ordering at darkened restaurants much easier.
I don’t understand why you had not considered taking a picture of it using the iPhone’s camera app and zoomed into the picture, or directly using zoom in the camera app. How is this magnifier app any different to the camera app?