Have you ever wished you could help a friend or relative with a Mac-related problem, but trying to chat about it over the phone or in Messages just isn’t cutting it? What you need is to be sitting next to them, so you can see what issues they’re having, and then show them how to troubleshoot the problem.
If you can’t sit next to them, wouldn’t it be helpful if you could somehow see their screen’s content and control their Mac remotely?
Actually, you can, and the apps and services you need for remote access are included with your Mac. You just need to turn them on and have your friend or relative grant you access. Then you can lend them a helping hand from just about anywhere in the world.
Screen Sharing: The Basics
Screen sharing is the process of allowing someone else to see what’s on your screen; open, close, and move files and windows around; open apps; and restart the Mac. Essentially, screen sharing allows someone to be virtually seated next to you, looking over your shoulder, or even taking control of your keyboard, mouse, or trackpad.
Screen sharing can be a great help in remotely troubleshooting a problem, whether it’s a Mac on your local network or a Mac that’s far away from you.
Screen sharing is accomplished through the use of VNC (Virtual Network Computing), a network protocol for remotely controlling another computer. VNC allows the full graphical interface of the host computer to be displayed and controlled by a remote computer.
Screen Sharing Setup
The Mac, whose screen you wish to view and control on your local network, needs to have its screen sharing system enabled. It’s turned off by default, but can easily be enabled and disabled as needed.
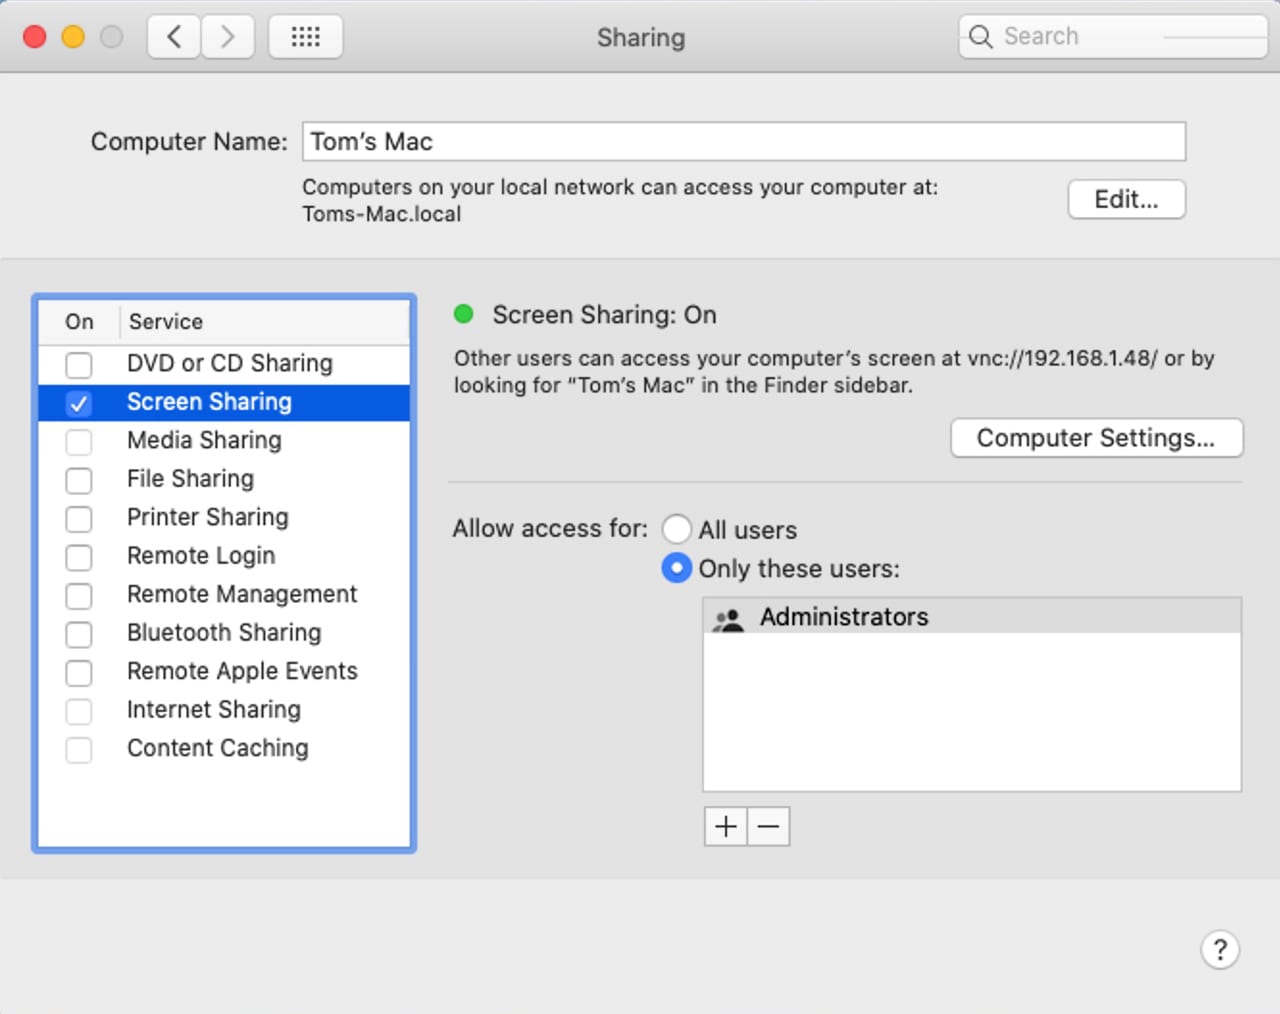
To turn on the ability to share a Mac’s screen, do the following on the target Mac:
- Launch System Preferences by clicking its Dock icon or selecting System Preferences from the Apple menu.
- Open the Sharing preference pane.
- In the Sharing preference pane, select Screen Sharing from the sidebar.
You need to specify who is allowed to access the Mac’s screen, using one or more of the following options:
Allow access for: This option allows you to pick any or all users on your local network who have a user account. There are two options for selecting which users will have access to your Mac’s screen:
- All users: This will allow anyone who has a user account on your Mac to access and control the Mac’s screen. If your Mac is part of a network account server, anyone with an account on your network can also share your Mac’s screen. The exception is anyone with a Sharing-Only account, which is used primarily to allow files to be shared but not to gain any control of the Mac.
- Only these users: You can choose specific users who have accounts on your Mac or on the network account server. By default, administrators are given access, but you can add other accounts by selecting the plus (+) button at the bottom of the user list to browse through the user directory and add an individual or group.
Remote VNC users: If you’re trying to make a remote connection to a friend’s Mac, chances are you don’t have a local account with their Mac. In that case, you can allow a remote VNC connection by doing the following:
Click the Computer Settings button.
A sheet will drop down with two methods for allowing a remote connection to your Mac:
- Anyone may request permission to control screen: This option will allow anyone at any time to request access to your Mac’s screen. If you select this option, you’ll see a notification any time some attempts to gain access to your Mac. You can then accept or deny the connection.
- VNC viewer may control screen with password: With this option, the remote individual who wants to share your screen uses a password. If you use this option, it’s a good idea to create a secure password. One of the benefits of selecting this method is that just about any VNC client on the remote system can be used. This allows not only a person with a Mac to help you, but also anyone using a Windows PC, iPad, iPhone, or Android device.
Once you have the access permissions set up, you can place a checkmark in the Screen Sharing sidebar item to enable screen sharing.

Once Screen Sharing is enabled, you’ll see a green dot signifying the service has been turned on. You should also make a note of the VNC address, usually shown as: vnc://xxx.xxx.xxx/.
If you’re screen sharing with a Mac on the same local network, you can use the Mac’s name, shown just under the VPN address.
Connecting to a Mac on the Local Network
You can connect to a remote Mac that’s part of your local network by using the Finder.
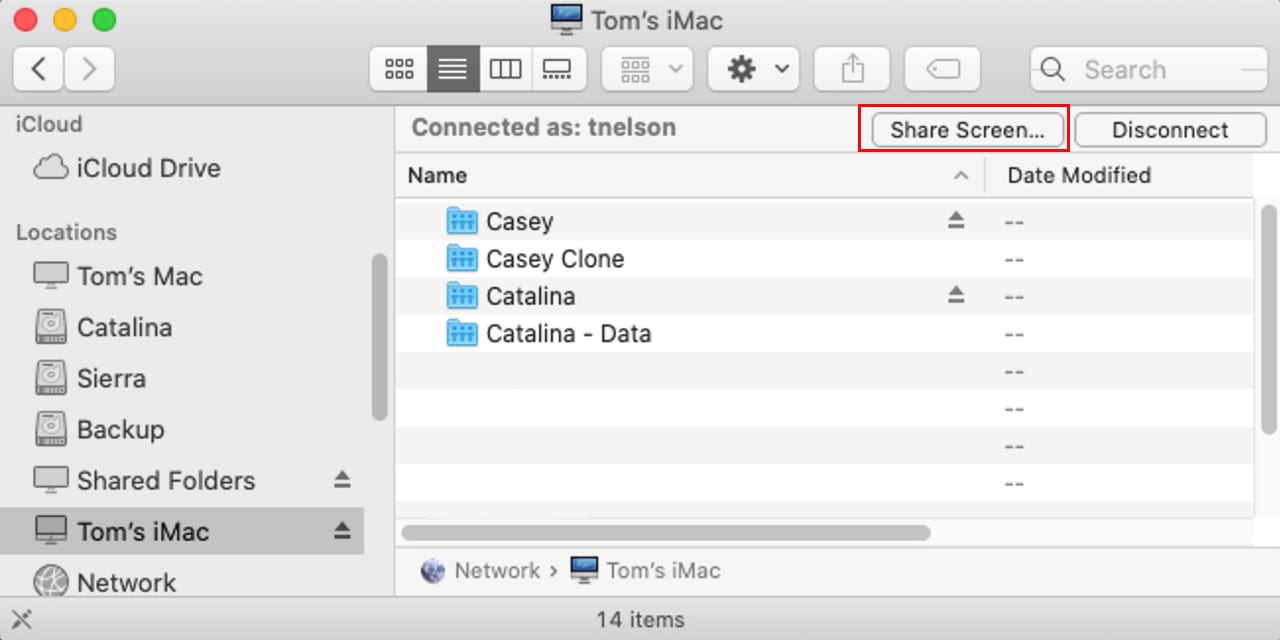
- Open a Finder window and check the Finder sidebar section labeled Shared or Locations (depending on the version of the Mac OS you’re using). The Mac you wish to connect to should be listed in the sidebar.
- Select the remote Mac from the Finder sidebar.
- The Finder will display a Share Screen option. Click the Share Screen button. Depending on how the sharing permissions were configured on the remote Mac, you will either connect right away, or you will need to supply a user account name and password.
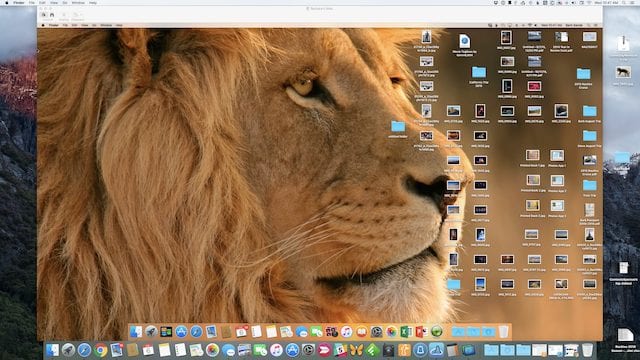
- The Finder will launch the Screen Sharing app and make the connection to the remote Mac. A window will open, displaying the current content of the remote Mac’s screen.
You can also connect to a local Mac by manually launching the Screen Sharing app located at: /Startup Volume Name/System/Library/CoreServices/Applications.
When you launch the app yourself (as opposed to using the Finder sidebar), you’ll be asked for the address of the Mac you wish to connect to. Use the VNC address or the Mac’s name that was provided when the Screen Sharing service was enabled (see above).
Tip: If you don’t see the remote Mac listed in the Finder sidebar, or the connection isn’t made and times out, make sure the Screen Sharing Setup was performed as outlined above.
Connecting to a Remote Mac on the Internet
Usually, connecting to a remote computer over the Internet requires not only configuring a VNC server and client on two or more computers but also likely having to change firewall settings on the two computers or network routers.
An easier way is to use the Messages app to initiate a connection, and then the Screen Sharing app to view and control the remote computer.
Start by using the Messages app to initiate a chat with the individual whose Mac you wish to view. The Messages app will perform some nifty tricks behind the scenes to find the right Mac to connect to. Once the connection is made, you not only can chat, you can also view the screen of the remote Mac. You don’t even have to turn Screen Sharing on with this method.
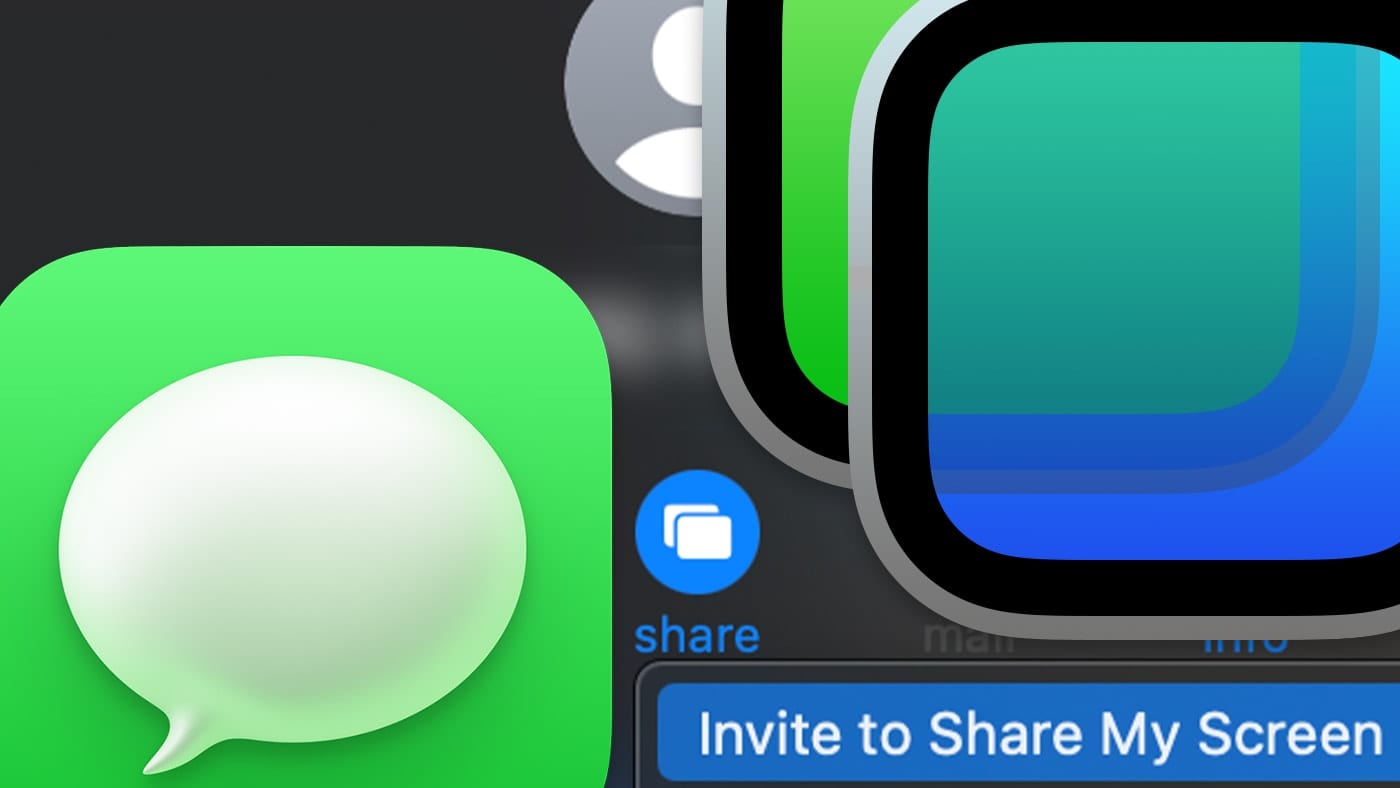
In the Messages app, select the Details item at the top of the messages window. A menu will open that will include the option to start a screen sharing session. Click the button that looks like two overlapping displays.
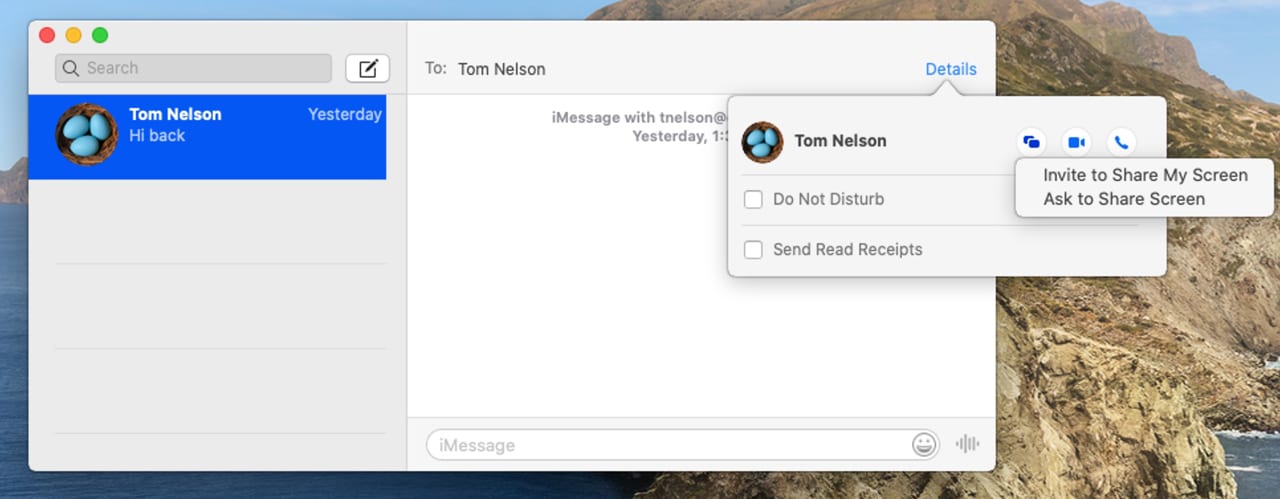
You’ll see the option to either Invite to Share My Screen, or Ask to Share Screen. Select the option to Ask to Share Screen.
A notice will be sent to the remote Mac, asking permission to share its screen.
If the user accepts the request to share the screen, a sheet will open, allowing the remote user to grant permission to either Control my screen, or Observe my screen.
Make a selection, then click the Accept button.
Once the connection is accepted, the Screen Sharing app will open.
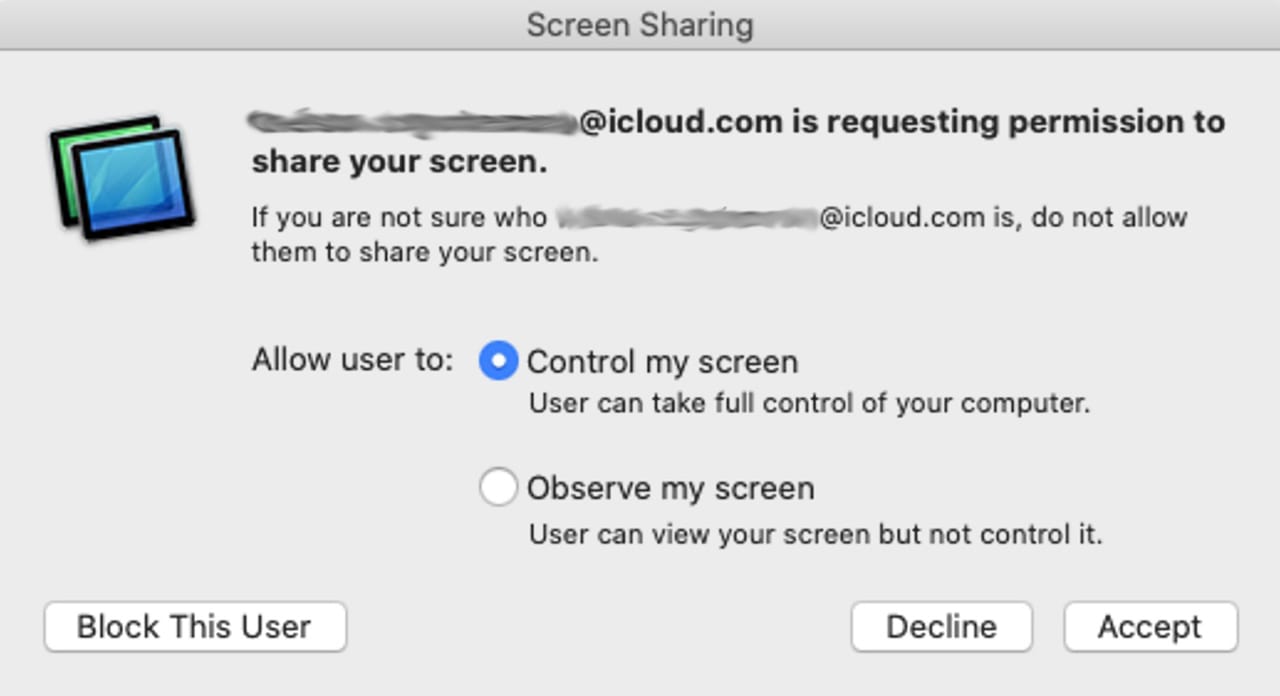
If you don’t want to use the Messages app to initiate the Screen Sharing process, you can do it directly from the Screen Sharing app instead:
Launch the Screen Sharing app at Name/System/Library/CoreServices/Applications.
A Connection window will open.
Enter the Apple ID of the user of the remote Mac, and then click the Connect button.
The same request to share the remote Mac’s screen will be sent, just as when using Messages. If accepted by the remote user, the Screen Sharing app will open.
Note: Using Messages or the Screen Sharing app directly, as outlined above, uses various iCloud services. An Apple ID is required, as well as a good Internet connection.
Using the Screen Sharing app
The Screen Sharing app’s window includes a toolbar at the top with which you can modify how you interact with the remote Mac.
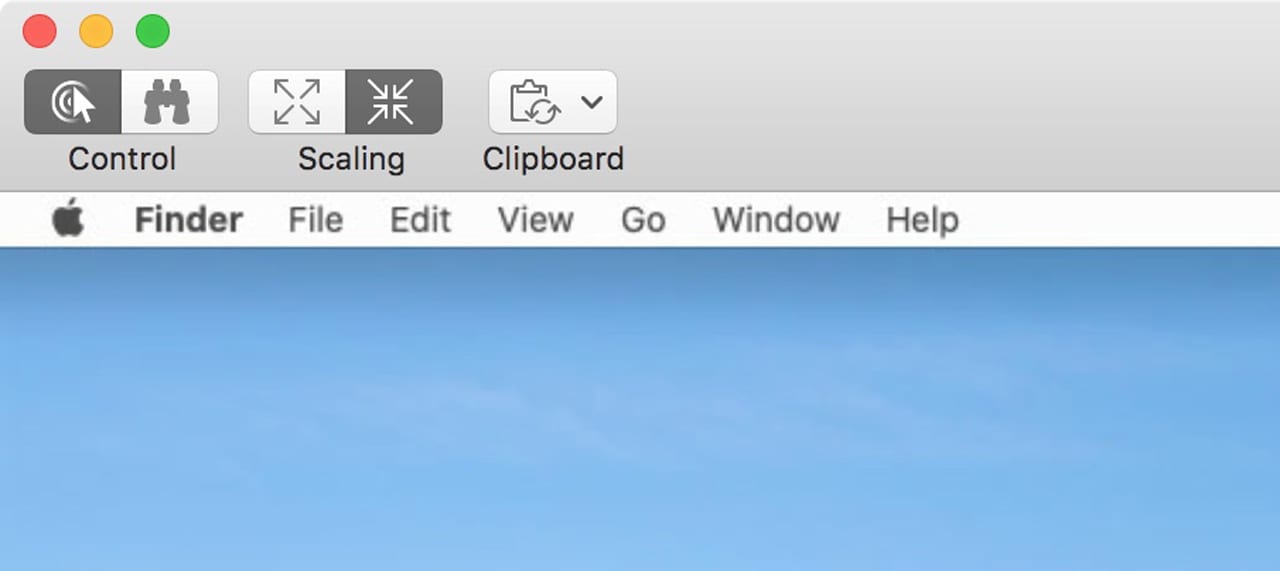
Control: You’ll find two buttons in the Control Mode group:
- Control Mode: This button with a cursor and target icon is used to interact with the remote Mac. As long as your Mac’s cursor is within the Screen Sharing window, you control the remote Mac’s cursor and keyboard, allowing you to use the remote Mac just as if you were sitting in front of it.
- Observe Mode: This button’s icon looks like a pair of binoculars. When selected, you can see what the remote user is doing; you can see how the cursor on the remote Mac is being used, what is being selected, or how apps are being used. Your local cursor turns into a magnifying glass. If you need to see an area at a higher resolution, you can click and hold the mouse or trackpad button to magnify a small section of the remote display.
Scaling: The Scaling group has two options you can use to adjust how the remote desktop appears on your Mac:
- Scaling Off: No scaling is performed; the remote Mac is displayed at full scale. If the remote display has a higher resolution than your Mac, you’ll only see a smaller section of the remote display. You can scroll about to see the unseen.
- Scaling On: When Scaling On is selected, the remote Mac’s display is sized to fit within the Screen Sharing app’s window.
Clipboard: The Clipboard setting uses a dropdown menu that allows you to share the clipboards between the local and remote Mac. You can set the clipboard to:
- Use Shared Clipboard: This allows the local and remote Mac to share the content of their clipboards.
- Get Clipboard: This will copy the content of the remote Mac’s clipboard to the local Mac’s clipboard.
- Send Clipboard: This will copy the content of the local Mac’s clipboard to the remote Mac’s clipboard.
End the Screen Sharing Session: Either party can end the screen sharing session. The Mac that has the Screen Sharing app open can simply quit the app. The remote Mac user can terminate the connection by locating the Screen Sharing item that was added to the Menu bar (it looks like two overlapping screens). Clicking on the Screen Sharing menu item will display the option to End Screen Sharing.
Have You Remotely Fixed a Mac Issue?
Chances are you’ve offered to fix an issue a friend was having with their Mac. With the Screen Sharing capabilities, you may not need to leave your home to perform the fix. On the other hand, that may mean less opportunity for complimentary beer and pizza. Oh, the trade-offs technology brings.
Have you used a remote viewing app to fix a problem? Let us know which one and how it worked out in the comments below.



Thanks for the great article!
Great steps in how to do screen sharing for troubleshooting MAC computers. Additionally, one can also have a look at and use tools like Zoom, Webex, Gomeetnow, Gotomeeting, R-HUB web conferencing servers etc. in order to do screen sharing, file transfer etc. These work on all platforms including MAC.
Screen sharing via messages is almost flawless!! I have a problem with one friend. He can send a screen sharing request to others, but he does not receive request when sent from someone else (me)? Any ideas why it only works when he sends request?
Is there a same function for MAC<=>Windows or MAC<=>Linux sharing?
I regularly use screen sharing via Messages to help an older relative when she gets her Mac into a confusing state.
Way too confusing, just use TeamViewer.
Nothing confusing about how the TeamViewer folks want to charge a great deal of money these days to use their product even intermittently. I mostly now use Jump Desktop for its excellent organization of host computers (I now have 16 on my list, both Win and Mac) and ease of setup with zero cost for people on the other end, all for a one-time investment on my part. I used TeamViewer for a long time waiting for them to achieve feature parity with Timbuktu after its double acquisition and subsequent death.
We dropped cable TV a long time ago and use an old MacMini with EyeTV as a DVR. The antenna plugs into the EyeTV device which is connected to the MacMini by USB.
The MacMini has no keyboard or screen so I use Screen Sharing to access the EyeTV program to make changes and copy recordings to my MacBook Pro to play on the TV via HDMI cable.
If we have time WiFi will transfer programs in a few minutes, if we want to watch now I use Screen Sharing to copy to an SD card or small laptop drive in an enclosure that can be used to transfer the file.
The EyeTV app also allows you to fast forward which takes most one hour shows down to around 40 minutes.