It’s March 31, which means it is World Backup Day. This observance is held each year to spotlight the importance of backups and remind people to make backups a habit.
Backups are the only way to make sure that your important data is copied to at least one other location so that it is still accessible if your Mac, iPhone or iPad is damaged or lost.
Every year, we celebrate World Backup Day here at The Rocket Yard by showing our readers just how easy it is to make backups on all of their Apple devices. If you’re not making regular backups, today’s the day that you should begin. Check out this informative video first, then follow our instructions to start making your backups.
Making a Mac Backup with Time Machine
Mac owners are fortunate in that their computers come with backup software built into the operating system, macOS. That backup software is called Time Machine, and it is the easiest and best way to make an ongoing backup. Time Machine initially makes a copy of all of the files on your Mac, then begins tracking changes that have been made to the Mac once every hour. Every day, those hourly backups are turned into a daily “snapshot” of what was on your Mac.
Did you just accidentally delete an important work file? With a Time Machine backup, you can go “back in time” one hour and retrieve that document as it was. At no point will you lose more than one hour of work.
Let’s get started with Time Machine.
First, we need to know the capacity of your Mac’s internal storage and how much of that is being used. To find this information, click the Apple menu, select About This Mac, then click the Storage Tab.

In this screenshot, the MacBook Pro has a 2TB SSD (solid state or “flash” drive) with 1.46TB of available storage. Depending on his or her work, that empty space could eventually be filled.
Now we’ll multiply the maximum storage capacity of the Mac by two, and roundup. This number represents the size of the backup drive you’ll need. What do you need twice the amount of storage to back up your Mac? Time Machine backups grow in size as time passes, and it takes a lot of space to store all of the files you’ve created and deleted over that time.
In this case, we’d need at least 2 x 2 = 4TB of storage in the backup drive. If the number is fractional, just round up to the next highest integer.
Now it’s time to get a backup drive, and fortunately for you MacSales.com is the perfect place to view and purchase storage. We have a few suggestions for those of you who don’t have a backup drive.

For those who have MacBooks, the sleek OWC Envoy Pro EX (image at right) is a portable and bus-powered backup pal that can go anywhere your laptop travels. Made of rugged aluminum and featuring USB-C or USB 3.0 interfaces, the Envoy Pro EX is incredibly fast, dustproof, and can even survive 30 minutes in 1 meter of water.
Perhaps you’re using a desktop Mac and need a lot more storage to hold your backups. That’s where the inexpensive OWC Mercury Elite Pro (see image below) can help out. Available in capacities from 1TB to a whopping 16TB, the Mercury Elite Pro has a variety of built-in interfaces to connect to almost any Mac or PC.

For even more capacity or speed that can support video editing, you might want to consider a Redundant Array of Independent Disks, also known as a RAID array. RAID storage uses multiple disks and specialized controllers to turn a number of drives into one large, redundant drive. What we mean by redundant is that one drive can fail and the data is still fully accessible until the bad drive is replaced.
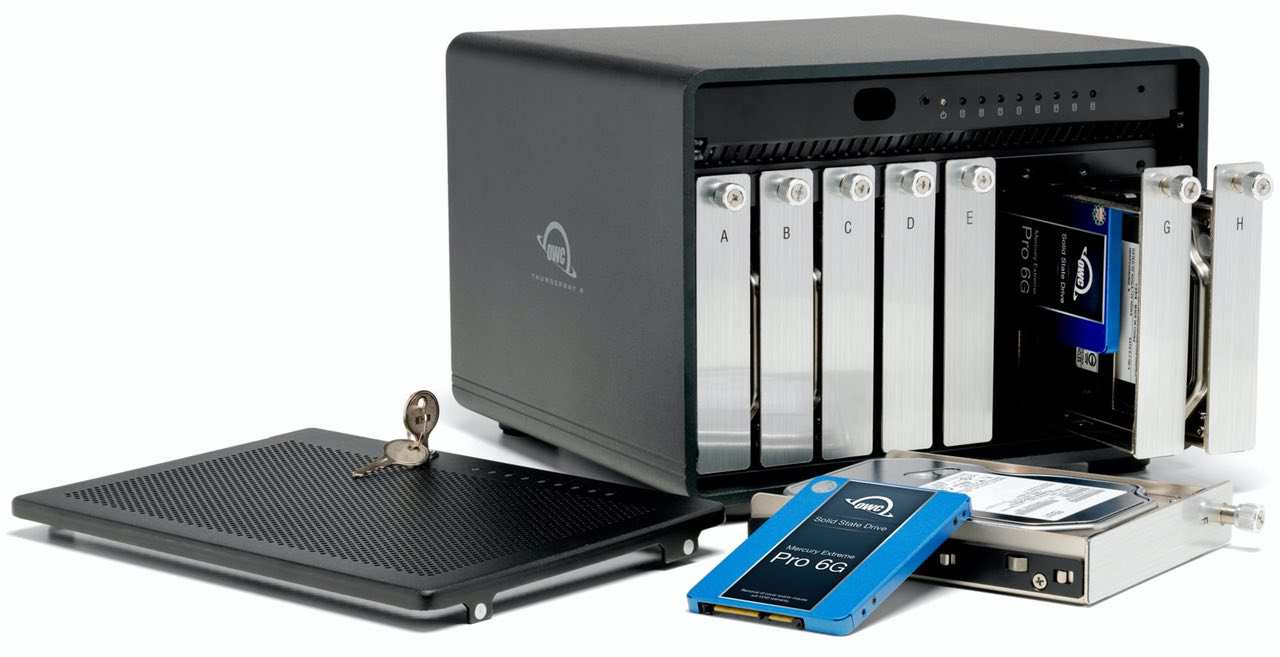
OWC’s new ThunderBay 8 (see image below) holds up to eight individual drives for a capacity of up to 128TB, and since it uses Thunderbolt 3 as the drive interface, six of the units can be daisy-chained together for up to 768TB of redundant RAID storage.

Once you have your new drive, unpack it, make sure it’s plugged into your Mac with the proper cable (usually included) and that it has power running to it. “Bus-powered” drives are great for backups in one respect — they don’t need an external power supply as the computer provides all of the power they require.
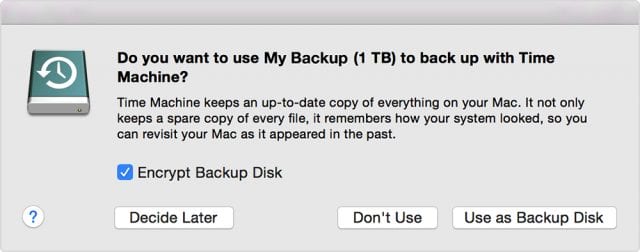
When the drive is plugged in and turned on, a dialog appears on the Mac desktop:

Click the “Use as Backup Disk” button, and Time Machine does a one-time full backup of your data. This can take a while. Once the first backup is done, the Mac backs up all new documents and changes that are made to them once an hour.
Some Mac users don’t like to have their Macs backed up that often, and if you want more control over when Time Machine performs backups, we have a tutorial for that.
Your Mac is now protected! Should the hard disk or SSD fail, the backup can restore your data once you have a replacement drive installed. Instructions on how to restore files or fully recover a Mac’s drive are available in this Rocket Yard article.
Backing Up an iPhone or iPad
Apple understands the importance of backups, so it built a very easy way to back up your iPhone or iPad into the devices: iCloud Backup. Once you start making nightly backups of your iPhone or iPad, restoring an existing or new device with all of your apps, data and settings is quick and easy. To set up iCloud Backup:
1) Launch the Settings app
2) At the top of Settings you’ll see your name and a list of some Apple services such as Apple ID, iCloud, iTunes and App Store. Tap this, and your settings for those services appear.
3) Tap the iCloud button, which looks like a blue cloud.
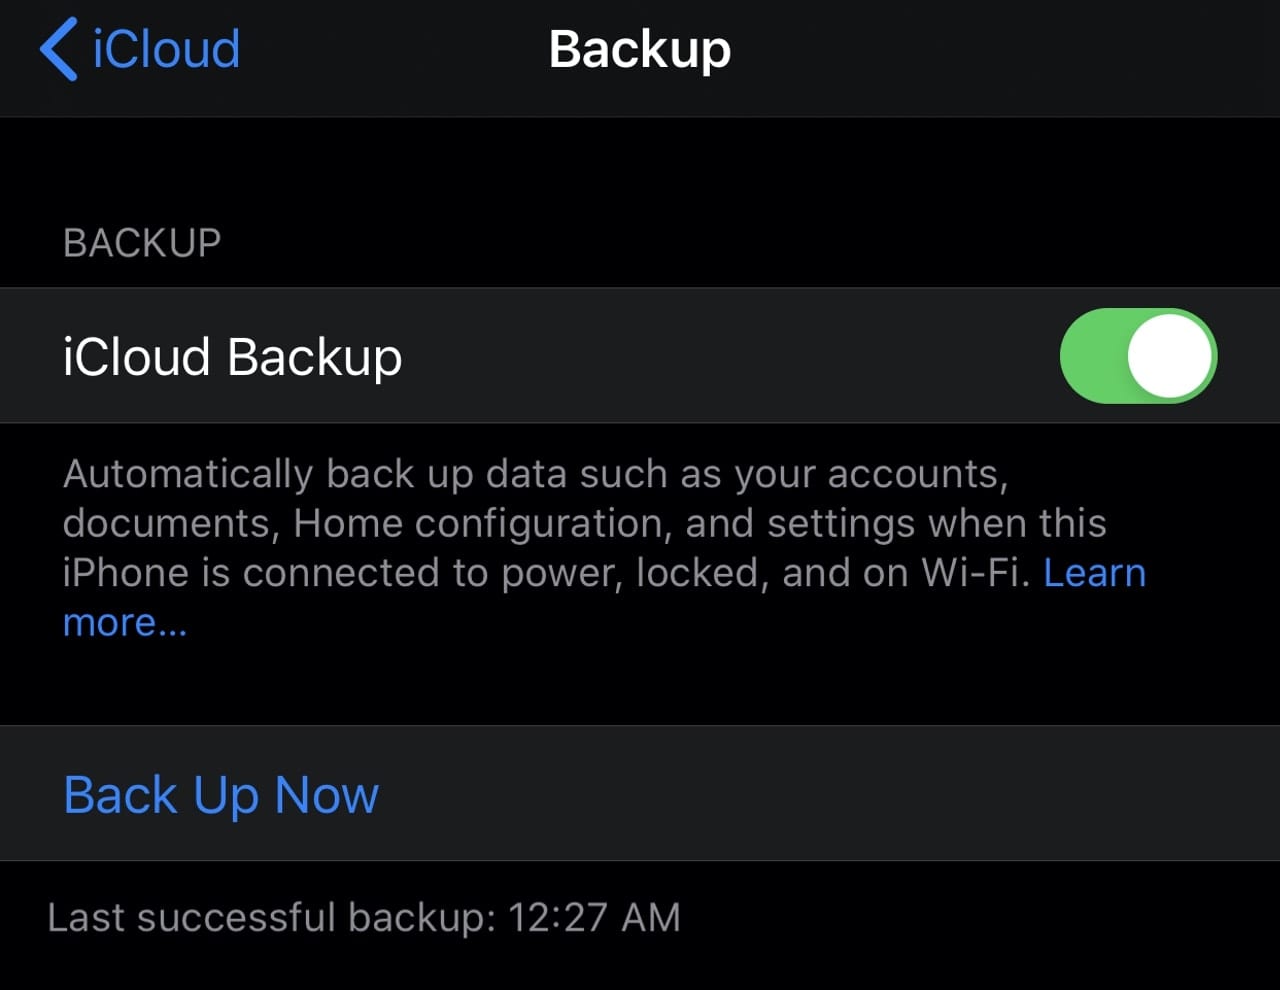
4) There’s a list titled “Apps Using iCloud”. Scroll that section until you see iCloud Backup. Tap iCloud Backup and make sure that that the iCloud Backup button is enabled (green — see screenshot below):

When the iPhone or iPad is connected to power, locked, and on a Wi-Fi network, it will automatically back up to iCloud. To force a backup (for example, just before an operating system upgrade), tap “Backup Now”.
The time and date of the last successful backup is always listed, and iOS or iPadOS informs you if the device hasn’t been backed up in a while so that you can manually start a backup.
As you can see, it’s quite simple to back up your Apple devices. We’ll discuss other backup strategies in future World Backup Month articles, so visit The Rocket Yard often for updates.
Note: This article is not officially endorsed or sponsored by the World Backup Day organization.


Great. Please, bring external portable SSD with capacities of 4, 8 & 16 TB (no RAID involved, please!). Current technology allows that. Apple has already 8 TB SSD in Macs.
Yeah, Yeah, Yeah. It’s all about backups. Everyone talks about backups. What about restores from Time Machine Backups in 10.15.3 and 10.15 4? Notwithstanding the previous blog on restoring TM Backups, it does not work; be it from NAS, OWC Envoy Pro USB drive or LaCIe USB-C drive.
The only way is to internet restore the OS and then use Migration Assistant in the newly restored OS to restore apps and personal stuff. Takes twice/three times as long as before.
Why is this not documented? Big down-grade Apple. What were you thinking?
“Err, we were busy compiling about a hundred new emojis”.
Time Machine backs me up hourly, I system clone bi-weekly, and any important data is backed up daily to two other backups. My home server external data drives are cloned daily. So, I guess I don’t need a yearly reminder to backup.