The Accessibility Keyboard is an on-screen keyboard that lets you type and perform other actions on macOS without using your Mac’s hardware keyboard. And it can be very useful for some folks, especially anyone who has trouble using a physical keyboard.
How to turn on the Accessibility Keyboard
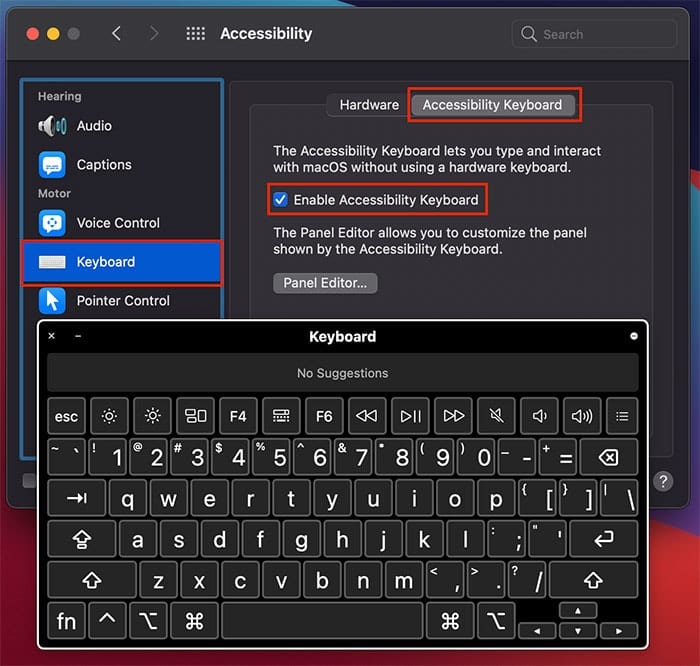
1. Chose “Apple menu () > System Preferences,” and click Accessibility.
2. Click on the Keyboard tab.
3. Check the box to “Enable Accessibility Keyboard.”
How to use the Panel Editor

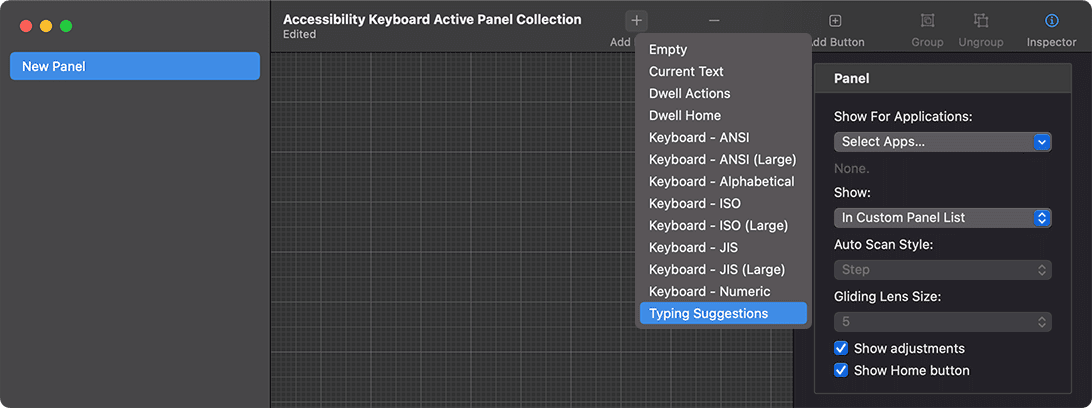
Click the Panel Editor pane if you wish to enable this feature. The Panel Editor allows you to customize the panel shown by the Accessibility Keyboard.
Click the Add Panel (NOT the “Add Button”) option at the top of the pop-up window to create an entirely new panel. Click the panel type you want to create.
You can choose and modify an existing template, or choose Empty to create a new panel from scratch.
When you add a keyboard panel, the Typing Suggestions field and system control buttons aren’t included; they are automatically shown when you use the panel. You can add a typing suggestions field to a panel; if you do, only your field is shown when you use the panel.
You can also choose to import, copy, rename, or delete panels. You can also share a panel by choosing “File > Duplicate.” A new window appears with a copy of the panel collection. Delete panels from the duplicate that you don’t wish to share.
Choose “File > Move To,” rename the file if you want – select a target location, then click Save.
In the Finder, select the file, click the Share button in the Finder toolbar, then choose how you wish to share it. You can create a new panel collection to give to other people. Choose “File > New Panel Collection,” then in the new collection window, choose “File > Save,” or click Untitled at the top of the window to name and save the file.
How to turn off the Accessibility Keyboard
- Chose “Apple menu () > System Preferences,” and click Accessibility.
- Click on the Keyboard tab.
- Uncheck the box to “Enable Accessibility Keyboard.”


