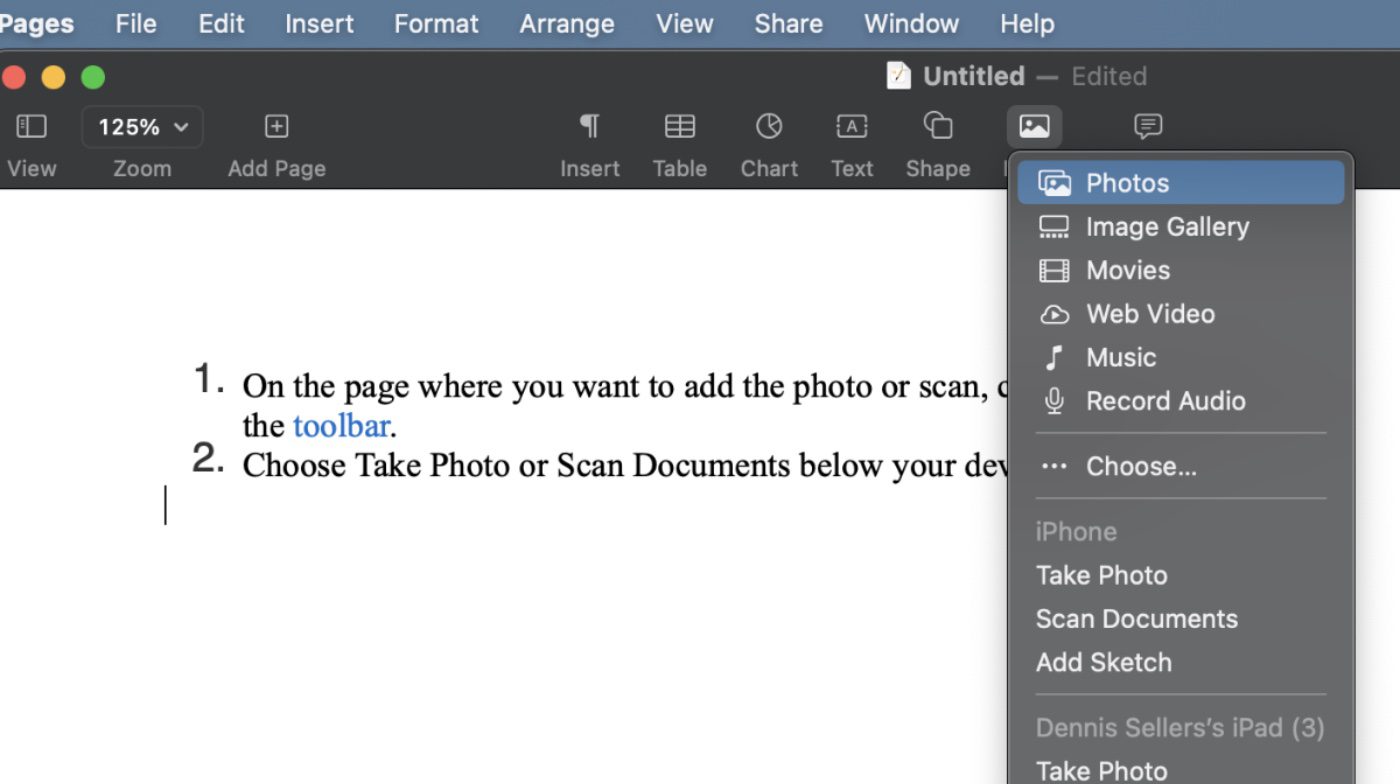
If you’re working in Pages on your Mac and you have your iPhone handy, you can use the smartphone to take a photo or scan and insert an image directly into a document on your Mac. You can also do this with an iPad, but I find it much easier to do so with the iPhone.
You accomplish this via the Continuity Camera feature. It allows you to, as mentioned, use your iDevice’s camera to take photos or scan documents, which then appear on your Mac. But before we proceed, let’s make sure that your devices support this feature. See the Apple Support article System requirements for Continuity.
They do? Great. Let’s proceed
° On the page where you want to add the photo or scan, click in the toolbar, then choose Take Photo or Scan Documents below your device’s name.

° On your iPhone or iPad, do one of the following:
Take a photo: Tap the photo button, then tap Use Photo.
Scan a document automatically: Position the document in view of the camera to automatically capture the page, crop it, and correct its perspective. To insert the scan in your document, tap Save.
Scan a page manually: Tap the photo button, then drag the frame to adjust the area you want to scan. Tap Keep Scan, then tap Save.
° Drag the image to move it, or drag any selection handle to resize it in your document.


