


On October 25, macOS 12 “Monterey” became available to the general public. The latest iteration of the Mac operating system builds on the legacy of previous versions, adding user-friendly productivity enhancements. We’ve covered many of the new features of macOS 12 in “The Road to macOS Monterey”. Today we give you the rundown on the top 20 macOS Monterey tips to make using your Mac more productive and fun.
Tip #1: Erase all content and settings from a Mac
In the past, it’s been a hassle to get a Mac ready to sell, give away, or trade in. The safest way to do this was to boot the Mac into Recovery Mode, erase the disk with Disk Utility, then reload a fresh copy of macOS.
Apple now made the process as simple on macOS as it is on iOS and iPadOS. Here’s how to erase all content and settings from a Mac running macOS Monterey:
1 – Launch System Preferences from the Dock or by selecting > System Preferences
2 – Under the System Preferences menu, select “Erase all content and settings”.
3 – Enter the user name and password for an administrator to enter the Erase Assistant.
4 – The Erase Assistant suggests that you use Time Machine to back up your Mac prior to erasing it. If you already have a backup or don’t wish to keep any of the data, click the Continue button.
5 -The following screen appears:

6 – Click Continue, then log out of your Apple ID at the prompt to complete the erasure.
Tip #2: Set an animated Memoji for your Mac login
This is a really fun tip! Take advantage of the many new Memoji features and create a new you. Your animated Memoji reacts when you log into your Mac after startup or a restart.
1 – Launch System Preferences
2 – Hover the pointer over the existing login image in the upper left. “Edit” appears – click it.
3 – On the window that appears (see below), click Memoji, then either select an existing Memoji or click + to create a new one.
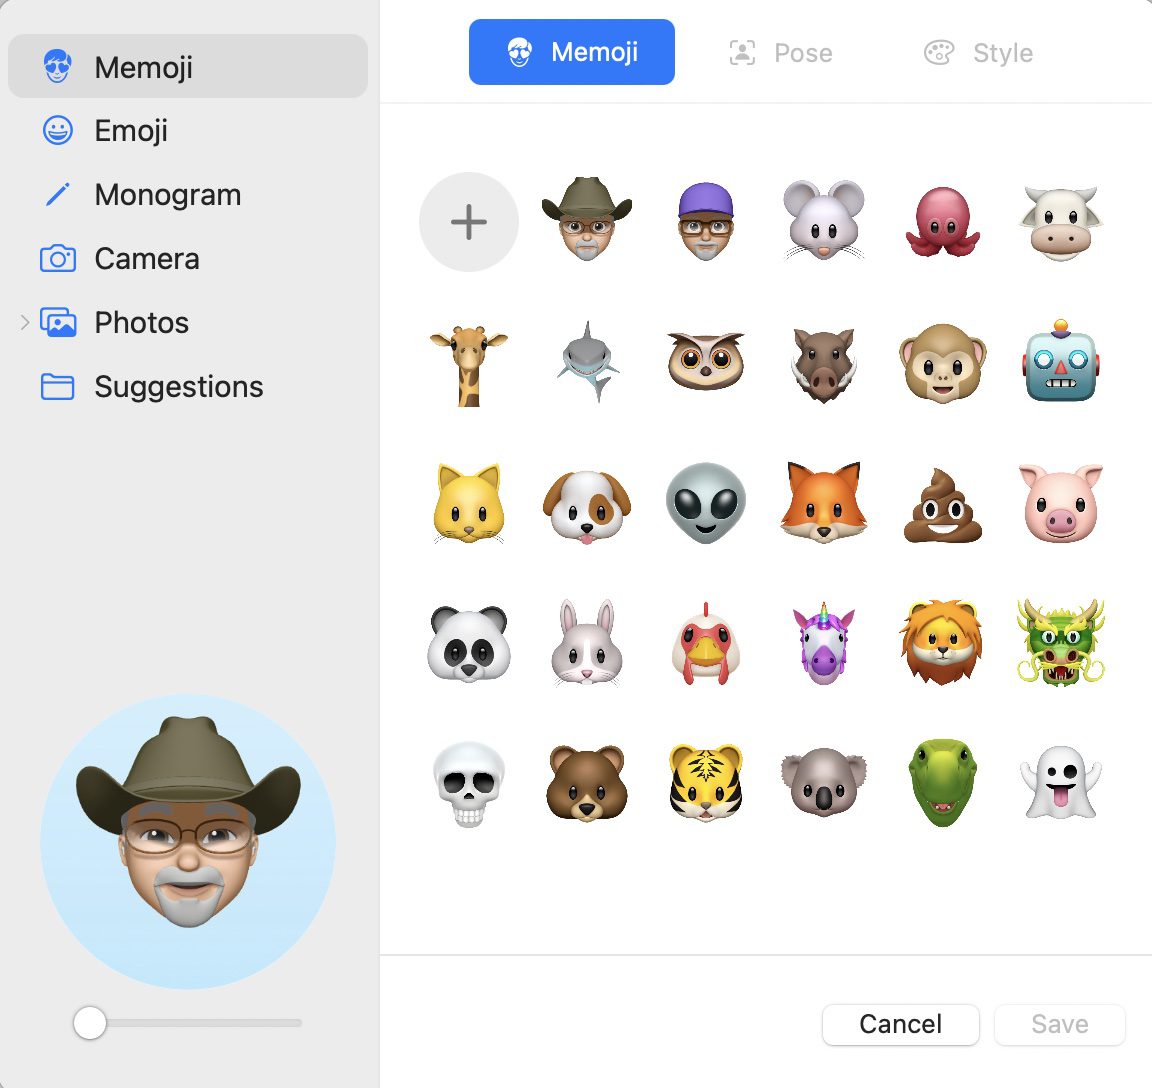
4 – Once you’ve selected or created the Memoji, click Save.
On subsequent logins, the animated Memoji “watches” you type in your password. This doesn’t happen on the first login into a Mac just turned on or rebooted.
Tip #3: Increase MacBook battery life with Low Power Mode
Do you use your MacBook, MacBook Air, or MacBook Pro on battery power frequently? If so, the new Low Power Mode in Monterey might help you squeeze some extra time out of each charge.
1 – Launch System Preferences.
2 – Click “Battery”, then click the “Battery” tab on the left sidebar.
3 – Check the Low Power Mode box (see screenshot below) to toggle this mode on and off.
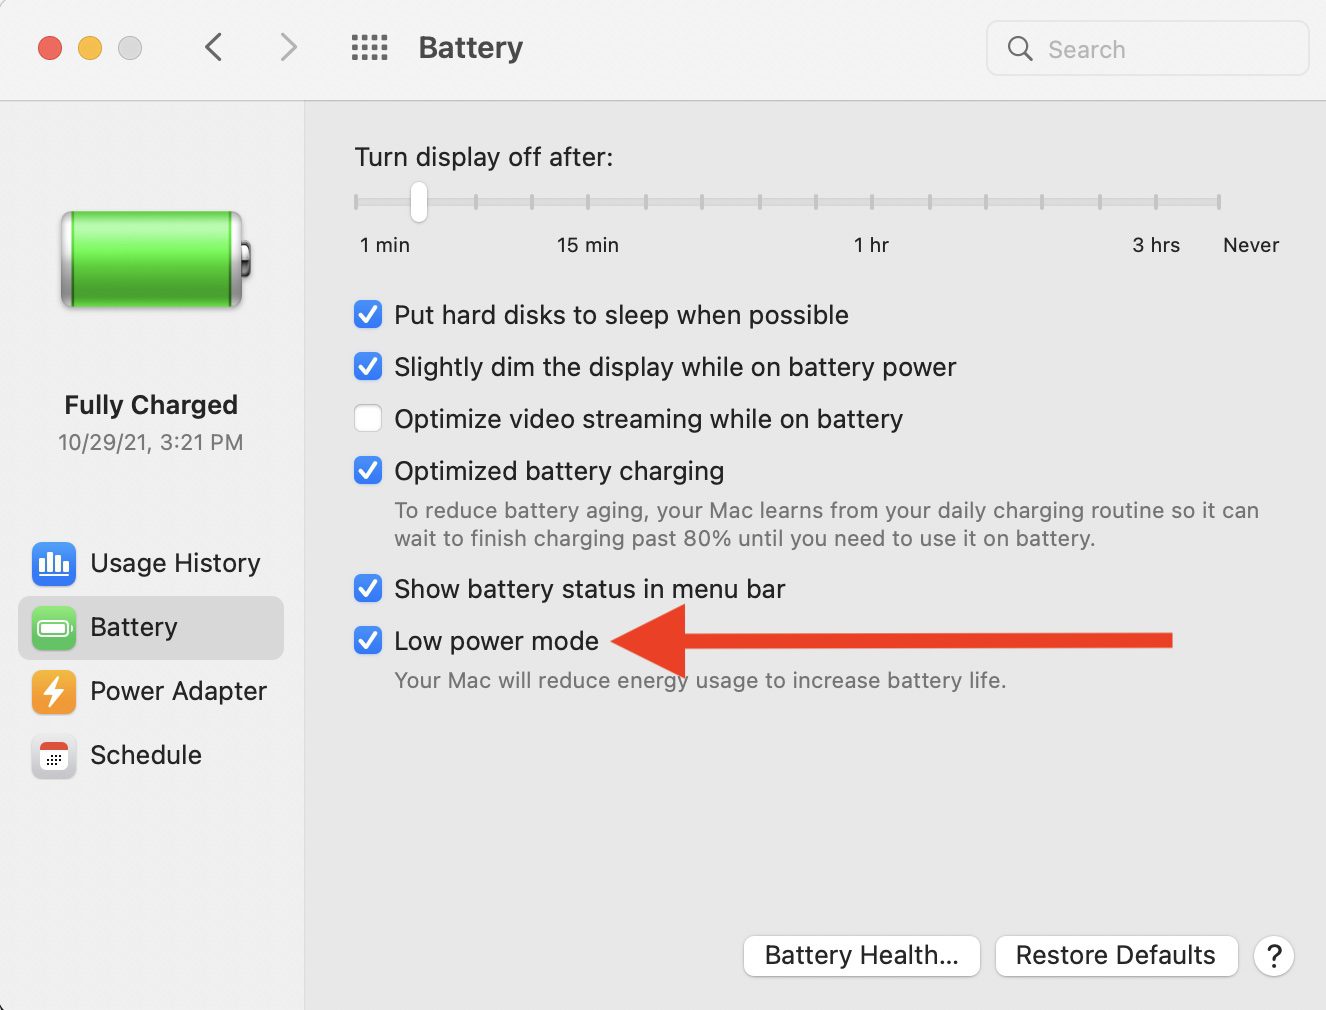
What happens while running on battery power in Low Power Mode? The screen dims just slightly. CPU performance may decrease to improve battery life.
Low Power Mode is also available when connected to a power adapter. In this case, click the “Power Adapter” tab on the left sidebar, then check the Low Power Mode box.
On the new M1 Pro and M1 Max MacBook Pros, there is a High Power Mode to improve performance during a sustained workload, and also an Automatic setting to have your Mac automatically select the best performance level for any situation.
Tip #4: Check out the new Passwords tab in System Preferences
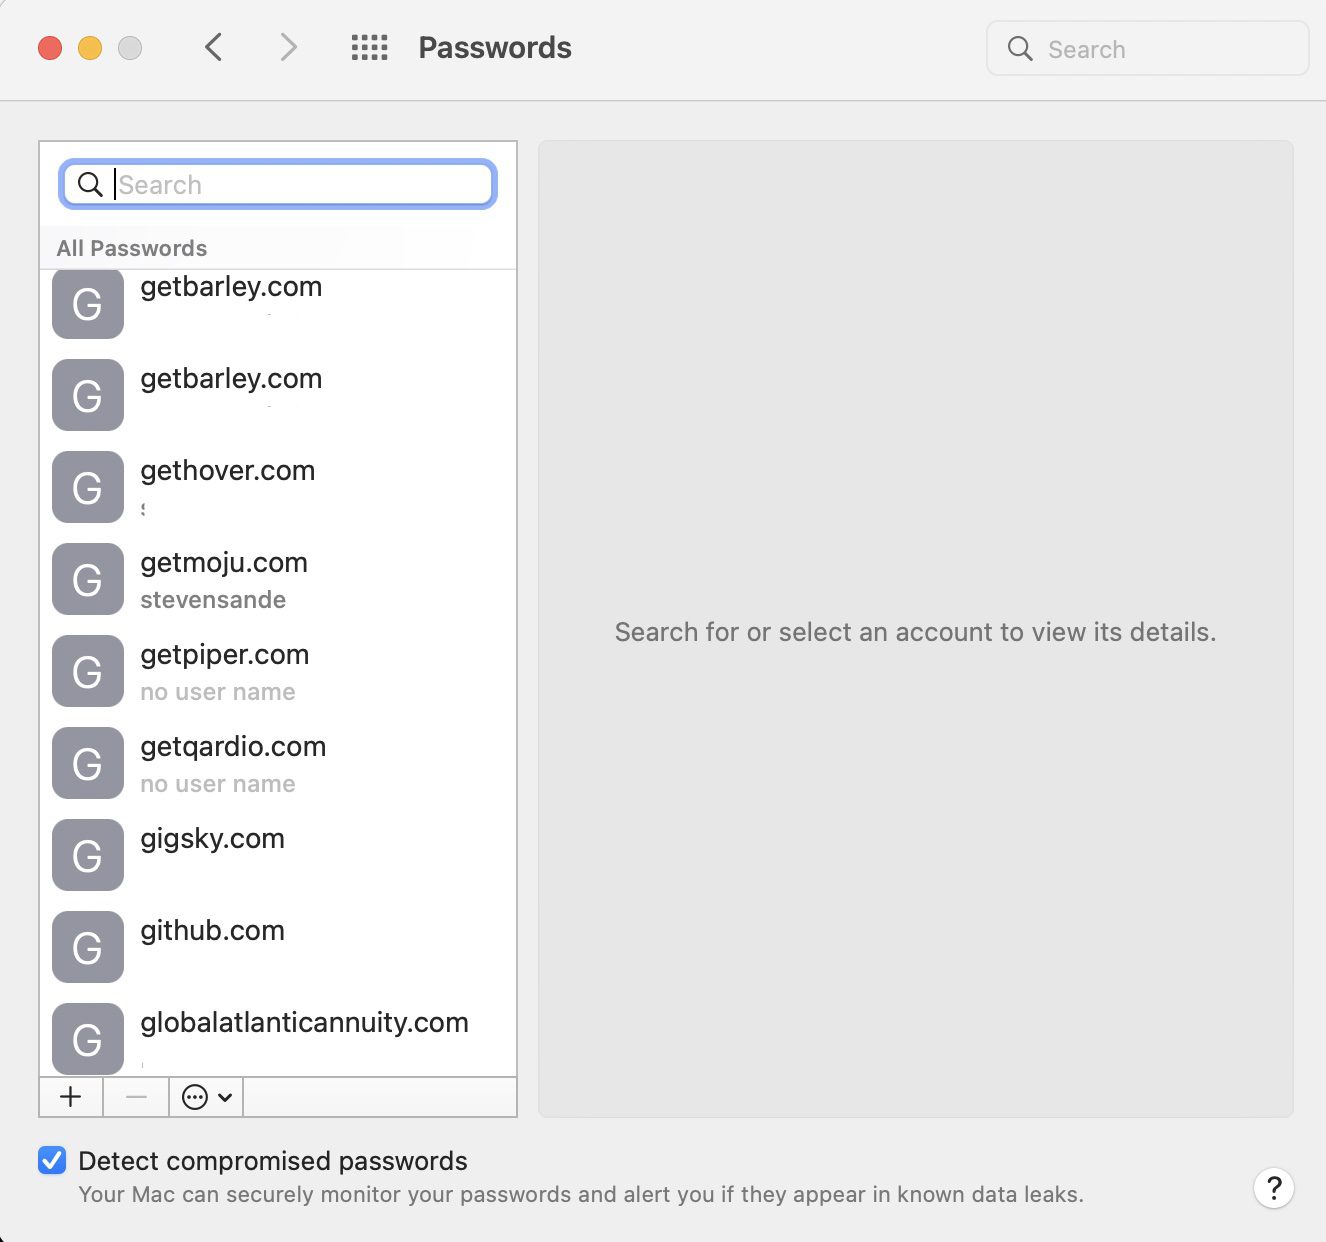
Remember the hassles of finding password (keychain) information in earlier versions of macOS? You had to open Applications > Utilities > Keychain. All that info is now in System Preferences > Passwords. Just launch System Preferences, then click on Passwords. You’ll need to enter your password to gain access.
The first thing I noticed when I fired up Passwords was a bunch of security recommendations. These include easily guessed, reused, or compromised passwords. It’s a really good idea to go through those items one by one and either change the passwords or delete old or unused accounts.
If you have a Mac with Touch ID, you’ll be happy to know that you can use your fingerprint to get into the new Passwords tab. One other useful capability is that you can import and export password files. Want a backup of all of your user accounts and passwords to put onto a flash drive and put in a safe deposit box? Just click the ellipsis (…) button at the bottom of the list of passwords and select Export Passwords. Be careful; user accounts and passwords you export are plaintext and easily viewed.
Tip #5: Use Hide My Email
Hide My Email is an iCloud+ based service that allows you to create random email addresses that forward mail to a regular email account. For example, let’s say that you like to sign up for the occasional newsletter, but you don’t like the fact that the newsletter publisher may sell your email address to others. Using Hide My Email, you can get a separate iCloud.com email address to use for that account. Any mail sent to that address ends up in your regular iCloud email inbox. If you find yourself receiving a lot of spam email at the Hide My Email address, it’s simple to delete that account.
You’ll Need iCloud+
To use Hide My Email, you need to be an iCloud+ subscriber. That means that you subscribe to iCloud+ for extra cloud storage or that you have an Apple One subscription. If you simply use the small amount of free storage allotted to anyone who gets an iCloud account, you won’t be able to use Hide My Email
Hide My Email in Safari
One of the most useful places for Hide My Email is on any website that needs your email address. As an example, we’ll click the email address slot in the Newsletter Signup box for OWC. A popup appears, asking which email address you wish to use, or if you want to “Create a unique, random address that forwards to your mailbox”.
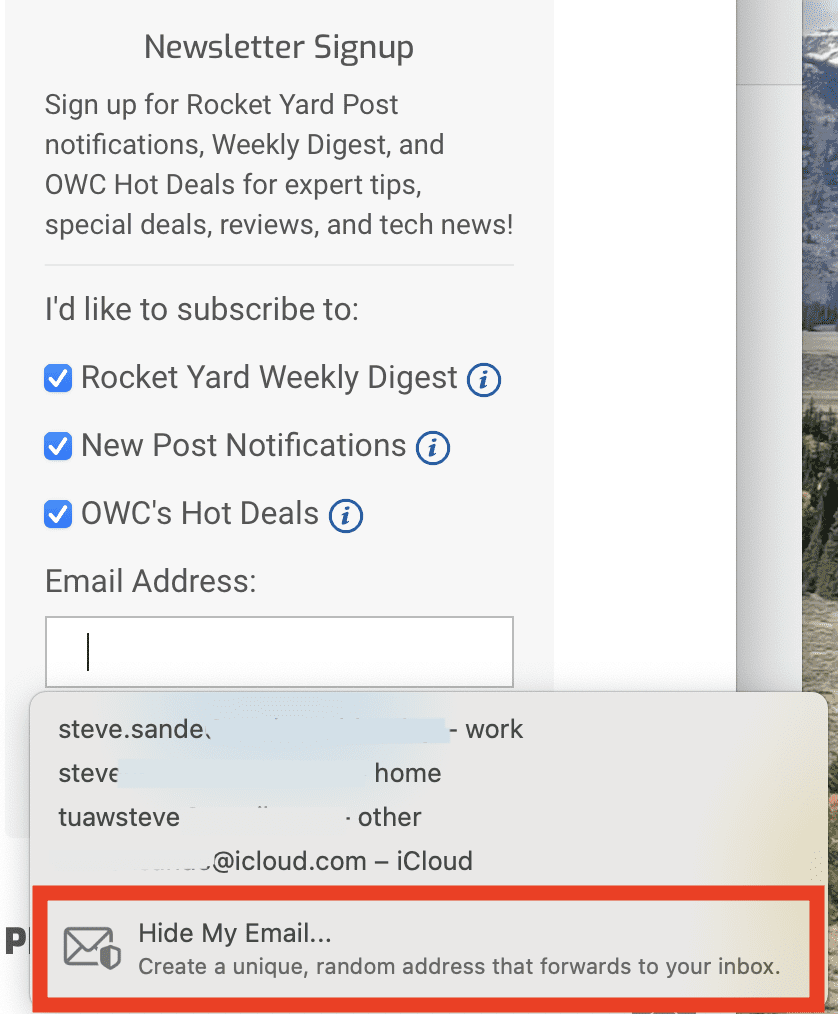
Click the Hide My Email button (outlined in red in the screenshot above) and the following dialog appears:
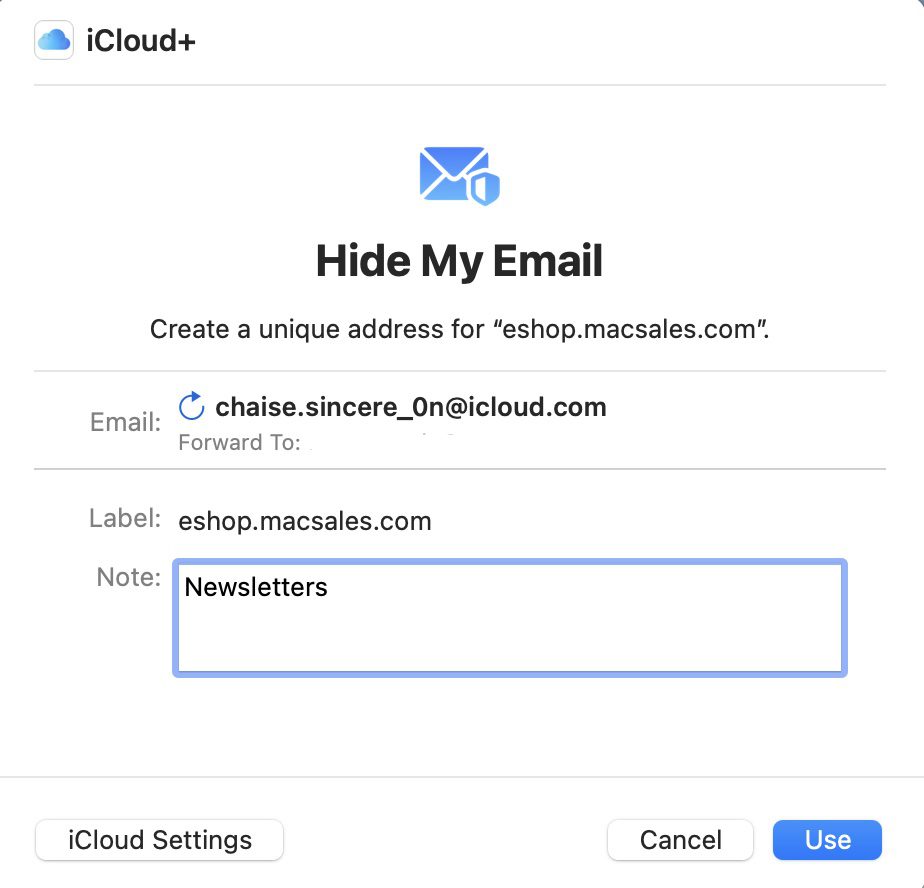
You can click the refresh button to the left of the email address to have it pick another random address, or just click Use to enter the generated address.
Create Hide My Email addresses
Chances are good that you might want to hide your email in something other than Safari. Let’s say, for example, that you’re sending an email to a politician offering your opinion, but you’d rather not use your real email address. Here’s how you can create a separate Hide My Email address just for politics, for example…
1 – Launch System Preferences.
2 – Click the Apple ID button.
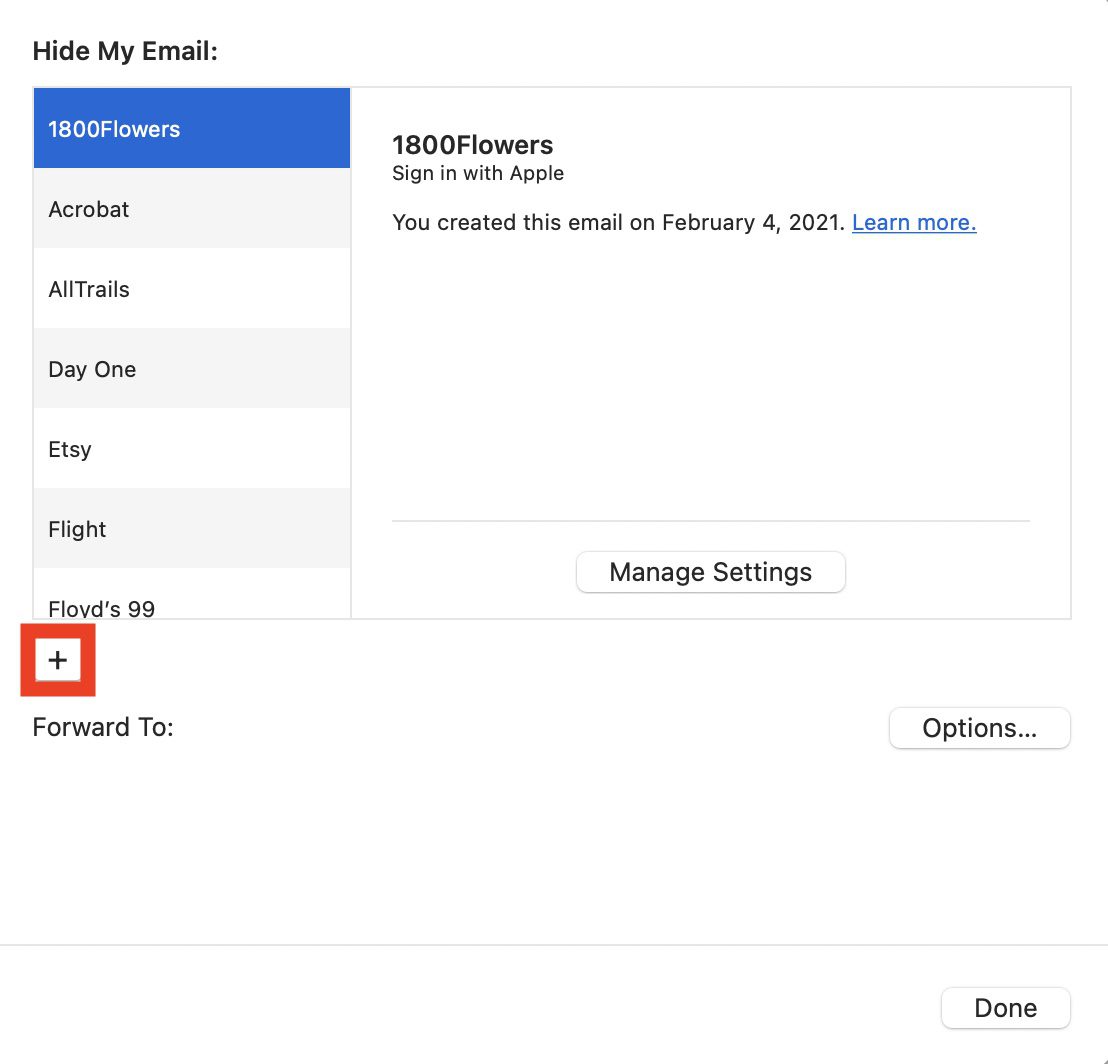
3 – In the window that appears, click the Options button to the right of “Hide My Email”.
4 – The following dialog appears. Click the + button to create a new Hide My Email address:
5 – Hide My Email generates a new email address for you. Don’t like it? Click the refresh button to the left of the email address to get a new one.
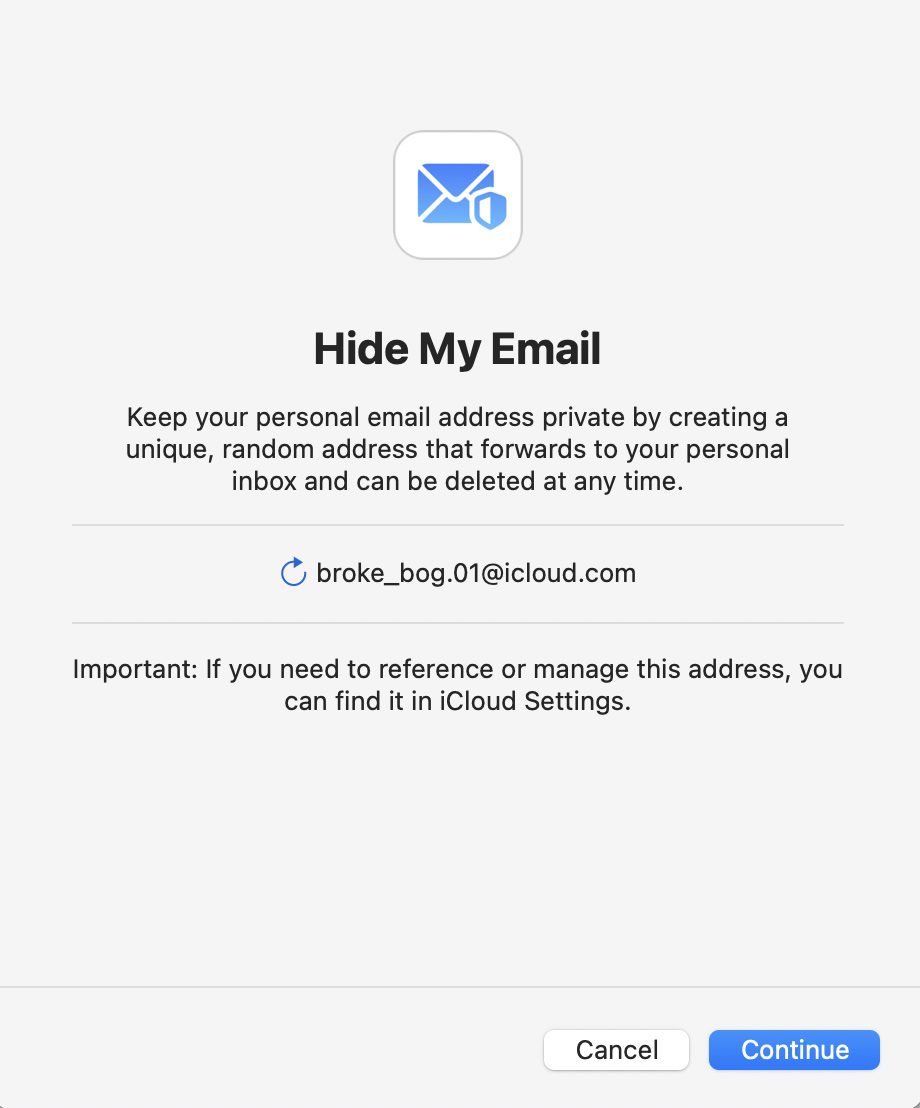
6 – Click Continue. Label your address on the next screen:
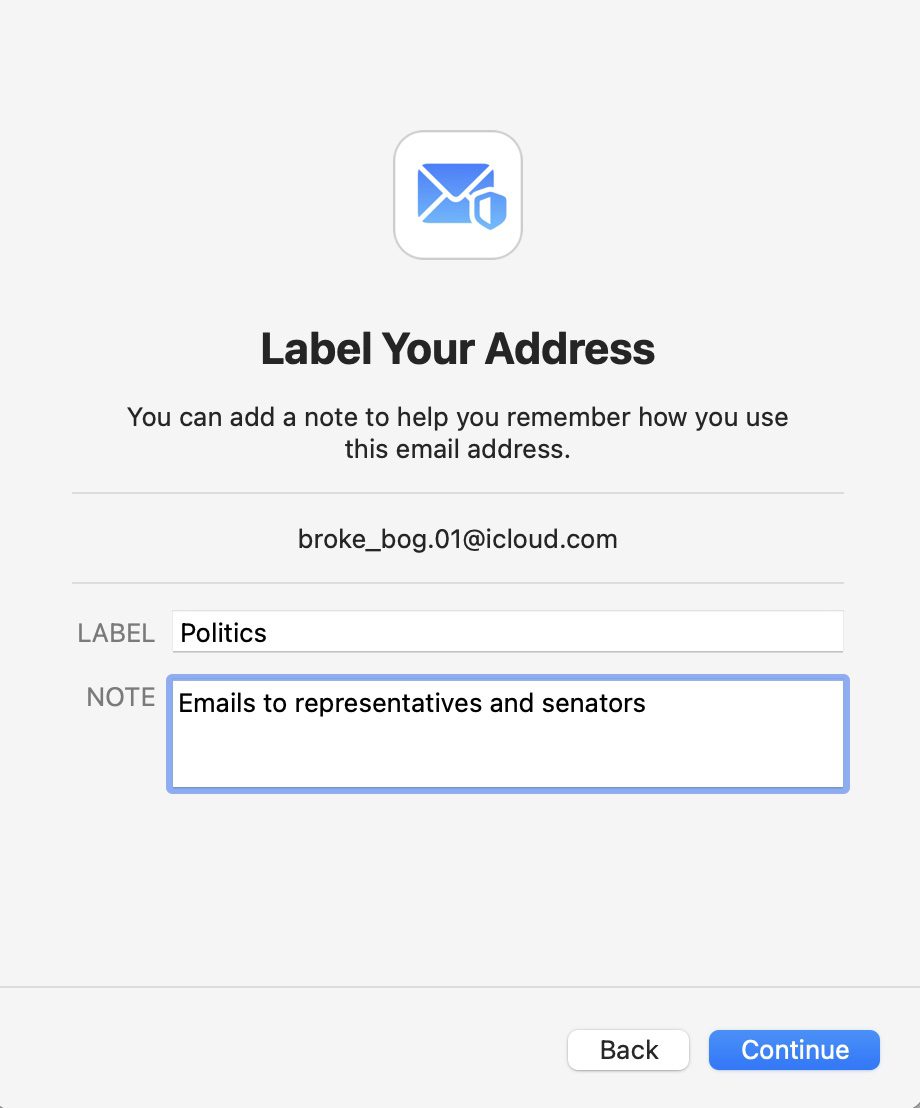
If at any future point you wish to delete that email address, return to System Preferences > Apple ID > Hide My Email > Options. Find the address or its label in the list of email addresses and click on it, scroll to the bottom of the information window, and click Deactivate Email Address.
Tip #6: Keep the menu bar in Full Screen Mode
Do you like the space afforded you in Full Screen Mode, but hate having the menu bar disappear? macOS 12 Monterey adds an easy way to keep the menu bar in Full Screen Mode.
1 – Launch System Preferences
2 – Click on Dock & Menu Bar
3 – Uncheck “Automatically hide and show the menu bar in full screen”:
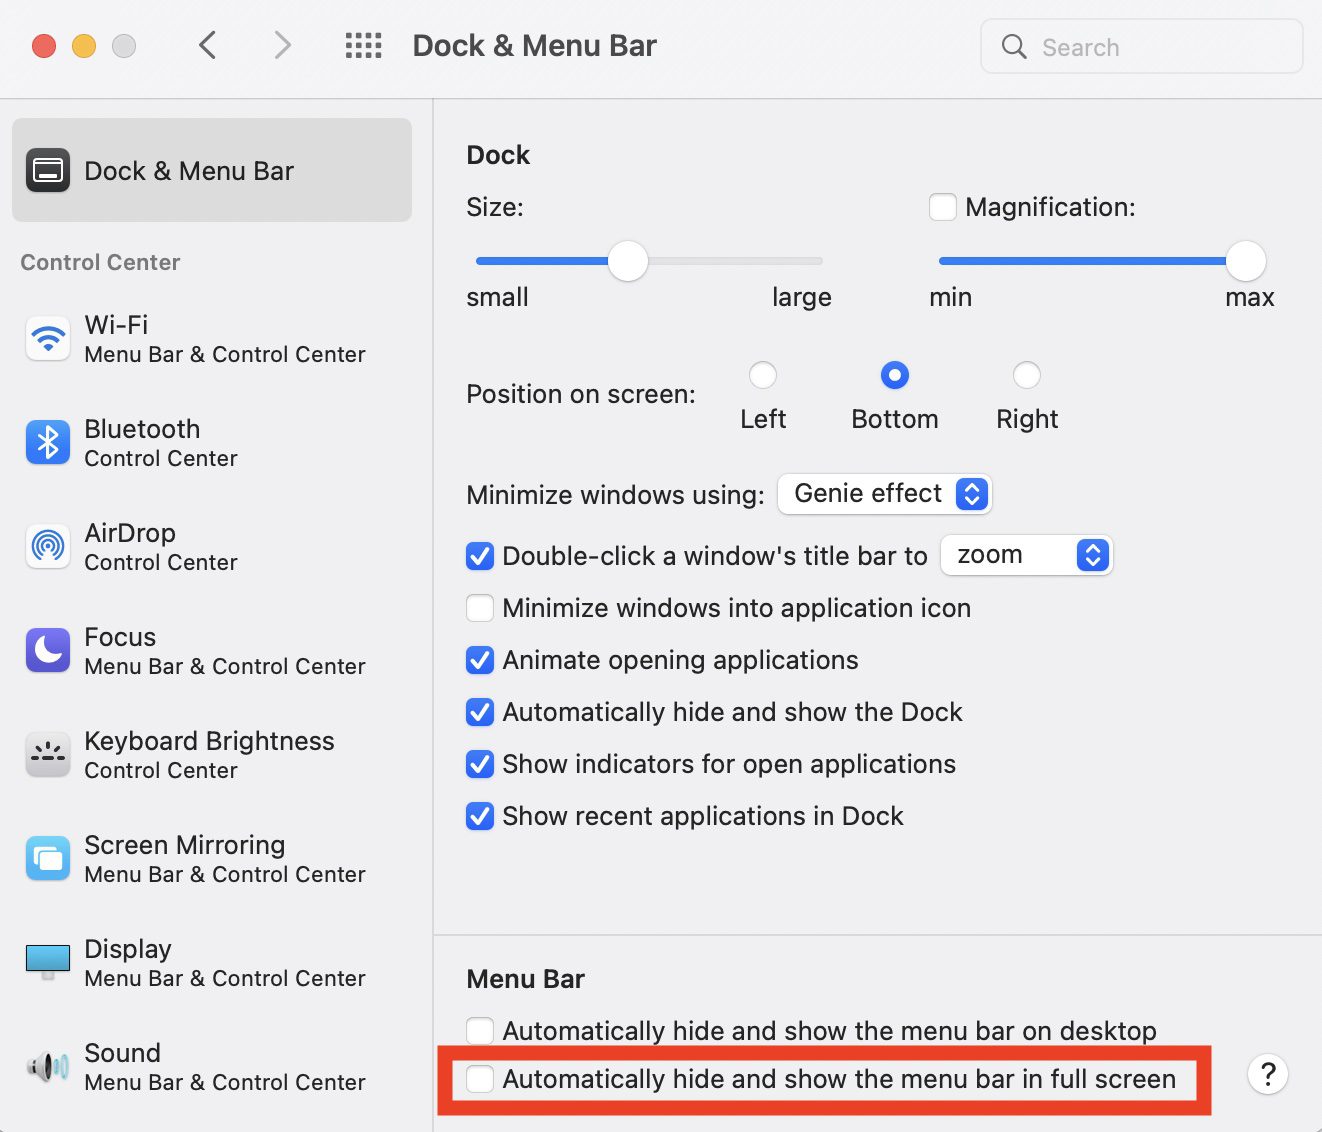
Now when you go into Full Screen Mode in any app, the menu bar is still visible at the top of the screen.
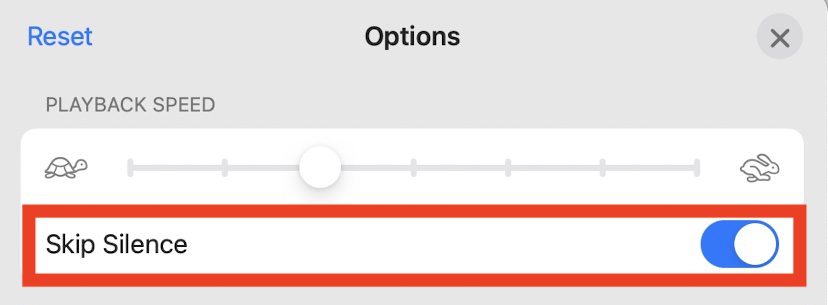
Tip #7: Have Voice Memos skip over silent parts of recordings
The Voice Memos on Mac app is useful for capturing meeting minutes, dialogue, you name it. However, sometimes you might have long sections of silence in a recording. Wouldn’t it be nice to skip over those blanks? macOS 12 Monterey adds the ability to skip over silent parts of recordings.
1 – Launch Voice Memos (found in Applications) and open a recording.
2 – Click the Options button (highlighted in red):

3 – In the Options dialog, click the Skip Silence button and it turns blue. Silent portions of recordings won’t be heard during playback:
Tip #8: Maps Interactive Globe (Apple Silicon Macs only)
The Maps app now has an Interactive Globe that’s fun to play with…but only on Macs that have Apple Silicon (M1, M1 Pro, M1 Max).
To see the Interactive Globe and move the Earth around at your command, launch Maps, then zoom all the way out by using either the pinch gesture on a trackpad or clicking the – button on the map repeatedly. Eventually, you’ll see this:
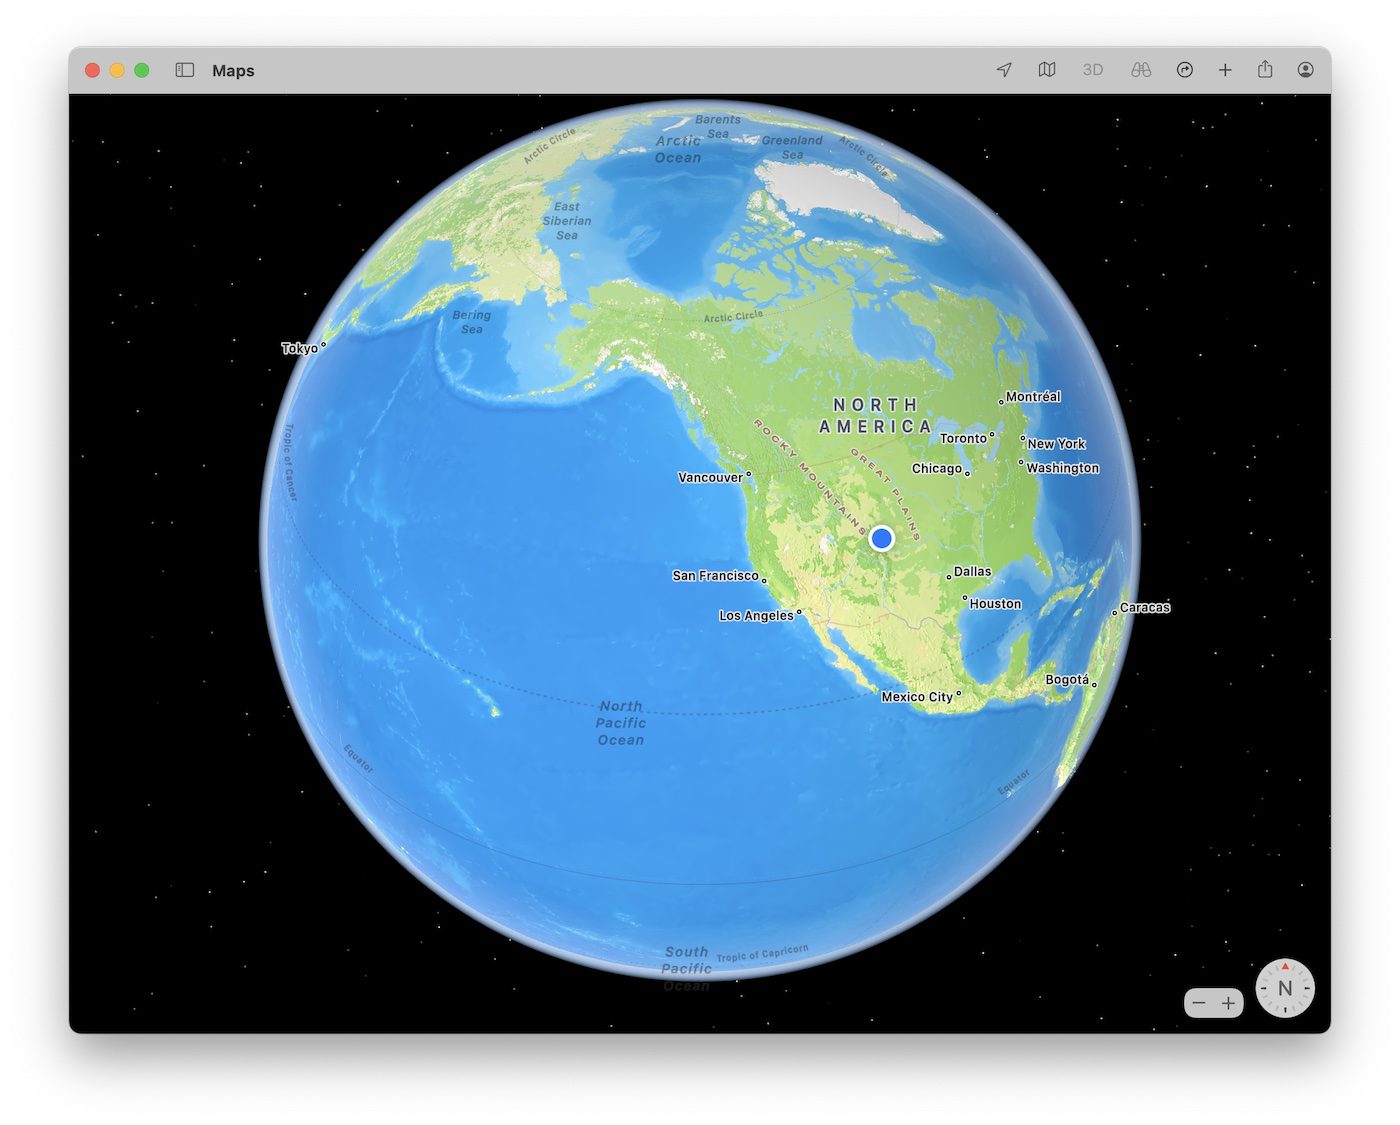
Click and drag the globe to twirl the world around.
Tip #9: Change app settings so menubar items don’t hide behind the MacBook notch
The new MacBook Pros announced last month are spectacularly fast and we’ll soon have a review and set of benchmarks for you to read. Immediately, some were concerned that the 1080p HDR FaceTime camera is in a “notch” at the top of the screen.
Apple quickly posted a support article on how to resolve this issue if it becomes a problem for you. In a nutshell:
1 – Quit the app you’re concerned about.
2 – In the Finder, go to Applications, right-click on the app icon, and select Get Info from the contextual menu (alternatively, press ⌘ – I.
3 – In the Info window that appears, check the box next to “Scale to fit below built-in camera”:
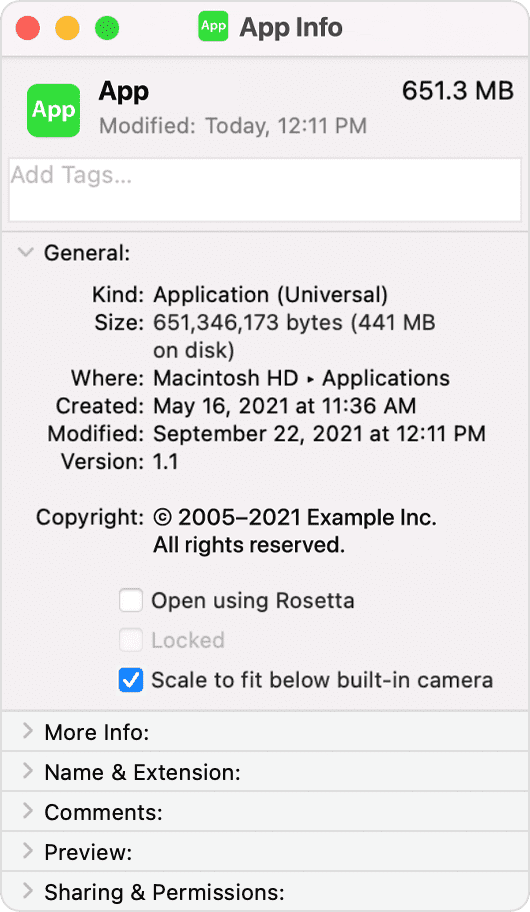
This does reduce the amount of screen available to the app window. You should also consider deleting some menubar icons by opening an app’s preferences and unchecking the “Show [app] status in menu bar” item.
Tip #10: AirPlay to Mac
AirPlay’s great. It lets you beam music and video from an iPhone or iPad to Apple TVs and other AirPlay-compatible devices. Now you can turn your macOS Monterey Mac into an AirPlay receiver. Want to watch movies on that nice Liquid Retina XDR Display on your new MacBook Pro or listen to your favorite tunes through its six-speaker sound system? Set the Mac up as an AirPlay receiver with these easy instructions.
1 – Turn your Mac on and connect to the same Wi-Fi network your iPhone or iPad are using.
2 – Start playing a song, podcast, TV show or video on your mobile device.
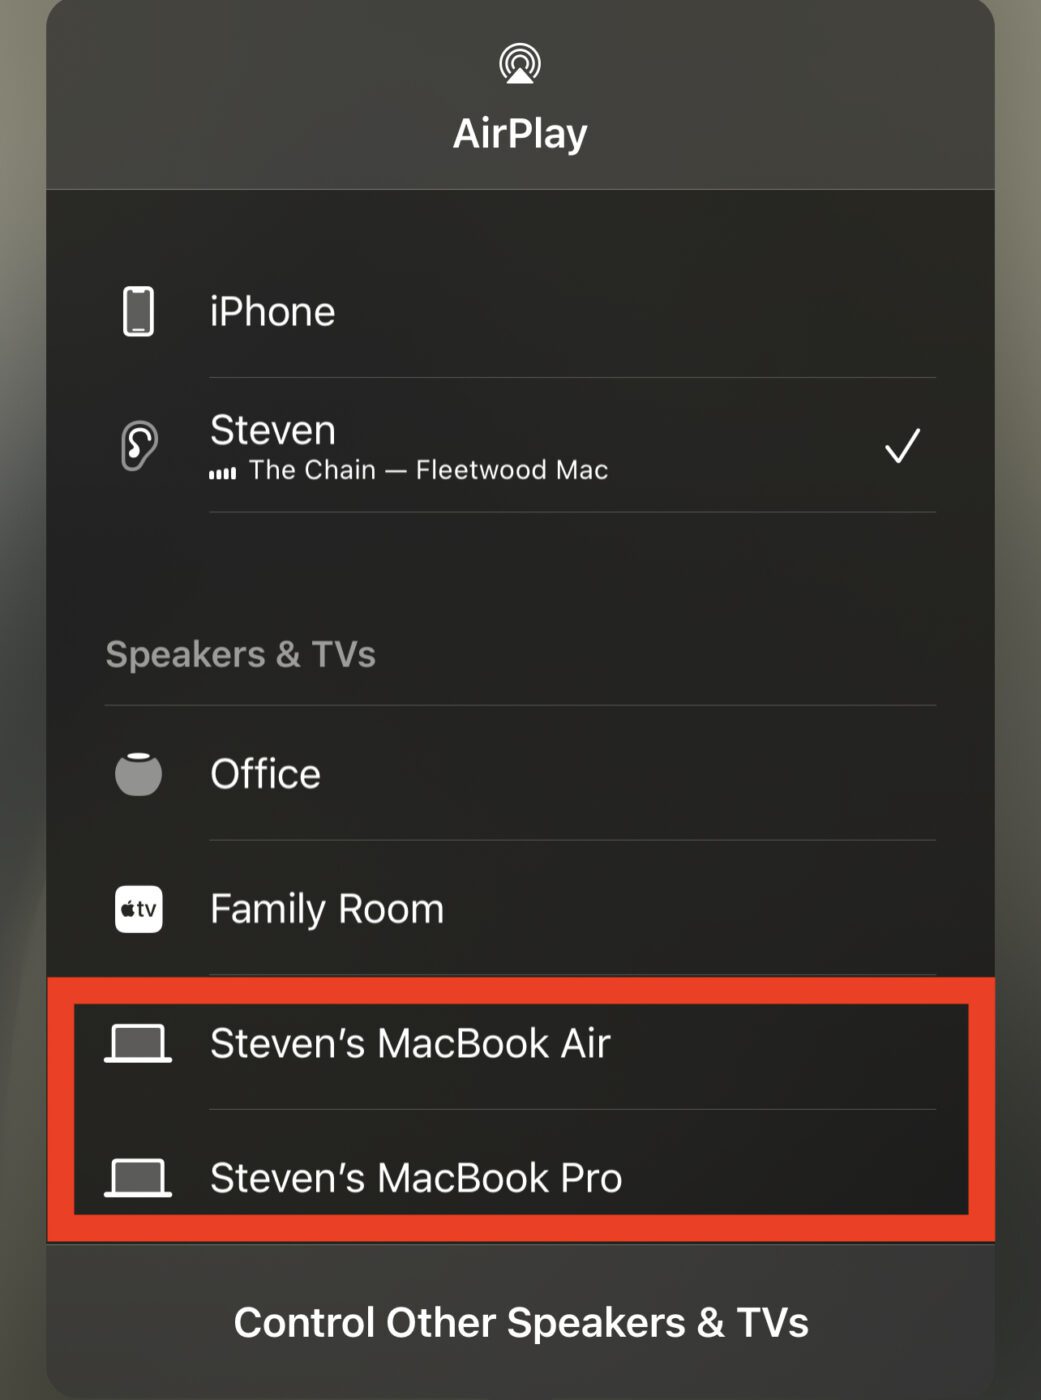
3 – Tap the AirPlay button at the bottom of the app (highlighted in red below).

4 – A list of AirPlay receivers appears, including Apple TVs, HomePods, and Monterey Macs. Select the Mac you wish to make the receiver and the media begins to play on that device.
Tip #11 – Use your favorite Shortcuts on your Mac
Monterey is the first version of macOS that includes the Shortcuts app that has been available on iOS and iPadOS devices since 2018. Some Shortcuts may not work on your Mac if they involve iOS / iPadOS-only apps, but generally they work quite well.
iPhone and iPad Shortcuts must be synced through iCloud to show up on your Mac:
1 – Launch Shortcuts (found in Applications) on your Mac.
2 – Select Shortcuts > Preferences…
3 – Check the iCloud Sync box:
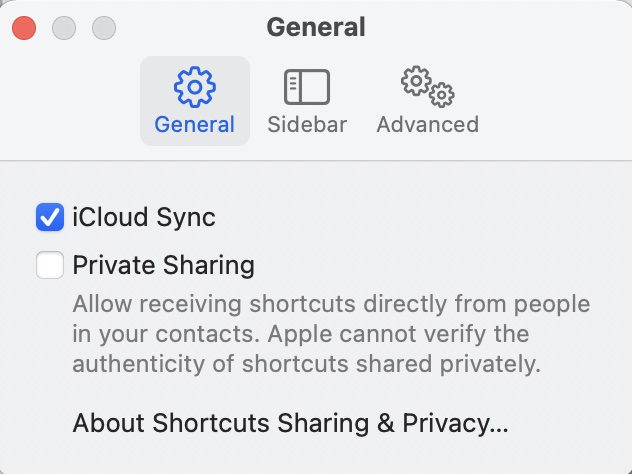
Now feel free to use your favorite “Video to GIF” shortcut!
Tip #12 – Capture notes quickly with Quick Notes
Quick Notes is a useful feature of macOS Monterey. It provides a way to jot down ideas and capture information from any app at any time with either a pointer gesture or keyboard shortcut.
To bring up Quick Notes from the keyboard, simply press fn + Q:

At this point, you can begin typing in a variety of typefaces and sizes, create lists and tables, and if you’re in Safari, you can even click the “add a link” button (looks like links of a chain with a + sign) to embed a link to the current web page.
Be sure to start your Quick Note with a line of text that will act as a title. Otherwise, the note is always titled “Quick Note”…
You can open and close the same Quick Note any number of times, adding links and annotations at any point. The note shows up in the Notes app under a new folder named “Quick Notes”:
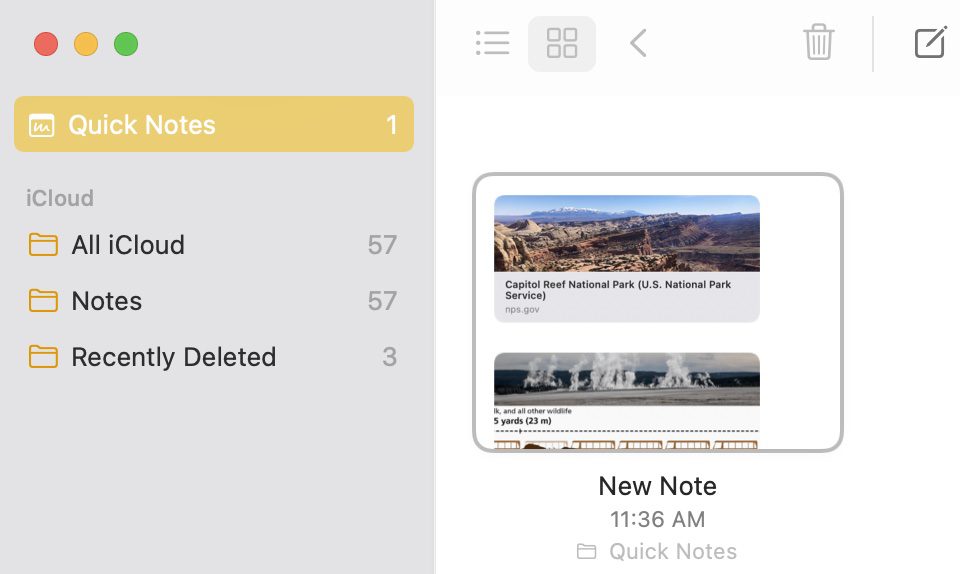
Want to move a Quick Note to a different folder in Notes? Open the Quick Note, then drag it to the folder you want to keep it in. It disappears from the Quick Notes folder.
There’s one other way to create a new Quick Note, and that is to set up a Hot Corner on your Mac. Move your pointer into that Hot Corner and a Quick Note window appears (screenshot below). Click on it to bring up the blank Quick Note.

You can set the Hot Corner by launching System Preferences, clicking the Desktop & Screen Saver button, selecting the Screen Saver tab, then clicking Hot Corners…

Select Quick Note from the popup menu, then click OK. Now moving the pointer to that corner brings up the New Quick Note.
Tip #13: Know when apps use your mic and webcam
On iPhone and iPad, there is a good indication when a microphone or webcam is in use. On those devices, Apple added indicators to the screen in the form of small glowing dots to let you know the camera or mic is in use. These indicators are available in macOS Monterey as well.
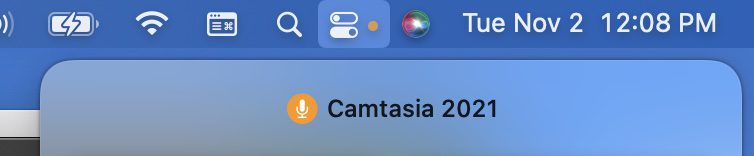
Macs with built-in cameras have always shown a small green light to indicate when the camera is in use, and that hasn’t changed. What’s new is the orange dot you see in the screenshot above. It appears next to the menubar Control Center button when the mic is in use. With a click, it’s possible to see which app is using the mic, in this case Camtasia 2021.
Tip #14: Travel down memory lane with the Hello screensaver
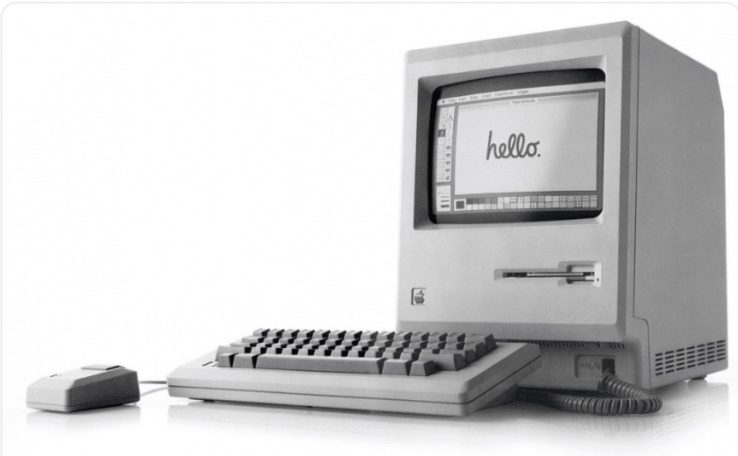
On January 24, 1984, a very young Steve Jobs introduced the Mac to the world. Actually, he had it introduce itself with a demo that “talked” and at one point showed the word “hello”. That friendly Mac greeting is iconic — literally. Take a look at the Finder button in the Mac Dock, and you see a smiling face.
With macOS Monterey, Apple surprised Mac old-timers like myself with a new Hello screensaver. It displays the word “hello” in a number of different colors and languages.
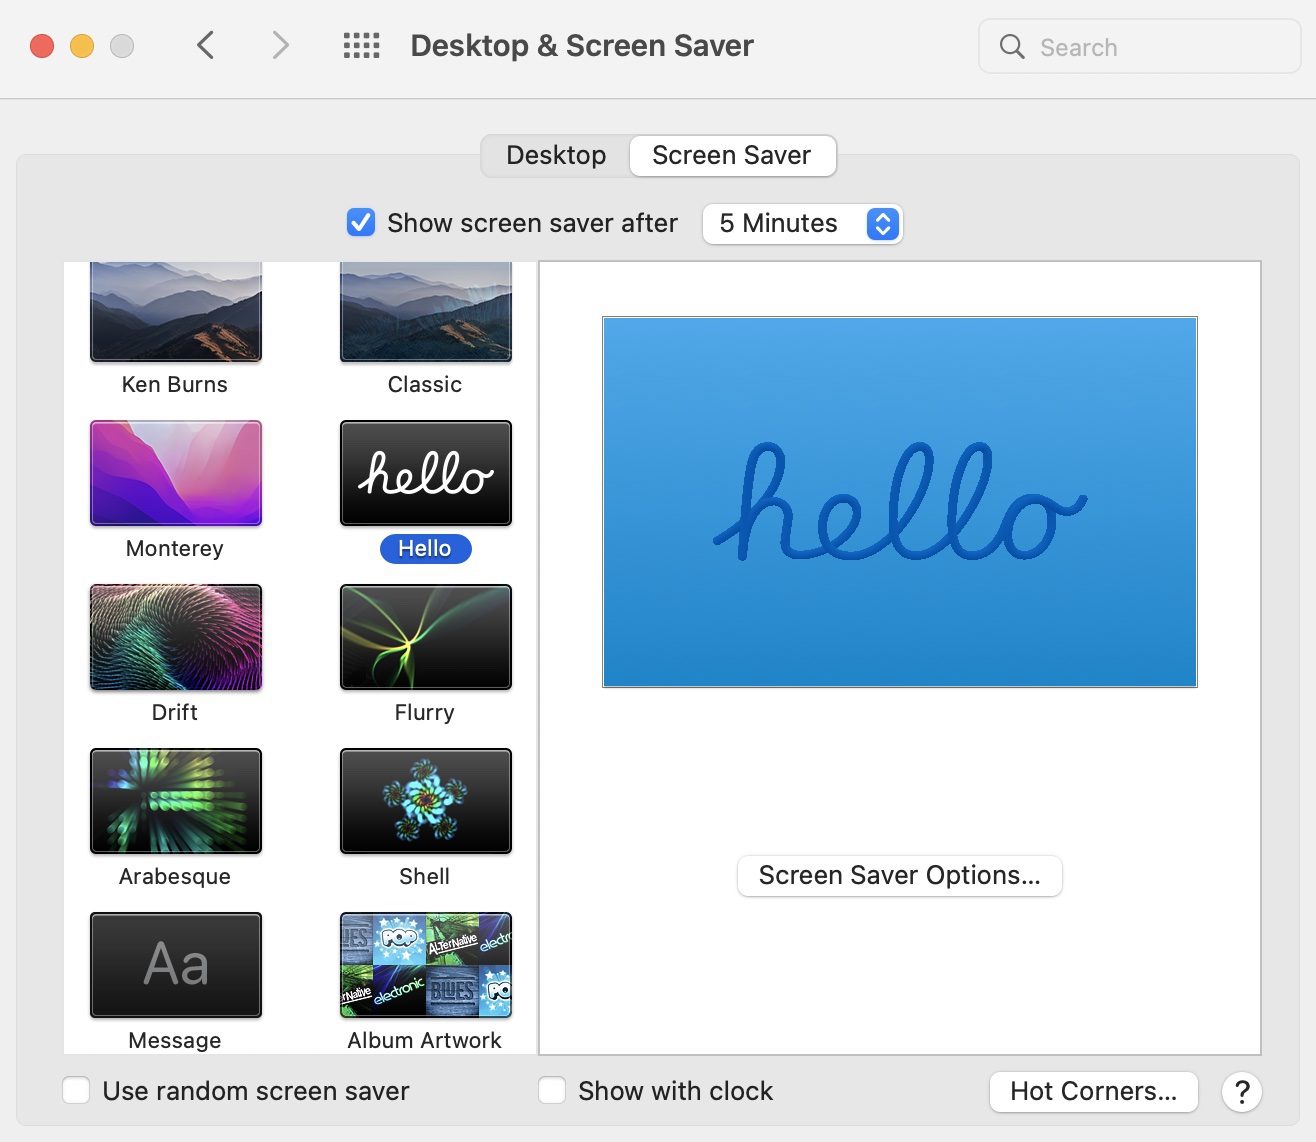
To set the Hello screensaver on your Monterey Mac, launch System Preferences, click on Desktop & Screensaver, and click the Screensaver tab. You’ll see the Hello screensaver on the left. Click it to apply the screensaver to your Mac.
Tip #15: Better on-device dictation (Apple Silicon Macs only)
Tired of typing or injured your hands? In the past, keyboard dictation on the Mac only allowed sixty seconds of verbal input to your device and it was all done through Siri. To convert your speech into text, Siri sent that text to Apple’s servers for processing.
Apple Silicon Macs running macOS Monterey eliminate the time barrier. You can use keyboard dictation for as long as you please. All speech-to-text happens on the Mac now, a definite plus in terms of privacy.
Add languages or change your keyboard shortcut for dictation in System Preferences > Keyboard > Dictation tab:

Tip #16: Visual Look Up in Photos
One of my new favorite features in macOS Monterey is Visual Look Up. It works in Photos to provide you with instant information or links referring to objects in your pictures.
To see if your Mac’s machine learning capabilities have identified something special in a photo, look for and click on the Visual Look Up button. This is the usual “info” button, but with “sparkles” hovering around it.
Once clicked, another button appears in the bottom of the image along with the word “Explore”. Click it, and a window appears with information about the item you photographed:
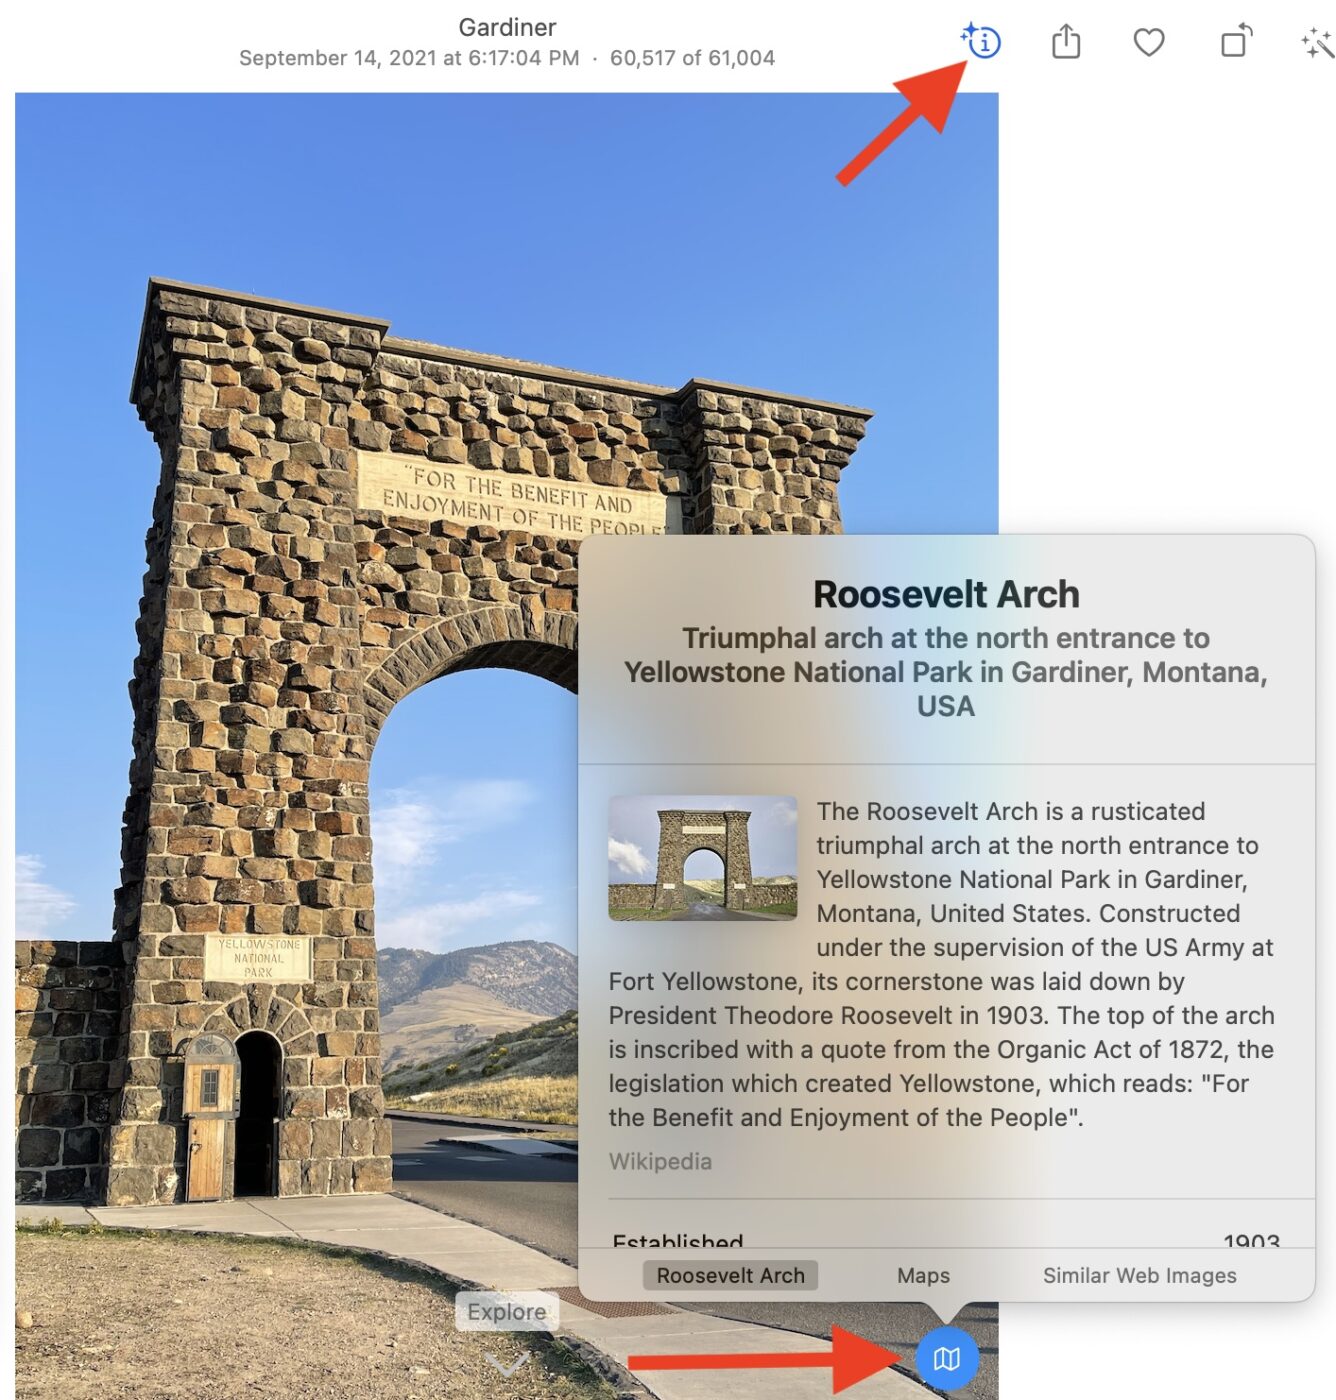
This map button may not always appear. If an object is a plant, a leaf button may appear on the object itself. For animals, a “paw” button appears. I’ve highlighted both types of buttons here:

For some photos, there’s a surprising amount of information. That cat? That’s our girl Merry. Until today, I never realized she was a Bombay cat.
Tip #17: Use Screen Time to set up scheduled downtime
Are you one of those people who sits down at the Mac and rarely takes a break? We all know how bad that can be for your health. Apple has added the ability to set up scheduled downtime in macOS Monterey:
1 – Launch System Preferences
2 – Click the Screen Time button
3 – Click the Downtime tab in the left sidebar
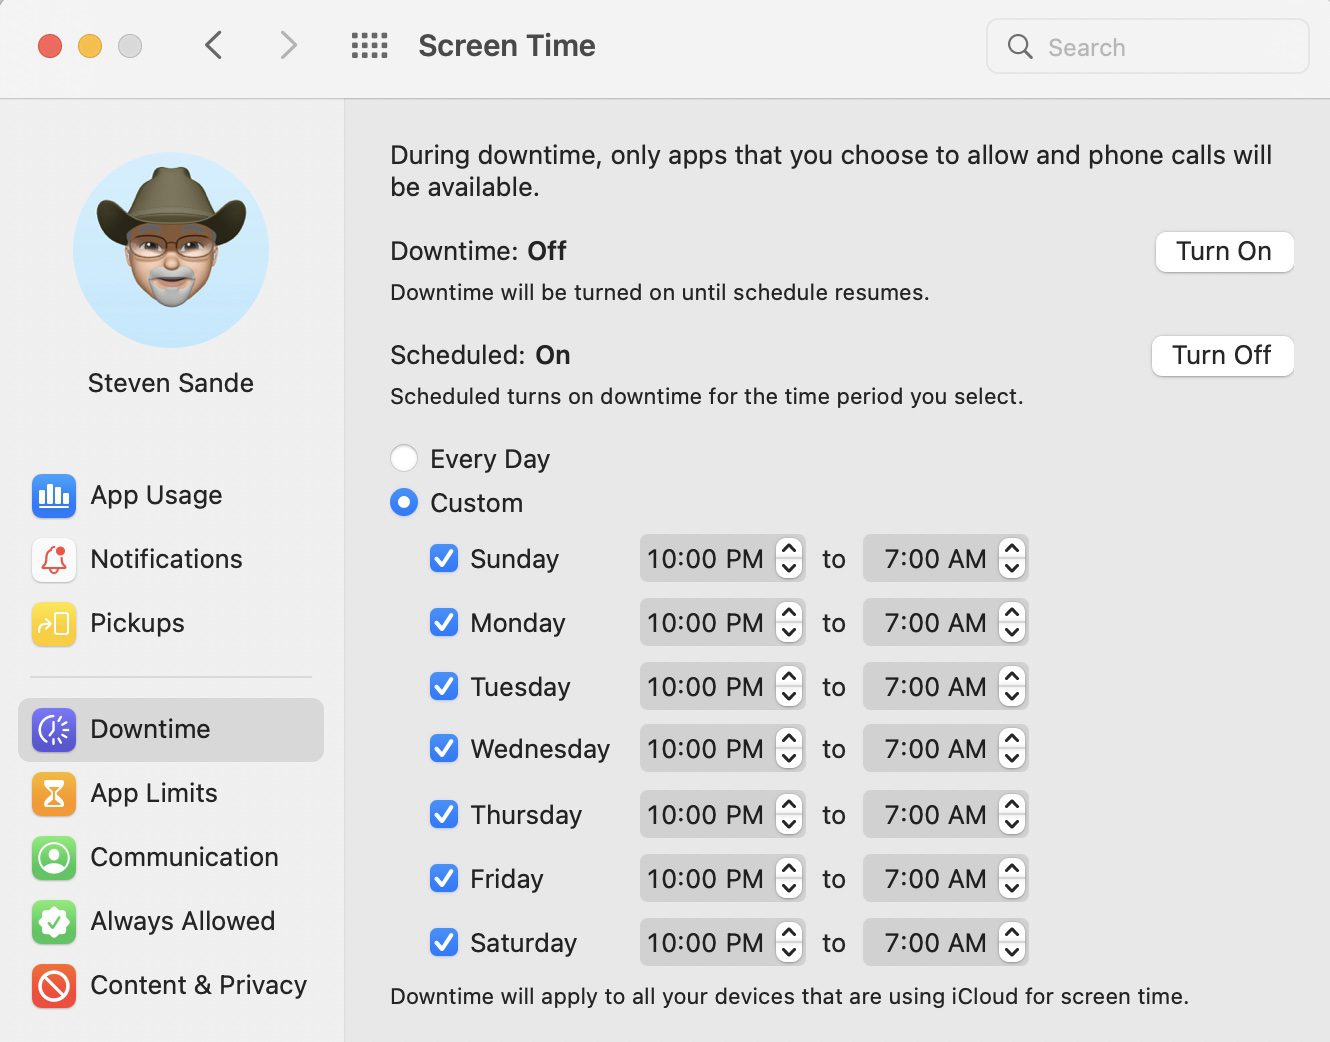
You can choose to turn on downtime at any time by clicking the “Turn On” button, or set up a schedule. For example, let’s say I want to schedule downtime between 12 Noon and 1 PM each day so I can go exercise. With Scheduled turned On, click Every Day, then set the clock to 12:00 PM to 1:00 PM.
Every day at that time, all of my devices show blank screens to remind me to go exercise!
Tip #18: Portrait Mode (Apple Silicon Macs only)
I love this tip! When using an Apple Silicon Mac and macOS Monterey, you can invoke Portrait Mode with the FaceTime camera and blur the background.
1 – Launch FaceTime or another app that uses the FaceTime camera.
2 – When the green camera light goes on, click the Control Center button, then click Video Effects.
3 – Select Portrait from under FaceTime or any other app supporting video effects. If you don’t see Portrait, the app doesn’t support Video Effects.

Tip #19: Universal Control (coming soon)
This great macOS Monterey feature didn’t make it to the first release of the operating system. Universal Control should arrive this fall in an update.
While it’s not possible to use Universal Control now, it revolutionizes how we can use multiple devices. Basically, a single mouse (or trackpad) and keyboard work across multiple Macs or iPads. Let’s say you have a MacBook Pro, an iMac, and an iPad on the same desktop. The keyboard and trackpad on that MacBook Pro can control all three devices.
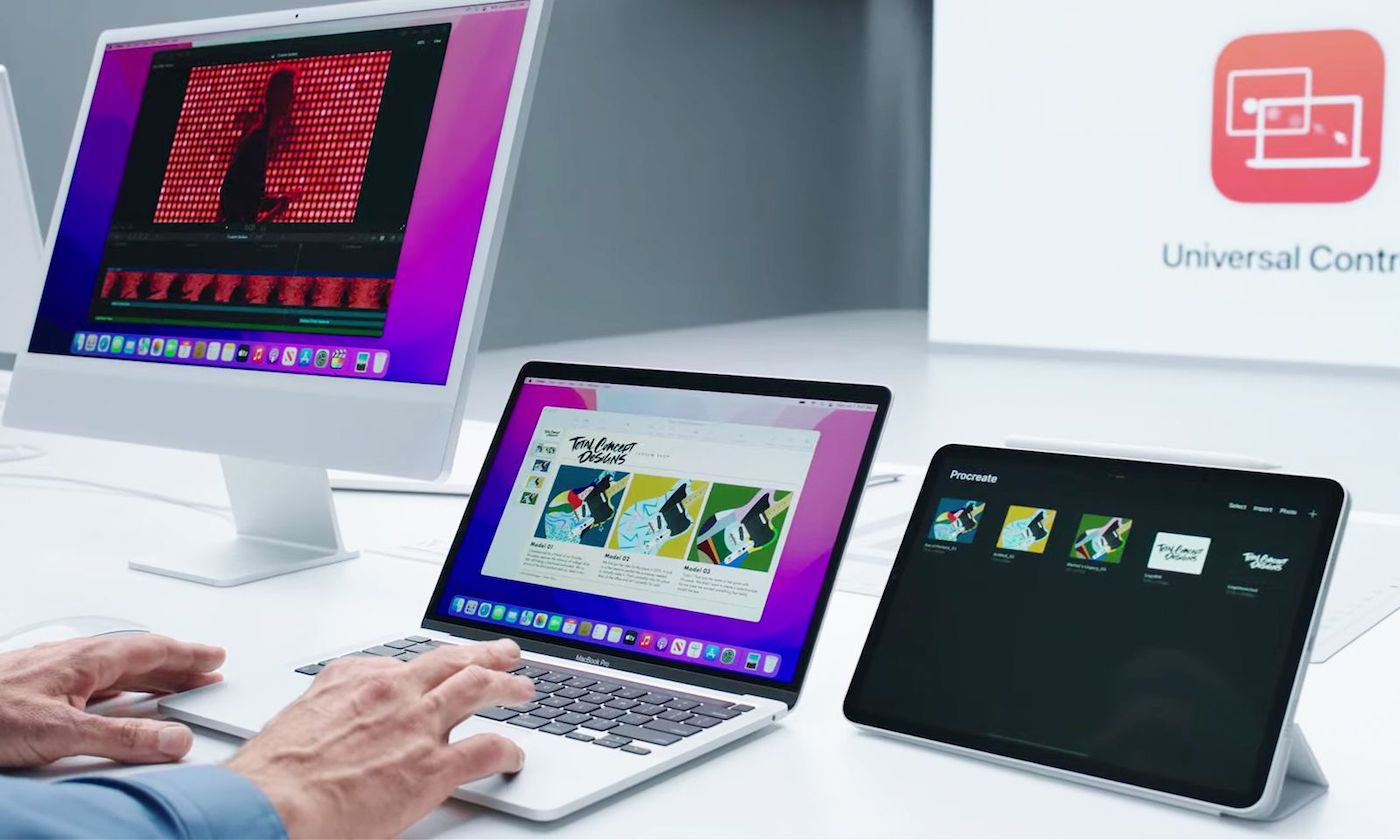
We’ll show you how Universal Control works once it’s available in macOS Monterey.
Tip #20: Change your pointer colors
For many people with visual impairments, the standard black on white mouse/trackpad pointer is difficult to see. macOS Monterey now offers a way to change the colors of the pointer.
1 – Launch System Preferences
2 – Click the Accessibility button, then click the Display tab under Vision in the left sidebar
3 – Click on either (or both) pointer outline color or pointer fill color to bring up a color picker. Select a color for the outline of the pointer and the pointer itself.
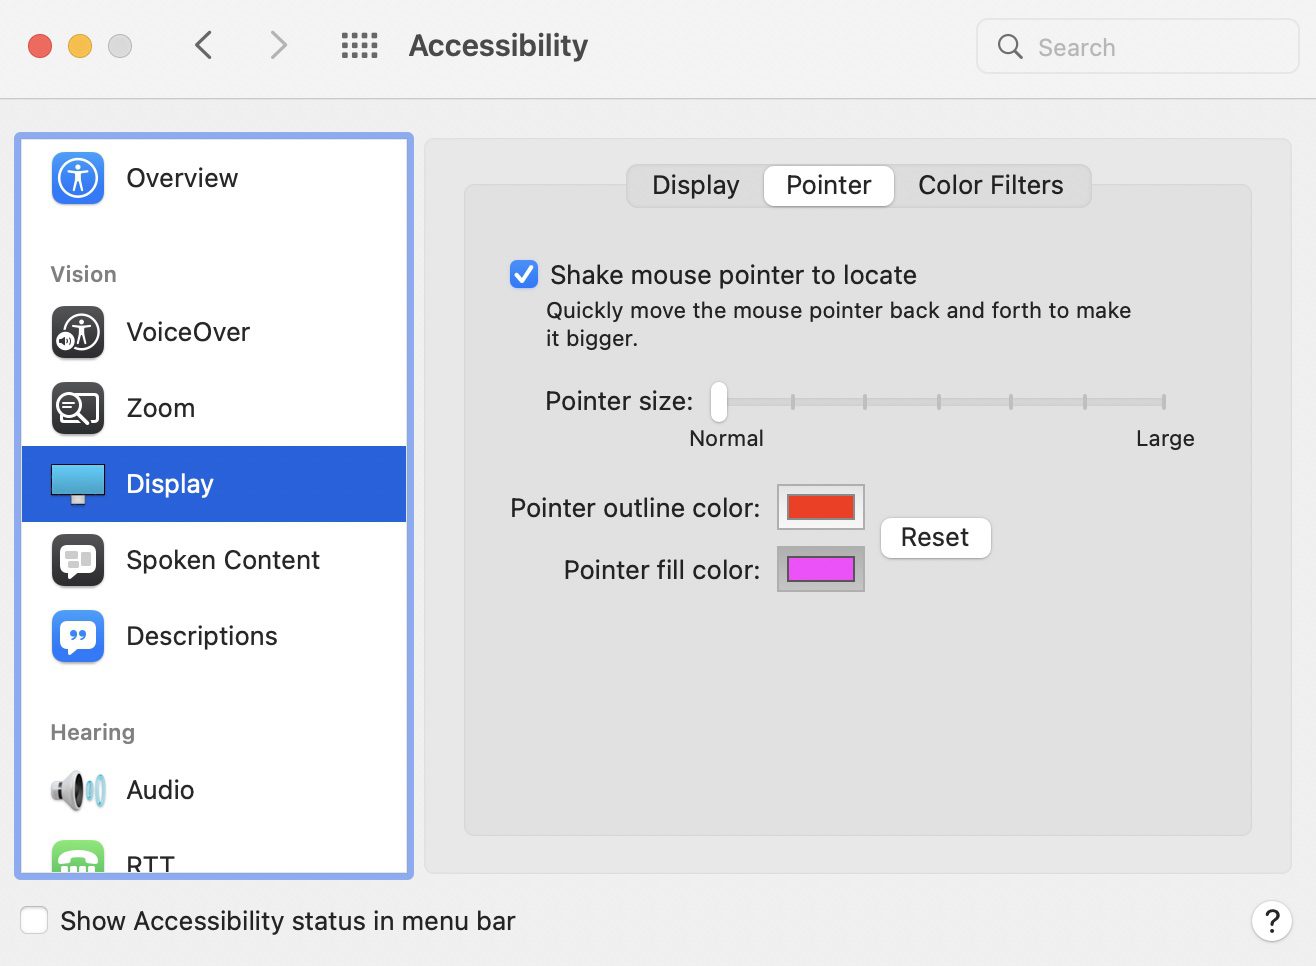
Here I’ve set the pointer color to magenta with a red outline. It’s certainly visible!
There you have it — our Top 20 macOS Monterey Tips! As always, visit The Rocket Yard Frequently for more tips on how to use your favorite Apple products. You can also sign up for the Rocket Yard Weekly Digest and have the latest tips sent to your email inbox.


Just to note, there’s currently a memory leak in Monterey when using a customized pointer.
Hello Jason. Thank you for participating in sharing this info. Feel free to share the specifics about the leak here in the comments as opposed to linking out to another blog. We’d love for the conversation and comments to thrive here as a convenience and courtesy to other Rocket Yard readers.
Thanks.
Very helpful – saving up for Monterey-capable MacBook Pro!
Love the article