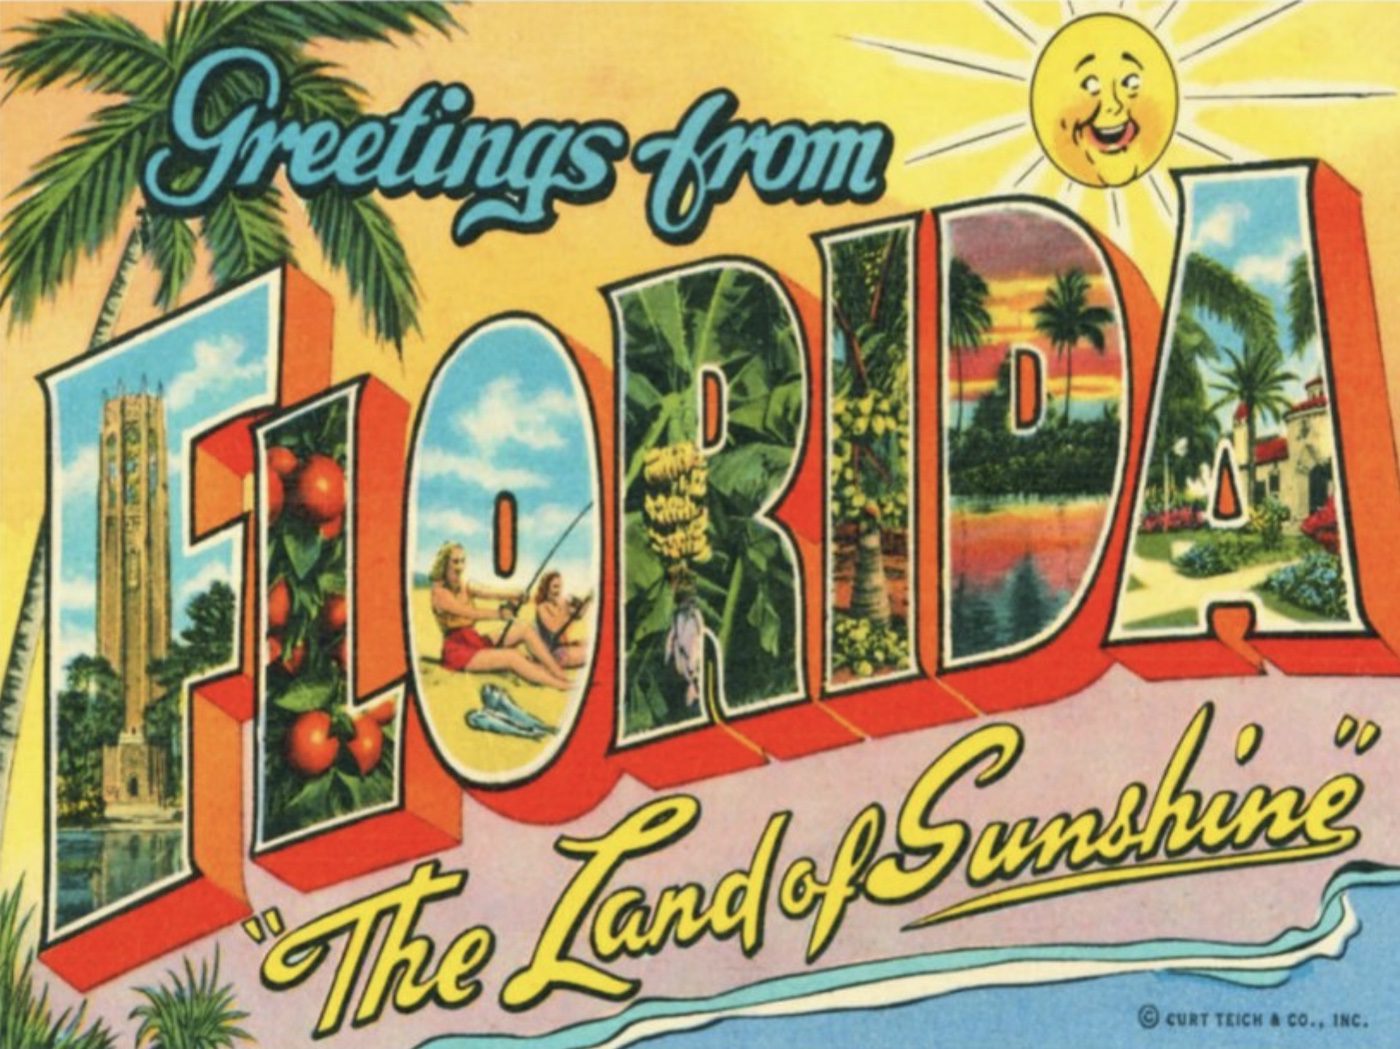
One of the most creative uses of Apple’s Pages and Keynote apps involves a feature added a few years ago called Image Fill. What’s so creative about it? It allows you to “fill” a letter or shape with an image. The idea may sound a little weird, but it was popular years ago on colorful postcards like this:
In this short tutorial, we’ll show you how to create captivating logos and headers in Pages and Keynote.
Start with text
To start the process, open a blank Pages or Keynote page. For the purposes of this post, we’ll use Keynote. Once the page is opened, delete any items on it (Keynote will have added items from a template) by clicking on them to select, then pressing Delete.
There are a few guidelines to follow:
- Use a bold font. For this example, the Arial Black typeface in all caps worked very well.
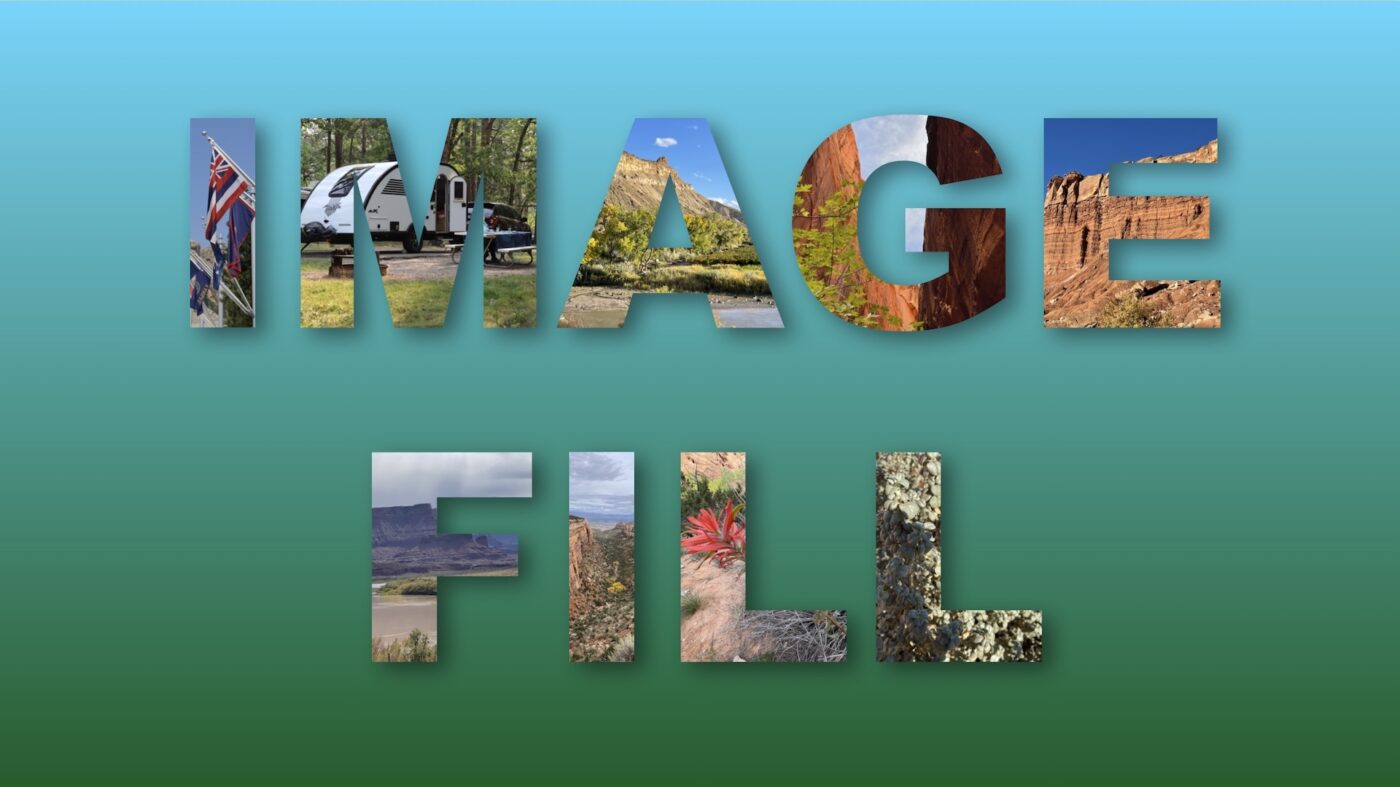
- Make the text as large as possible! The featured image for this post (the one that says “Image Fill”) used 400-point text.
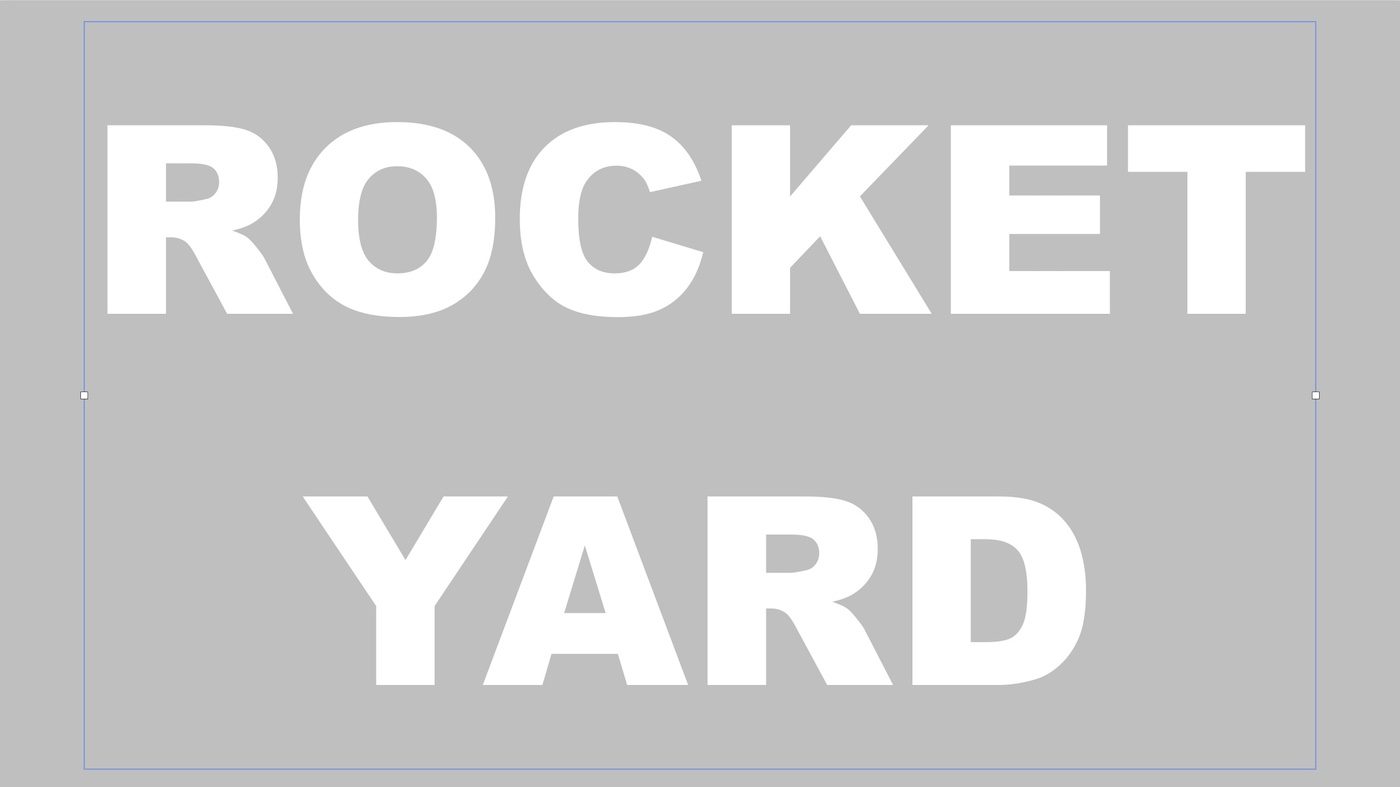
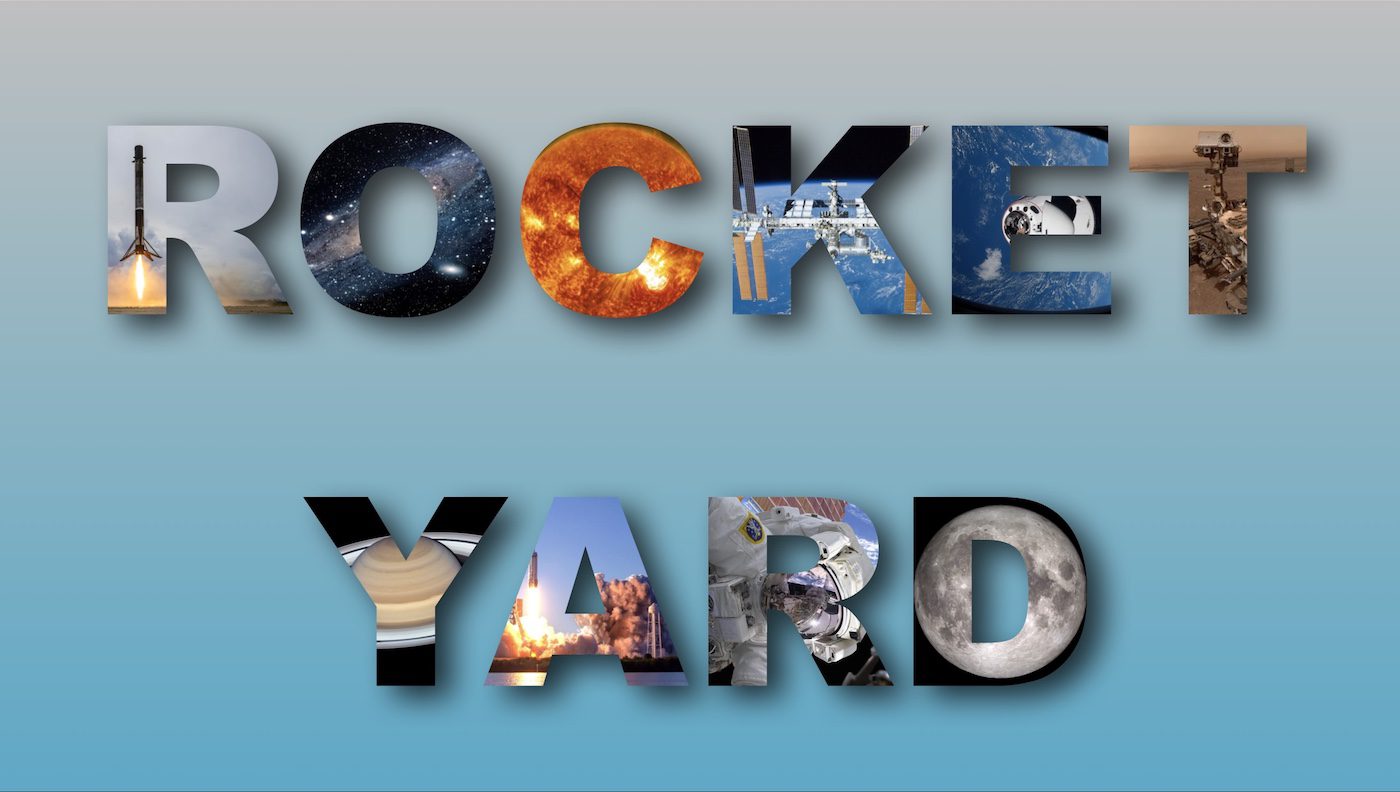
- Set aside one image for each letter in your words. “Florida” would take seven images, “Rocket Yard” ten!
- Have an idea of what you want. For example, a Rocket Yard logo with space scenes in the text
Start by clicking the Text Box tool in the toolbar. A text box appears with the word “text” in it. Double-click the word, then type your desired text.
The Keynote template selected uses Avenir as the default font. To change the font to Arial Black, double-click on the text, then select the font from the text tab of the sidebar. With the text tab still viewable, change the font size to something large:
Add the images
It’s time to add an image to each letter. You can also have a single image used as the “backdrop” to an entire word; it depends on what you select. For this example, we’ll add an image to each letter. We’ve grabbed ten space-oriented images. If you’re using your own pictures from the Photos app, drag them to a separate folder.
We’ll drag across the letter “R” to highlight it, then click on the word Text Color drop-down in the sidebar. One of our choices is Image Fill, the hero of this article:

When you select Image Fill, the dialog shown below appears. Click Choose, and select the image you wish to fill the letter with. For the R in ROCKET, we’ve selected a photo of a SpaceX Falcon 9 booster landing:
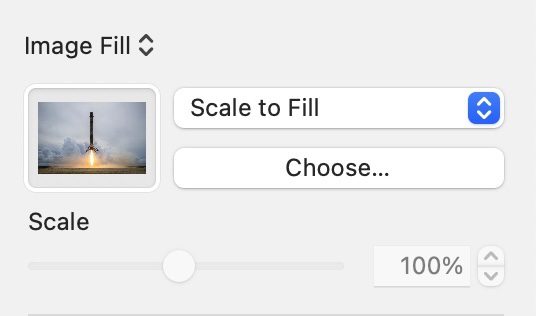
Once an image is selected, you’ll see it appear “in” the letter. Scale to Fill must be selected (as shown above) for the image to completely fill the letter or word. Here’s what our R looks like now:

Note that you can’t move the image filling the image. If, for example, we wanted the rocket to show up in the vertical line of the letter R, we’d need to crop the original image to place the rocket on the left side of the image. This is a trial-and-error method, but can produce really impressive results.
We won’t repeat this for the rest of the letters, but here’s what the almost-completed logo looks like:

Jazz it up!
The logo as it stands is somewhat flat-looking, so let’s add some depth and a background. Adding depth is simple.
Highlight all of the text, then select Shadow > Drop Shadow from the Style tab in the sidebar. Adjust the color, blur, offset and opacity of the shadow to your liking. Here we chose a black shadow with a 41 point blur, a 25 point offset, and 73% opacity to make the image appear to float above the background.
We also selected a gradient background by clicking on the gray background, then selecting Gradient Fill from Background on the Slide sidebar tab. If we had wanted to, we could have also selected a plain white background (for use on a website, as an example) or even another image—although that would have made the final image very busy!
More you can do
Those are the basics of using Image Fill in Pages or Keynote to turn plain letters into works of art. Other things you might want to try on your own include:
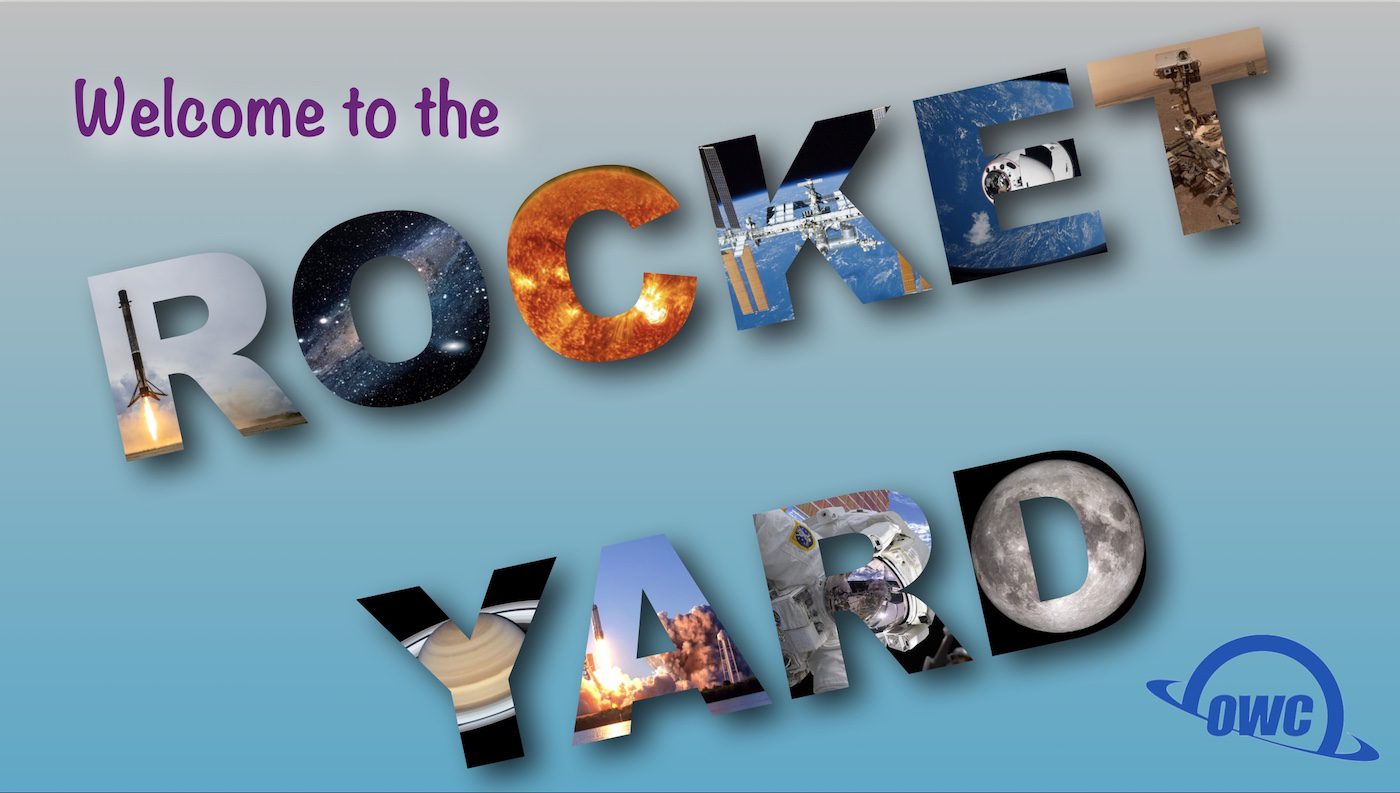
- Rotating the text. Click the text box to select it, then Command (⌘) – Click on one of the handles and drag to rotate the text.
- Adding more text boxes. Here we’ll add a “Welcome to the” banner in a cheery, handwritten typeface (Noteworthy).
- Adding a logo or picture. Of course, an OWC logo looks good here.
Now, this is probably a bit “over the top,” and we’re sure it’s making professional graphic designers gag. But this final image shows you that the sky is the limit of what you can do with Image Fill. Here’s hoping Apple gives us the opportunity to have text follow curving lines in a future version of Keynote and Pages, so we can recreate that vintage Florida postcard!
Related Topics
The Rocket Yard is filled with thousands of articles to answer your questions or stimulate creativity. You may find these articles to be helpful: