


Photo collages are a lot of fun. Back in the old days, there were picture frames one could buy that had openings for multiple photos of family, trips, and so on. In these all-digital days, there are Mac apps that do the same thing for you. Posterino is popular, as is Instantane. These and many of the other apps have a price associated with them, so why not create photo collages on your Mac using tools you already have? Today I’ll show you how to do this with two free Apple apps: Pages and Keynote.
Why both apps?
Wondering why I listed both Pages and Keynote? Pages is perfect for creating printed photo collages, while Keynote is awesome for collages displayed online or on a screen. The two apps are similar in how they work, so I’ll go into much more detail about the Pages method and show how those instructions apply to Keynote as well.
Using Pages
Let’s create a photo collage!
First, launch Pages on your Mac and click New Document. Select Blank Landscape as the template, then click Create. At this point you have a blank “canvas” on which to place photos. Of course, we’re not going to be writing text on this page, so the next step is to select File > Convert to Page Layout. This remove the document body, including body text and inline objects.
Add photos from Finder
Do you have a folder of photos on your Mac that aren’t in the Photos Library? It’s simple to add those photos to your document. Simply drag them from the folder, then drop them onto the page:

Not too exciting, is it? Well, we can do a lot more than just put photos on a page in some sort of grid. In the upper-left image in the collage above, you’ll see handles (small white squares) around the perimeter. Drag a corner and the image grows larger or smaller. Click on the image and you’ll see the handles, and you can also move the image around by dragging it.
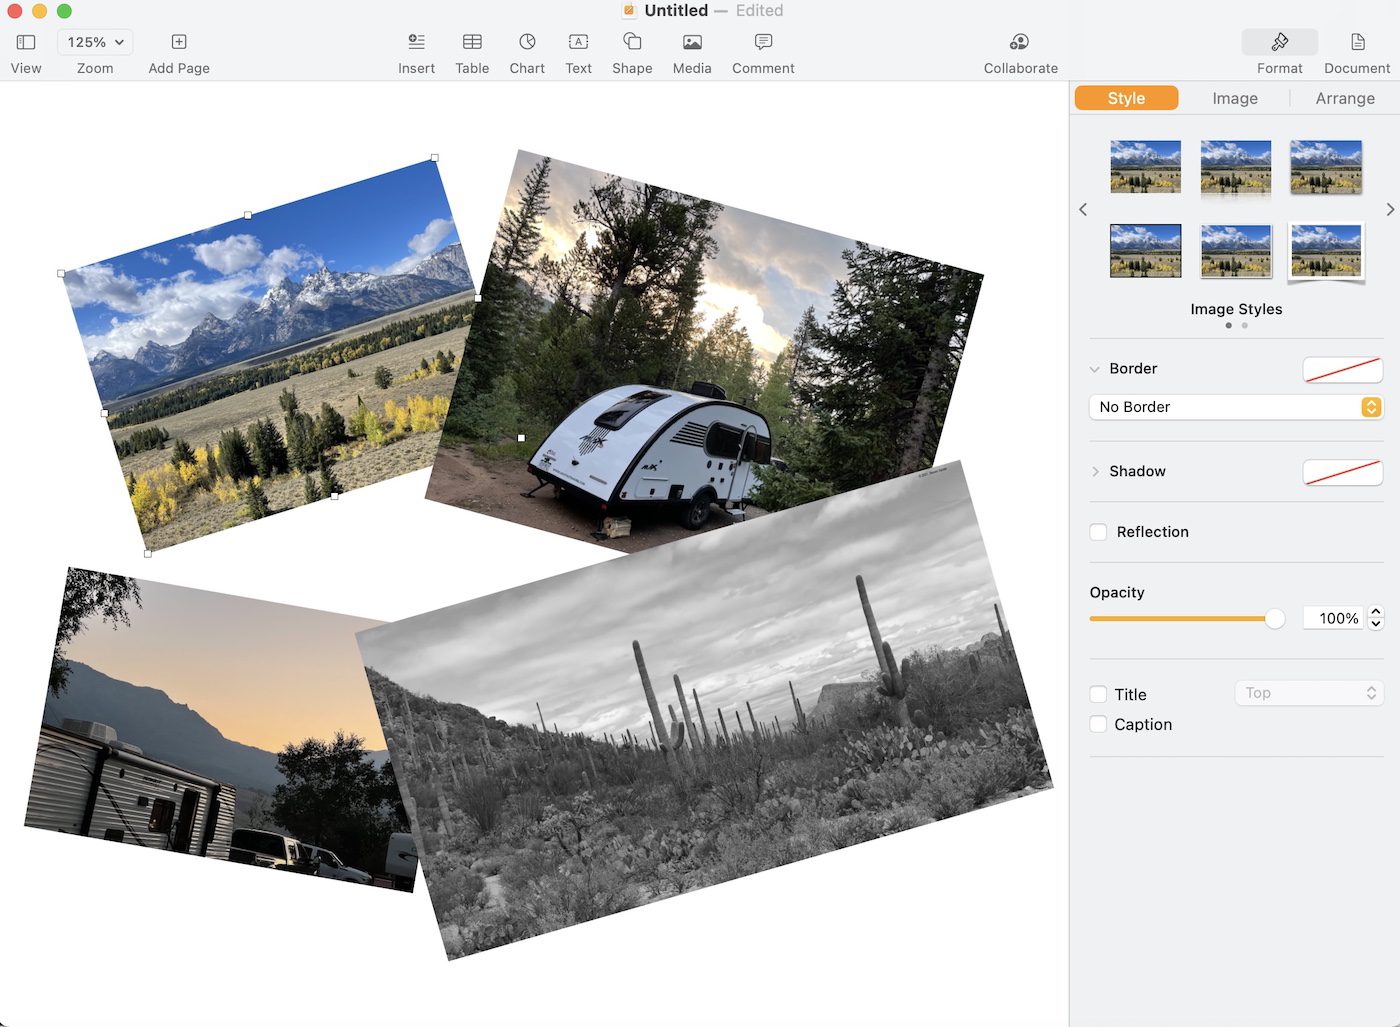
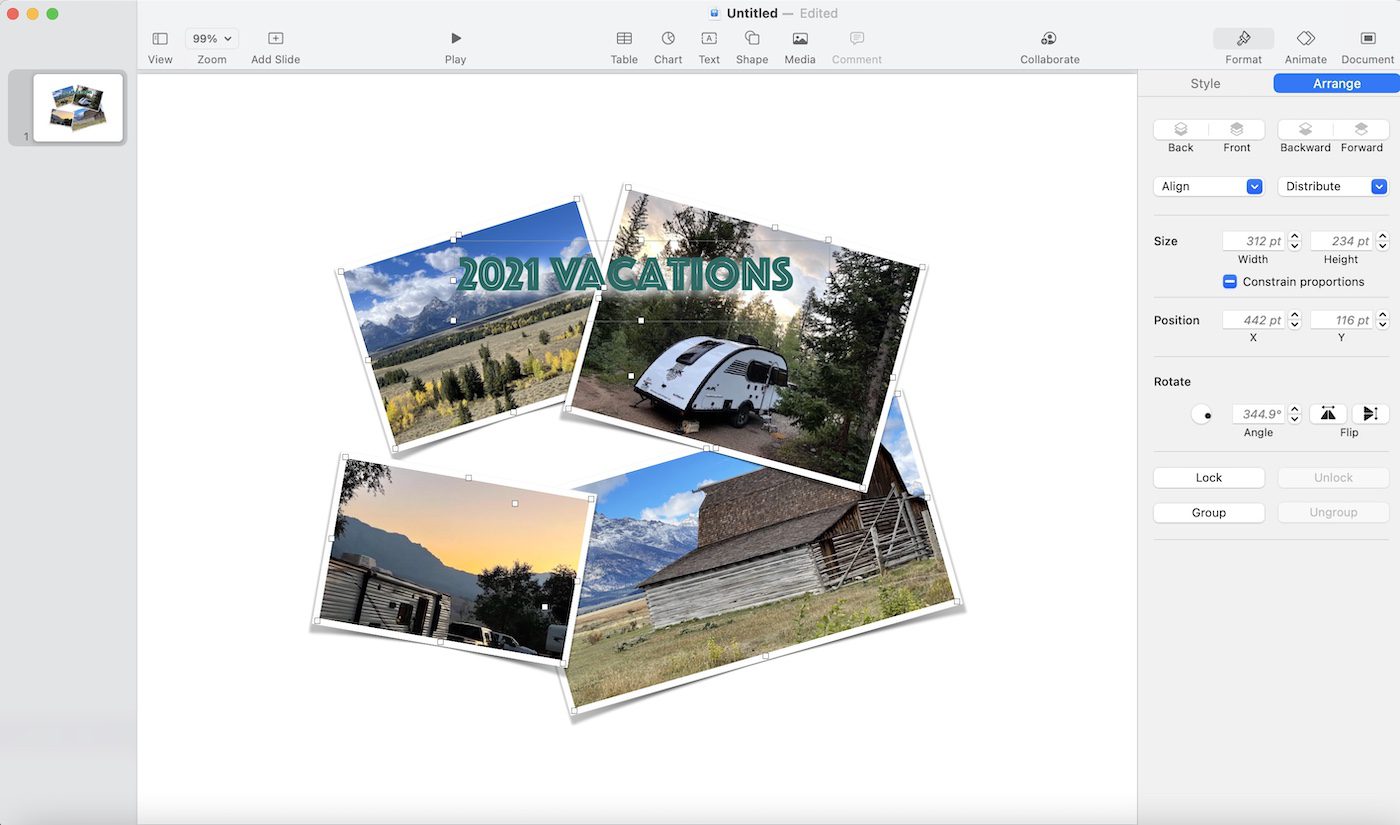
One fun thing you can do is to rotate the photos. Press the Command (⌘) key and hover your pointer over one of the handles. You’ll see a small arc with an arrow on each end, indicating that the image can be rotated by moving your pointer. In the screenshot below, I’ve rotated each picture slightly:
Add Photos from Photo Library
The other method of adding photos is to select them from Photo Library. To use this method, click the Media button in the toolbar at the top of the page. A photo picker appears:
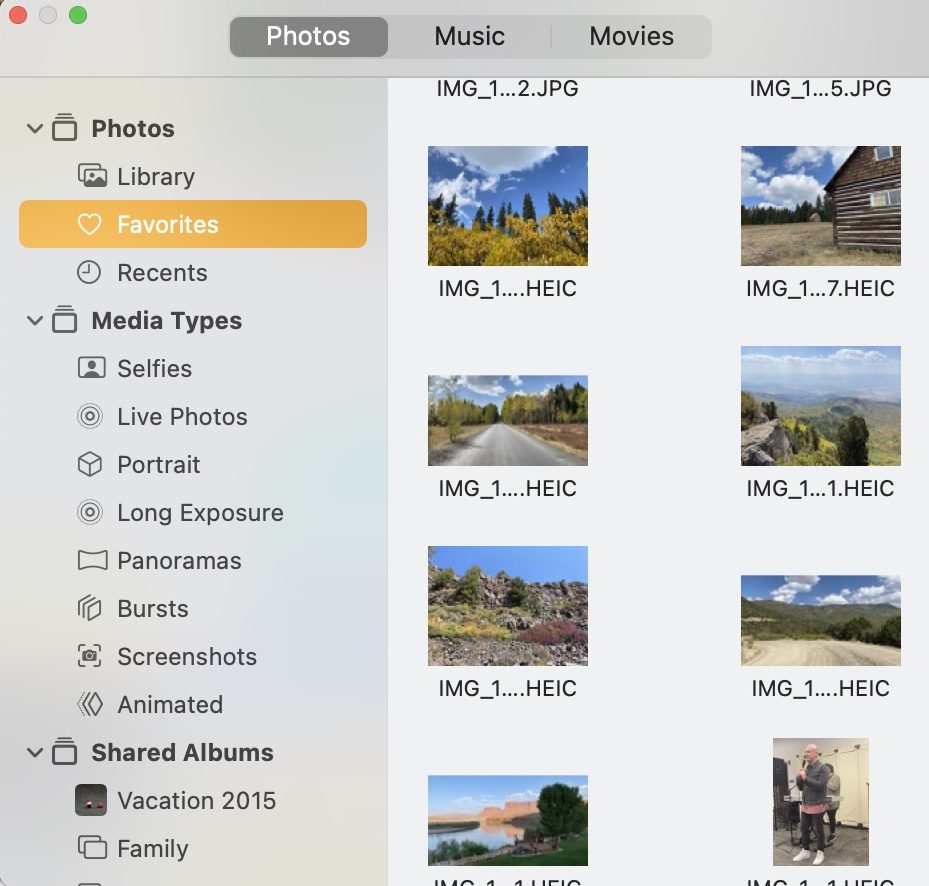
Click on any of the photos to insert it into the collage.
Adding picture frames
Let’s add frames to each of the pictures to give the collage some depth. One of my favorite frames for collages is called “picture frame.” It looks like a printed photo with a white border. To apply this frame, click one photo (or Option-click to select all photos), then from the Format sidebar at right, choose Picture Frame from the Border pop-up menu.
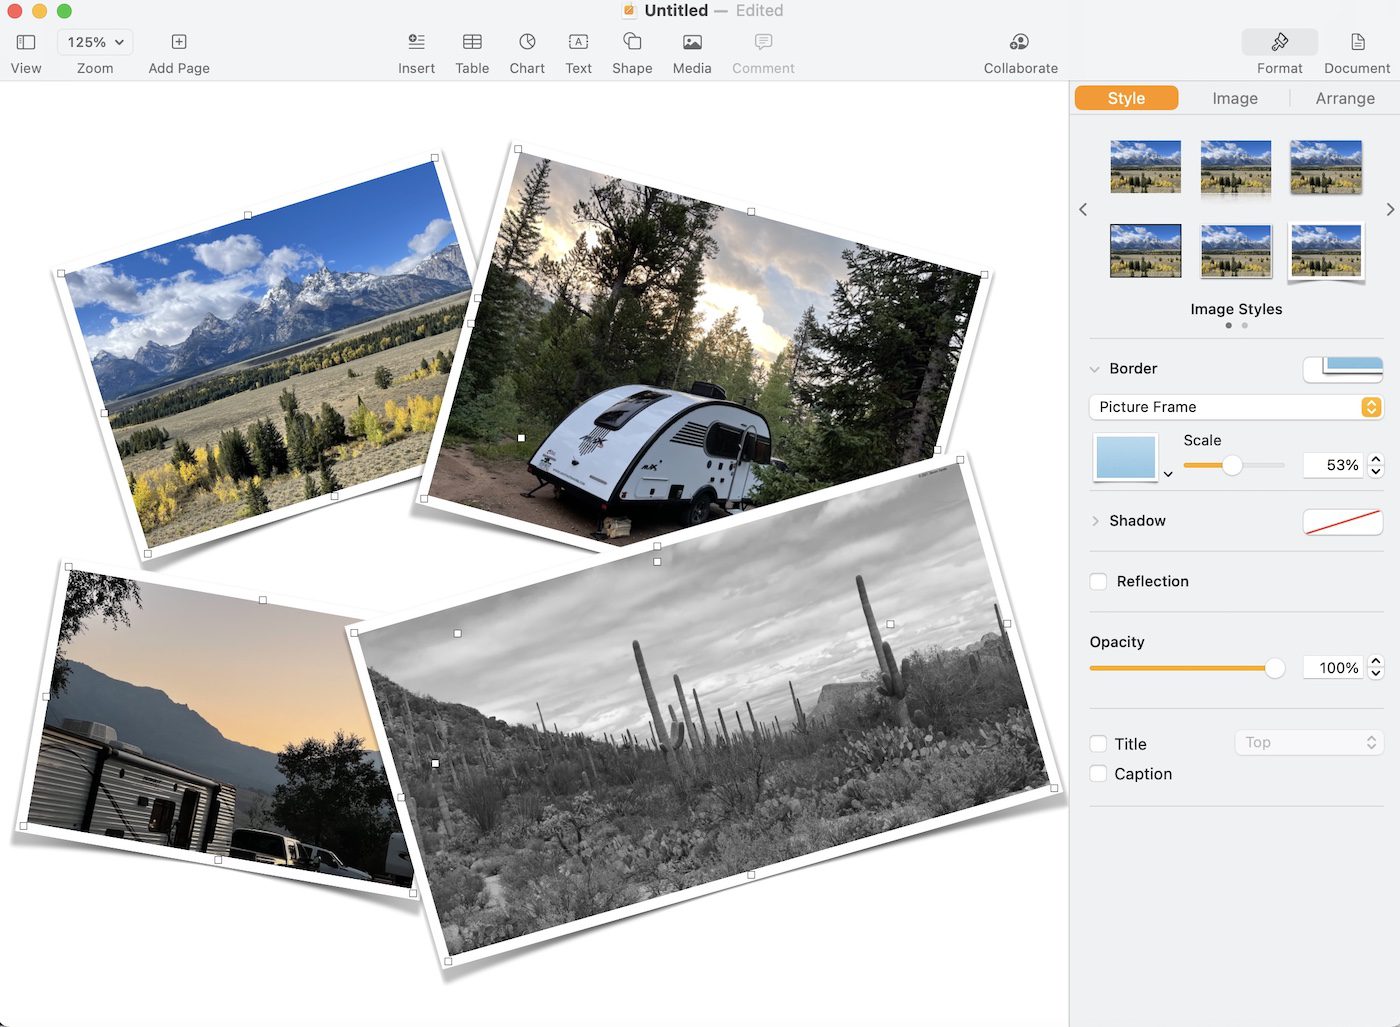
Note that there are other frames that can be applied. For example, there’s one that looks like a pushpin, as if you’re pinning the photos to a cork board.
You can increase or decrease the width of the white border on the photos with the Scale slider, and adjust the shadow types, width, and even color from the Shadow pop-up. Reflection adds a “reflected” image to the bottom of the photo. For photo collages, I don’t recommend adjusting opacity, because it makes the images “see-through.”
Depth
Want to move one image in front of another? To do that, click the photo you want to move, then click the Arrange pane in the sidebar. Click Forward to bring the photo ahead of the others, or Backward to move it behind another. In this image, I’ve moved the trailer picture in front of the black and white desert photo.

Adjusting or replacing photos
While working on a photo collage, you might decide that one picture is out of place, or perhaps it is too dark or light. Fortunately, it’s easy to adjust an image or even replace a photo.
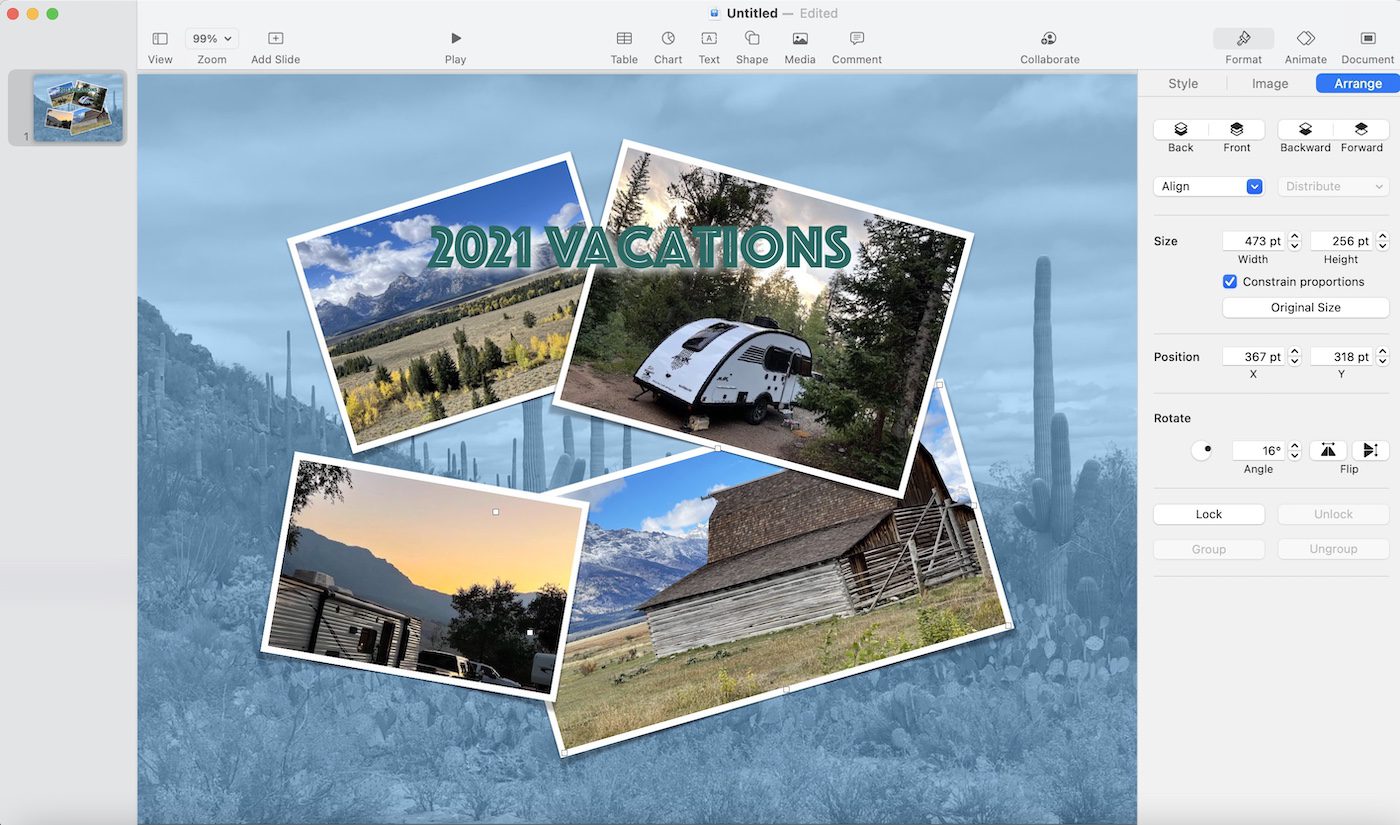
In the example collage, I’ve concluded that the black and white desert photo is out of sync with the rest of the mountain photos. To replace it with another mountain image, I click on the black and white photo, then click the Image pane in the sidebar at right. There’s a Replace button to bring up a Finder file picker, from which I select another photo from my folder. It immediately replaces the previous image.
Under Adjustments you’ll find the tools that change how a photo looks. Drag the Exposure slider to make a photo lighter or darker. Drag the Saturation slider to increase the color of an image or removes color. The Enhance button is identical to the Magic Wand Auto-Enhance tool found in Photos, picking the best settings to make a photo look “better.”
Add a title
To add a title to a photo collage in Pages, click the Text button in the toolbar at the top of the page. This creates a text box. Type in the text you want, then use the Style and Text buttons in the sidebar to change the font, size, background fill, and other variables for your title.

Add a background
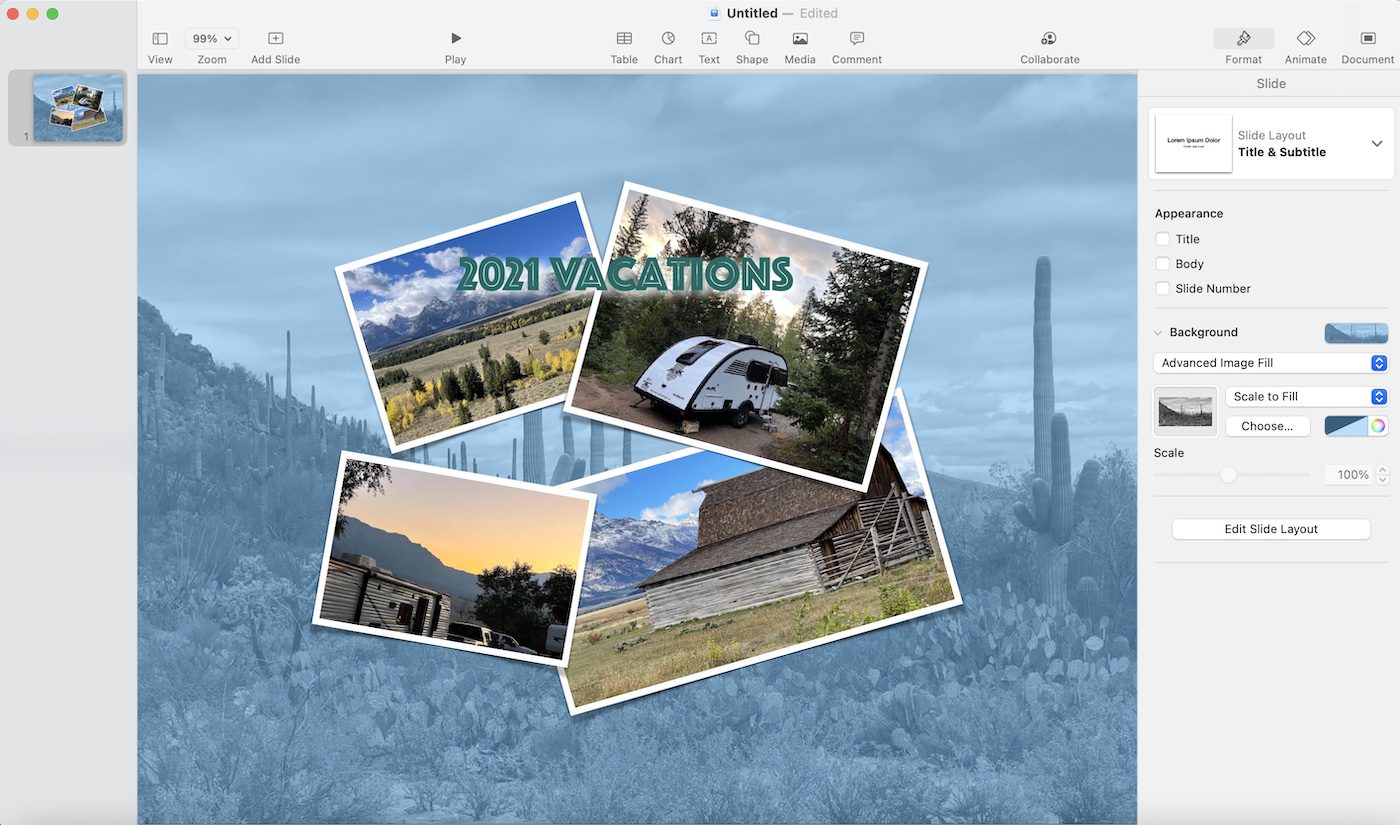
Don’t like that plain white background on our collage? Change it! To do this, click on the background of the collage, then select Format from the right side of the toolbar. You’ll see the type of Page Template used, and a section for Background. By default, it’s set with No Fill. You can add many types of backgrounds: Color Fill (one color), Gradient Fill (a gradient from one color to another from top to bottom), and Advanced Gradient Fill (gradients at an angle or with multiple shades of color). Use another photo as a background by choosing Image Fill, or Advanced Image Fill to add another photo and a gradient.
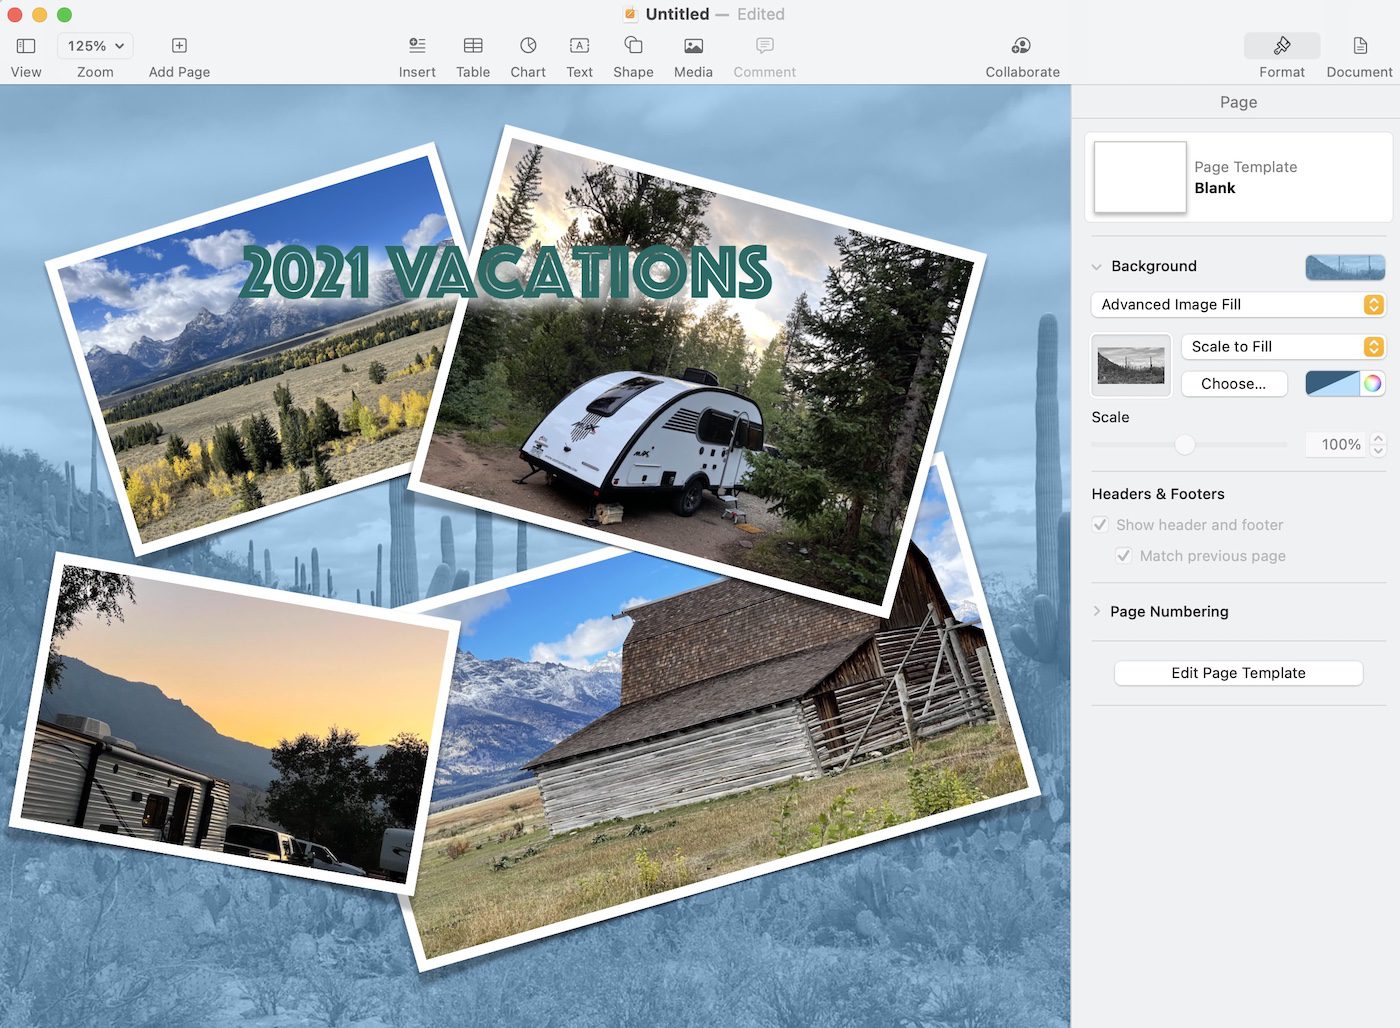
In the example screenshot above, I’ve added a photo using Choose… in Advanced Image Fill, then selected a blue gradient to tint the background.
Save and Export
When the photo collage meets your approval, it’s time to make sure that it’s saved for safekeeping. Next, if you’re going to print it directly to a local printer, you can just use the standard File > Print menu command to send it to your printer.
Want to export it to a PDF file? Use File > Export To > PDF with Best Image Quality selected. That PDF file can be sent to many photo or camera shops and printed on high-quality paper. You might find that file sizes get rather large if you use many images, in which case you can use Keynote to create the collage.
Using Keynote
Earlier I noted that Keynote is best for photo collages that are to be displayed online or projected. It’s also very useful for making Pages photo collages smaller in size. Our example here is about 7.9 MB in size, but maybe we want it to be smaller for easier emailing or to show on a website.
Start by launching Keynote. You’re asked to select an aspect ratio and a theme. In this case, we want to use the work we’ve already done in Pages, so select 4:3 as the aspect ratio and use the regular White presentation theme. This creates a blank page that looks like this:
The toolbar is very similar to what you see in Pages, which is why you can use most of the instructions for creating a photo collage in Pages in Keynote! However, since we’ve already done the work in Pages and just want other options for file exports, we’ll bring our our photo collage into Keynote.
To start this process, we’ll need to remove the standard Title and Subtitle seen in the screenshot above. To do so, just click on those text boxes to select them, then press Delete on your keyboard. The result is a blank white page.
Copy and Paste
With your Pages photo collage open, select Edit > Select All, then Edit > Copy (or Command ⌘ – C). Now switch to your blank Keynote presentation and select Edit > Paste (or Command ⌘ – V) from the menu bar. Your images and title appear on the blank Keynote page:
You’ll notice that our copy-and-paste between Pages and Keynote transferred the photos and title, but not the background was not transferred. That’s OK—it’s easy to add it back in.
To begin, click on the blank white background of the Keynote slide, then select Format from the toolbar. Here you’ll see the familiar controls for using an Advanced Image Fill as described in the Pages photo collage instructions. After adding the same background photo and tinted gradient, your slide will look like this:
One thing you’ll notice here is that since Keynote is designed to display a full screen of imagery rather than just a “page,” the photos and title appear smaller than they did with our Pages document. Let’s fix that.
Group and Resize
This is a two-step process. First, we’ll group the photos and title, then drag them to scale the images. The title isn’t scaled, so we’ll then ungroup the photos and title, and increase the font size.
With your Keynote slide open, select Edit > Select All (or Command ⌘ – A), then click the Group button found in the sidebar. This keeps the photos in their relative positions while allowing them to be resized.
Rather than finding the small white square handles at the corners and sides of each picture, we see that there are handles on the outside of the group. Click and drag one of the handles to resize the images. The title will stay the same size.
Ungroup and Increase Font Size
When you’ve resized the images to your satisfaction, make sure that the group is still selected, then select Format > Ungroup from the sidebar. Click on the title to select it, then select the Text pane from the sidebar and change the font size. The resulting document looks very similar to the one we created in Pages:
Export the Keynote Collage
Keynote offers a few more options for exporting the collage, but the most useful is File > Export to Images… This menu command offers options to save as JPEG (High Quality), JPEG (Smaller File Size), PNG, and TIFF. Remember that 7.9 MB PDF file exported from Pages? As a High Quality JPEG exported from Keynote, it’s 890 KB in size. As JPEG (Smaller File Size), it’s just 182 KB! PNG and TIFF files are also smaller than the PDF, but larger than the JPEGs.
Either of the JPEG collages can be easily emailed, uploaded to your favorite social media, or posted on a blog.
Photo collages are a snap to make in Pages and Keynote, and are eye-catching whether you plan to print them or share them online. Give them a try soon!
Related Topics
The Rocket Yard is filled with thousands of articles to answer your questions or stimulate creativity. You may find these articles to be helpful:


Thank YOU for the fantastic, informative article for someone who was absolutely clueless how to put photos in Pages. I love creating photos and it’s a big part of what I do with my Mac. I could manuver my old 2008 iMac flawlessly but having a new iMac 24″ M1 since July 2021 had me thinking I made a HUGE mistake to upgrade. Now I think I can muddle thru with this new one although I keep comparing it to my TRUSTY 2008 Intel iMac.
What I miss is the collage screen saver that used to be part of Mac OS. Any alternative for that?