Every social media network has a way to show others what you look like. The profile picture is generally a square photo you upload to social media during setup, displaying your smiling face. It can also feature text labels, icons, logos, or other objects that define your identity. Why settle for a plain photo when you can show friends and followers your best face? Today we’ll show you how to create a compelling social media profile picture in the Mac Photos app.
There are other apps that might provide more features for creating your social media profile picture (like Adobe Photoshop, for example). Those features include removing or replacing backgrounds, advanced facial retouching tools, and the ability to bring out or hide details with masking. For the purpose of this article, we’re using the free and easy-to-use Photos app.
Start with a good photo
Although there is a lot you can do to make a so-so photo into a better profile photo, it helps if you start with a decent picture of yourself. To make your search easier, launch Photos and select People from the sidebar on the left side of the window. If you’ve been using People for a while and have kept up with matching names to faces (which Photos then continues to do using machine learning), there should be an album with your name on it.
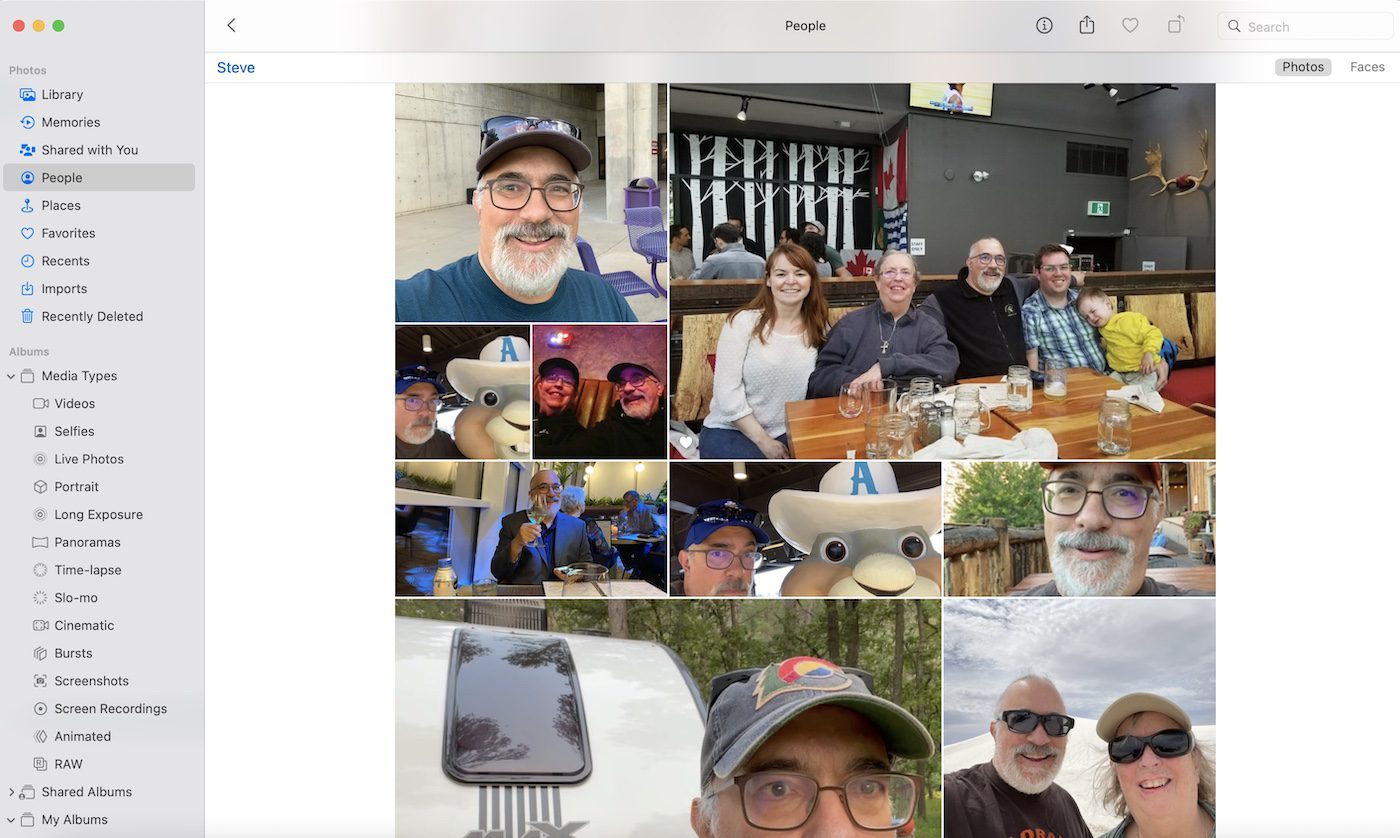
In this example, there are hundreds of photos of this person (me) from age two to my current grizzled state. That’s a good start for finding an image that works as a good social media profile photo. Another good place to look for images is in the Selfies album, also located in the sidebar under Albums > Media Types.
In a perfect world, your image would be well lit, show facial features perfectly, and have you centered in front of a non-distracting background. The world is not perfect, so your photo is going to require some work to look its best on social media.
Crop the image
The first step is to crop the image. Cropping means that you take an image that is most likely in a 4×3 (landscape), 16×9 (landscape), or 3×4 (portrait) format, then convert it to a square (1×1) image. Why do you want a square image? Because it’s the best format for social media images.
Most of the photos you see in the People album screenshot above have me to one side or another in the frame. It’s going to work better if my head is directly in the center of the image. I decided to use a selfie in which I wasn’t smiling because I’m in a grumpy mood today. This selfie was shot in portrait mode.
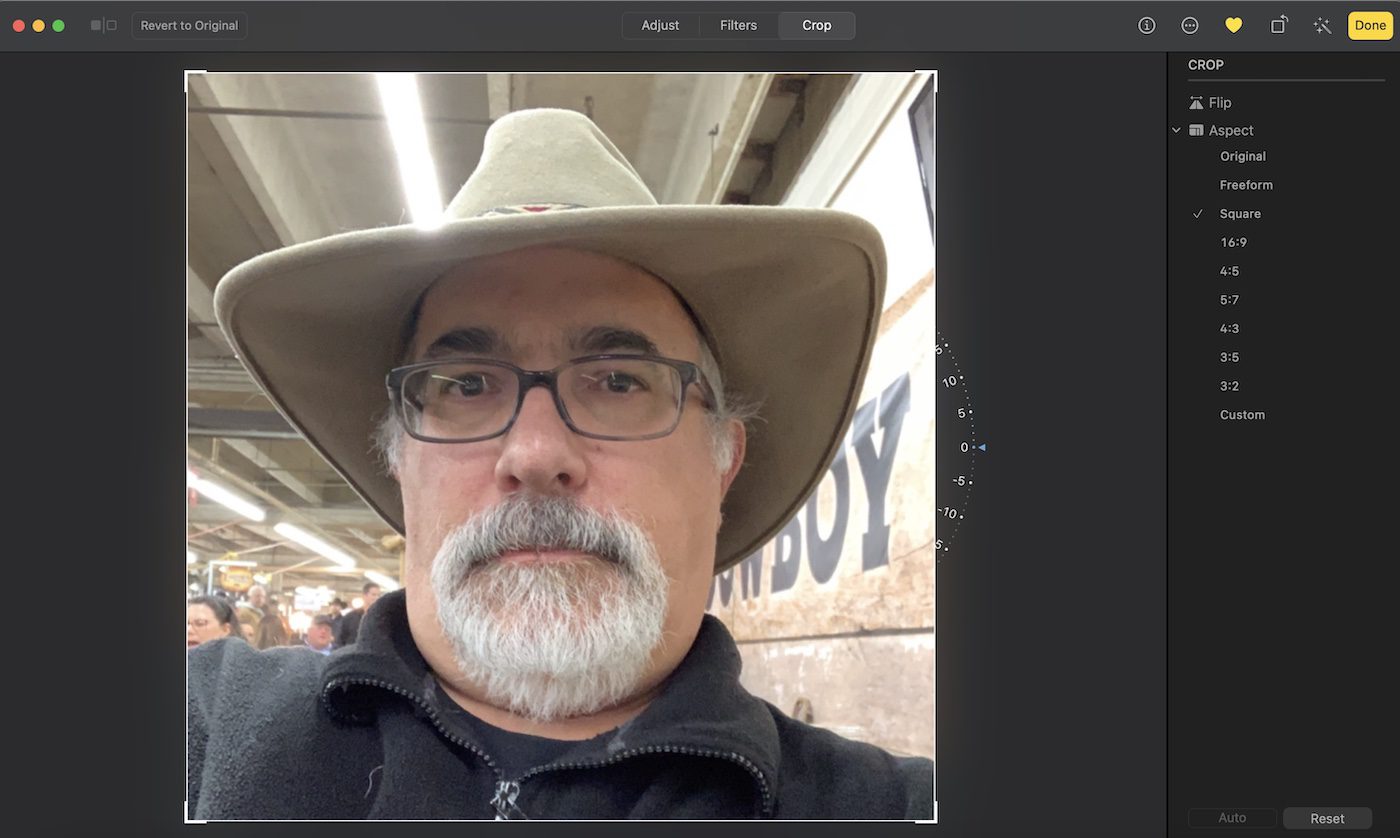
To crop the photo, I double-click it in the Photos Library, then click the Edit button in the upper-right corner of the Photos window. This editing window appears:
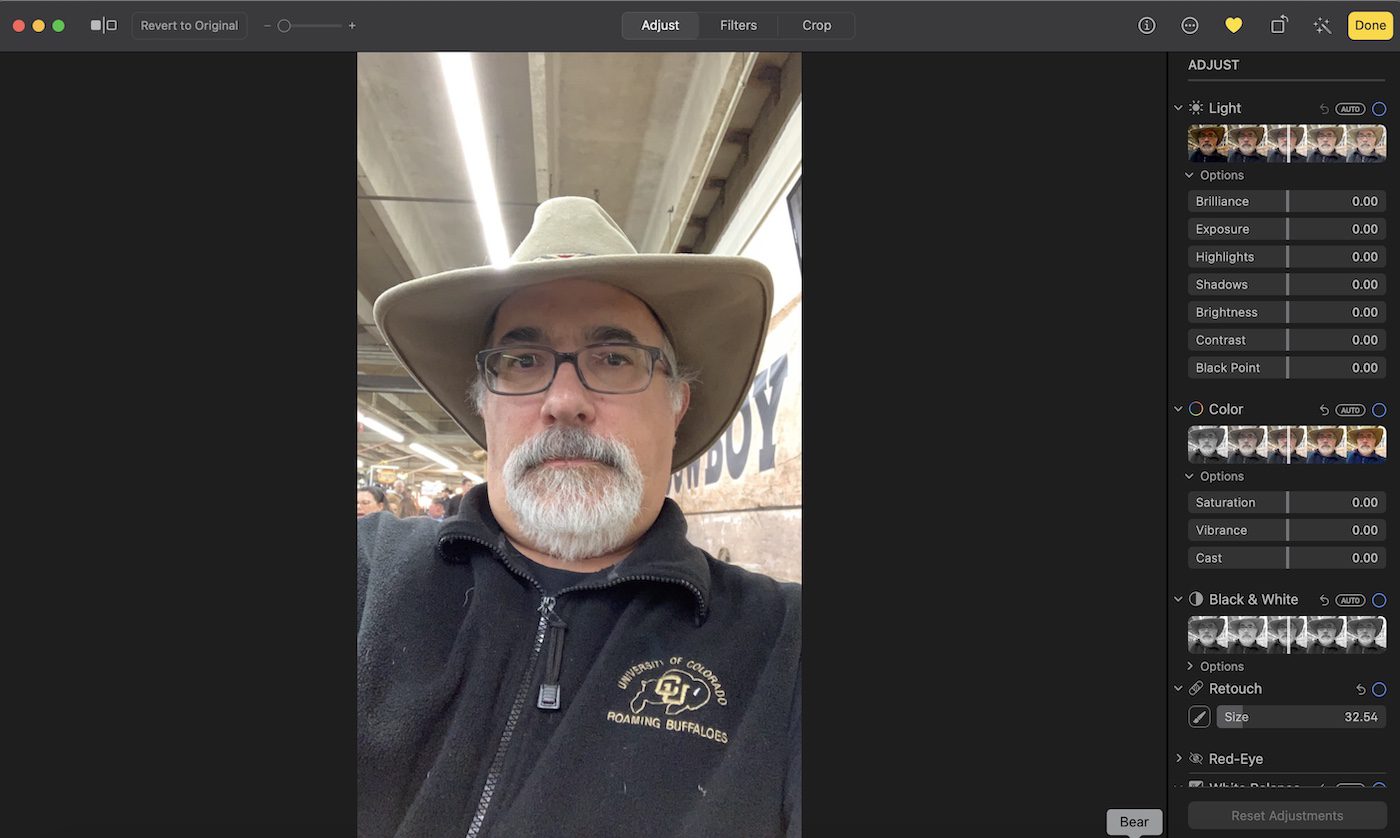
There are several things to notice in this screenshot. First, if at any time you wish to go back to the original format and unedited state of the photo, click Revert to Original in the upper left of this window. That removes all edits made to the image.
Next, pay attention to the fact that Adjust is selected in the toolbar at the top of the screen. When Adjust is selected, all of the adjustments sliders for light, color, retouching, red-eye reduction, and more are visible in the right sidebar. This becomes useful later in this example.
Cropping
Also, notice the Crop tab in the top toolbar. We’ll click that next, and select Square from the list of aspect ratios in the right sidebar. Photos automatically applied a square (1×1) aspect ratio to the image. I had to drag the image down a bit to center my face in the image, but here’s the result:
That’s a good start, but I want to improve the portrait a bit. Click on the Adjust tab, and there are a few things I can do quickly. See that “magic wand” button to the left of the yellow Done button? Clicking it applies some automatic tools that Photos thinks will improve the image. For example, it brightened the entire photo and got rid of some shadows under the hat. While that’s helpful, it’s not what I really wanted. Another click on the magic wand removes the automatic changes.
There are a lot of useful tools in the Adjust tab. If you’ve never used them before, be sure to give them a try to see what each adjustment does. Don’t like the result? You can either select Edit > Undo from the menu bar or press Command (⌘) + Z. Undo can be used any number of times to erase changes you’ve made.
While I won’t go through all of the changes I made step-by-step, here’s a synopsis:
- Decreased brightness of Highlights
- Brightened shadows
- Increased contrast and black point
- Used retouch tool to get rid of some facial blemishes, “trim” sideburns, and reduce reflection on glasses
- Added a vignette (shadowing in corners) to emphasize the face
Filters
When all of these adjustments were done, I clicked the Filters tab to see if any of them would make the photo slightly more dramatic. Unsurprisingly, the “Dramatic” filter added just the flair I wanted, although it darkened the photo somewhat. All filters can be adjusted by dragging them to the desired strength.
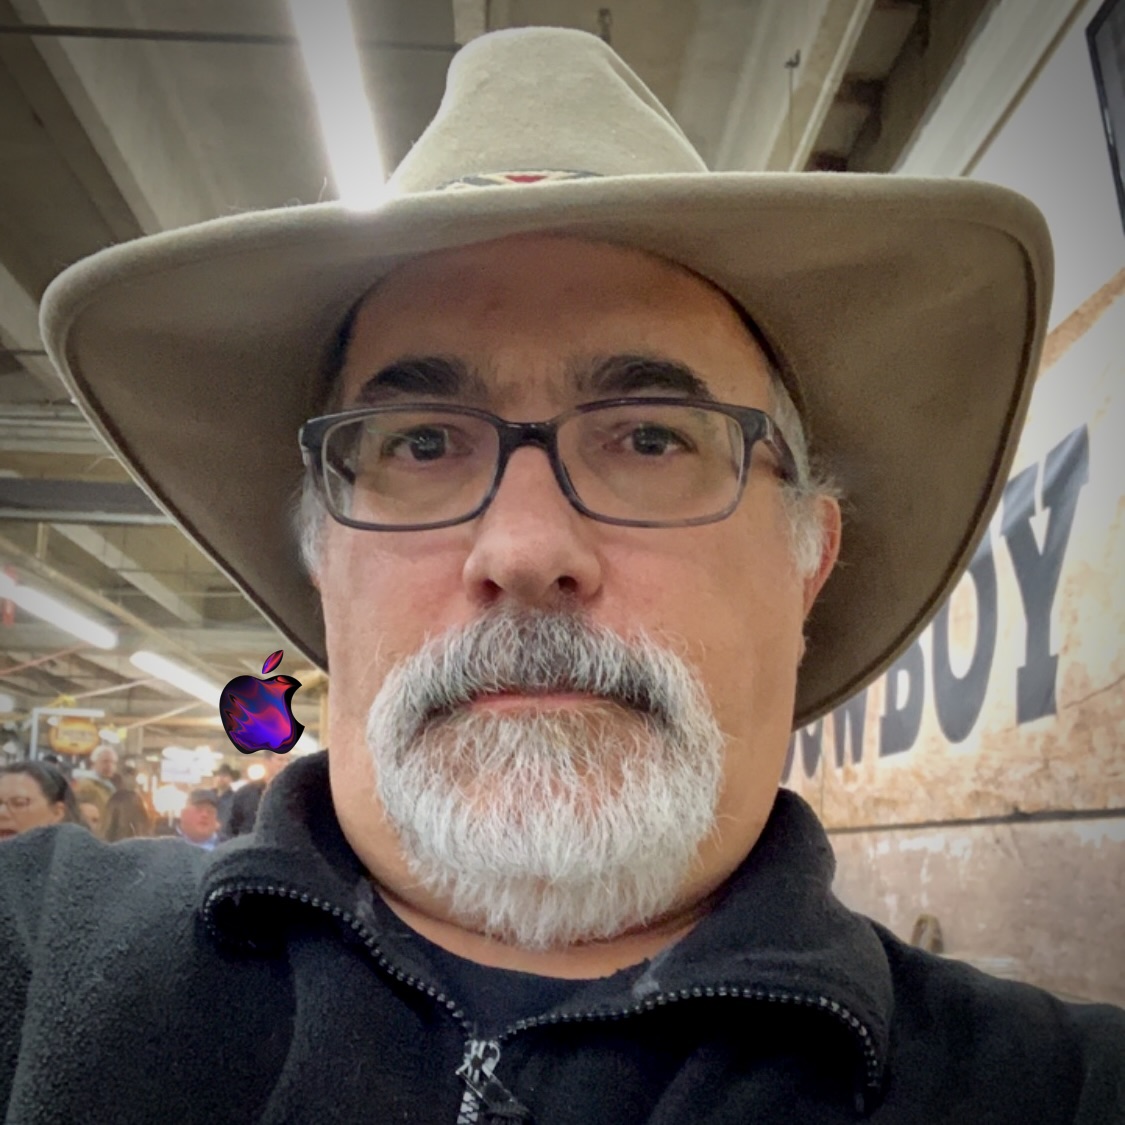
Here’s what the final image looks like, side by side with the original:

The fluorescent lights aren’t as distracting, the reflections on the glasses are decreased, those straggly sideburn hairs aren’t as obnoxious, and the fleece vest is darker. Sadly, the changes did not turn me into Yellowstone‘s Rip Wheeler (played by actor Cole Hauser).
Export
The next step is to click the Done button in the upper-right corner to save the changes. Remember: You can bring this image back to the original look by editing and clicking Revert to Original. Considering you’ve probably done a lot of work up to this point, export the image for use on social media first!
This is easy to do—just drag the final image from the Photos Library to a folder or the desktop.
Labels or Logos
Perhaps we’re not done yet. Let’s say that I want to add a logo or some text to the image. A good place to do that is in the macOS Preview app.
I double-click the exported image to open it in Preview. I’ll make some other adjustments in a minute, but here I want to add a transparent .png image of an Apple logo I found on the web. Double-clicking the .png file, it opens in another Preview window.
The next step for the Apple logo is to select Edit > Select All from the menu bar, then Edit > Copy (or Command (⌘) – C. Next, I click on the portrait image, then select Edit > Paste (or Command (⌘) – V) to paste the .png onto the portrait. To move it around the portrait, I just clicked and dragged. I didn’t want the logo to overwhelm the image, so I grabbed one of the corner handles and dragged “in” to reduce the size of the logo.
Resize
The final thing you may wish to do in Preview is resize the image. For Facebook, the optimum profile picture size is 360×360 pixels at 72 pixels per inch. My profile picture here is 1125×1125 pixels at 216 pixels per inch. To resize the image, select Tools > Adjust Size from the Preview menu bar.
Where the 1125 is, I select the number and type 360. For the pixels per inch, I replace 216 with 72. Clicking OK reduces the size of the image and the file as well.
For Instagram, it’s recommended that the image be 180×180 pixels. It will actually be downscaled to 110×110 pixels on Instagram. Twitter profile pictures are usually 400×400 pixels.
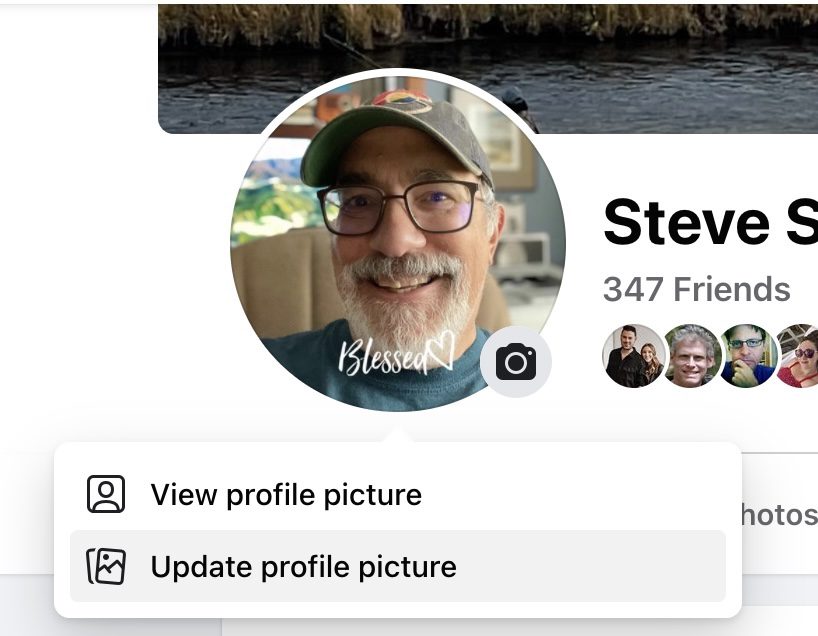
Once your image is the right size, use the social media network’s preferred method of adding or replacing a profile picture. For Facebook, it’s just a matter of clicking your profile (usually your name), then clicking the camera button on your existing profile picture:
Another Profile Picture Source: Memoji
Don’t like your picture? Consider using a Memoji! These are humorous, look like you, and don’t require all of the touchup work that a normal photo might. Here’s mine, which I think I’ll keep…

You’ll need an iPhone or iPad to create your own Memoji. For full instructions, this Apple support document is very useful.
Related Topics
The Rocket Yard is filled with thousands of articles to answer your questions or stimulate creativity. You may find these articles to be helpful: