

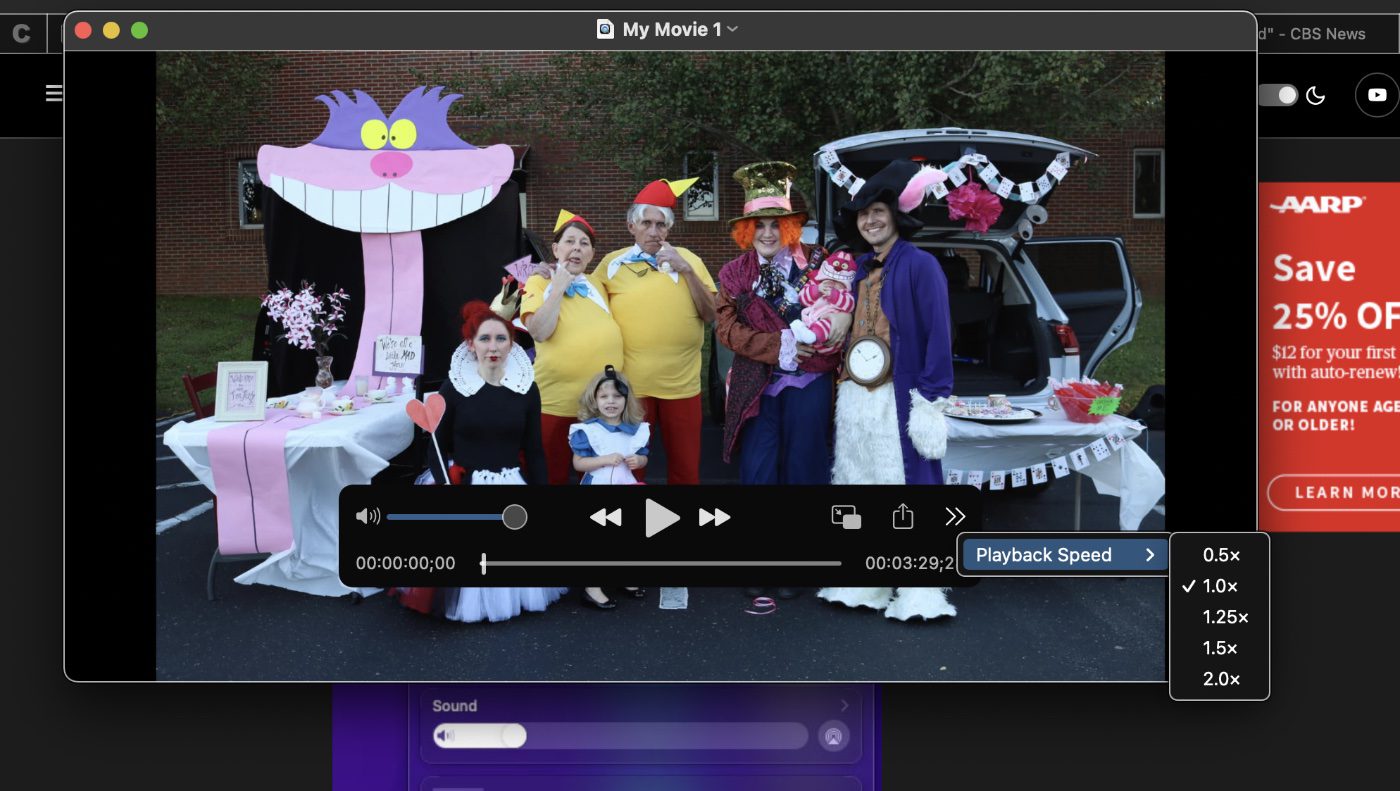
QuickTime player in macOS Monterey natively supports different playback speeds. Now, when you play a video using QuickTime, click the → button in the bottom-right corner of the media controls overlay and select your preferred speed from 0.5x to 2.0x.
Recording your screen
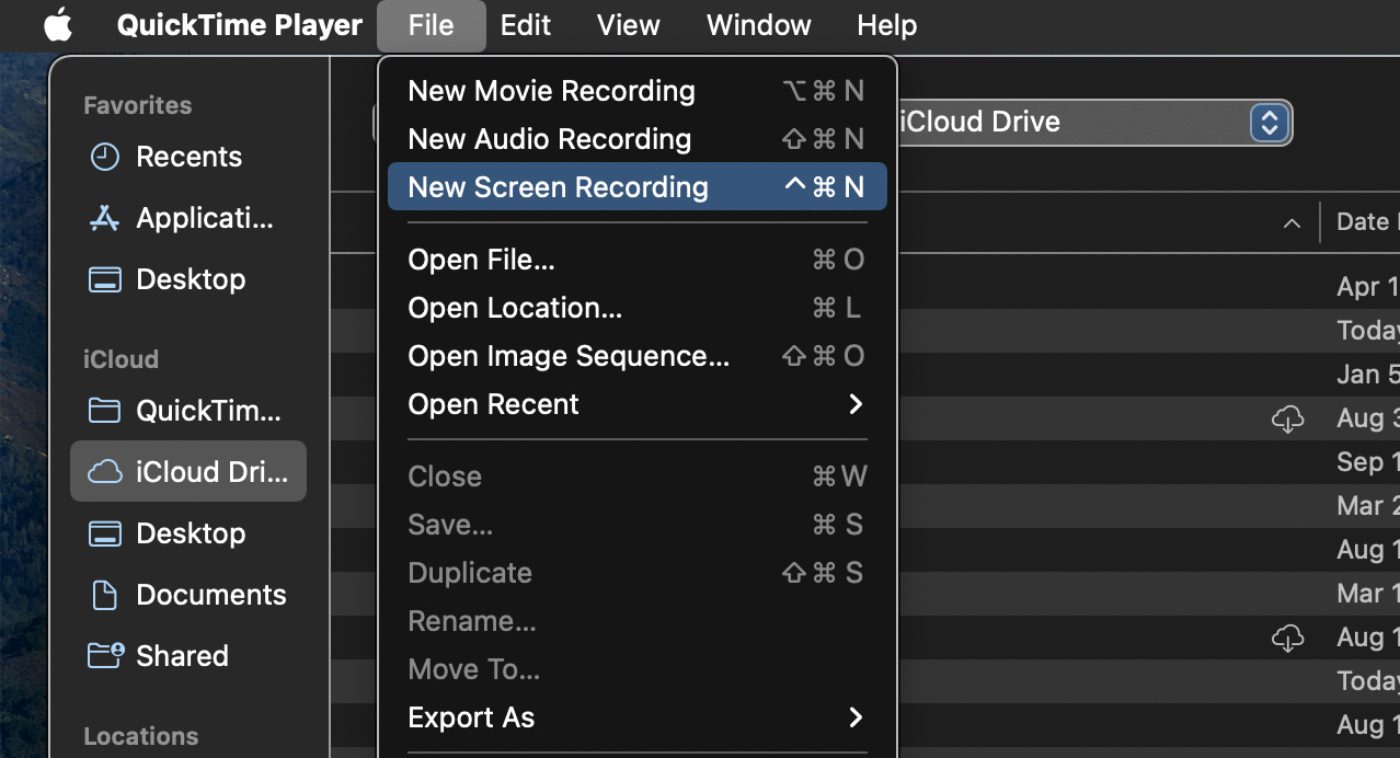
Of course, to adjust playback speed, you need a video on which to adjust it. One thing you can do is use the screenshot in the QuickTime Player app, you can make a video recording of your Mac’s screen. You can open the recording in the app and save it on your Mac.
- Open QuickTime.
- Choose File > New Screen Recording to open Screenshot and display the tools.
- Click Options to control what you record. For example, you can set the location where you want to save your screen recording, or include the pointer or clicks in the screen recording.
- Click Record.
- To stop recording, click the Stop Recording button.
Another app may open depending on where you save your recording.
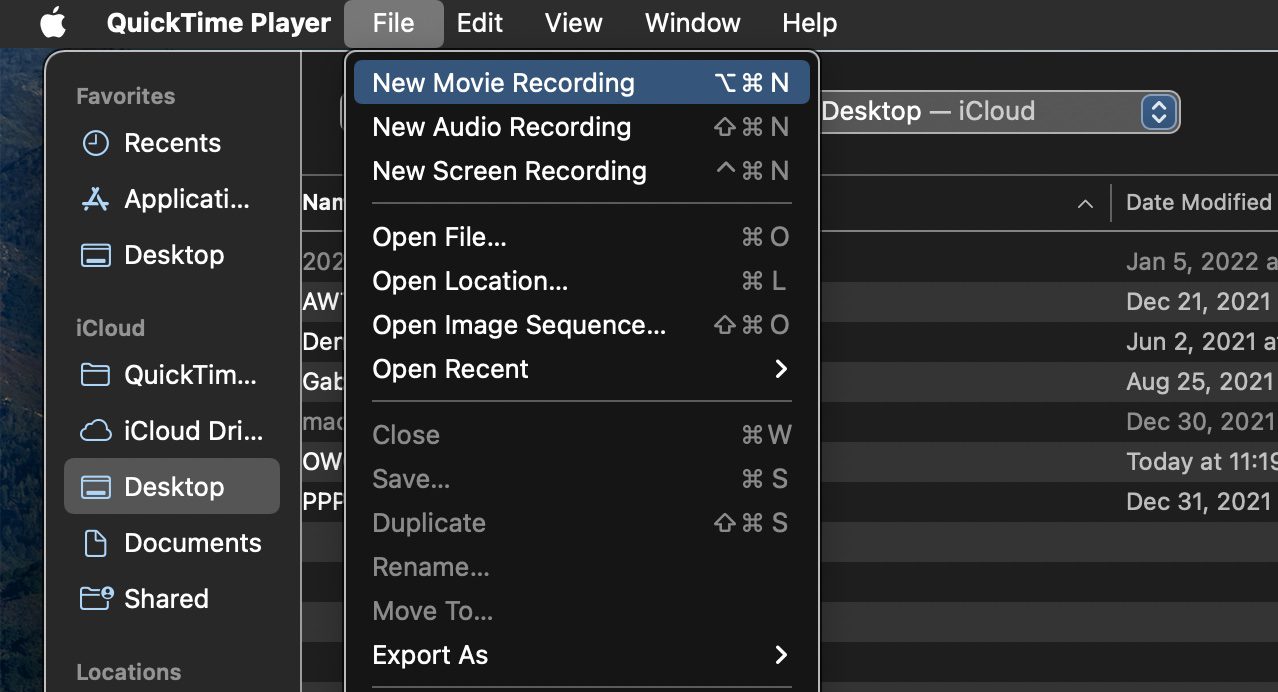
Recording a movie
You can also record a movie using the built-in camera on your Mac. The recording controls that appear let you start recording, control the volume and choose recording options. Launch QuickTime Player and:
- Choose File > New Movie Recording. When the recording controls appear, you see a green light next to the built-in camera in your Mac.
- Click the Options pop-up menu, then choose any of the following recording options:
- Camera: Choose a camera if you have more than one camera available.
- Microphone: Choose a microphone if you have more than one microphone available.
- Quality: Choose the recording quality. Maximum-quality recordings produce uncompressed files, which can use large amounts of storage space.
- Adjust the volume control to hear the audio you’re recording.
- Click the Record button to start recording.
- To pause recording, Option-click the Record button; click it again to resume recording.
- Click the Stop button to stop recording.
- Choose File > Save to save and name the recording.
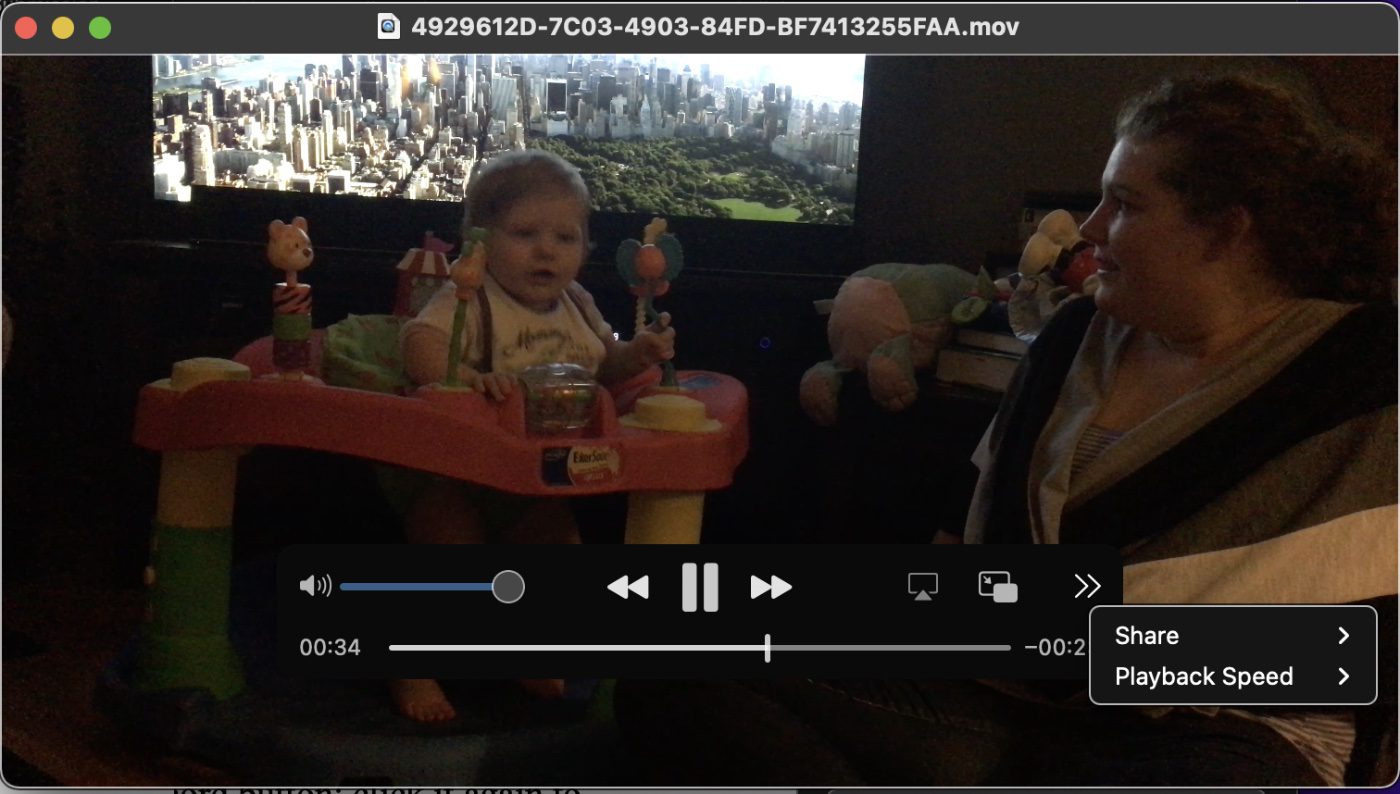
Adjusting playback speed
While watching a video in QuickTime:
Locate the Playback Speed option and increase or decrease the speed of the video.
Close the box and proceed with playing the video. Then, you’re ready to go!


Hi Dennis
Was hoping you’d offer instructions here as to how to save the video with an adjusted playback time – eg sped up or slowed down, so when you share it with someone else, it automatically plays at that new speed when they open it, rather than the speed being user dependent each time.
Any ideas?
How can you record a 4k image in QuickTime when a 4k web camera is attached like a Logitech brio? I have found that QuickTime will only record maximum HD 1920×1080 I used to be able to record a 4k video via LogiCapture software but the software is not going to being updated for M1 macs, and the Mac version of Logitune which does work on an M1 Mac doesn’t record a 4k image either. I’m unable to find any other app to record 4k from my Brio camera which is more than disappointing after buying a new Macbookpro M1 Max that supports 4k in so many other ways.
Playback speed is also in the View menu.